• 0 items$0.00
  • Skip to primary navigation
  • Skip to main content
  • Skip to primary sidebar
  • Skip to footer

Hands Occupied

Contemporary yarn crafts by Heidi Gustad. Knitting, crochet, latch hook and macrame.

  • BLOG
    • Knitting
    • Crochet
    • Latch Hook
    • Macramé
  • ABOUT
  • Shop
  • Studio
  • Nav Social Menu

    • Facebook
    • Instagram
    • Pinterest
    • RSS
    • Twitter
    • YouTube

Crochet Rings

March 24, 2014 11 Comments

Crochet Ring DIY with Free Pattern at Hands Occupied

Today, 6 DIY blogger friends and I have joined forces to share each our unique takes on a DIY jewelry project. The kind of jewelry we tackle, be it a necklace, earrings, bracelet, or ring, is totally up to us – we’re each bringing our own style to the table. We call ourselves The Quarterly Collab, and you can read more about all of the ladies involved here.

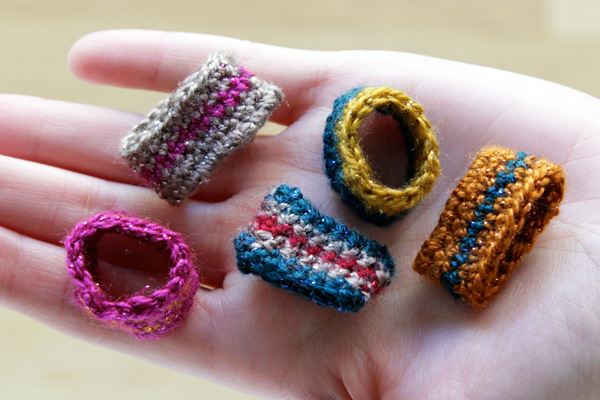
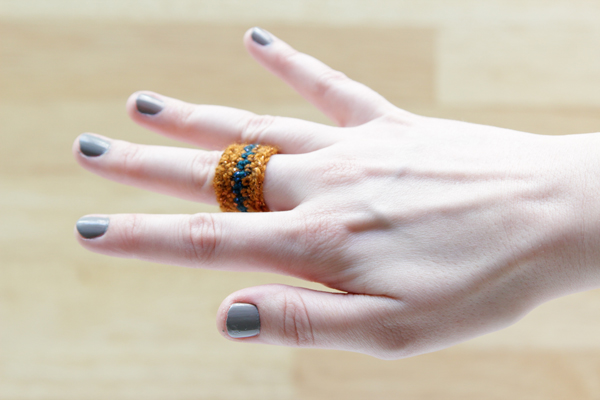
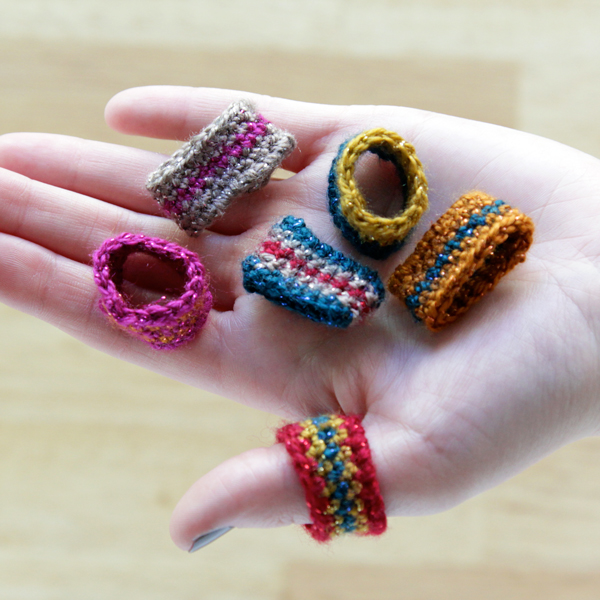
I decided, obviously, to make some easy & colorful rings for this collab, and I’m totally addicted. They’re made with just a few rows of crochet and take advantage of a novelty type yarn I might not normally use. Novelty yarns often exhaust me really quickly when I’m using it for a more involved knitting or crochet project… maybe I just don’t like looking at shiny things for too long at a stretch? Whatever the reason, today’s project is the perfect way for me to use some uncharacteristic yarn for a fun and quick little crochet DIY. These rings are fun an funky, and they could also be used as Barbie doll cowls, just in case you’ve got a Barbie lover who’d appreciate some handmade doll accessories.
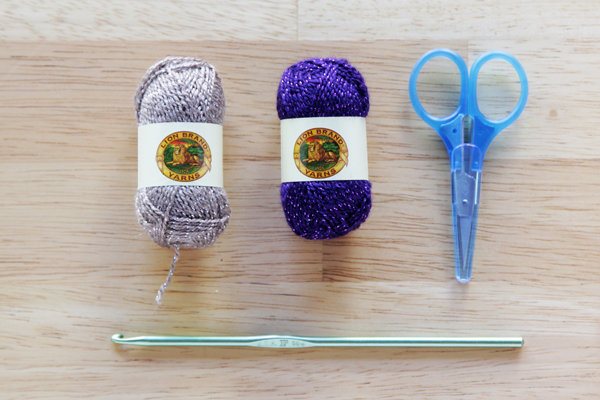
Quarterly Collab: DIY is better together

Supplies

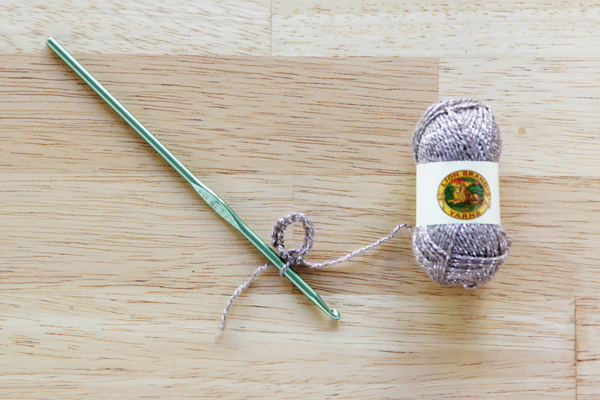
fine yarn (I used Lion Brand’s bonbons in Party, which comes in a pack of 8 mini skeins.)
size F crochet hook (or whatever’s appropriate for your yarn)
scissors
Scotchgard (optional)

Crochet Ring DIY with Free Pattern

Directions

Abbreviations

ch – chain
sl st – slip stitch
sc – single crochet
sts – stitches

The pattern

ch approximately 16 stitches, depending on the size of your finger.** Join into a ring using a sl st.

round 1. sc 16*  into the ring, join with sl st
rounds 2 – 6. 
ch 1, sc 16* around, join with sl st
Cut your yarn, leaving an inch or two of a tail. Draw the tail through your final loop and weave in ends. Trim tails to finish.

**Wrap the chain around your finger to see how many stitches works best on the finger you’re making the ring for to test it.
*or whatever number of stitches you went with in your initial chain.

Crochet Ring DIY with Free Pattern at Hands Occupied

If you’re really new to crochet, here’s what getting the setup rows started will look like. First, chain 16(ish) stitches.

Crochet Ring DIY with Free Pattern

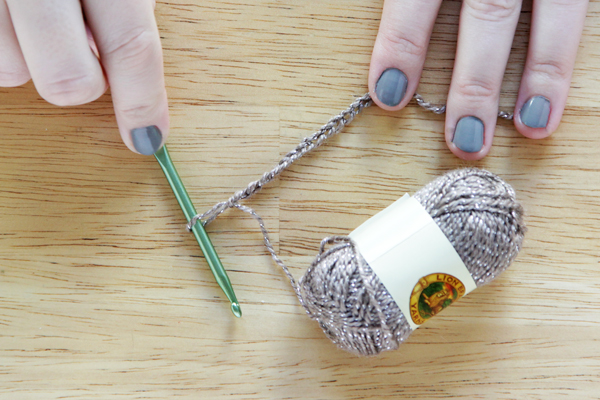
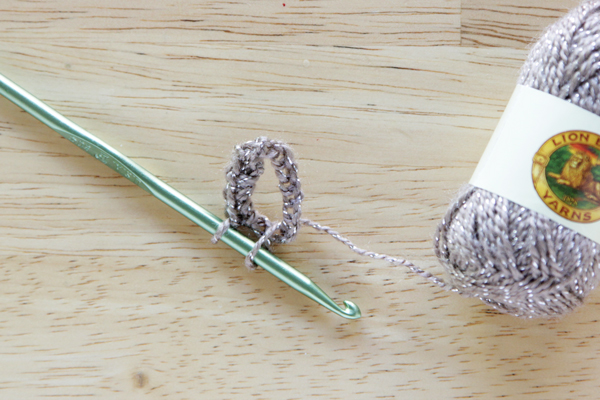
Join the end of the chain to the beginning of the chain with a slip stitch, forming a ring.

Crochet Ring DIY with Free Pattern

Chain 1 and then single crochet 16(ish) stitches into the center of the ring, joining them together with a slip stitch. Stuck? For more beginner tips on crocheting in the round, I recommend this tutorial. 

Crochet Ring DIY with Free Pattern

After that, you’ll just crochet a few more rounds as normal, alternating colors if you wish. When you’ve woven in your ends, you might want to use a coat of Scotchgard to project your finished rings from getting dirty, but that’s totally optional.

Of the designs I experimented with, I like the single centered accent color, and the ring that’s half yellow and half blue the best :). What color combos would you like to try?

Crochet Ring DIY with Free Pattern at Hands Occupied

Filed Under: Crochet, DIY Style, Knitting & Crochet Tagged With: bonbons, collaboration, crochet, diy, free pattern, novelty yarn, quarterly collab, rings

About Heidi

Heidi Gustad is an artist, author and crafts designer specializing in knitting, crochet, latch hook and macrame. In addition to running the Hands Occupied Blog and Pattern Shop, you can find her making videos & co-hosting the Very Serious Crafts podcast.

Previous Post: « Weekly Reader
Next Post: Fun-mazing Jewelry DIYs »

Reader Interactions

DID YOU LIKE THIS POST?
Visit similar articles...

  • Hacky Sack Crochet PatternHacky Sack Crochet Pattern
  • Picks of the WeekPicks of the Week
  • Picks of the WeekPicks of the Week
  • Picks of the WeekPicks of the Week

DON’T MISS ANOTHER UPDATE

Comments

  1. Rach

    March 24, 2014 at 3:19 pm

    These are totally adorable. Love it!

    Reply
  2. johannarundel

    March 25, 2014 at 2:33 pm

    These Rings are awesome! Thank you for sharing!
    xoxo Johanna

    Reply
  3. Meghan

    March 26, 2014 at 10:10 am

    Hey There!

    I found your crocheted rings on craftgawker and think they are super cool! If you have a second, I would love if you came by and linked up at The Blitsy Crafts Linky Party. http://ss1.us/a/wtcjKlt9. We are featuring all “things crochet”. We are choosing 3 of our favorite projects, and those chosen will get $5 in Blitsy credits. Hopefully we see you at our party! :)

    Reply
  4. Julie Wilson

    December 9, 2014 at 10:56 am

    I’m pretty sure the Lion Brand Bob Bons “Party” is made from Lion Brand Vanna’s Glamour. Just an F.Y.I.

    Reply
  5. Aleta Jean Castro Dailey

    December 19, 2014 at 1:13 am

    I am new to Crocheting. I have been wanting to learn. These rings are so yarn cute :) ! I am going to try my best. I think my nieces will love them. Thanks for sharing especially the tutorial. Happy holidays!!♡

    Reply
    • Belinda

      January 9, 2015 at 9:42 am

      I’m fairly new to crocheting as well and am always looking for cute little patterns to try. big projects still seem to daunting to me. :)

      Reply
  6. Belinda

    January 9, 2015 at 9:40 am

    So cute. I think I’m going to try adding some beads to the center row. :)

    Reply
  7. Belinda

    January 9, 2015 at 9:40 am

    So cute. I think I’m going to try adding some beads to the center row. :)

    Reply
  8. Ronnie

    March 17, 2015 at 12:57 am

    Love it. Thanks. I’ll try them bigger for bracelets, too.

    Reply
  9. Jennifer

    November 21, 2017 at 10:16 pm

    I really like these rings, you could also use them as napkin rings in different colors for various occasions. CHRISTMAS, wedding showers, anniversaries and so on.

    Reply

Trackbacks

  1. 6 Must-Try Jewelry DIYS - The Crafted Life says:
    March 28, 2014 at 10:27 am

    […] DIY Hexi Earrings by Crafted 2. Crochet Ring DIY by Hands Occupied 3. DIY Faux Enamel Bracelets by Love From Ginger 4. Multi-Strand Bracelet by […]

    Reply

Leave a Reply Cancel reply

Your email address will not be published. Required fields are marked *

This site uses Akismet to reduce spam. Learn how your comment data is processed.

Primary Sidebar

Heidi Gustad from Hands Occupied / Craft Book Author and Knitting, Crochet, Latch Hook and Macrame Designer

Hi! I’m Heidi, an author, yarn craft designer and content creator specializing in knitting, crochet, latch hook & macrame. My work unapologetically features primary colors and vintage-meets-modern style. My first book, Latch Hook: 12 Projects for the Modern Maker, is now available!

Professionally I’m most known for: advanced intarsia knitting design & modern latch hook design.

work with heidi

UPDATES BY EMAIL

Get a free pattern + biweekly updates sent to your inbox.

Let’s be friends!

  • Facebook
  • Instagram
  • Pinterest
  • Twitter
  • YouTube
Latch Hook by Heidi Gustad

Footer

INSTAGRAM

handsoccupied

Craft book author & content creator in love with primary colors & vintage vibes. / #latchhookbook out now!
.
knitting, crochet, latch hook & macramé

Heidi Gustad 🧶✂️
Head to the link in bio for an update on my 2021 p Head to the link in bio for an update on my 2021 plans for Hands Occupied. The two words that best describe this post are self-care and boundaries. 😜 
.
.
Much love to everyone who sent supportive messages about taking time off and creative burnout. I often deflect with humor, but it was genuinely touching to connect with folks who understand. I’ll have something new for y’all later this week, so stay tuned! ❤️💛💙 
#handsoccupied 
.
.
Pictured: An unblocked pile of four striped sweater panels in primary colors sitting on a blanket in my lap.
There’s an update on the blog today, & it’s ab There’s an update on the blog today, & it’s about how I’m going to take the next 2 weeks off to rest & recharge. ☺️🧶 No new content for y’all means I can also take a moment to zoom out & plan what’s next. Link is in bio. 
.
.
A note on Very Serious Crafts: In the post I discuss stepping away from the @seriouscrafts podcast to give myself more time to devote to some minor medical issues. Don’t you worry - my health will be fine, & @molliejohanson @redhandledscissors and I are still pals, and after a short break of their own, the podcast will be back! Just sans moi. 💁🏼‍♀️😆 
.
.
See you in a couple weeks! ✌🏻#handsoccupied #knitdesign #craftdesign #sofadedsweater
Been a little quiet this holiday week, as it shoul Been a little quiet this holiday week, as it should be. ☺️🎄The past few days have been filled with a lot of catching up on festive zoom calls & raising toasts to the camera. 🥂 Connecting with people has been a welcome change of pace! Now I’m feeling ready to meet my inevitable end-of-year deadlines. 😆
.
.
Warmest wishes for the season, my friends! ❤️💛💙
Hi, I’m Heidi, the craft book author & maker beh Hi, I’m Heidi, the craft book author & maker behind Hands Occupied! 👋🏻 I’ve been enjoying making Reels a lot lately, but I wanted to bop in to share a regular photo & say hello. 🤓 
.
.
rather than giving you my bio right now, I have a question. I just got this new sweater & I can’t stop imaging how funny it would be to wear this to a knitting class ... is that bad? 🤣🤣🤣
.
.
Pictured: a blond woman with glasses wearing a sweater that reads “all your sweaters are ugly” standing in front of a Christmas tree.
Wet blocking, also called immersive blocking, is o Wet blocking, also called immersive blocking, is one of the most common methods for finishing a knitting project and helping ensure its final size and shape. Learn basic blocking for absolute beginners in an easy-to-follow (non-Reel!) video tutorial! Catch the tutorial on YouTube or the Hands Occupied Blog, link is in bio. 🧶 #handsoccupied #stopswatchandblockit #KPAmbassadorsDec20 #sponsored
Load More... Follow on Instagram

Copyright © 2021 / Foodie Pro Theme On Genesis Framework / Branding by Ink + Mortar
All Site & Shop Policies / Privacy Policy / Cookie Policy