• 0 items$0.00
  • Skip to primary navigation
  • Skip to content
  • Skip to primary sidebar
  • Skip to footer

Hands Occupied

Colorful, contemporary knit & crochet.

  • BLOG
  • ABOUT
  • Shop
  • Events
  • RAVELRY
  • Nav Social Menu

    • Bloglovin
    • Facebook
    • Instagram
    • Pinterest
    • Twitter
    • YouTube

DIY Color Blocked Glitter Bangle Bracelet

February 4, 2014 4 Comments

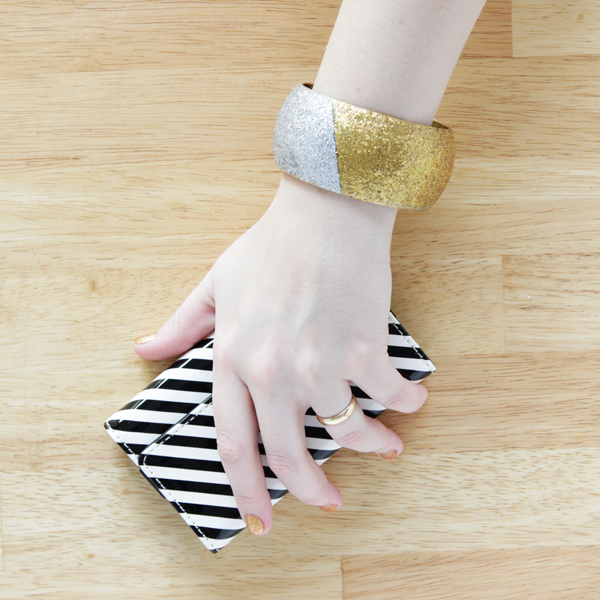
DIY Color Blocked Glitter Bangle at Hands Occupied

Don’t you just love a DIY that takes something that cost a quarter and makes it look like a million bucks? Well, maybe not a million, but more than 25 cents! I got a bangle bracelet at a thrift store years ago and realized I hadn’t been wearing it at all as it was, so a quickie makeover was in order! :)

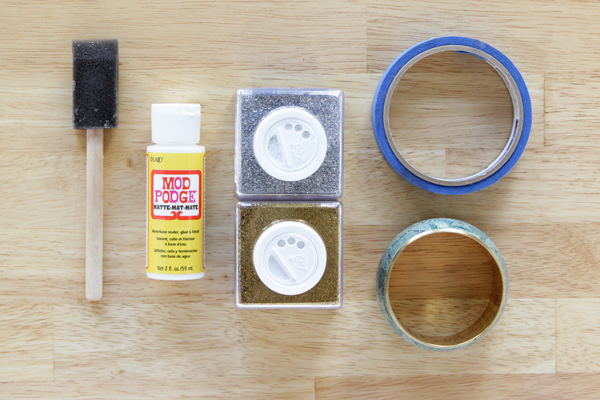
Supplies

thrift store bangle bracelet
Mod Podge Matte
painter’s tape
sponge brush
extra fine gold glitter
extra fine silver glitter
paper towel (optional – it’s just an easy way to keep the mess to a minimum)
acrylic sealant (optional)
DIY Color Blocked Glitter Bangle - An Easy Mod Podge craft project!

Directions

Clean and dry your bracelet. Tape two lines of painter’s tape where you’d like your first color of glitter to be. Press down the edges of the tape so there are openings along its edges.
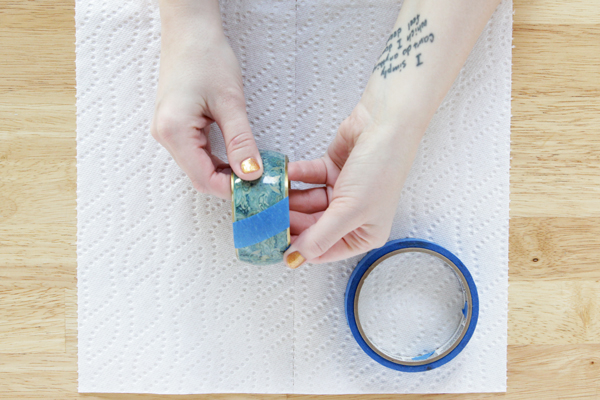
DIY Color Blocked Glitter Bangle - An Easy Mod Podge craft project!

Paint a layer of Mod Podge onto half of the bracelet, right onto the edges of the tape.
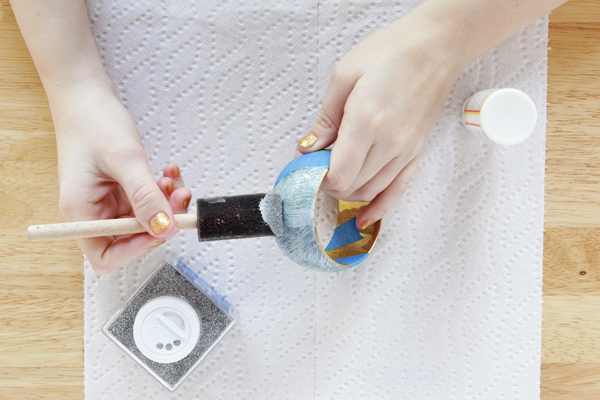
DIY Color Blocked Glitter Bangle - An Easy Mod Podge craft project!

Sprinkle a generous amount of extra fine glitter onto the wet Mod Podge, and use your sponge brush to press the glitter into the Podge. Keep sprinkling and pressing glitter all over the first section of the bangle until you’ve completely covered the bracelet’s color underneath. Let dry completely – the Mod Podge will dry clear, leaving only the glitter visible!
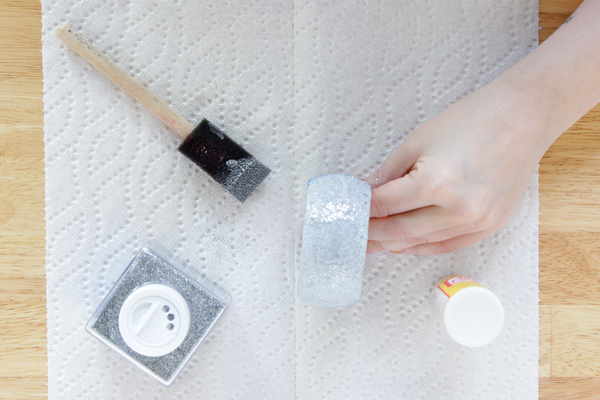
DIY Color Blocked Glitter Bangle - An Easy Mod Podge craft project!

Carefully peel of the painter’s tape, revealing a hard line where your glitter ends and the rest of the bracelet begins.
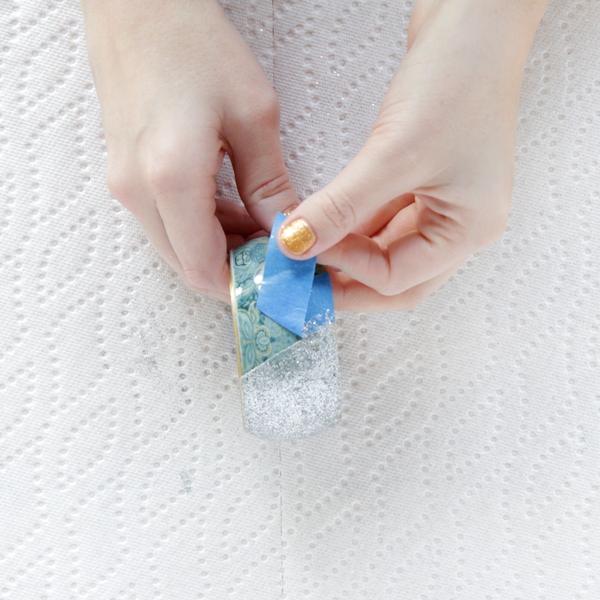
DIY Color Blocked Glitter Bangle - An Easy Mod Podge craft project!

Repeat the process of painting Mod Podge, sprinkling glitter, and pressing the glitter into the Mod Podge, but with your second glitter.
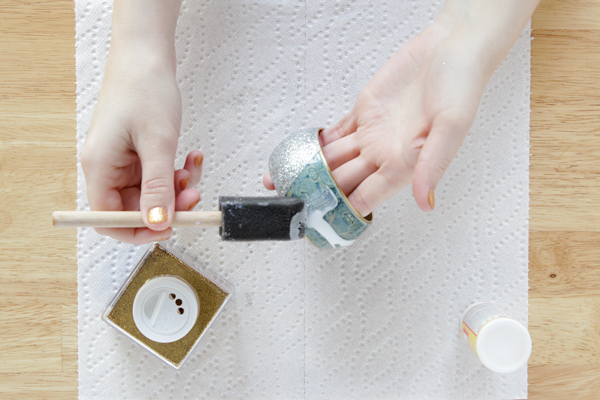
DIY Color Blocked Glitter Bangle - An Easy Mod Podge craft project!

You don’t need to use painter’s tape for the second half of the bracelet. Since the (in my case) silver glitter is so thick on top of the bangle, it’s easy to apply gold glitter and Mod Podge right up to the edge of the silver glitter. Just make sure to cover the bracelet entirely so you can’t see the original color underneath.
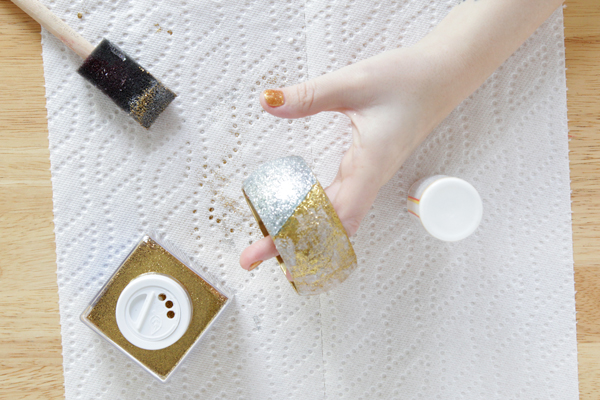
DIY Color Blocked Glitter Bangle - An Easy Mod Podge craft project!

Let the second half of the bracelet dry totally before painting over the whole bracelet to seal in the glitter. If the completed bracelet is sticky to the touch, you might want to use an acrylic sealant to finish it.

The sparkly metallic bracelet is now something I wear all the time since it’s more on trend and matches everything! What would you do differently if you make this? Any color changes?

I first posted a version of this bracelet over at Mod Podge Rocks.

Filed Under: Decoupage, DIY Style, How-to, My Work Elsewhere Tagged With: bangle, bracelet, craft, diy, diy style project, glitter bangle, glitter bracelet, mod podge, thrift store craft, thrift store makeover

About Heidi

Heidi Gustad is a knitting, crochet and crafts designer. She first learned to knit at age 8 from a grandmother who saw in her a need for something to keep her busy. She's now a full time designer, video host, blogger & teacher. You can keep up with her designs and more by following handsoccupied on your favorite social network.

« Staggered Holes Baby Blanket Knitting Pattern
Olympic Rings Valentine »

Reader Interactions

DID YOU LIKE THIS POST?
Visit similar articles...

  • Dimensional Easter Egg EarringsDimensional Easter Egg Earrings
  • Simple Ribbon Vase DIYSimple Ribbon Vase DIY
  • How-to: Lantern-style Votive LuminariesHow-to: Lantern-style Votive Luminaries
  • How-to: Lucky Charms BraceletHow-to: Lucky Charms Bracelet
Knitflix Suggestions Banner

DON’T MISS ANOTHER UPDATE

Comments

  1. washi tape ideas

    February 5, 2014 at 5:42 am

    I blog frequently and I genuinely thank you for your content.
    This great article has really peaked my interest.
    I’m going to take a note of your site and keep checking for new information about once per week.
    I opted in for your RSS feed as well.

    Reply
  2. Tan of Squirrelly Minds

    February 5, 2014 at 12:42 pm

    SUCH a great way to spruce up an old bangle. I love it!

    Reply
    • Heidi

      February 5, 2014 at 5:44 pm

      Thanks! And SO easy.

      Reply

Trackbacks

  1. Program Kit: Glitter Bangle Bracelet Makeover | Library as Incubator Project says:
    February 21, 2014 at 7:02 am

    […] my tutorial for making these color blocked glitter bangles to learn the process of how to make one successfully and have a sample on hand for the program. […]

    Reply

Leave a Reply to Heidi Cancel reply

Your email address will not be published. Required fields are marked *

Primary Sidebar


I’m Heidi Gustad, a knit & crochet designer, Midwesterner, & one-time Librarian, obsessed with colorful knitting, crochet & yarn crafts.
❤️💛💙

work with heidi

SUBSCRIBE BY EMAIL

& get 20% off in the shop!

Let’s be friends!

  • Bloglovin
  • Facebook
  • Instagram
  • Pinterest
  • Twitter
  • YouTube

Partners

Bijou Basin Ranchonline photo editorStickerYou

Footer

INSTAGRAM

Something is wrong.
Instagram token error.

Good to Know

  • New here?
  • Collaborate
  • Policies
  • Press

Looking for something?

knitting-button crochet-button yarn-crafts-button free-button life-button inspiration-button knit-along-button knitting-101-button

Et Cetera


needles

Copyright © 2018 | Foodie Pro Theme On Genesis Framework | Branding by Ink + Mortar
Site & Shop Policies