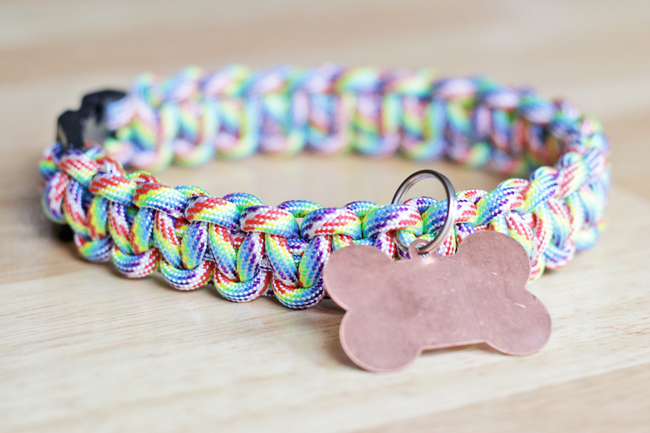
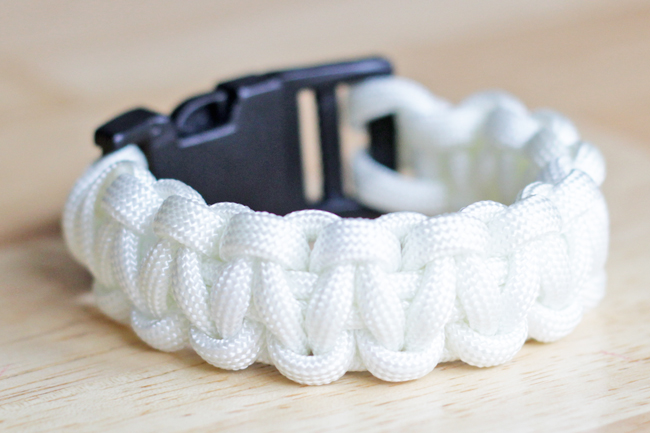
Paracord accessories are really fun and pretty easy to make once you get the hang of the knot or braid you’re trying to use. They’re good projects to do with kids, especially boys and teens, because they’re often worn by military service people, and they involve the use of a lighter, which dudes tend to think is cool (sorry to generalize :) ). For today’s project, I thought making my dog a rainbow collar would be fun for St. Patrick’s Day and a good excuse to play with paracord and lighters. I also made myself a bracelet using the same technique, so even if you don’t have a brooding teen or a dog to craft for, you can do this project too.
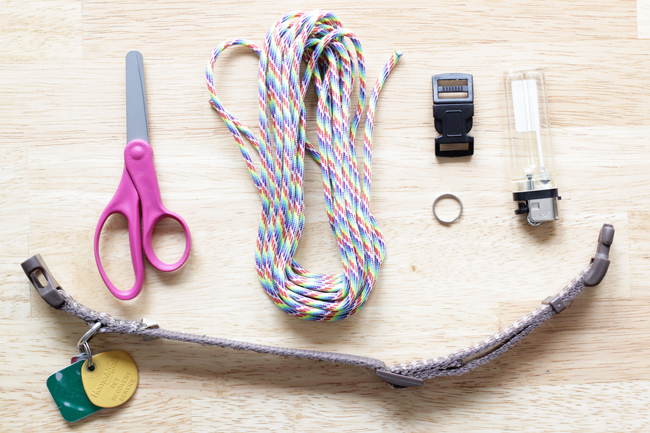
Supplies
rainbow 550 paracord
side release buckle
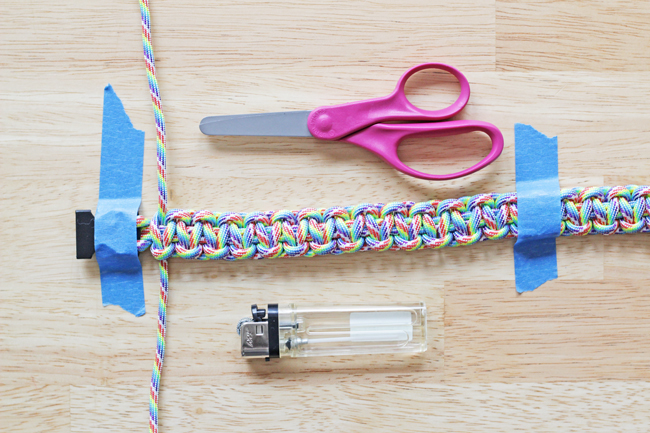
lighter
scissors
small key ring
measuring tape (optional)
painter’s tape (optional)
Directions
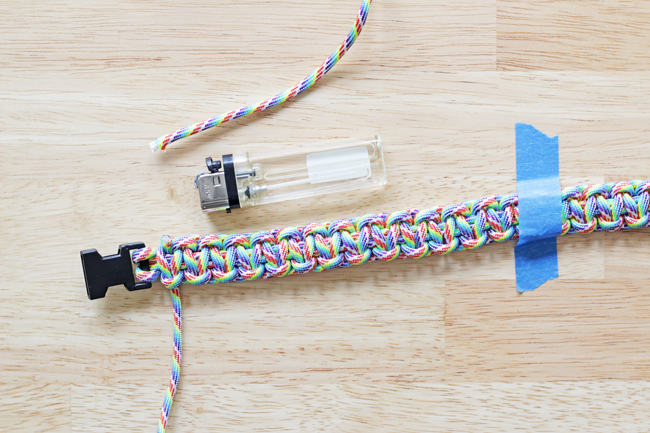
Fold your paracord exactly in half and thread it through one end of the slide release buckle. Flip the folded end over the buckle it’s threaded through and tighten. This is what it should look like:
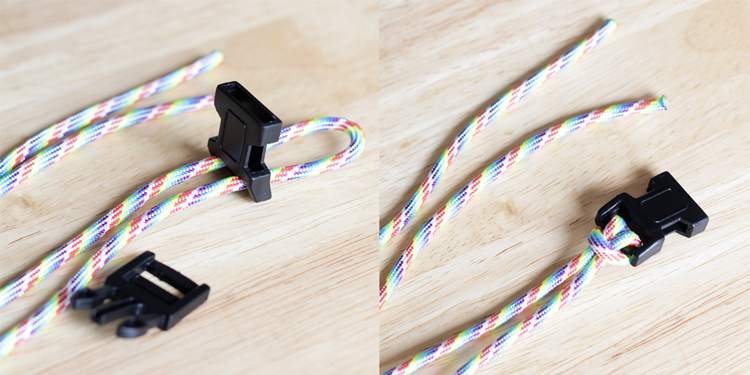
Using your dog’s existing collar as a guide, or a measuring tape if you want to be precise, thread the second end of the slide release buckle onto the two open ends of the paracord, letting the second end rest at the spot at which it will fit your dog, as shown.

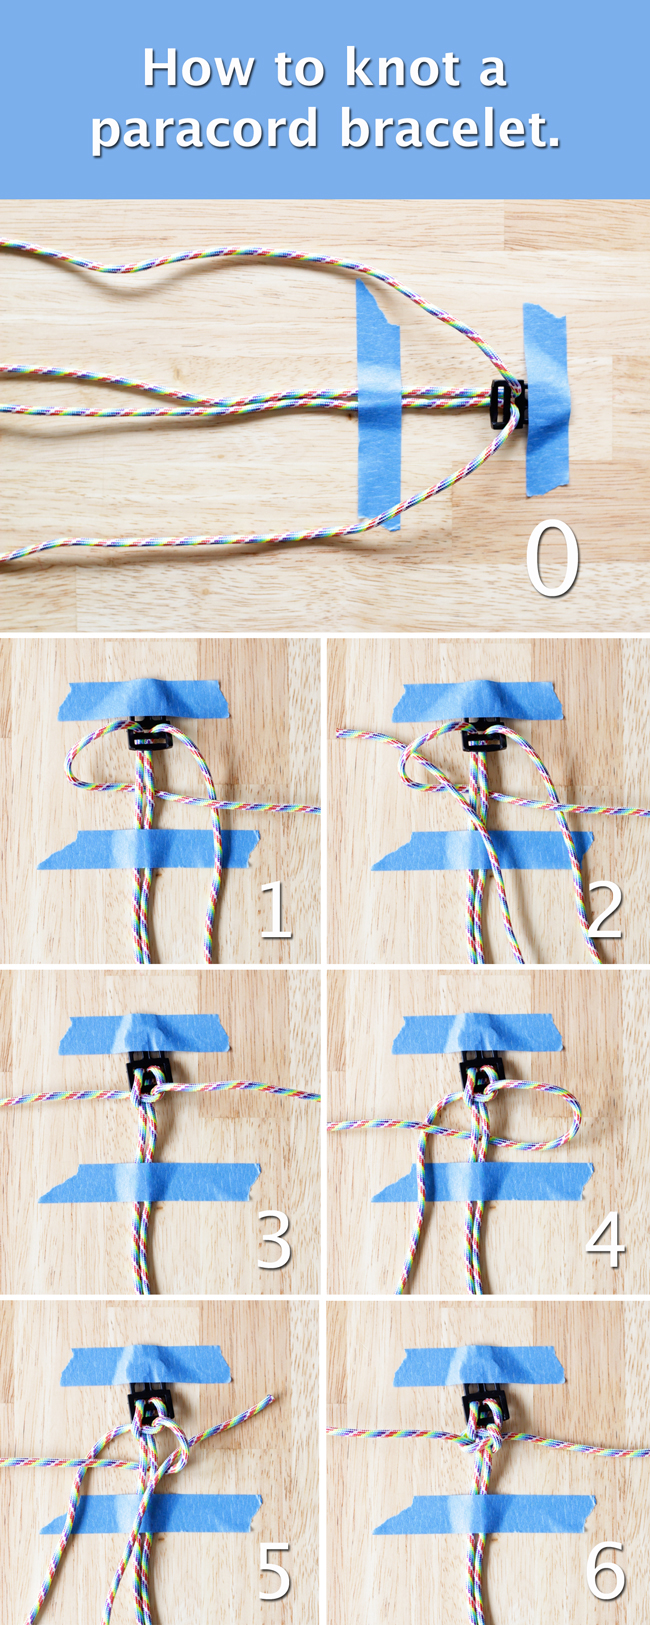
Tape down the second end as well as the middle of the collar with some painter’s tape to help keep it at the correct length. You can skip the taping if you’re confident you can keep the buckle in place by itself.
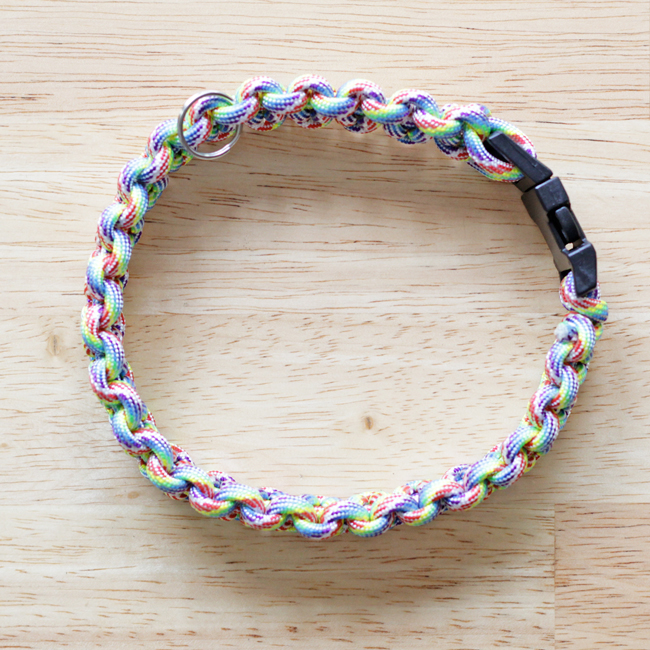
I’ve got two things to keep in mind as you go. One, if you’re making a dog collar, add your key ring to one knot wherever you like for attaching your dog’s tags to the collar. Also remember to tighten each knot fully before moving on to the next knot in your project.
When you have knotted all the way down your bracelet, cut the excess paracord from the last knot and burn the raw ends to prevent fraying.
If you did the collar, now you can add your dog’s tags to the ring to complete it.
Being a librarian, I of course did some research before putting together this project, and I recommend this tutorial from Instructables if you want another look at how to make a paracord bracelet or collar.


So excited to try this! My only question is, what length of paracord did you use to acheive which length of collar? I’d hate to cut mine too short and discover it halfway through my collar! Argh!
Thank you for sharing this! :)
Thanks for the question, Nica! I totally made my first dog collar like this too short, so I hear you on this concern.
I got my paracord at Michaels in their jewelry section. The amount of cord needed will depend on how tight your knots are. I found it easiest, for my dog’s 14″ collar, to use the entire package of 550 paracord, aka 16 feet. I had a little leftover at the end. Good luck!
Where did you get the slide release buckles?
Michaels – they were right in the same endcap as the paracord I used.
Hi! I was just wondering, is this kind of collar alright for cats? I know they have narrower necks than dogs as well as more fragile ones too. I’ve been looking into creating my own collar since I don’t see one that I really like in stores. Thanks.
Great question, Eunice! I am so not a cat expert, so I think you should ask your vet to be safe. I know for my dogs, my vet is a-ok with my calling with random questions about what’s best for them. If your vet has wise words of wisdom, please let me know!
Eunice, The slide release buckles are not good for cats. You need to get specific buckles for cats. They are quick release or also called break aways. Cats get caught up in stuff and will panic and throw their bodies around. If you don’t have a quick release buckle they can get themselves in a lot of trouble. I have made dog and cat collars for a few years and used to sell them online or at craft-shows.
Thank you, Dana!! Like I said above, I know little about cats and don’t want to put misinformation out there :).
Hi! I wanted to ask if you notice the collar stretching out at all after using it a few times – I’d hate to make it just right at first only to have it stretch out to be too big later on! Thanks!
I haven’t had any stretching- I tied it super tight. It’s just dirtier these days ;)
The paracord will stretch out over time, but if you put it in water it’ll strink back up
Hi Heidi,
Really love the design of your collar, I have a labrador she is only ten months and I really want to make her a collar. Living in England I don’t have the luxury of Michaels (will have to stock up when I visit florida this year). I was just wondering if you have ever made a lead to go with the collar.?
Hi Nikki!
I bet your pup is so cute! Two things: 1) I searched a few UK retailers for paracord, and found some options from Etsy UK! Strangely, Hobbycraft carried books about paracord crafting and not paracord.
And 2) I haven’t yet tried lead/leash-making, but I’ll add it to my to-make list for February or March! I really like some of the rope and leather options I’ve seen in preliminary searching, but I can think about what might work with paracord too. Stay tuned :)
Thanks for the comment,
Heidi
Years ago I made a dog leash – I actually crocheted using a heavy string. It lasted for years. It was different and plain, using the paracord to make one would be a nice set. You might use a carabiner and the tight knots you used for the collar.
Great ideas! :)
I have ordered para-cord from on line good prices & if you ask for a bit of info on thickness heaviness of cords they just might send you some samples. some suppliers also have clips & other supplies one might use.
I made a leash at the request of m y nephew, but I think I did it very tight & it was stiffer than many leashes, so maybe make it less tight
I have made a few things with paracord (bracelets, dog collar, key chain, water bottle holder) From my experience and what I have read for that knot you should expect about a foot of cord for each inch you need. I have yet to try it but I saw a tutorial that says you should boil the cord first because it will shrink when it gets wet. It also said you can boil it once its done to tighten the knots.
What colour is this paracord
It’s the rainbow-colored paracord available (at least in the US) at Michaels: http://www.michaels.com/Parachute-Cord/bd1508,default,pd.html :)
I’ve just maded one for my dog Beagle x Jack Russel, named Cooper. I have the color: Neon turquoise with black. It is beautiful on my dog. Thank you verry much for making this blog. My dog thanks you to!!
Grtz,
Caroline & Cooper
Hello I’m just wondering if you have any suggestions how I could make this color adjustable? I wanted to make some as gifts but it’s too hard to know exact sizes without asking for them?!
Hmm, that I’m not sure about. Since the paracord knotting is so thick, it would be hard to find a buckle that would allow it to be adjustable. I’m coming up blank on that, I’m sorry :(
They have smaller “belt buckles” that you can use
Hi,
I’m just wondering if anyone knows if the buckle has to be a particular type? and what size is best? I am picking up my puppy in 4 weeks, so have some time to get everything and start trying to make it :)
I have looked on Amazon UK and there are millions of different buckle types & sizes!
Also has anyone tried Kathryn’s suggestion of boiling the cord and is this a good thing to do?
Katie :)
OMG I love this! Totally adding this to my “things to do this summer” list :)
Oh, wow. I have completely forgotten to check your blog post for the answer to my question. Silly me. Thanks for all those who answered my questions. I will definitely contact my vet and look into the breakaway clasps for the collars. Thanks.
Can you make this wider?
Hi Debbi – If you use thicker paracord, that should do the trick! -Heidi
Thanks for this tutorial! :) I made one for my little dog Daisy, and it looks amazing!!! :)
Hi :)
Great idea and design. :) i will try to make paracord collar for my dogs but i wonder is it safe for dogs ? i don’t know how to make end to be safe for my dog.
Would a D ring work too?
I believe so, if big enough. The thing about weaving the tail through a D ring is that the paracord part is really thick, so that could pose a challenge. I think it’s worth a try if you have one on hand already! I just bought some more clips on Blitsy.com for pretty cheap if you’re looking for a good source. -Heidi
Debbie
Hi, I’m just wondering when you get to the end of the project where you burn the edges to prevent fraying… Won’t there be a problem with knots coming undone as all four paracords are not attached to each other? Thank you.
Since this is essentially a series of knots, they have stayed put in my experience. Paracord is good for staying put!
You need to prewash and dry all paracod, it will shrink at least 10% or more depending on the color. You don’t want to make a collar and have it not fit after they swim or you wash the collar.
Me encanta esta idea. Trataré de hacerlo. Te enviaré la foto con mi mascota una vez lo confeccione. Deséame suerte.
buena suerte!
How can i buy this product ?
I don’t sell these, but I recommend searching Etsy. This is a popular technique, and there are several options available.
What size is the side release buckle?
I used a 1″ buckle, but for dogs of different sizes, you’ll want to choose a buckle suited to their size.
Unique and wonderful idea. But I was wondering if it is safe for my mini Bernedoodle because she always pull herself during the walks.
As with all handmade projects, the responsibility for function and safety is up to the maker. I do not have a way of knowing this answer, unfortunately. Best of luck!
Debbie
Hi, I’m just wondering when you get to the end of the project where you burn the edges to prevent fraying… Won’t there be a problem with knots coming undone as all four paracords are not attached to each other? Thank you.
The knots stay put on their own as long as the tails aren’t cut too short! :)
Hi Heidi,
What size side release buckle did you use?
The one I used is about 1 inch/26mm.