• 0 items$0.00
  • Skip to primary navigation
  • Skip to main content
  • Skip to primary sidebar
  • Skip to footer

Hands Occupied

Contemporary yarn crafts by Heidi Gustad. Knitting, crochet, latch hook and macrame.

  • BLOG
    • Knitting
    • Crochet
    • Latch Hook
    • Macramé
  • ABOUT
  • Shop
  • Studio
  • Nav Social Menu

    • Facebook
    • Instagram
    • Pinterest
    • RSS
    • Twitter
    • YouTube

How-to: Wizard of Oz Concept Pumpkins

October 8, 2012 1 Comment

Since I’m an urban apartment-dweller, I get to pretend my dirty stair well is my porch. I also stink at pumpkin carving, as this post from the early days of Hands Occupied illustrates. I’ve been so much more inspired by Halloween home decor this year, rather than my usual costume designing.

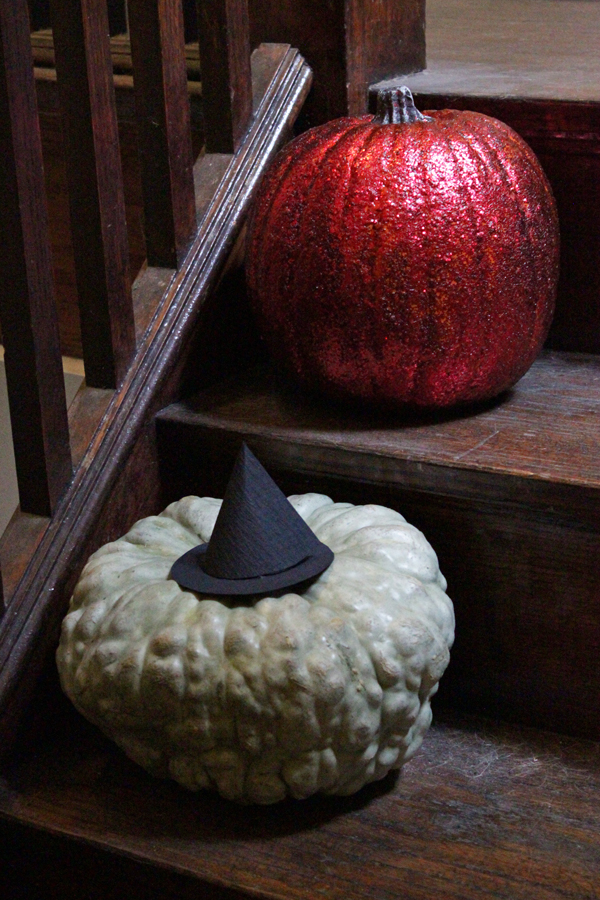
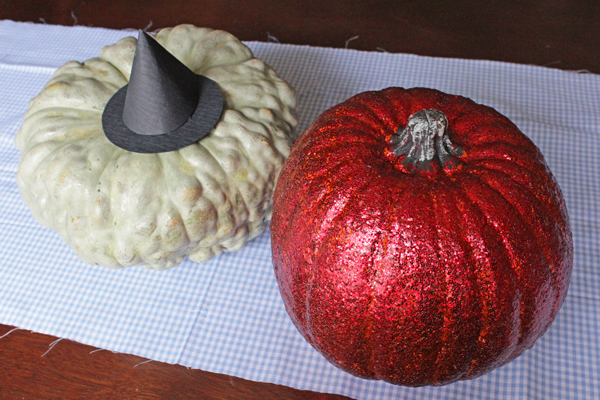
My father-in-law visited last week and serendipitously brought the most amazingly insane gourd for me to craft with. The green color and warts immediately got my Halloween decorating brain hooked on the idea of a Wizard of Oz project, and I came up with this set of conceptual pumpkins. The pumpkin entirely covered in red glitter is channeling ruby slippers, and the warty pumpkin, of course, had to represent the Wicked Witch of the West. Read on to learn how to make these for yourself.
How-to: Wizard of Oz Concept Pumpkins | HandsOccupied.com

Skip to: Ruby Slipper Pumpkin Directions // Wicked Witch of the West Pumpkin Directions

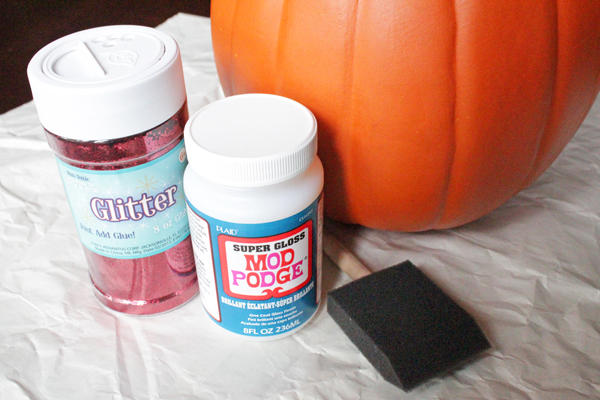
Supplies

red glitter

super gloss Mod Podge

sponge brush

faux or real pumpkin

faux or real green, warty gourd

black construction paper

scissors

small, disposable cups

this witch hat template

x-acto knife

Directions

Ruby Slipper Pumpkin

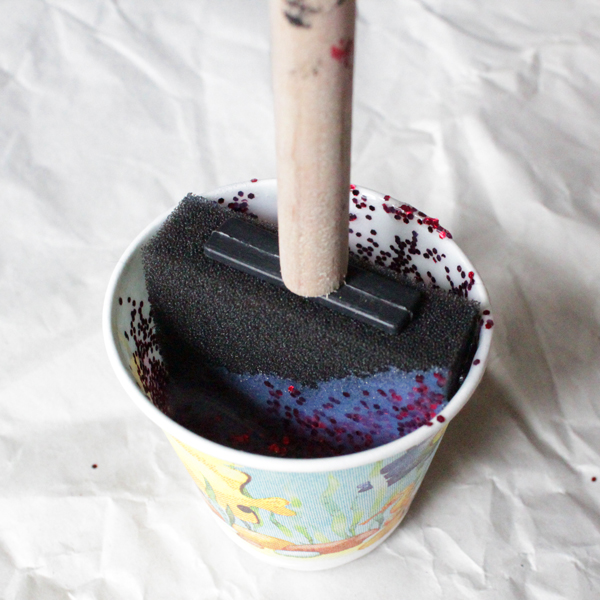
Mix 3 parts glitter and one part Mod Podge in a disposable cup, and stir well.
How-to: Wizard of Oz Concept Pumpkins | HandsOccupied.com

How-to: Wizard of Oz Concept Pumpkins | HandsOccupied.com

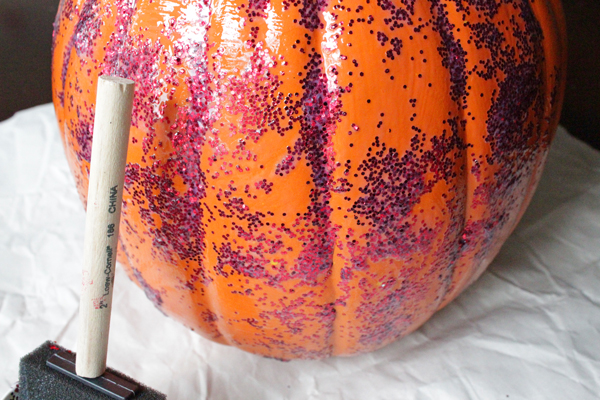
Apply a layer of the Mod Podge and glitter mixture to your pumpkin.
How-to: Wizard of Oz Concept Pumpkins | HandsOccupied.com

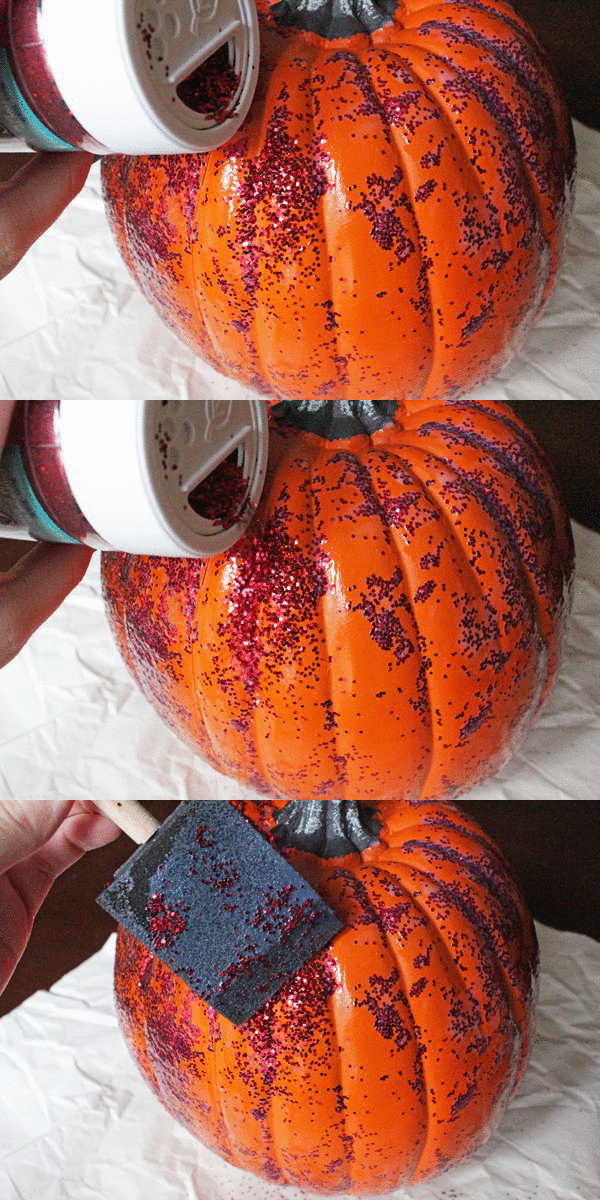
Add additional glitter to your pumpkin by pouring it onto an area that is shiny with Mod Podge, and using your brush to squish it in place. Your brush will have extra Mod Podge in it, since it’s a sponge that absorbs Mod Podge and not glitter. The extra Mod Podge will adhere to the glitter/pumpkin, securing the glitter.

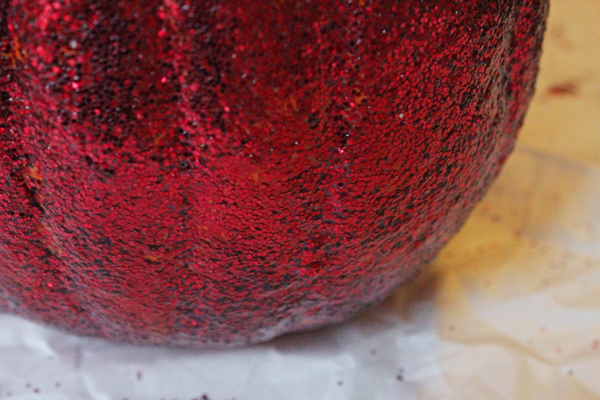
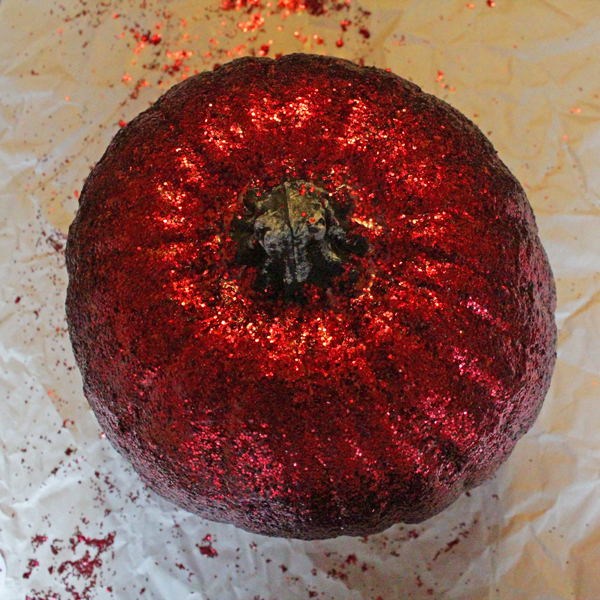
After you’ve applied a good first layer of glitter (you’ll still see the orange of your pumpkin), let it dry for 15-20 minutes. Add more layers of glitter and Mod Podge in this way until you’re satisfied with how much glitter coverage you’ve got. It took me about four layers to get my pumpkin totally covered. Remember to let each layer dry in between applications. Pro tip: The less Mod Podge you use the better. The glitter gets clumpier and therefore thicker and covers more easily than a mixture that’s 0ver-saturated with Mod Podge.
How-to: Wizard of Oz Concept Pumpkins | HandsOccupied.com

When you’re satisfied with the coverage, let it again sit for 15 – 20 minutes before applying a coat of plain Mod Podge over the entire outside of the pumpkin to lock all of that glitter in place.
How-to: Wizard of Oz Concept Pumpkins | HandsOccupied.com

How-to: Wizard of Oz Concept Pumpkins | HandsOccupied.com

Wicked Witch of the West Pumpkin

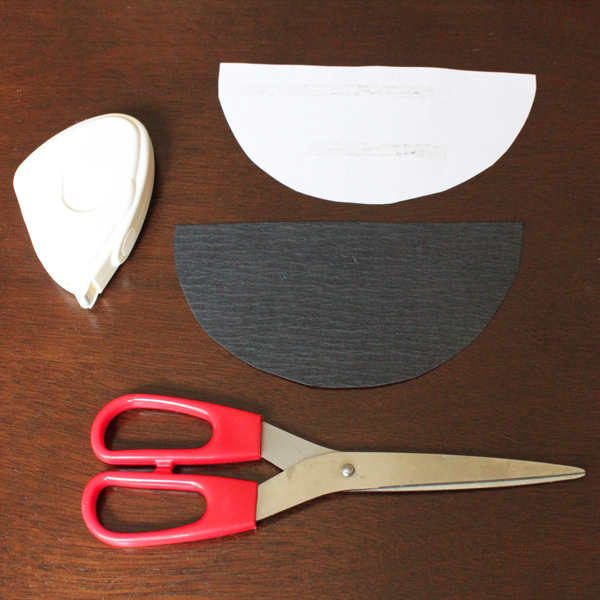
This pumpkin is, comparatively speaking, a million times less work. :) The key for this pumpkin is to use this template for a paper witch hat from craftideas.info. Download and print the template, scaling it up in size if you want a specifically-sized hat for your green gourd. Use a removable dry adhesive roller to stick the paper pattern onto your construction paper. Cut out the half circle that will become the cone of your hat.
How-to: Wizard of Oz Concept Pumpkins | HandsOccupied.com

Using the same method, cut out the brim of the hat. Then, cut along just the dotted lines with an x-acto knife, being careful of your work surface.
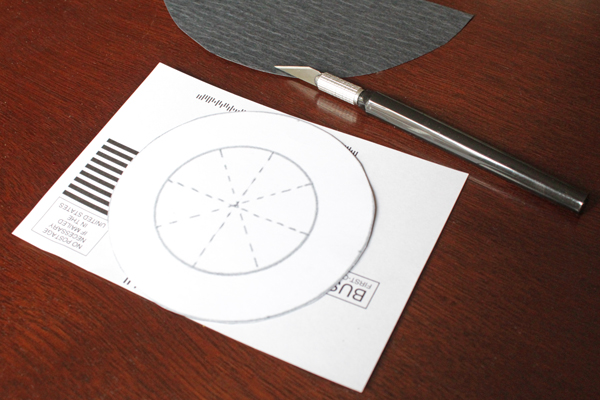
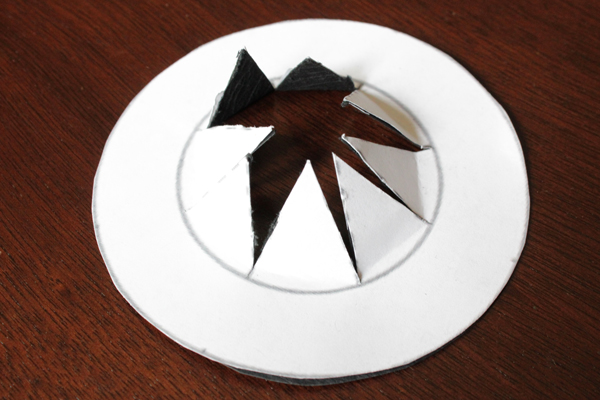
How-to: Wizard of Oz Concept Pumpkins | HandsOccupied.com

How-to: Wizard of Oz Concept Pumpkins | HandsOccupied.com

Carefully remove the pattern from your construction paper. Tape or glue the cone of the hat together, and then tape or glue the hat brim to the hat cone. That’s it! Like I said, the witch pumpkin is way easier because the green, warty pumpkin itself does almost all the work!
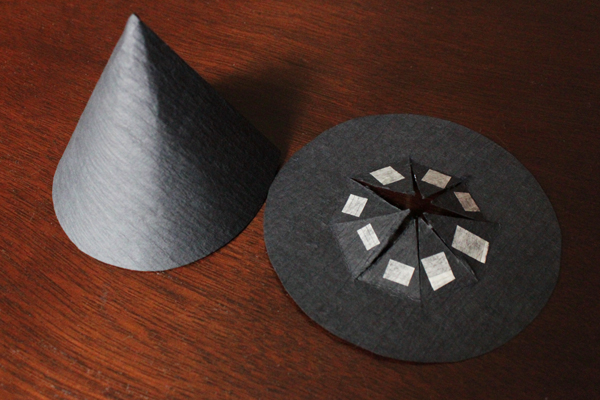
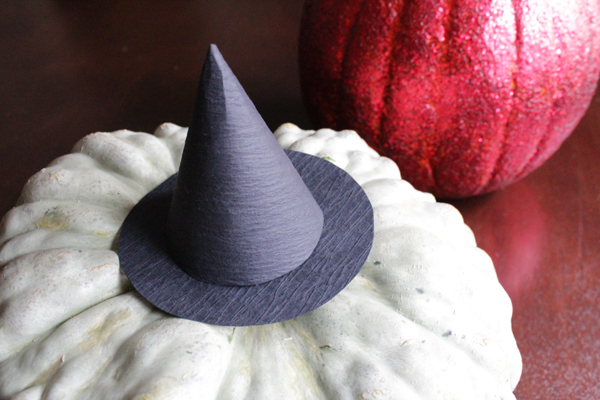
How-to: Wizard of Oz Concept Pumpkins | HandsOccupied.com

How-to: Wizard of Oz Concept Pumpkins | HandsOccupied.com

You can use these as a table or porch decoration, and some light blue gingham fabric makes a nice table runner. If any of you have ideas for fleshing out the Wizard of Oz cast of characters in conceptual pumpkin form, let me know! A table or porch full of these pumpkins would be adorable.
How-to: Wizard of Oz Concept Pumpkins | HandsOccupied.com

The Mod Podge, dry adhesive roller, and faux pumpkin featured in this project were provided by Michaels Stores. 

Filed Under: Decoupage, Halloween, Home Decor, How-to Tagged With: dorothy, faux pumpkin, funkin, glitter pumpkin, halloween, mod podge, witch, witch hat, wizard of oz

About Heidi

Heidi Gustad is a craft book author & content creator in love with primary colors & vintage vibes. She specializes in knitting, crochet, latch hook and macramé, and her first book, Latch Hook: 12 Projects for the Modern Maker, is out now!

Previous Post: « Halloween Decor Inspiration
Next Post: Halloween Costume Inspration »

Reader Interactions

DID YOU LIKE THIS POST?
Visit similar articles...

  • How-to: DIY Ruby SlippersHow-to: DIY Ruby Slippers
  • How-to: Halloween Party JarsHow-to: Halloween Party Jars
  • Attempting a Giant Pom Pom CostumeAttempting a Giant Pom Pom Costume
  • Smiling Jack-o’-Lantern Knitting Chart for HalloweenSmiling Jack-o’-Lantern Knitting Chart for Halloween

DON’T MISS ANOTHER UPDATE

Trackbacks

  1. 25 Amazing Pumpkin Crafts - Just Us Four says:
    October 8, 2013 at 1:02 pm

    […] Wizard of Oz Concept Pumpkins from Hands Occupied […]

    Reply

Leave a Reply Cancel reply

Your email address will not be published. Required fields are marked *

This site uses Akismet to reduce spam. Learn how your comment data is processed.

Primary Sidebar

Heidi Gustad from Hands Occupied / Craft Book Author and Knitting, Crochet, Latch Hook and Macrame Designer

Hi! I’m Heidi, an author, yarn craft designer and content creator specializing in knitting, crochet, latch hook & macrame. My work unapologetically features primary colors and vintage-meets-modern style. My first book, Latch Hook: 12 Projects for the Modern Maker, is now available!

Professionally I’m most known for: advanced intarsia knitting design & modern latch hook design.

work with heidi

UPDATES BY EMAIL

Get a free pattern + biweekly updates sent to your inbox.

Let’s be friends!

  • Facebook
  • Instagram
  • Pinterest
  • Twitter
  • YouTube
Latch Hook by Heidi Gustad

Footer

INSTAGRAM

handsoccupied

Craft book author & content creator in love with primary colors & vintage vibes. / #latchhookbook out now!
.
knitting, crochet, latch hook & macramé

Heidi Gustad 🧶✂️
A new YouTube tutorial is live today covering how A new YouTube tutorial is live today covering how to knit the Little Butterfly Stitch (aka Bowknot Stitch). It adds so much cute character to simple stockinette. Only a little funky to knit, and it packs a huge visual punch! 🦋 
.
Find the video & written stitch pattern on the blog and YouTube, links are in bio. 
.
#kpambassadorsfeb21 #sponsored
.
Yarn: @kelbournewoolens Germantown in Baby Blue via @knit_picks. Needles: Prism Interchangeables, also from Knit Picks. 
.
Pictured: a light blue swatch of Little Butterfly Stitch knitting on a pink background. A skein of yarn and a few stitches of knitting are nearby.
“You’re telling me words can be pronounced in “You’re telling me words can be pronounced in different ways and mean the same things?!” 👀 Posting this here, just to make it clear: when anyone says skayne, skeen, or skyne, it can be safely assumed we’re talking about a bundle o’ yarn,  a SKEIN. It’s not necessary to shame someone for using a word that is known to have MULTIPLE common pronunciations. 🧶
.
.
Can you plz comment sharing how you say SKEIN and where you learned it? The OED happens to say SKAYNE, but it’s not a personal attack if someone says SKEEN and you say SKYNE or even Saskatoon. I’m legitimately curious. We don’t all knit or crochet the same way, and craft evolves a bit like language - it is passed on. There is so much value in having conversations about & embracing these variations! ✌🏻
.
Pictured: A blond woman holds a skein of mustard yellow yarn up to her head like a phone, looking shocked. She’s wearing glasses & a knit sweater. 
.
#handsoccupied #heidigustad #skein #yarn #yarncraft #knit #crochet #yarnaddict #knitincolor #soldotnacrop #language #englishisweird #oed #oxfordenglishdictionary
Sometimes my weekend projects involve hair rather Sometimes my weekend projects involve hair rather than yarn. Here’s the latest mediocre-but-improving result of my slow quest to learn to set vintage inspired curls. 💇🏼‍♀️ I’m hoping to be able to wash my hair less using a regular vintage set, but we’ll see if it ends up being practical. 😆 Hair frustrates me so much more than crafts! 
.
Do you also style your hair using vintage methods? If you have any tips for vintage hair styling or good resources to share, please do!
I suppose this is one way to decide what yarn colo I suppose this is one way to decide what yarn color suits your pooch. 😆 Navy really might be Woodrow‘s color - what do you think? 
.
Pictured: A medium sized, brown, senior dog asleep on a green bed. For some reason a donut ball of navy wool yarn sits on his head.
The first stitch tutorial of the new year is live The first stitch tutorial of the new year is live on YouTube! Diamond Brocade is a great knit+purl only stitch for beginners or anyone wanting a classic look for their knitting project. Find the video with a written stitch pattern on the blog or head directly to the video on YouTube. Both are linked in bio. ✌🏻 
#kpambassadorsfeb21 #sponsored
Load More... Follow on Instagram

Copyright © 2021 / Foodie Pro Theme On Genesis Framework / Branding by Ink + Mortar
All Site & Shop Policies / Privacy Policy / Cookie Policy