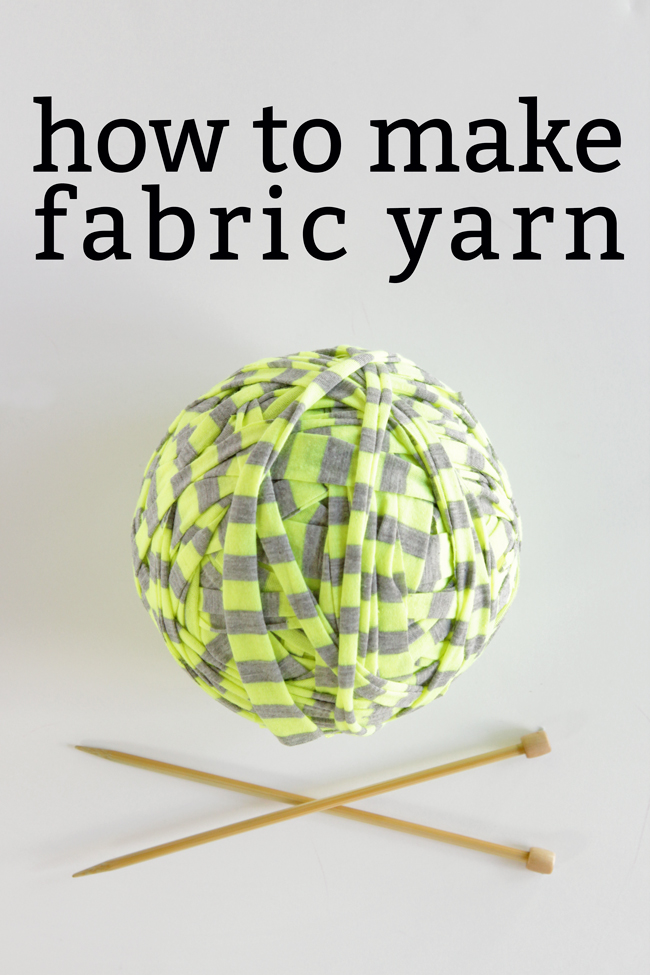
A couple weeks ago, I shared how to make yarn from an old t-shirt, and based on the number of times I’ve seen it pinned, you guys were into it. The thing with t-shirt yarn is that one t-shirt doesn’t yield all that much yarn. I mean, the cross-body phone case pattern I shared took most of one t-shirt’s worth of yarn to make. But what about when you’re thinking about projects on a larger scale? That’s when I recommend you try your hands at making fabric (a.k.a. jersey) yarn. It’s super easy, and if you get your hands on a set of jersey sheets at the thrift store, you can upcycle that into yarn using the same technique I’m about to share. It’s so easy and the effect fabric yarn has on knit and crochet projects is something I’m LOVING right now!
Supplies
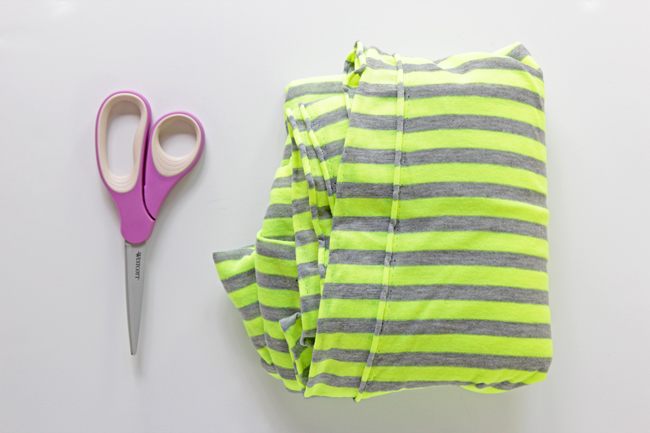
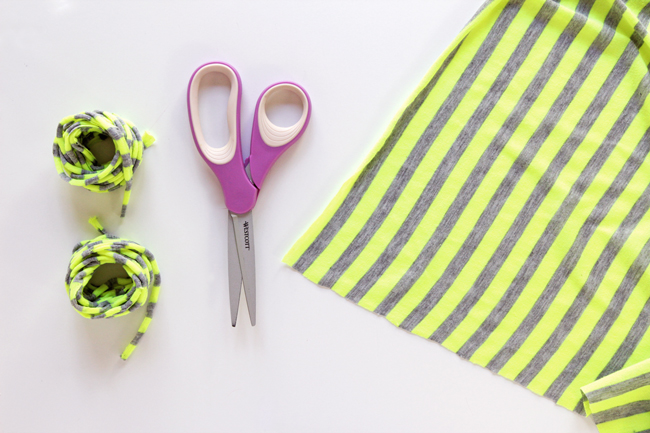
a few yards of knit jersey fabric (I prefer using something that’s 50% cotton/50% polyester.)
fabric scissors
Directions
Start by cutting the selvage off of your fabric’s edges. Most fabrics you buy come with an edging woven specially so that it won’t fray or ravel. That’s great for the fabric as it sits on its bolt at the store, but for yarn creation purposes, you want that stuff gone.
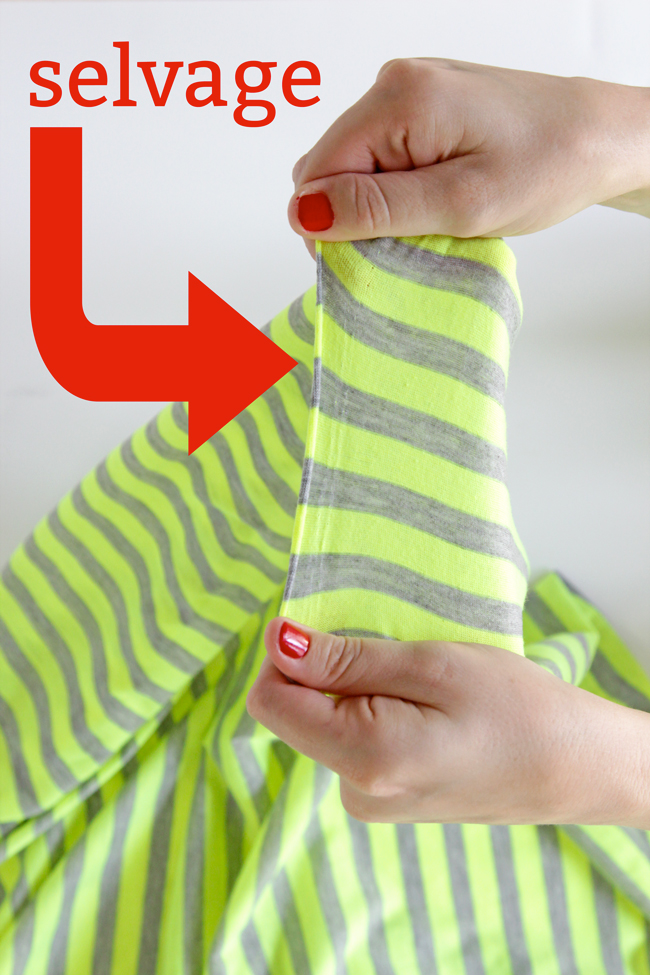
The selvage will stretch a little differently than the body of the fabric. Pictured below, you can see how it immediately rolled up like a scared bug when I cut it away from the fabric’s body. The rest of the fabric didn’t do that when cut, which means it will result in weird patches of your knitting or crochet project that could have a different gauge when you work with your DIY yarn.
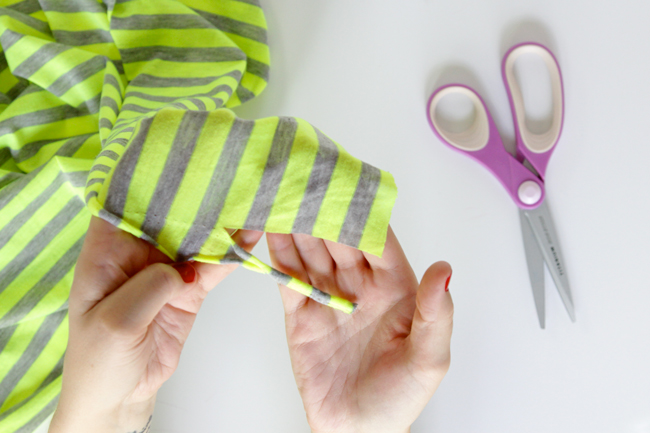
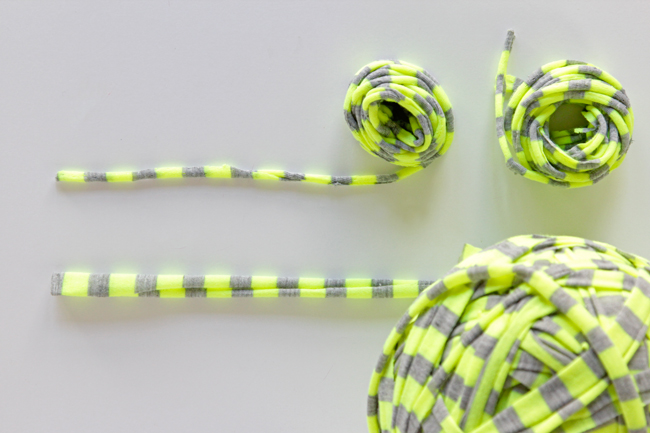
In this picture, the selvage fabric is pictured on top and the yarn is on the bottom. See the difference?
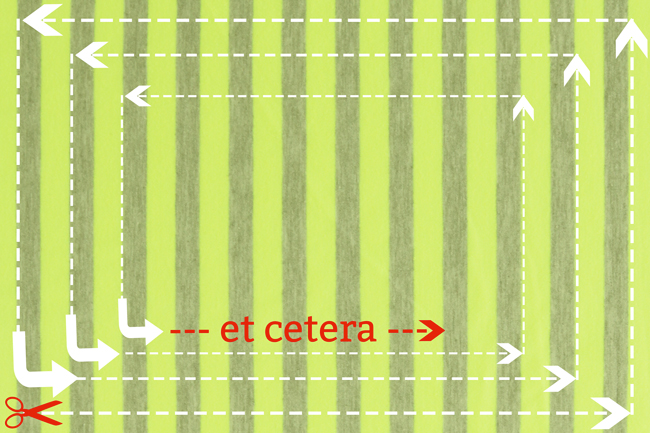
When your selvage is severed, set it aside. Start cutting your fabric into one, continuous inch-wide strip.
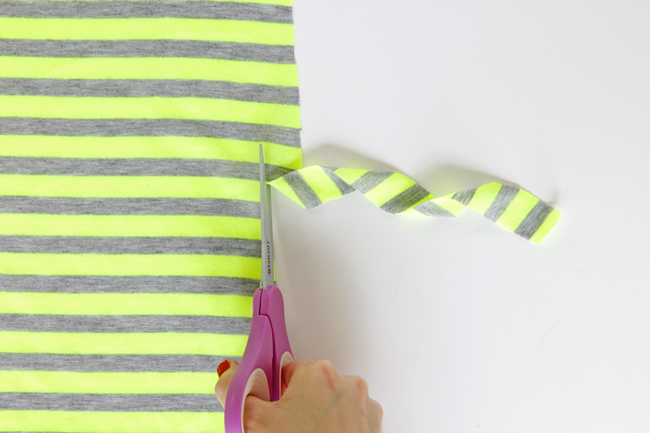
Work around your fabric in a jointed spiral, like this, to make the strip of continuous fabric.
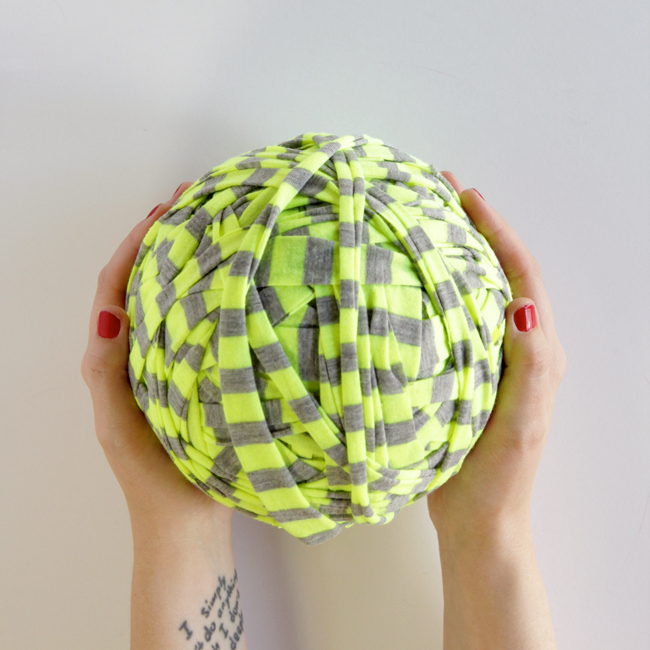
I recommend balling your yarn as you go – the whole point here is to make enough yarn to make more than a tiny project, which means you’ll be cutting and winding for awhile. If your hands start to hurt, take a break! I bruised my knuckle and made my tendons achier than necessary before I realized this was more than a single sitting project! (Oops.)
That’s really it! You just need to make sure to buy the right fabric and cut it into a single, long, yarn-like piece of fabric. Between the t-shirt yarn and this fabric yarn, I might be skipping the yarn store more often in the summer to experiment with this fun fiber alternative.


How cool! Can’t wait to see what you do with this pattern!
Superb ideas. Want to try ASAP.
Neat! I was using my serger to attach the ends, but this looks much easier.
I’ll give it a try. I also like you fabric choice <3
Thanks! I think it’ll make a fun summer bag! ;)
Thanks for that great tip! I crochet a basket with yarn and loved it (2014 Xmas gift for neighbors!). Will look for fabric at thrift stores.
Awesome! I’m totally hooked (no pun intended) on DIY fabric yarn right now!! -Heidi :)
Hi! I love this and making tshirt yarn and was looking into using the jersey fabric to get more consistent yarn. I just experimented with a small bit of unusable tshirt shaped like a rectangle using this method. I was curious how the corners of yours did when stretched out (when you turn the cut at the ends of the fabric)? Because mine were ugly and stuck out quite a bit. I’m not exactly an expert with scissors so I was just looking for some tips for this! Thanks!
Oh and also if you know how many yards you got out of the fabric? any rough guesstimate will do!
Hi Stefanie – I left the corners sort of wild, but if you cut your fabric into an oval before cutting and are careful to cut a consistent width, you won’t end up with flaps sticking out wider than the rest of the yarn (does that make sense?). And the yardage you get out of your fabric will totally vary depending on how thick you cut it – the thicker it is, the few yards you’ll get out of your fabric. I have no idea if this helps – let me know! -Heidi :)
Thanks so much that helps a lot actually!
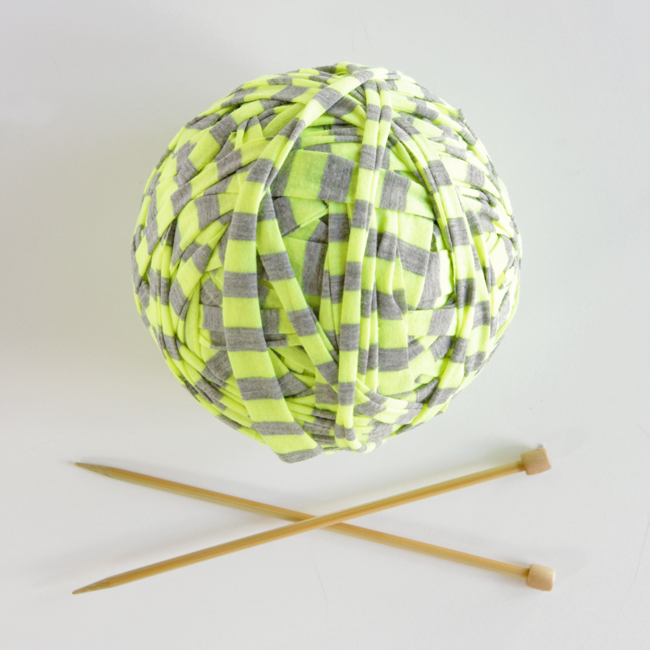
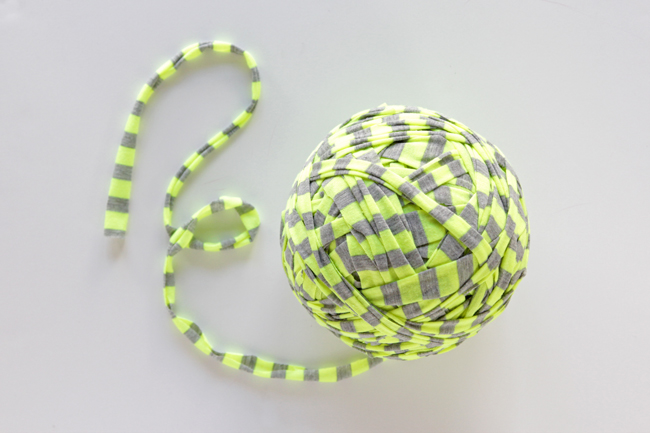
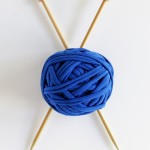
why don’t we see bands/strands of just gray or just yellow in your ball of yarn?
I cut most of the fabric perpendicular to the stripes, so the bands of solid grey & yellow are just hidden within the pictured ball of yarn. To see the project I made with the yarn pictured, see this post.
Hi Heidi
This is brilliant!
Thank you so much.
Sarah
Love this!!! I actually have a bunch of old jersey sheets I was saving for drop cloths. Nun-uhh! Not any more! 😉
Loved the tote pattern too! Thank you!! ☺️
Why not just remove the needles from your serger and use that to cut the fabric in strips? I’ve done it and it works wonderful – and fast.
If I had a serger that would be easier for sure!
Hi Heidi
Your yarn looks beautiful. I tried out the method but had a lot of problems with the corners. No matter how I pulled, the corners won’t curl in nicely. It just stuck out. So the necklace project I tried to make look kind of awkward with parts sticking out…
Please help! Thanks! 😃
This technique works best with knit jersey fabrics. If your fabric isn’t curling, cutting it into narrower strips should help for a necklace project. :)
Hi Heidi,
I have problem with my crochet bag project. When I pulled the corner part is seem weird or twisted in different direction. Can you pls advise? Thanks in advance.
Could you send me a picture of the issue you’re having? I’m happy to see if I can figure it out. :) -Heidi
It makes sense that it would do that because it is a different grain. Heidi, did you have that problem?. Would it be better to make strips straight on yardage and then sew together?
It’s up to you. Joining fabric yarn can be a pain and result in you having two layers of fabric a the join, which also results in places with different thickness. It all depends on your desire to weave in ends and the finished look you’re hoping for. :)
Thanks for the tip . I’ve read a lot of sewing tutorials online where there was a tremendous amount of work involved in making one continuous piece of fabric. This looks a lot easier!
How do you get it to roll with the right side of the fabric out? It always seems to curl with the ugly side out. Does that make sense?
Unfortunately, that’s the nature of knit fabric. If you’ve ever knit something in stockinette stitch, aka knit one row, purl one row when you’re working flat, you’ll know that a characteristic of that is curled edges that you need to work around. Most knit fabric is a tiny equivalent of stockinette stitch, so when it’s cut, there’s curl to it. My best advice is to work with a fabric that has a decent looking “wrong side.” Solids are great for this!
I have been searching for an answer to this same issue. I have so many pieces of knit clothing I’d love to make into yarn, but the “white” side (back) always seems to wind up on the outside of the “curl.” However, I recently purchased a “shred” scarf from a company who has apparently figured out a way to get the knit to roll the other way, so that the “good” side is out. It seems to be slightly stiff with some sort of sizing. Also, I purchased another scarf from a big-box store that was strips of knit fabric braided together. Again, the “good” side was on the outside of the curl. What is the secret??? I’d love to know.
They are probably somehow creating the fabric somewhat differently. It’s just like when you knit in stockinette stitch and it curls inward toward the knit side. Since the fabric you’re cutting is knit, it curls inward toward toward that knit side as well.
Thanks for the comments, but i guess there’s no solution to this. I also purchase beautiful fabrics with the idea of making yarn fabric.
Great article! I really like the idea of making yarn from t-shirts. I can do best use of my old t-shirts now. I like this article so much. Thanks for sharing.