• 0 items$0.00
  • Skip to primary navigation
  • Skip to main content
  • Skip to primary sidebar
  • Skip to footer

Hands Occupied

Colorful knitting, crochet, latch hook and macrame from craft book author & designer Heidi Gustad.

  • BLOG
    • Knitting
    • Crochet
    • Latch Hook
    • Macramé
    • Punch Needle
  • ABOUT
  • Shop
  • Nav Social Menu

    • Instagram
    • Pinterest
    • RSS
    • TikTok
    • YouTube

The ESP Dress / Handmade Wardrobe

May 29, 2019 4 Comments

Handmade Wardrobe / Learn the ins and outs, pros and cons of sewing the beginner-friendly ESP Dress from Decades of Style.
Hi, I have some serious resting face.

In honor of Me Made May soon coming to a close, today we’re going to take a closer look at a Me Made May project from last year, The ESP Dress from Decades of Style. Last year around this time, I really wanted to finally make the time to take my sewing skills from rusty-at-best to ok-I-sort-of-know-how-to-do-this. I wanted to be able to sew a dress start to finish in a weekend and install a zipper so the teeth lined up (more on why that was a goal in a moment). So I dug into my stash and pulled out my copy of the ESP Dress pattern, a pattern I’d used for somewhat-successfully making my Ms. Frizzle cosplay a couple years before.
Handmade Wardrobe / Learn the ins and outs, pros and cons of sewing the beginner-friendly ESP Dress from Decades of Style.

About the first go ’round

Like I said, I’d initially made this dress a few years ago, having not sewn much as an adult, except for a simple t-shirt dress. For my first attempt at the ESP Dress, the skirt was poorly gathered, the zipper wasn’t lined up (it zipped, but the zipper tops were half an inch off), and there were a couple issues with fit. I also modified the original short-sleeve dress pattern to include long sleeves with elastic cuffs to create a makeshift, elongated puffy sleeve. Considering I was largely stabbing in the dark on ESP attempt #1, I’m still excited that it was a functional dress at all.
Handmade Wardrobe / Learn the ins and outs, pros and cons of sewing the beginner-friendly ESP Dress from Decades of Style.

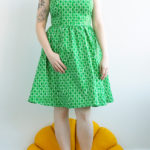
The ESP Dress

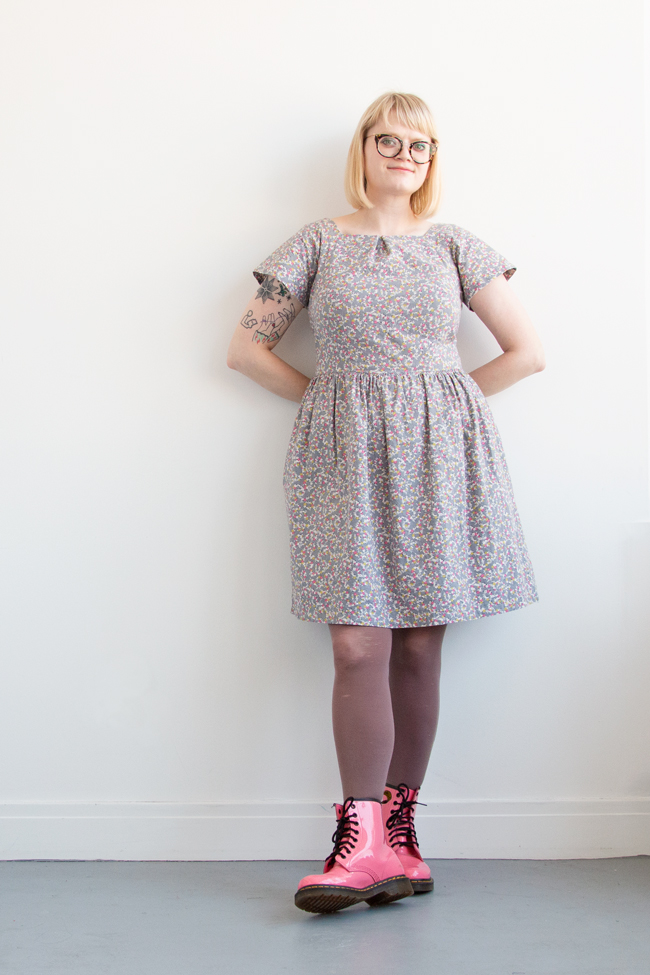
Fast forward now to this grey, floral take on the ESP. I wanted specifically to see if I could make a dress in a day, so a pattern I’d worked with before was in order. I’d sewn a couple circle skirts from a self-drafted pattern in the weeks leading up to making this dress, and I was feeling confident. I’d gotten zipper practice doing the skirts, so how hard could a longer zipper be?

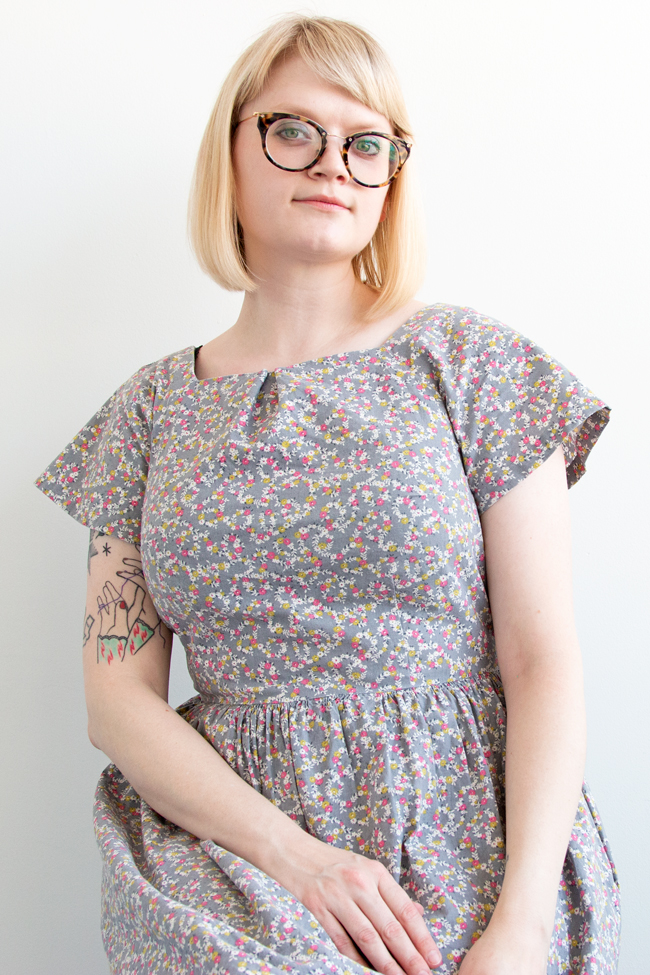
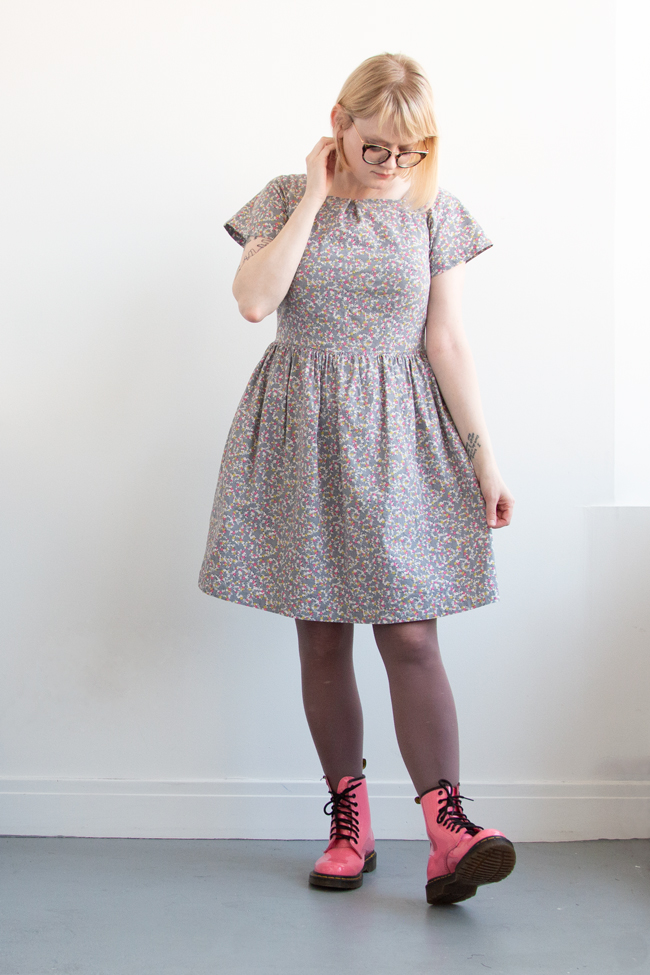
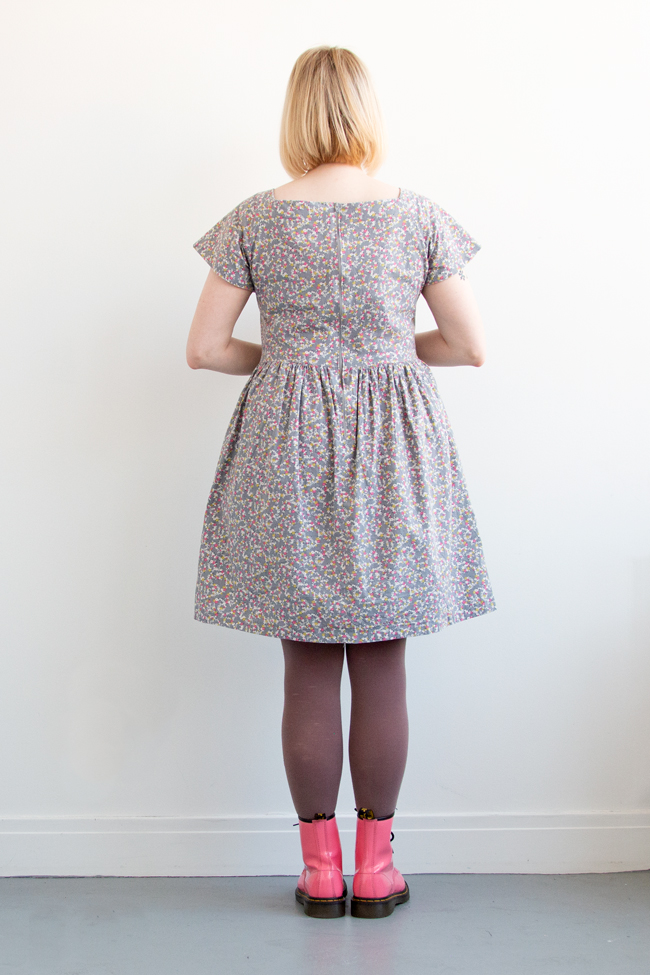
Good news! While I went into the project 50% confident/50% apprehensive about my ability to sew a wearable dress in a single day, I emerged victorious. (At 2 a.m., but still!) The visible zipper turned out perfect, my gathers were improved, and I had myself my first-ever, made-in-a-day dress. Combined with pink boots, my grey take on the ESP Dress has become a spring wardrobe staple.
Handmade Wardrobe / Learn the ins and outs, pros and cons of sewing the beginner-friendly ESP Dress from Decades of Style.

Pros & Cons

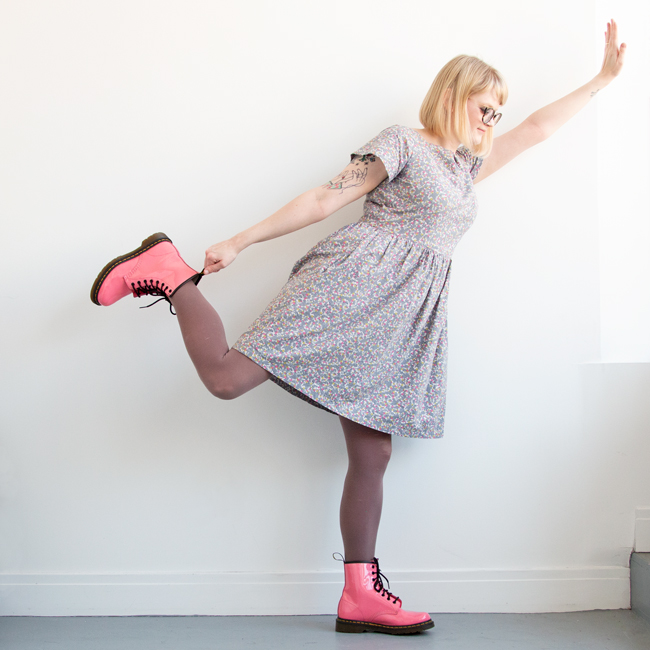
Pros: The dress is incredibly wearable, with casual short sleeves done raglan-style. (Yes, knitters & crocheters! Raglan like the sweater sleeve!) The raglan sleeve and angular neck assembly mean that most of this dress is sewn in straight lines, which is how it’s so quick to whip up. Curved lines are found at the hems and in the dress’ pockets, and they’re good practice for beginners!
Handmade Wardrobe / Learn the ins and outs, pros and cons of sewing the beginner-friendly ESP Dress from Decades of Style.

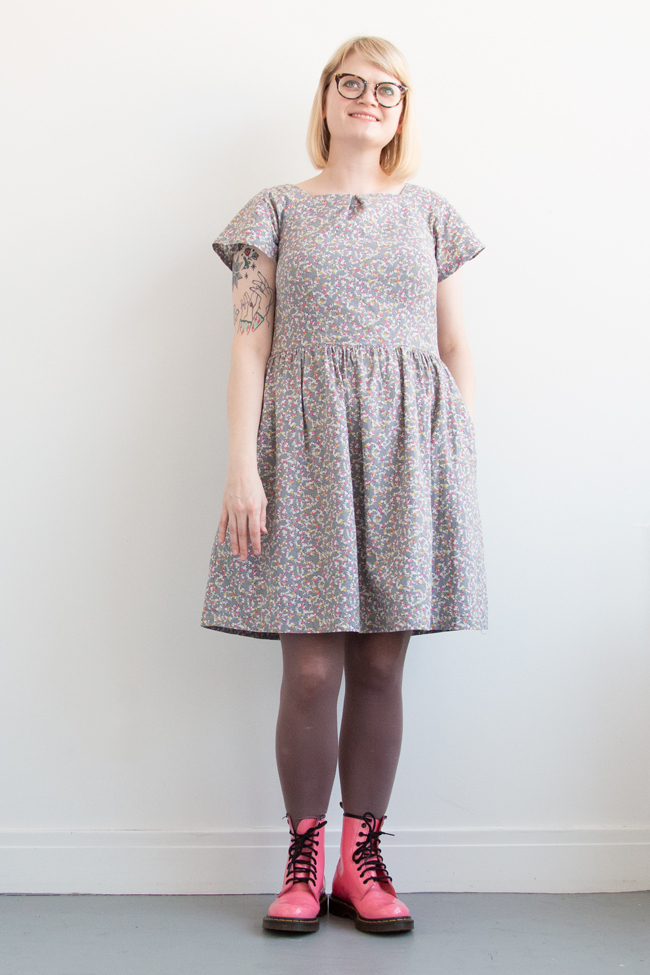
Cons: This is largely due to the dress being one of my first self-made items in awhile, but if you’ve got narrow shoulders like me, be aware that the neck opening is fairly wide on the ESP. The whole upper part of the dress nicely reminds me of a 1960s dress silhouette, but it was simply too wide on me out-of-the-box, so to speak. To quickly tweak this dress to avoid constant bra strap peek-a-booing, I added a pleat at the center front of the neckline by hand. It was simple: invisibly mark the center front of the neckline and half an inch on either side of it, then fold the side marks in to meet at the center. After pressing, I hand-basted and sewed the pleats down, and the dress was much more wearable.

If I made this dress again, I’d take the time to attempt grading between sizes to accommodate my unique bust to ribs to shoulders proportions, alleviating the need for the added front pleat. This would also mean the armpits of the dress, which had gotten sort of pulled up in the process of adding that pleat, wouldn’t feel quite as claustrophobic as my grey dress does.

Would I make this dress a third time? Absolutely! Knowing this pattern fairly well at this point, I think it presents a great opportunity to learn even more about fit and my own body. I already know I can make it in a day, don’t I?
Handmade Wardrobe / Learn the ins and outs, pros and cons of sewing the beginner-friendly ESP Dress from Decades of Style.

P.S. The ESP Dress passes the pockets test. ;)
Filed Under: Handmade Wardrobe, Sewing Tagged With: decades of style, esp dress, handmade clothes, handmade wardrobe, me made may, sew, Sewing

About Heidi

Heidi Gustad is a craft book author, designer & creator specializing in yarn crafts like knitting, crochet, latch hook & macramé. Her first book, Latch Hook: 12 Projects for the Modern Maker, is out now.

Previous Post: « An intro to knitCompanion, a knitter’s best friend!
Next Post: Picks of the Week »

Reader Interactions

DID YOU LIKE THIS POST?
Visit similar articles...

  • Simplicity 1803 / Handmade WardrobeSimplicity 1803 / Handmade Wardrobe
  • Hey hey hey! It’s Me Made May!Hey hey hey! It’s Me Made May!
  • Simplicity 1803: Just the Skirt / Handmade WardrobeSimplicity 1803: Just the Skirt / Handmade Wardrobe
  • The TLC Caftan / Handmade WardrobeThe TLC Caftan / Handmade Wardrobe

DON’T MISS ANOTHER UPDATE

Comments

  1. Allison

    May 30, 2019 at 3:33 pm

    Pockets forever! Now is not the time for be to become a sewist, but I appreciate that these posts remind us we can dig out rusty skills and polish them off :)

    Reply
    • Heidi

      May 30, 2019 at 4:15 pm

      That’s awesome! -Heidi

      Reply
  2. Christine Seid

    June 1, 2019 at 12:09 pm

    Good for you, Heidi. You look adorable in that dress and, even though you know you might be able to improve the fit, it looks like it fits you perfectly. And I’m also encouraged that we can dust off unused skills and achieve something new again. Great post.

    Reply
    • Heidi

      June 3, 2019 at 7:05 pm

      Thank you, Christine!

      Reply

Leave a Reply Cancel reply

Your email address will not be published. Required fields are marked *

This site uses Akismet to reduce spam. Learn how your comment data is processed.

Primary Sidebar

Heidi Gustad from Hands Occupied / Craft Book Author and Knitting, Crochet, Latch Hook and Macrame Designer

Hi! I’m Heidi (she/her/hers), a craft book author & pattern designer specializing in knitting, crochet, latch hook & macrame. Really anything with yarn! ❤️  My work combines vintage and modern design elements, featuring bold colors and graphic motifs.

EMAIL NEWSLETTER

Never miss a tutorial with these short & sweet monthly updates.

Find Me on Social Media

  • Instagram
  • Pinterest
  • TikTok
  • YouTube
Latch Hook by Heidi GustadDiscover Unique Items

Footer

INSTAGRAM

handsoccupied

Craft book author, designer & creator specializing in yarn crafts like knitting, crochet, latch hook & macramé
❤️ Email preferred

Heidi Gustad 🧶✂️
Finally organizing & putting the finishing touches Finally organizing & putting the finishing touches on my home studio. After losing my studio space last fall, it’s feels really great to *occupy* this new space all the way. 😉
.
I started by removing general clutter & returning straggler supplies from various WIPs, videos & design deadlines to their homes. Next, I hung a third peg board in the space - this one is mostly for display and less for organizing tools or projects. For the first time ever, I’m displaying projects from my book, plus a couple other faves. (The best thing about designing more yarn crafts besides knit & crochet is that I have some really fun -and delightfully pettable 😆- samples around.) I finished by adding a square dowel to my small supply storage tower to keep it from tipping over, plus re-arranging and de-cluttering the closet. 
.
This cleaner space already has me feeling so much more creative and less overwhelmed. Now to find a safe spot in the basement for the tower of project samples in Rubbermaid tubs I liberated from my WIPs closet. Also why are there five?! 
.
Here’s to keeping it clean for a few weeks! 🧶 
.
#handsocupied #handsoccupiedstudio #craftroom #craftroomorganization #craftroomstorage #yarncraft #knitter #crocheter #latchhook #latchhookbook
It’s a disaster in here and my video microphone It’s a disaster in here and my video microphone isn’t cooperating, but it could be worse! How’s your day? 
.
(If we haven’t yet met, I’m Heidi and I’m a pattern designer and tutorial creator specializing in yarn crafts like knitting & latch hook. You can learn more about my work and regularly find new tutorials in my profile. ☺️👋🏻)
.
#handsoccupied #craftstudio #knitter #yarncrafter
How to knit a one-row buttonhole 🧶 . Sweater k How to knit a one-row buttonhole 🧶 
.
Sweater knitters, listen up! Learn how to knit a buttonhole over the course of a single row of knitting, a.k.a. a one-row buttonhole. In this technique, a combination of binding off and casting on stitches on opposite sides of the work creates a symmetrical, stretchy buttonhole. 
.
The time limit on these is 90 seconds, so this quick tutorial is perfect to save for future reference. (Did you know you can make folders of saved items like tutorials? 👩🏼‍🏫) 
.
If you’re brand new to the technique or want to see this demonstration slower and more in-depth, my bl0g and You/2be are the place to be. Thanks for watching & let me know if you have any questions or requests for future tutorials in the comments. ☺️
.
#handsoccupied #knitting #onerowbuttonhole #learntoknit #sweaterknitting #knittutorial #knitting_inspiration
One-row buttonholes are one of a few common ways t One-row buttonholes are one of a few common ways to knit a buttonhole. Created using a combination of binding off and casting on stitches over the course of a single row, this technique is one you’ll come back to again and again, and bonus: it’s not wildly challenging. 
.
Find a brand new video tutorial for knitting one-row buttonholes and a post with other useful buttonhole resources on the bl0g, 🔗 in bi0.
.
#handsoccupied #onerowbuttonhole #knitting #sweaterknitting #buttonhole #knittersofinstagram
It was quiet last week as I’ve been working on a It was quiet last week as I’ve been working on a few behind the scenes projects, including filming a bunch. The goal: tutorials most weeks!
.
I also put some time into neglected design projects, in particular the pattern collection I began working on back in 2022. As I work on the samples, you’ll be seeing some sneak peeks here and there in my feed. ☺️
.
The other thing occupying my time: I got an iPad to try digital planning and keep my design notes more organized, not to mention digitized. (Paper scribbling just ain’t it after 12 years.) If anyone has tips for how to make the most of digital planning as a crafter / knitter, I’d love to hear them! Accounts to follow, apps, must-know hacks for crafters - I’m excited to learn it all! 👩🏼‍🏫
.
#handsoccupied #knitting #knittingtutorial #digitalplanning #knitdesign
Load More... Follow on Instagram

Copyright © 2023 / Foodie Pro Theme On Genesis Framework / Branding by Ink + Mortar
All Site & Shop Policies / Privacy Policy / Cookie Policy