• 0 items$0.00
  • Skip to primary navigation
  • Skip to main content
  • Skip to primary sidebar
  • Skip to footer

Hands Occupied

Colorful knitting, crochet, latch hook and macrame from craft book author & designer Heidi Gustad.

  • BLOG
    • Knitting
    • Crochet
    • Latch Hook
    • Macramé
    • Punch Needle
  • ABOUT
  • Shop
  • Nav Social Menu

    • Instagram
    • Pinterest
    • RSS
    • TikTok
    • YouTube

How to Fix Mistakes in Brioche Knitting

January 5, 2015 16 Comments

A video tutorial for how to fix mistakes in brioche knitting without having to rip out your entire project! | HandsOccupied.com

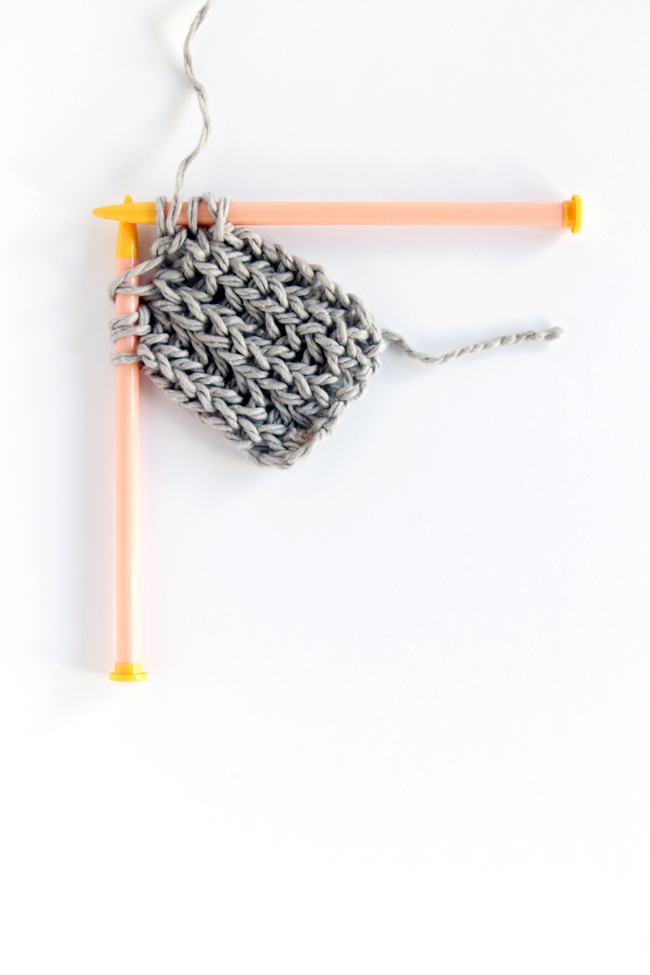
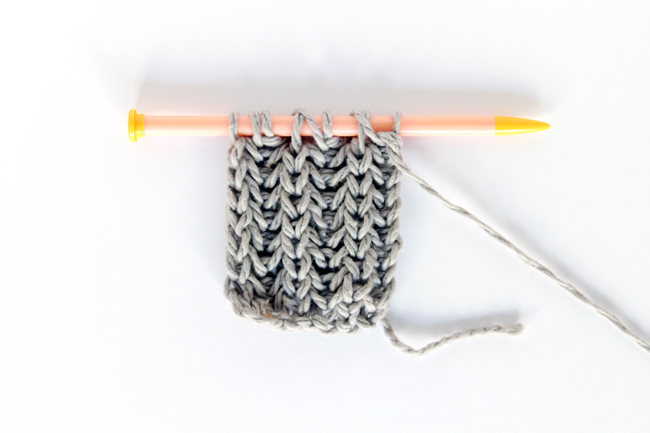
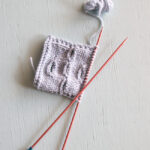
A couple months ago I shared a pattern for an awesomely fluffy cowl in brioche stitch, which a lot of you lovely knitters out there have made (and even adapted!) for yourselves. One thing I didn’t think to write about in that post was how to tear back and fix a brioche project if you make a mistake. Luckily one of your fellow readers reached out on Facebook to ask if I’d make a video on just that. Today’s new video shows how to wrangle all of the yarn-overs and slipped stitches when you’re ripping back to get rid of a misworked stitch in brioche.

Brioche Knitting & A Brioche Cowl Pattern at handsoccupied.com

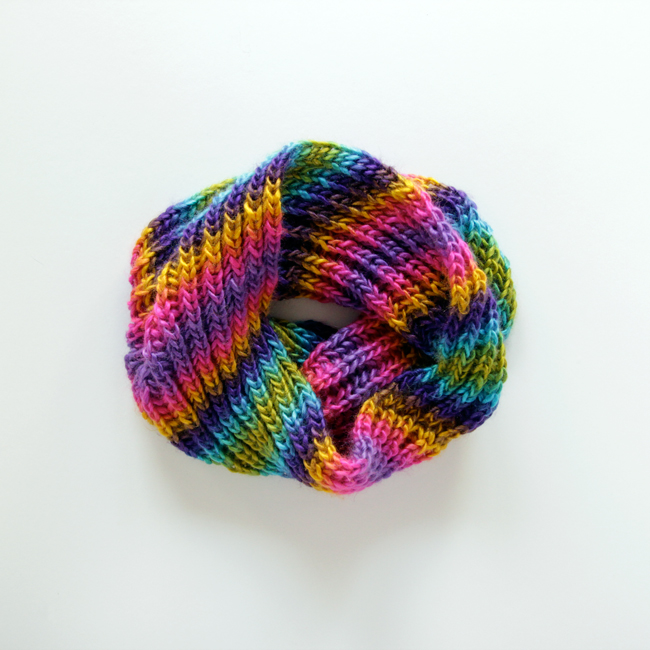
The Basic Brioche Cowl Pattern 

A video tutorial for how to fix mistakes in brioche knitting without having to rip out your entire project! | HandsOccupied.com

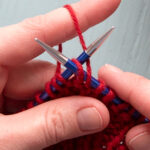
I’ll admit, fixing brioche is a little scarier than ripping out and rethreading loops of vanilla knit and purl stitches. The key is knowing where you’re picking up the X of a yarn over as well as a knit stitch and where you’re just picking up a purl loop by itself. Check out the video below for a nice and slow visual explanation on how to successfully redo mixed up brioche without having to tear out all of your work and start over. Hint: slow and steady wins the race! :)

A video tutorial for how to fix mistakes in brioche knitting without having to rip out your entire project! | HandsOccupied.com

Video: How to Fix a Mistake in Brioche Knitting

Filed Under: Knitting, Knitting & Crochet, Video Tutorials Tagged With: brioche, brioche knitting, how to fix brioche knitting, Knitting, video tutorial

About Heidi

Heidi Gustad is a craft book author, designer & creator specializing in yarn crafts like knitting, crochet, latch hook & macramé. Her first book, Latch Hook: 12 Projects for the Modern Maker, is out now.

Previous Post: « Picks of The Week
Next Post: Make the World Better with a Sweater Party »

Reader Interactions

DID YOU LIKE THIS POST?
Visit similar articles...

  • How to Knit a One-Row ButtonholeHow to Knit a One-Row Buttonhole
  • Norwegian Purling for Continental Style Knitters + VideoNorwegian Purling for Continental Style Knitters + Video
  • How to Fix Common Knitting Mistakes + Video TutorialHow to Fix Common Knitting Mistakes + Video Tutorial
  • One-Step Provisional Cast On with Video TutorialOne-Step Provisional Cast On with Video Tutorial

DON’T MISS ANOTHER UPDATE

Comments

  1. Natasha Price

    January 5, 2015 at 10:45 am

    Thanks for linking to my blog. I truly enjoy this stitch and your pattern. Funny, I was thinking as I was making my last brioche cowl, how tricky it is to fix mistakes and wondered whether you would post a tutorial. I look forward to watching your video and seeing how you do it.
    -Natasha

    Reply
  2. Jeannie

    January 5, 2015 at 9:52 pm

    Thankyou Heidi…!!
    I really appreciate this tutorial….!!
    Thankyou for taking the time to put
    This together in such a clear and easy to understand way!!

    Jeannie Swanson Mustoe
    Seattle Washington

    Reply
  3. Joan Trautwein

    January 11, 2015 at 4:34 pm

    Thank you Heidi. I think I can at least recognize where my mistakes are and will be able to find and fix without ripping out (3 times after 5+ inches) all of the knitting. The yarn is holding up pretty well even after re-casting on and ripping.out. Now I’m confident that I’ll fix my work because I’m not going to start all over again–there will only be fuzz left after so many times. Thanks again you really make it very clear.

    Reply
  4. Dinah Wright

    September 19, 2015 at 12:37 pm

    I loved this stitch the first time I saw it. Even though I do not do the continental stitch I had no trouble picking it up…UNTIL I MADE A MISTAKE! Ripped it out , started again and completed 43 rows on 28 stitches…mistake. I found your post and it was so easy to follow. Correction was made and I could move on with this piece. I love this fluffy stitch but if you can’t make corrections knitting it is no longer fun. Thanks so much for this great tutorial.

    Reply
  5. Liz R

    October 14, 2015 at 4:28 pm

    Wow! This is such a helpful video that I desperately needed. I was on my 3rd attempt at a 2-color brioche cowl knit in the round and realized I was 50 stitches into a mistake. Determined not to rip out the entire project, I found your video. It is actually easier to fix in the round because I was able to work backwards stitch by stitch rather than tearing out an entire row…always tricky in the round. I am so glad this lead me to your blog!

    The website link I listed is for this specific project on my Ravelry page.
    ~ Liz

    Reply
  6. Maddie

    November 10, 2015 at 9:03 am

    Ditto the previous comment… Wow! This is such a helpful video : ) I’m such a novice knitter that I don’t think to worry about a stitch being difficult; I plow ahead and do it. But, when I made a mistake in the brioche scarf I’m making I suddenly realized how hard it was going to be to fix. Your video is really well done and truly saved my project. Thanks!

    Maddie

    Reply
  7. JoyceN

    January 14, 2016 at 2:21 pm

    This tutorial was a lifesaver! I am knitting my first brioche scarf, and while I am also using a lifeline at intervals, this enabled me to only tink back three rows, rather than going back 20 rows to my lifeline.

    Reply
  8. Beth

    May 3, 2017 at 9:20 pm

    Thank you so much! I’m working on my first brioche scarf and this tutorial just saved it!

    Reply
    • Heidi

      May 4, 2017 at 4:47 pm

      That makes me so happy! Brioche is so fun. :)

      Reply
  9. Victoria

    September 14, 2017 at 6:40 am

    Is there any trick to fixing a brioche increase? I have a project where I was supposed to brk4brk but instead only brkyobrk and sort of fudged it as I went along. I’d like to go back and fix it, but I’m worried messing around with my center spine may be a point of no return…thanks!!

    Reply
    • Heidi

      September 14, 2017 at 9:05 am

      That’s a little more daunting! I’ve done a video explaining how to do brioche increases and decreases, but none yet on fixing them. I generally am a big fan of using lifelines and frogging if I’m doing something involving needing to fix a spine. (I realize frogging is a nasty word for a lot of folks, though! ;) )

      Hopefully this was helpful in some way! For your reference, here’s the playlist from my YouTube channel that features all of the brioche tutorials I’ve done so far: https://www.youtube.com/watch?v=aTrKpKeEHBk&list=PLieTn2MJTvhDhkN8Cij1cT_5mT2A74D_J.

      Reply
  10. C.A. Mills

    February 13, 2018 at 12:13 am

    I can’t thank you enough…just taught myself brioche….and I was so upset that I made a mistake, and no idea how to fix it. Thought I was going to have to rip it all out the whole thing …..and I am already 2 skeins in…..thank you again. For some reason the ladies in the knitting store said minutes and your tutorial. You are a great teacher.

    Reply
    • Heidi

      February 14, 2018 at 5:10 pm

      Glad it helped you out! 😊

      Reply
  11. Carola

    January 5, 2019 at 2:51 pm

    Thank you so much for this super video. I was about to throw my knitting away and you saved it! So very well explained. Best wishes from Germany!

    Reply
  12. Stephanie

    November 3, 2022 at 8:13 pm

    Heidi thank youuuuu soooo much for this video!!! Awesome Awesome!!! Great, helpful video!!!!

    Reply
    • Heidi

      November 18, 2022 at 9:56 am

      You’re welcome! :)

      Reply

Leave a Reply Cancel reply

Your email address will not be published. Required fields are marked *

This site uses Akismet to reduce spam. Learn how your comment data is processed.

Primary Sidebar

Heidi Gustad from Hands Occupied / Craft Book Author and Knitting, Crochet, Latch Hook and Macrame Designer

Hi! I’m Heidi (she/her/hers), a craft book author & pattern designer specializing in knitting, crochet, latch hook & macrame. Really anything with yarn! ❤️  My work combines vintage and modern design elements, featuring bold colors and graphic motifs.

EMAIL NEWSLETTER

Never miss a tutorial with these short & sweet monthly updates.

Find Me on Social Media

  • Instagram
  • Pinterest
  • TikTok
  • YouTube
Latch Hook by Heidi GustadDiscover Unique Items

Footer

INSTAGRAM

handsoccupied

Helping yarn crafters untangle various techniques on the internet since 2010
🧶 Really into intarsia
Stay up-to-date 💌 & shop the latest patterns ⤵️

Heidi Gustad 🧶 knitting & yarn crafts
How to convert a closet into WIPs storage with jus How to convert a closet into WIPs storage with just a few supplies ✂️
.
When I was a librarian, we would use these hanging bags to circulate books with audiobook CDs. They came to mind when I wanted to develop a filing cabinet-like system for my differently-sized WIPs. To fit in my studio closet, a standard bedroom closet, they just needed custom hangers. 🤙🏻 
.
HOW TO MAKE THE HANGERS
1. Carefully cut approx. a 9” (23 cm) length of flexible 3 mm aluminum wire.
2. Near the end of a large knitting needle or dowel, wrap the wire around it as you would a twist tie. 
3. Bend the other end into a hook shape, perpendicular to the circle shape you just created. 
4. Hang like a hanger in a closet, as shown. 
.
#handsoccupied #handmadelife #knitting_inspiration #craftcloset #craftroom #craftroomorganization #craftroomstorage #craftroomdecor #crocheter #latchhook #knittersofinstagram #wip #wips #hangingstorage
It’s time for the monthly review and giveaway! T It’s time for the monthly review and giveaway! This go around, get to know two new sister yarns from @manosyarnsusa, Marla and Sami, and enter to win a skein of each to try for yourself. 
.
What makes these yarns sisters is that, while dyed differently, they’re the same weight and come in intentionally coordinating color palettes. For my review, I opted for a sky-inspired combo of Sami in Natural and Marla in Nube. 🌧️ 
.
Check out the full review & enter the giveaway at the link in my bio. 
.
#handsoccupied #yarnreview #manosdeluruguay #knitting_inspire #crochet #yarngiveaway #knitters #yarn #crochetersofinstagram
If only knitting a whole project took 39 seconds… 😮‍💨 
.
In this video, you can see how the Intarsia Flower Pillow pattern knits up - two flat panels, one with intarsia, both are blocked, and then they’re seamed. Find the pattern on @hi.ravelry & my website, just search Intarsia Flower Pillow. 🌸 
.
P.S. I’m really smiling in this video while seaming the pillow, so I guess I’m proving last week’s claim that I truly enjoy that sometimes-dreaded task. 😆🫣
In knitting, a Left Lifted Increase (LLI) lets you In knitting, a Left Lifted Increase (LLI) lets you add a stitch in between two columns of stitches that leans to the left. Similar to an M1L, LLIs allow you to increase nearly invisibly.
.
To learn more about lifted increases, including when to use them and how they differ from Make 1s, head to the 🔗 in my profle. 
.
Have you ever used lifted increases? I used M1’s almost exclusively for a long time when I needed to inc between stitches, but when I designed the Intarsia Flower Pillow pattern, I needed something that would allow me to increase a lot near my cast on, and M1’s resulted in edge curling. The more you know! 🌈 
.
Yarn: @lionbrandyarn Wool Ease from my Stash / Neddles: @boyeyarncrafts - Just remembered these are the needles I learned to knit on at age 8. 😂
.
#handsoccupied #knitting #learntoknit #howtoknit #sweaterknitting #knitinspiration #knittersofinstagram #liftedincreases
Last week I got to hang out with my family & helpe Last week I got to hang out with my family & helped babysit my red-headed niece and nephew. So here’s some plane knitting, and a couple pictures (shared with permission) of my babysitting adventures.
.
Lessons learned: 1️⃣ Trying to knit around 2 toddlers, 2 cats & 2 large dogs is pretty hard. 2️⃣ I learned during water color time that pink and black make “colorful black.” 🩷🖤 3️⃣ Toddlers do NOT care about your rainbow sorting of their toys. 4️⃣ Toddlers are very good at finding mischief in a very short amount of time, what a surprise. 😂
.
#handsoccupied #knitting #placesyoucanknit #knitters #knitinpublic #handmadelife #knitting_inspiration
Load More... Follow on Instagram

Copyright © 2023 / Foodie Pro Theme On Genesis Framework / Branding by Ink + Mortar
All Site & Shop Policies / Privacy Policy / Cookie Policy