• 0 items$0.00
  • Skip to primary navigation
  • Skip to main content
  • Skip to primary sidebar
  • Skip to footer

Hands Occupied

Colorful knitting, crochet, latch hook and macrame from craft book author & designer Heidi Gustad.

  • BLOG
    • Knitting
    • Crochet
    • Latch Hook
    • Macramé
    • Punch Needle
  • ABOUT
  • Shop
  • Nav Social Menu

    • Instagram
    • Pinterest
    • RSS
    • TikTok
    • YouTube

How-to: Basic Screenprinting

October 31, 2011 Leave a Comment

When I was in high school, a friend of mine taught me the basics of DIY screenprinting. It takes a little bit of time, but has come in handy a bunch of times over the years. I made shirts for friends, my band, my brother’s tennis team, and a bunch for fun. The method  I use is called the screen filler method. You can read about other screen printing methods here.

This Halloween, I wanted to make some easy costumes for my dogs to go along with my family’s Parks and Recreation themed costumes (Pawnee Goddess costume, Pawnee Ranger costume). The part of the Pawnee Rangers episode I have yet to explore this Halloween is the treat yo’self subplot. I decided to make my pups a couple of trick or treat yo’self t-shirts. In the past, I’ve tried to make them costumes they’ll actually be comfortable in, but it turns out they’re basically intolerant of clothing of any kind, other than t-shirts.

Supplies

t-shirt in the appropriate size

screenprinting ink (Speedball is the brand that’s most available at stores like Michaels)

screen printing frame (again, Speedball is the brand I use)

screen filler (yep, Speedball)

screen printing squeegee

pencil

rags that you’re ok with staining

something to protect your work surface

bright desk lamp

hair dryer

one large and one small paint brush

cardboard large enough to fill most of the inside of your shirt

Directions

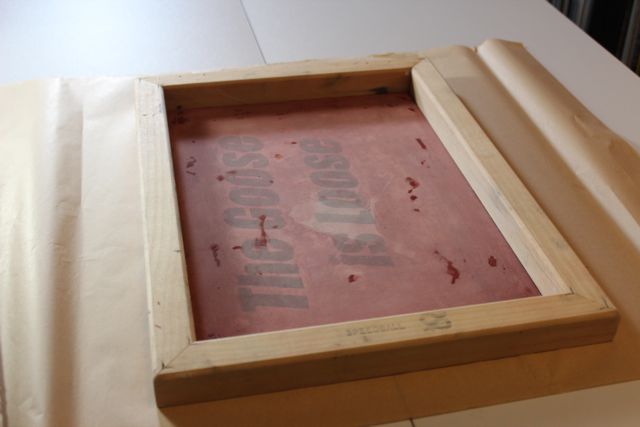
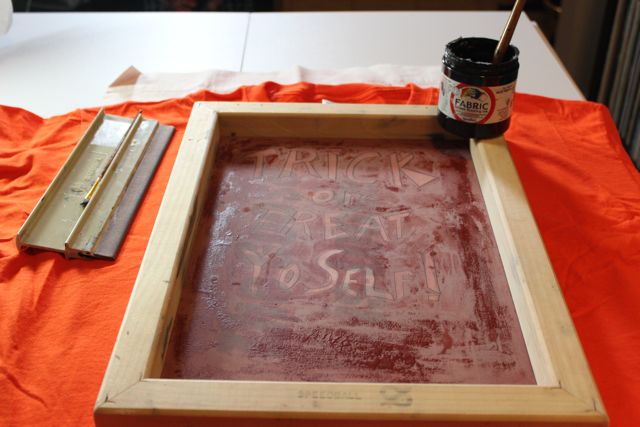
Draw your design directly on the screen printing frame. If the direction of the design on the shirt matters (like if you’re including words), write it on the side shown below.
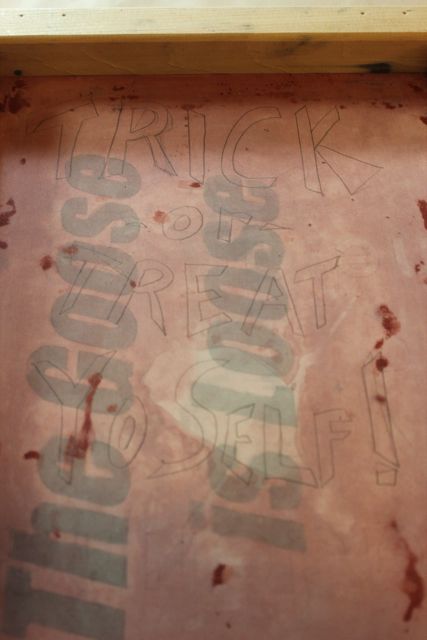
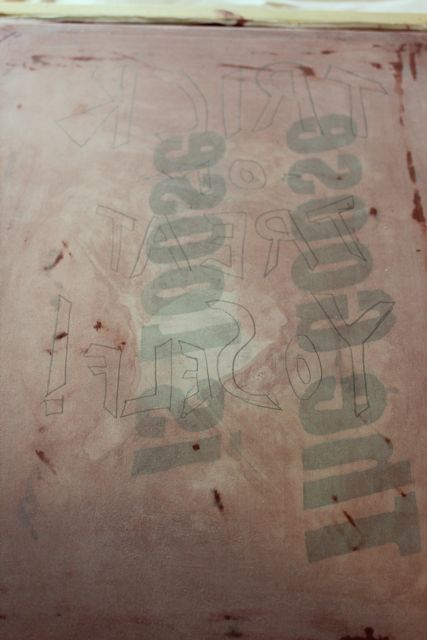
Flip the screen over and trace the design on to the other side of the screen. This is the side you’ll be applying screen filler to, so you’ll need the design to be discernible on it.
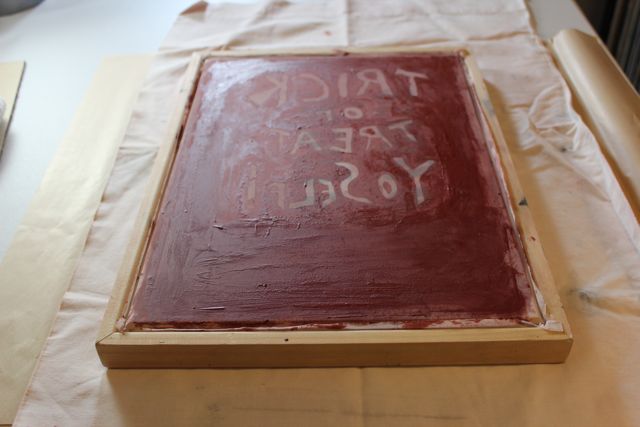
Apply screen filler to everywhere on the screen you don’t want ink to seep through on to your t-shirt. You’re basically creating a stencil. Screen filler fills all of the holes in the screen to keep the ink from going through.

I find it works best to apply screen filler to the big areas of the screen using a large paint brush first. Then, take a smaller paint brush to paint up to the edges of your design.
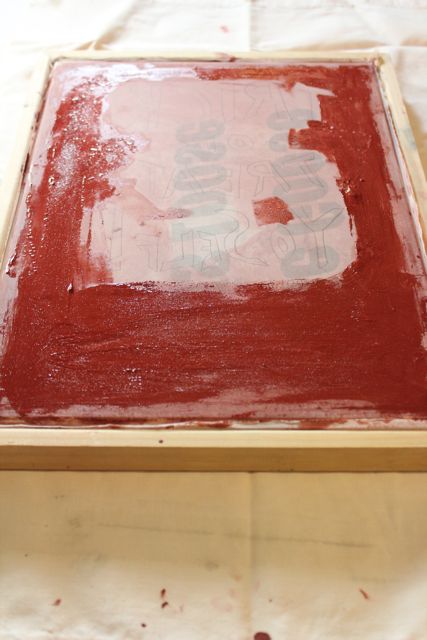
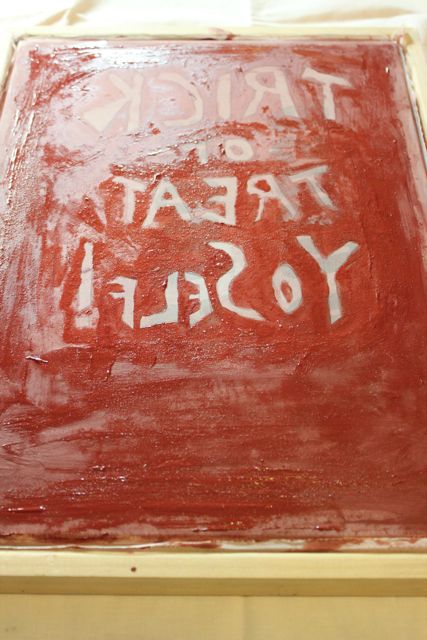
Let your ink dry naturally, or use a hair dryer to speed up the process.
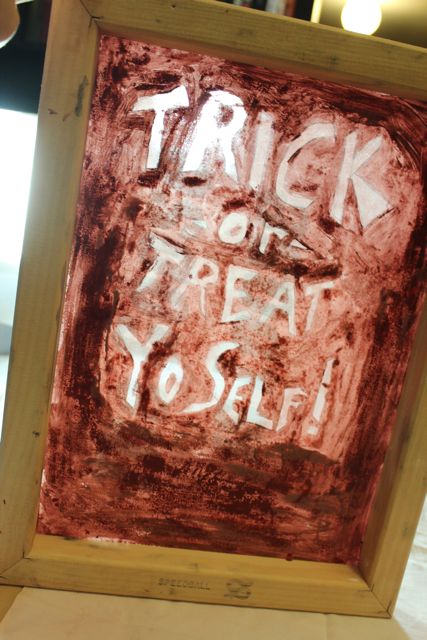
Hold your dried screen up to the light. If you can see little dots of light, ink can get through. I also find that getting straight or solid edges on my design takes a couple rounds of screen filling to get right.
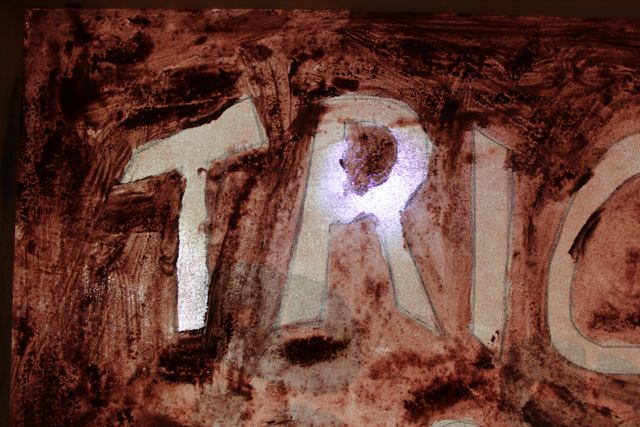
Once you’re confident the screen is all set, you’re ready to print. You can even use an old rag or scrap of fabric to test the accuracy of your stencil before attempting to ink your official shirt.

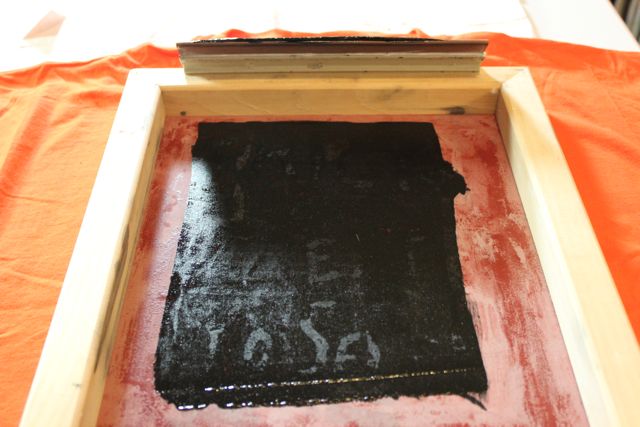
Lay your shirt out on your work surface, which is protected with a rag or newspaper. Grab a piece of cardboard and put it inside your shirt to protect the far side of it from ink bleed. Straighten your shirt fabric over the cardboard.
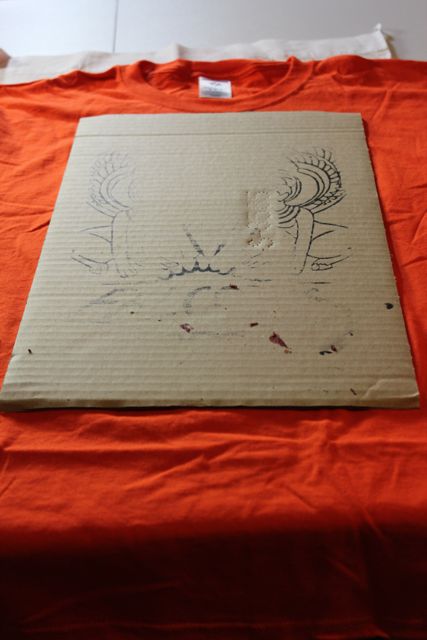
Place one end of your screen at the top of your shirt, as shown. Use your desk lamp to cast a shadow down on the shirt, giving you an idea of how the design will look once it’s printed on the shirt. Try to make it as straight as possible.
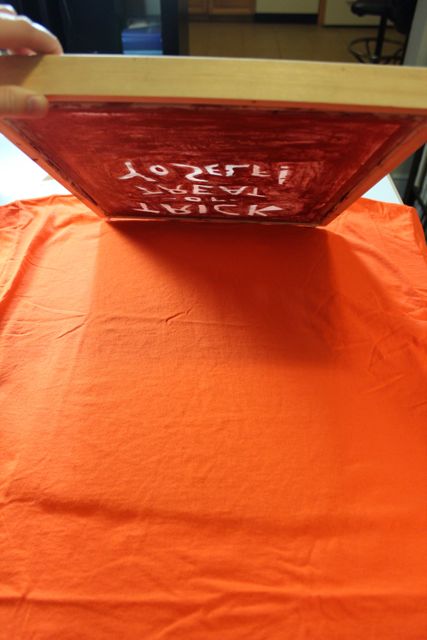
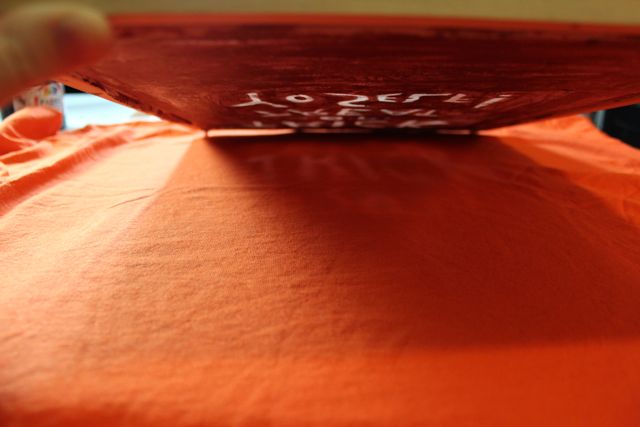
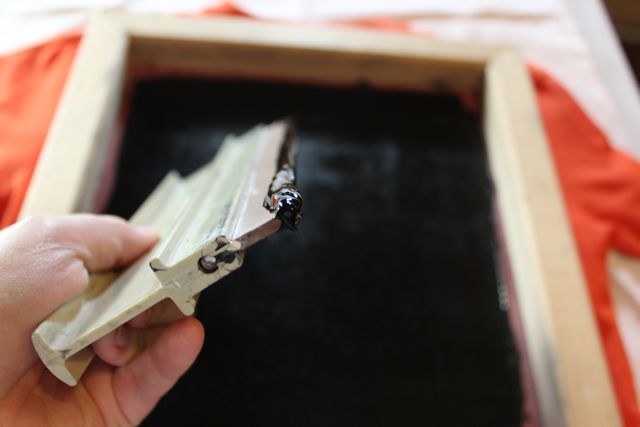
Grab your screen printing ink and squeegee. Paint ink (not too much!) over the openings in your stencil. Brace the frame in place by pressing down with your forearm on the wood part of it. Using the squeegee, wipe back and forth, up and down across the screen while pressing down.

A couple tips:

  • If you apply too much ink to the screen, it can more easily bleed past the stencil when you squeegee it through.
  • Be careful to hold the screen in ONE place. If your stencil shifts, your shirt will get all effed up.
  • If you do eff up your shirt, quickly running over to the sink and rinsing it incredibly thoroughly in cold water cleans it. You’ll have to run your shirt through the dryer before trying to print a second time, but your shirt won’t be ruined.
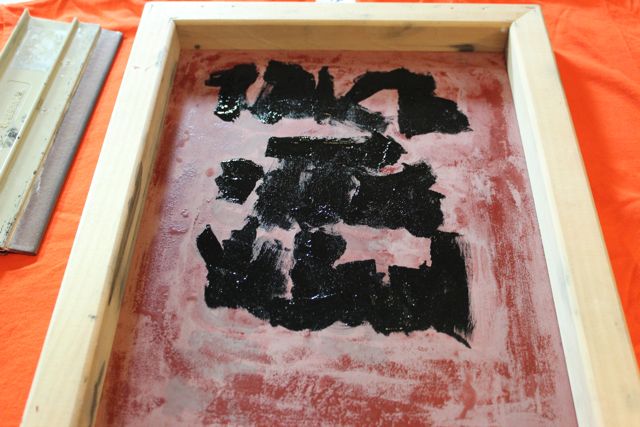
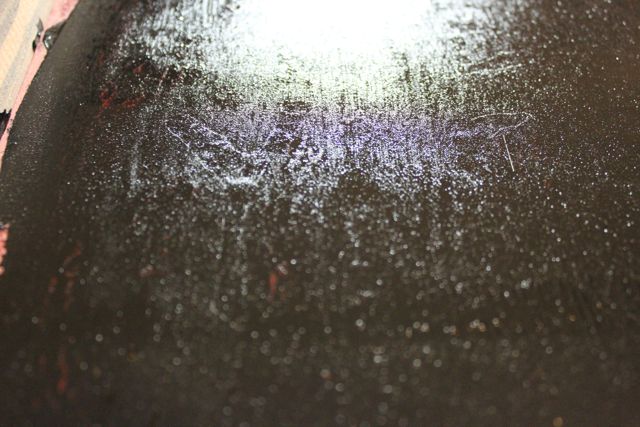
How do you know when you’ve successfully printed the design? As the ink passes through the stencil, you’re able to make out the design by looking closely at the frame. Here’s what it looks like when the ink has gone through (see the “Y”):

Once you’re confident you’ve squeegeed enough, carefully lift the frame off the shirt. It will stick a little, so make sure to hold the shirt down as you lift the frame. Don’t let the shirt fold. While the ink is still wet, it can stain other parts of the garment.
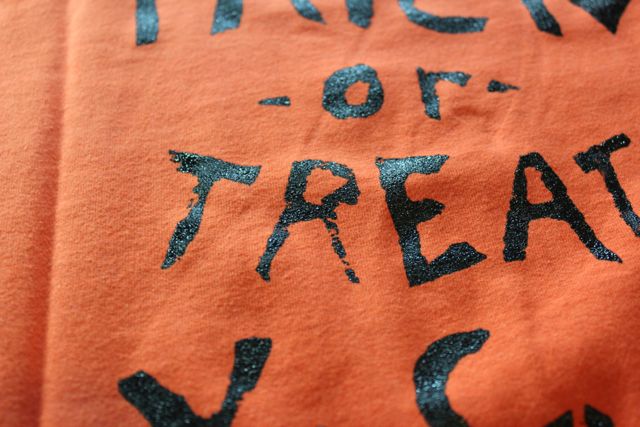
Despite your best efforts, the stencil won’t always perfectly come through. The easy solution is to use a paint brush (and only the tiniest amount of ink) to fill in gaps in your design.
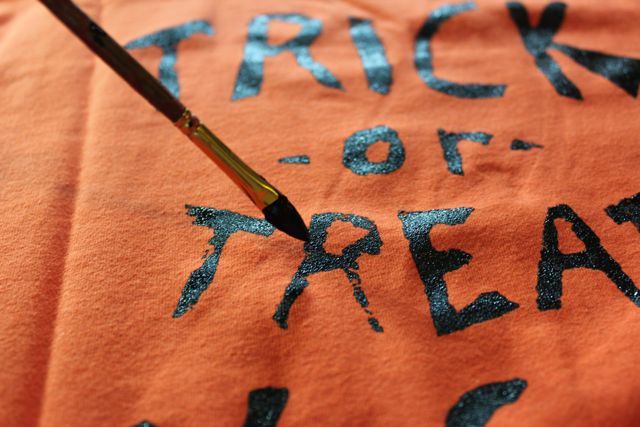
When you’re all set, carefully hang your shirt on a hanger and let it dry overnight. Rinse all of the ink off of your screens using tepid water before the ink dries on them. In my experience, this helps them last longer. Set your screen aside to dry.
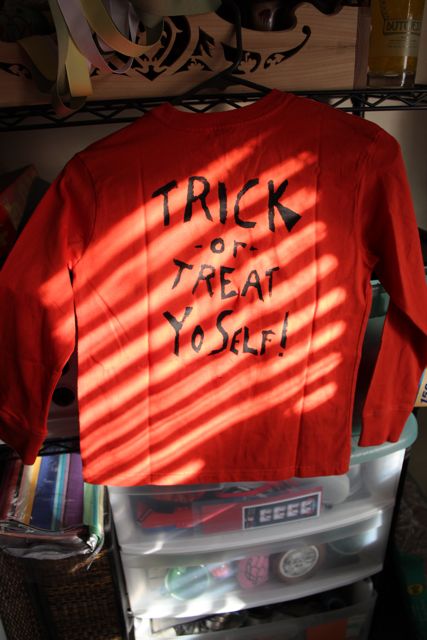
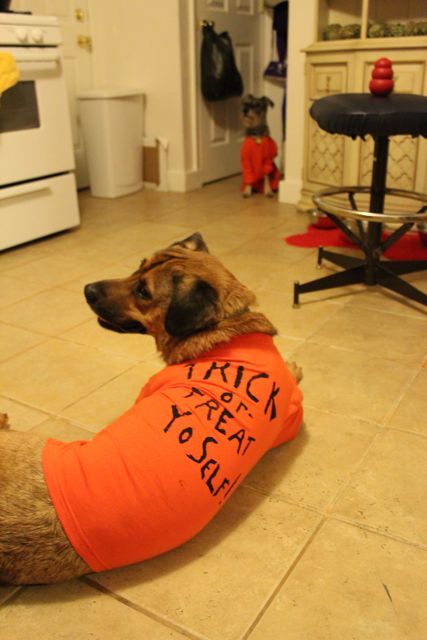
When they’re dry, they’re ready to wear! Check out my cute pooches in their getups. They’re not very good models, but now associate wearing these shirts with getting yummy treats.
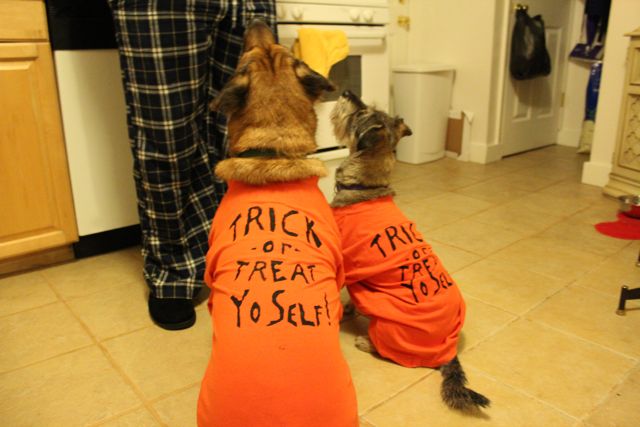
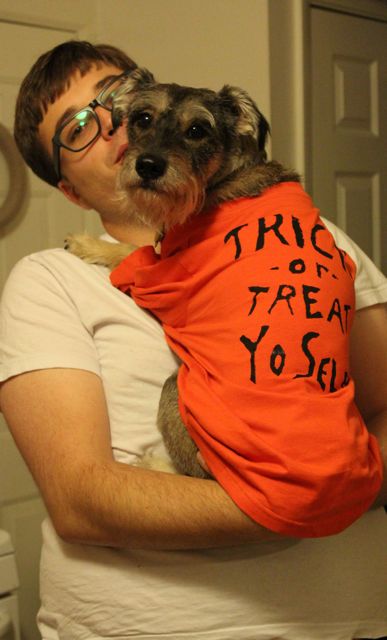
Screen printing supplies aren’t the cheapest things in the world, so remember to clean them after each use. 

Filed Under: Halloween, How-to Tagged With: diy, dogs, How-to, screen printing, speedball

About Heidi

Heidi Gustad is a craft book author, designer & creator specializing in yarn crafts like knitting, crochet, latch hook & macramé. Her first book, Latch Hook: 12 Projects for the Modern Maker, is out now.

Previous Post: « How-to: Louise Dress from Bob’s Burgers
Next Post: How-to: Google Reader Onesie »

Reader Interactions

DID YOU LIKE THIS POST?
Visit similar articles...

  • How-to: Halloween Doggie Bow Tie How-to: Halloween Doggie Bow Tie
  • Halloween 2011 RoundupHalloween 2011 Roundup
  • Attention, DIY Brides & Handmade Hostesses!Attention, DIY Brides & Handmade Hostesses!
  • Top 10 DIYs of 2013Top 10 DIYs of 2013

DON’T MISS ANOTHER UPDATE

Leave a Reply Cancel reply

Your email address will not be published. Required fields are marked *

This site uses Akismet to reduce spam. Learn how your comment data is processed.

Primary Sidebar

Heidi Gustad from Hands Occupied / Craft Book Author and Knitting, Crochet, Latch Hook and Macrame Designer

Hi! I’m Heidi (she/her/hers), a craft book author & pattern designer specializing in knitting, crochet, latch hook & macrame. Really anything with yarn! ❤️  My work combines vintage and modern design elements, featuring bold colors and graphic motifs.

EMAIL NEWSLETTER

Never miss a tutorial with these short & sweet monthly updates.

Find Me on Social Media

  • Instagram
  • Pinterest
  • TikTok
  • YouTube
Latch Hook by Heidi GustadDiscover Unique Items

Footer

INSTAGRAM

handsoccupied

Craft book author, designer & creator specializing in yarn crafts like knitting, crochet, latch hook & macramé
❤️ Email preferred

Heidi Gustad 🧶✂️
If only knitting a whole project took 39 seconds… 😮‍💨 
.
In this video, you can see how the Intarsia Flower Pillow pattern knits up - two flat panels, one with intarsia, both are blocked, and then they’re seamed. Find the pattern on @hi.ravelry & my website, just search Intarsia Flower Pillow. 🌸 
.
P.S. I’m really smiling in this video while seaming the pillow, so I guess I’m proving last week’s claim that I truly enjoy that sometimes-dreaded task. 😆🫣
In knitting, a Left Lifted Increase (LLI) lets you In knitting, a Left Lifted Increase (LLI) lets you add a stitch in between two columns of stitches that leans to the left. Similar to an M1L, LLIs allow you to increase nearly invisibly.
.
To learn more about lifted increases, including when to use them and how they differ from Make 1s, head to the 🔗 in my profle. 
.
Have you ever used lifted increases? I used M1’s almost exclusively for a long time when I needed to inc between stitches, but when I designed the Intarsia Flower Pillow pattern, I needed something that would allow me to increase a lot near my cast on, and M1’s resulted in edge curling. The more you know! 🌈 
.
Yarn: @lionbrandyarn Wool Ease from my Stash / Neddles: @boyeyarncrafts - Just remembered these are the needles I learned to knit on at age 8. 😂
.
#handsoccupied #knitting #learntoknit #howtoknit #sweaterknitting #knitinspiration #knittersofinstagram #liftedincreases
Last week I got to hang out with my family & helpe Last week I got to hang out with my family & helped babysit my red-headed niece and nephew. So here’s some plane knitting, and a couple pictures (shared with permission) of my babysitting adventures.
.
Lessons learned: 1️⃣ Trying to knit around 2 toddlers, 2 cats & 2 large dogs is pretty hard. 2️⃣ I learned during water color time that pink and black make “colorful black.” 🩷🖤 3️⃣ Toddlers do NOT care about your rainbow sorting of their toys. 4️⃣ Toddlers are very good at finding mischief in a very short amount of time, what a surprise. 😂
.
#handsoccupied #knitting #placesyoucanknit #knitters #knitinpublic #handmadelife #knitting_inspiration
Weaving in ends & seaming with mattress stitch are Weaving in ends & seaming with mattress stitch are both so useful for garment knitting! But for me, weaving in ends can feel like a chore while the latter feels like I’ve successfully done magic. 🧙🏻‍♀️ Does anybody else run into this phenomenon? Are you the opposite? Any theories as to why they feel different? 
.
In this video, I’m finishing my brand new Intarsia Flower Pillow. 🌸 I’m working with @universal_yarn Uni Merino & the pattern is available at the 🔗 in my b1o. 
.
#handsoccupied #intarsiaflowerpillow #intarsia #intarsiaknitting #knitting #colorwork #knitpillow #knittinginspiration #knittersofinstagram
I independently released a knitting pattern today, I independently released a knitting pattern today, my first in 5 years! The Intarsia Flower Pillow is a 16” (40cm) round pillow knit with an intentional combination of intarsia, stockinette, garter and seed stitch. This pillow has everything you need to level up your intarsia technique while also knitting something you can use. 
.
This pillow allows you to practice knitting intarsia while simultaneously increasing and decreasing. The Intarsia Flower Pillow pattern was designed to be a little knit-nerdy for learning and a little cute, arming you with many of the skills you'd need to knit an intarsia sweater. 
.
Intarsia Flower Pillow is available in the Hands Occupied Sh0p and on @hi.ravelry . You can read more about the pattern on the bl0g, the🔗 are where you’d think.
. 
YARN: @universal_yarn Uni Merino in Antiquity, Fjord and Conch / NEEDLES: US 2 (2.75 mm) / PATTERN: Intarsia Flower Pillow by Heidi Gustad
Load More... Follow on Instagram

Copyright © 2023 / Foodie Pro Theme On Genesis Framework / Branding by Ink + Mortar
All Site & Shop Policies / Privacy Policy / Cookie Policy