I’m going to tell you up front – this is a long tutorial. Today’s project has a bit of a back story. I don’t normally share kid crafts, which this loom knitting technique kind of is, but it’s also just a convenient way for anyone to learn to knit from square one. I first learned to knit on a loom (also known as French or spool knitting) like the one I’m sharing today when I was in early elementary school. I had a kit that came with a plastic loom and a crochet hook, I learned to make things on it, and I thought it was so cool!
Fast forward to now, I’m an urban teen librarian. I love, love, love (duh- I’m a craft blogger) crafts, and I wanted to put together a program for my kids and teens to do something similar. But I had $0 for supplies. I did my research (duh- I’m a librarian) and found several people had made knitting looms using popsicle sticks and toilet paper tubes. After some practice, time put in by my teen volunteers, an ask for recycled cardboard tubes, and some donated yarn, I accomplished my dream of actually getting teens, even boys*, to come to my program. Read on for how to make these for yourself and learn some tips about using this idea to teach others.
*Hint: If you do this as a program for scouts/libraries/etc., call it DIY Wrist Warmers or Make Your Own Scarf, don’t call it knitting. The word ‘knitting’ makes them run. Just a heads up.
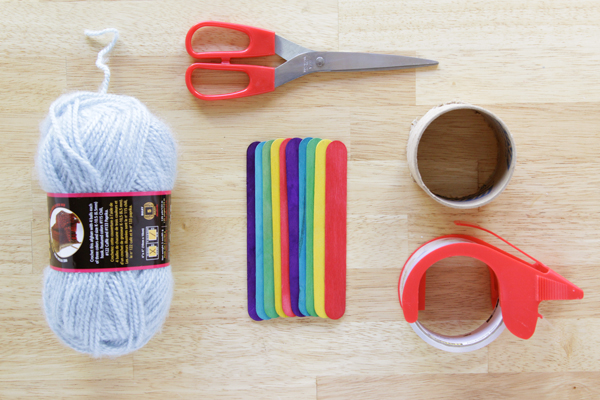
Supplies
a cheap, tube-shaped object (toilet paper tubes work great)
popsicle sticks
packing tape
yarn (particularly something thick and a little stretchy)
scissors
Directions
Make the Loom
For your tube, you can use anything from toilet paper tubes to the cardboard rings from empty tape rolls to a plastic cup with its base cut off. You want it to be sturdy enough to hold up to being squeezed.
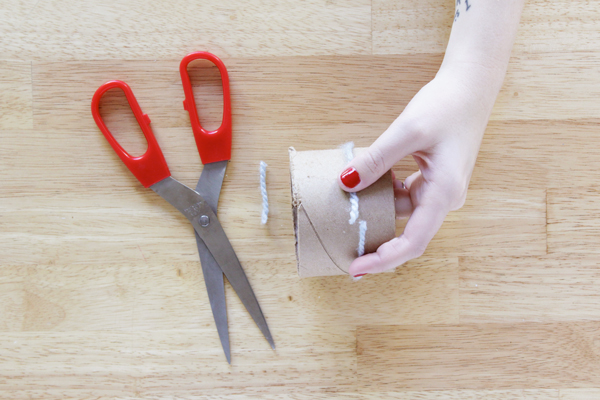
Cut a piece of yarn long enough to wrap exactly around your tube. Don’t stretch your yarn while you wrap the tube, you’re trying to get a measure of the circumference of the tube.
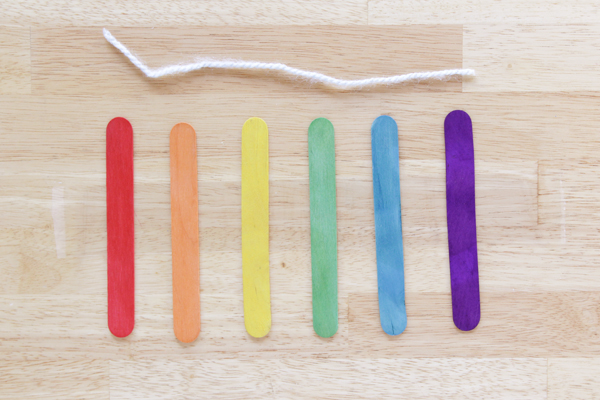
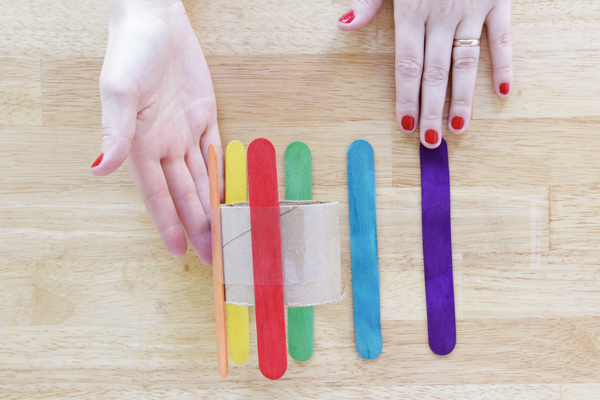
Cut a piece of tape a couple inches longer than your yarn piece. Arrange your desired number of popsicle sticks along the tape, using your yarn piece as a guide for how much of the tape should be encompassed by sticks. You want your popsicle sticks to be evenly spaced, and the tape to stick to each popsicle stick at approximately the same height.
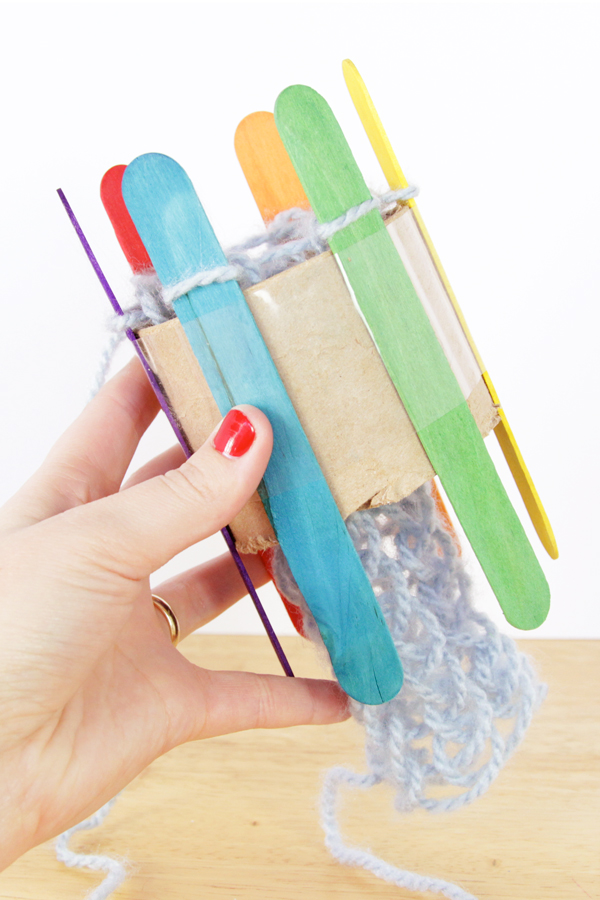
Roll your cardboard tube along the tape and popsicle sticks, pressing on the tape to secure. All of your popsicle sticks should stick out the same amount past the tube. If you’ve got a longer tube like a toilet paper tube, the tail ends of your popsicle sticks might not hang past the non-knitting end of the tube. They don’t need to.
Cast On
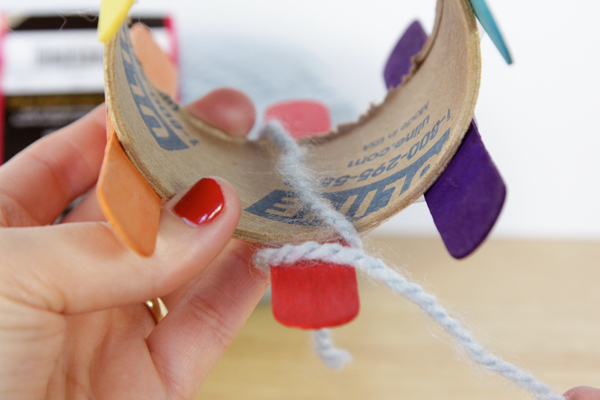
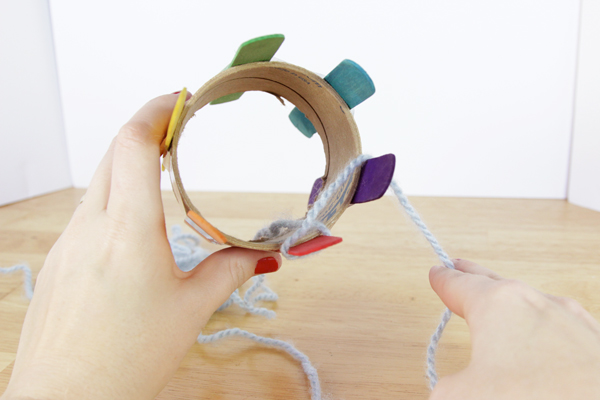
Find the end of your skein of yarn (here’s instructions on the best way to do this if you’re new to working with yarn). Feed it into the center of your loom.
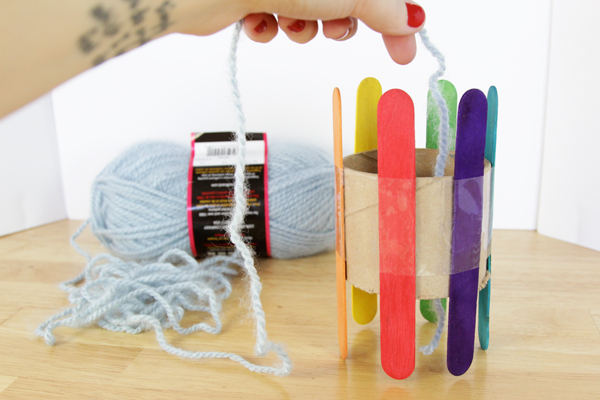
Holding the tail end against the inside if the loom, wrap the working (long) end of the yarn around your first popsicle stick.
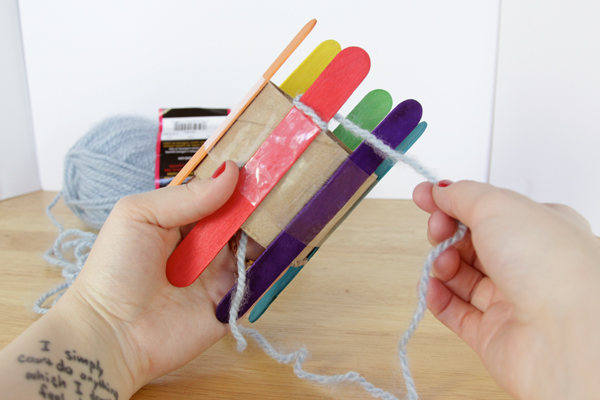
Make sure your yarn is crossing over itself in back, as shown, when you’re wrapping it.
Wrap another loop in the same fashion around the next stick. Do NOT, for your own sanity, wrap it too tight. (Working with kids on this? Make sure to emphasize the need to relax with the yarn – beginning knitters, and I was one of them, often knit too tight. Too tight, and you’ll have a devil of a time trying to knit your project. You might even break your loom.)
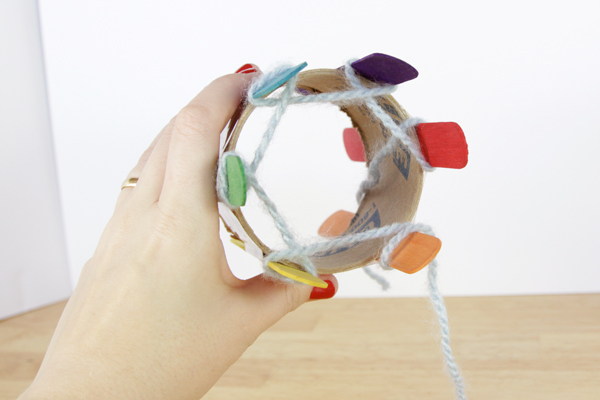
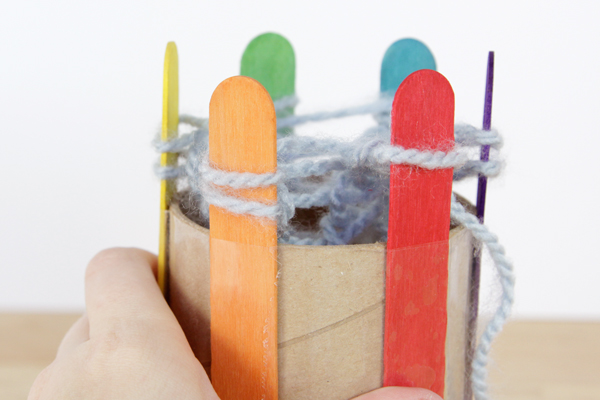
Keep wrapping loops until each stick has one. It should look like this. See how the yarn always crosses over on the inside of the loom?
Knitting Method #1: One Stitch at a Time
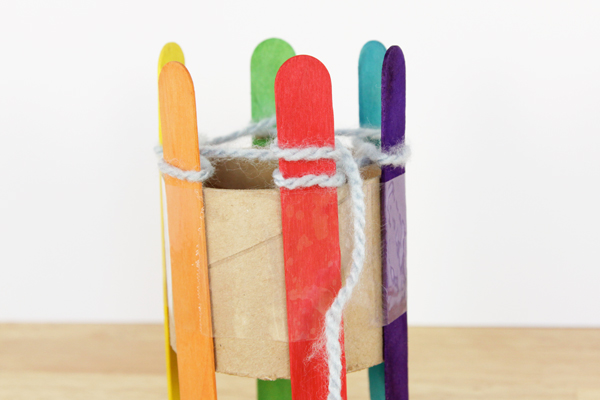
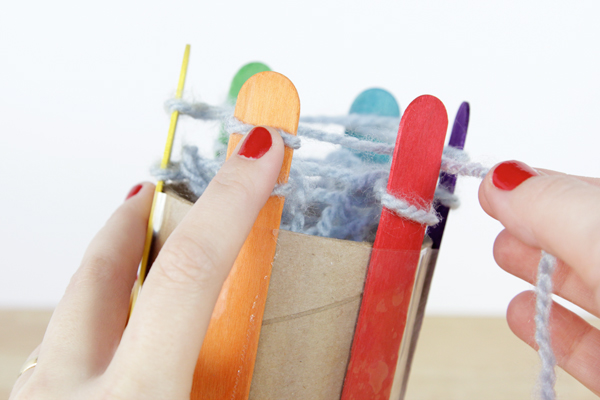
Wrap another loop on the first stick of your loom. (Feeling lost? Note the color of the popsicle sticks in the photos.)
Grab the bottom loop with two fingers, pull it out and over the top loop and popsicle stick.
Yay! One stitch down. Just wrap a loop around the next stick, bring the bottom loop over the top loop & popsicle stick, and you’ve done two.

At this point, I tell the kids, while full of excitement, “Now just do that like 200 more times and you have a hand warmer, or do it 1,000ish times and you’ve got a scarf!” Some kids will be like, “I think I’ve got a computer reservation now.” Others will get to work and have a blast doing it. I had one girl miss my program and come to my desk the following Saturday morning asking if I could show her how to “do the hand warmers” that she’d missed. Having the supplies gathered already (and we were quiet that early in the day), I figured why not. That girl sat in a bean bag chair for the next 5 straight hours in silence and whipped up half of a scarf then and there.
Knitting Method #2: One Round at a Time
I find method #1 the easiest way to teach people to knit on the looms. One stitch at a time. The way I prefer to knit on these myself, is to do one “row” or round at a time. Maybe because I am a regular knitter in my personal life.
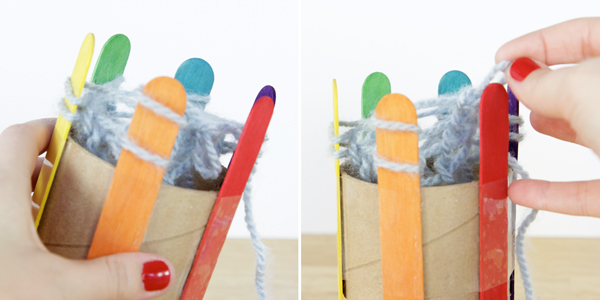
The round by round method just means that you need to make sure to wrap a loop onto each popsicle stick of your loom before pulling over the stitches. So when you cast on, you wrap a second round of loops until there are two loops per stick.
A couple notes on the round by round method:
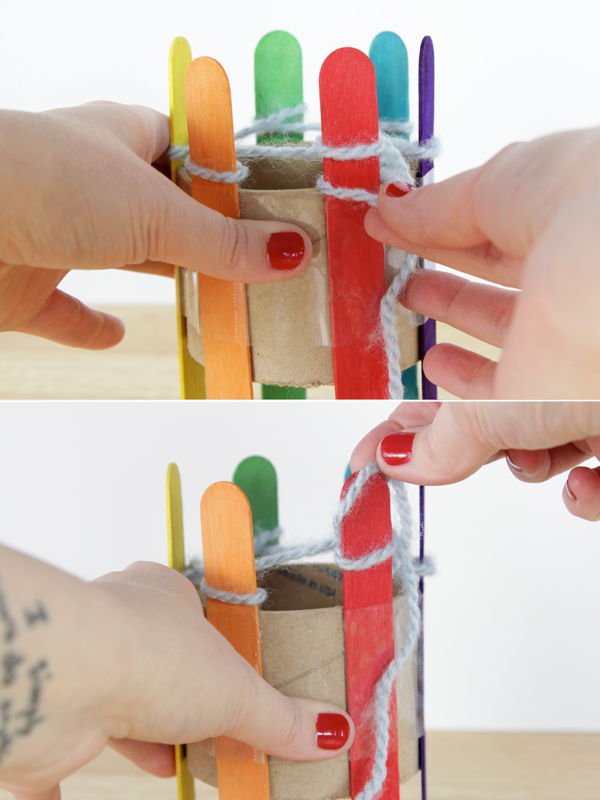
To avoid the loops popping off the top of your sticks and to avoid wrapping them too tightly, hold down the previous stitch like I’m doing above as you wrap your loops.
Always work the stitch that the working end of your yarn is on first to secure it. Then you don’t have to think about the working end of the yarn for the rest of that round.
Fixing Mistakes
When one of my kids would drop a stitch or have a stitch pop off the loom, they’d freak out just a little the first time. I started saying to them, “Hey, no big deal! I’ll just do some mini surgery on this, and it’ll be all good.” A lot of times they’d want to learn how I did it so they’d be independent if something happened when I was helping another kid.
Here’s the way to fix a finished stitch that’s slipped off a popsicle stick:
Maybe this is obvious, and the pics are a little off. I said I was going to be thorough though, so I’m including it anyway.
Here’s how to fix a cast-on loop if you’re doing knitting method #2 and one of the middle loops pops off. The twist in the second photo is key:
Casting Off
To finish a loom knitting project like this, you can simply pop the loops off the loom one by one, cut the working end of your yarn, and sew it through the loops and tie it off. A real cast off looks way better though, and even my library kids preferred the “real cast off” to the sewn loops, even though it might be the hardest part of this process.
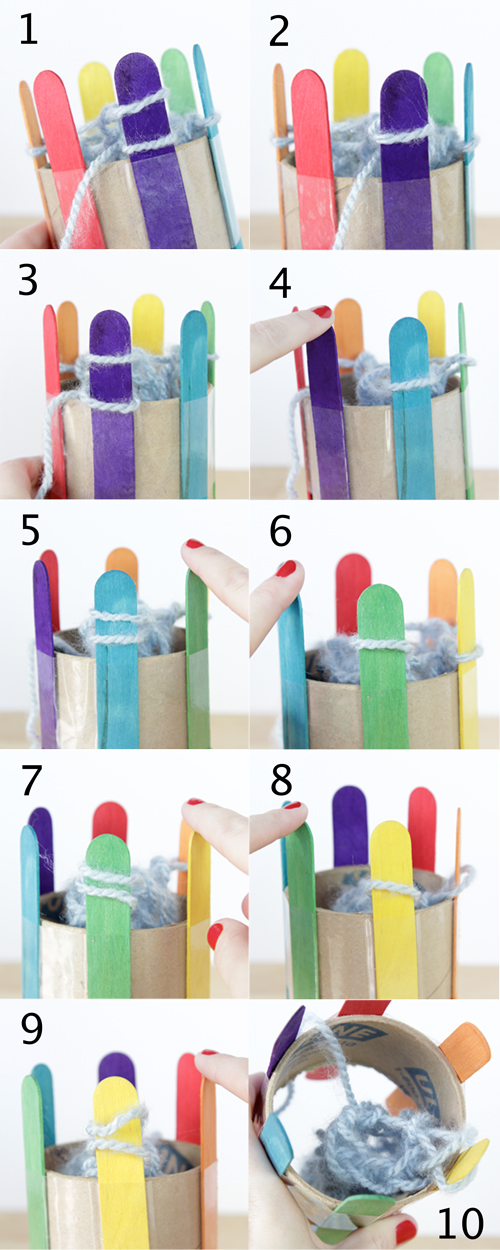
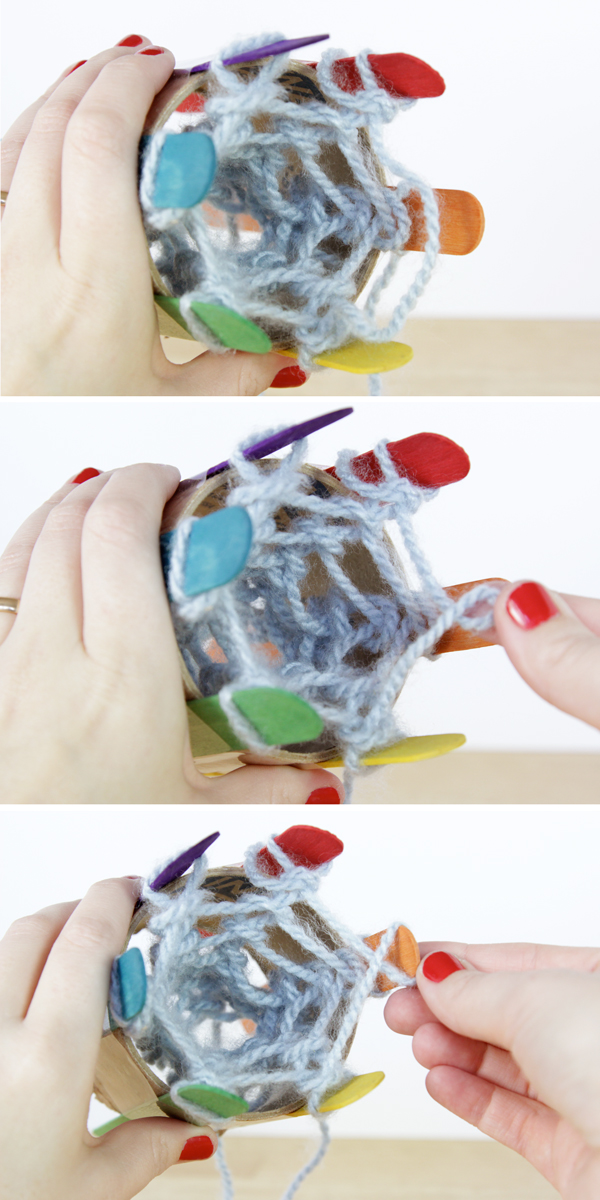
While you don’t need to color code your sticks to match mine, I’m going to refer to the pictured colors for easier explanation. Your loom might have way more or way fewer stitches, so you’ll need to simply cast off more stitches one by one than I did.
1. Move the loop from the red stick onto the purple.
2. Knit the bottom stitch over the top.
3. Move the loop from the blue stick onto the purple, and knit it.
4. Move the loop from the purple stick onto the blue. (You’re really just moving this stitch into a more convenient place to avoid stretching your work out.)
5. Move the loop from the green stick onto the blue, and knit it.
6. Move the loop from the blue stick onto the green.
7. Move the loop from the yellow stick onto the green, and knit it.
8. Move the loop from the green stick to the yellow.
9. Move the loop from the orange stick onto the yellow.
10. Knit the last stitch, pull the loop off the last stick, cut your working end of yarn (leaving plenty of extra yarn), and sew the cut working end through the loop.
11. (not pictured) Sew the two raw ends of your yarn into the top and bottom edges of your work and trim the tails. If you don’t have a needle available, which we didn’t at the library, use some of your packing tape to wrap the raw end of the yarn and use it like a needle to sew in the ends.
What can you make with a DIY knitting loom?
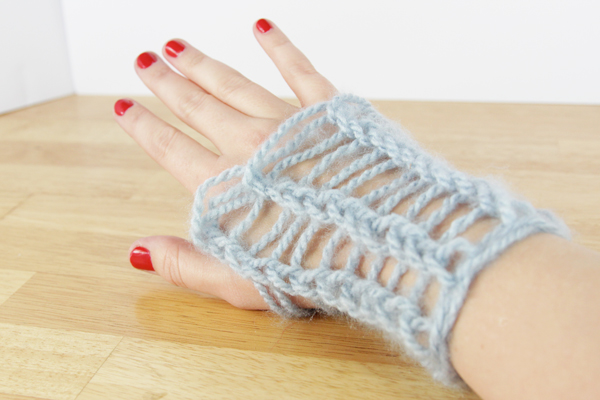
You can make anything from a set of easy hand warmers to back packs to scarves using this technique. If you’re working with kids on a timeframe, I like to start with the hand warmers because they work up quickly.
And a final note from me…
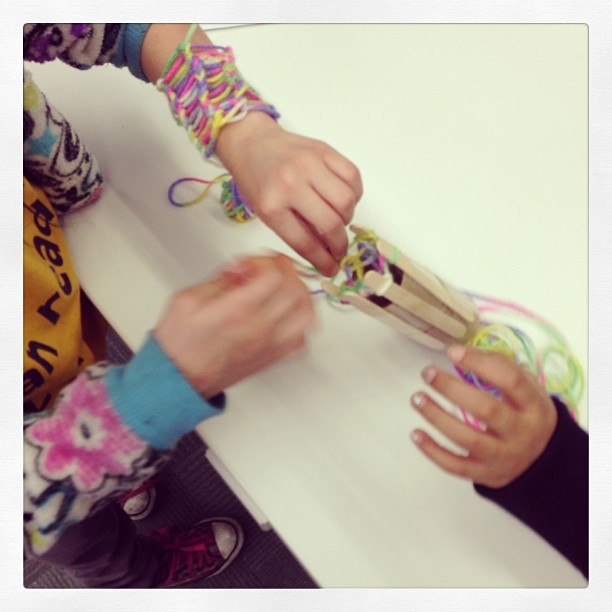
This post is weird because it’s the first time I’ve let myself completely smash my two passions and careers together into one, highly researched, maybe overly in depth post. But I know I’ve got some librarian, parent and educator friends who have been waiting with bated breath for this tutorial ever since I instagrammed some of my library kids’ creations using these low-cost looms. I figured I might as well REALLY show you how I do this kind of knitting since I couldn’t find a comprehensive tutorial while prepping for my library program. If you want another perspective and some inspiration for other things you can knit with these looms, I recommend checking out My Material Life- she’s got the best ideas for things to make with these and with kids. She’s even got instructions for knitting flat (non-cylindrical) items on these looms.
What did you think of this totally humongous post? Way too much? Loved it? I kind of went out on a limb and got maybe rambly. Let me know what you think, I’m super curious! :)


I’ve never used a knitting loom before but this looks fun. I should try making one myself. Thanks a lot for the thorough tutorial :)
You’re welcome :D
Wow, this is really cute… I love it! Thanks for the thorough tutorial :)
Thanks, Miranda!
Well done Heidi – the internet needed a post like this! And thanks for the nice referral – Colleen @ mymateriallife
I’m so glad you saw it! Thank YOU for your posts. Your French knitting posts are super inspirational! :)
I really appreciate this post and all the details. I can’t wait to try this with my nephews over this Thanksgiving break. Thank you for including the detailed instructions for casting off – I think it’ll be really helpful.
Love your tute and thoro explanatiion
Love this tutorial, and how to make the loom. I did this as a kid about a million years ago, but forgot how to do it. (and I ended up with a long cord that had no useful purpose, so I love the idea of actually having something I can use!).
Awesome! Glad to jog your memory ;)
really cool, used to do the spool one all the time, but i am much much older now and i have forgot all of this…………i dont understand the 1-11 casting off and binding/sewing……….. any videos of this??? could you??? thanks :)
I think this video does a good job of it, but please note she’s knitting flat instead of in the round. :) https://www.youtube.com/watch?v=c-9WEN3QJAI
Mahalo, thank you, for this detailed tute for a non-knitting children’s librarian who would love to try this at a summer crafternoon with school-aged children. Tape tubes, tp rolls, yarn and kraft sticks I have by the bagsful so I’ll get the volunteers to make some looms for us and I’ll practice, practice, practice. As for tutes, there can never be enough detail; good job!
Thank you! My teens and even a few of their siblings really enjoyed doing this. :)
First, I don’t think you got too rambling or over-detailed. You can’t do something like this in 5 steps! Excellent work. Photos are clear, as the instructions also seem to be. I haven’t tried to follow them yet – but they read through easily! I would say good job! I don’t even know how I got here – as I’m not a knitter!
Hi,
I was wondering, how do you weave in the yarn ends since there isn’t a lot of actual knitting bumps to weave the ends into? Also, when I bind off my stitches at the end, the rim becomes very taunt. How do I loosen it so that it will stretch over my hand?
Love the idea of a DIY knitting loom; thanks for posting it!
Sheila
Hi Sheila! At the library my teens ran into that issue a lot. The easiest solution is to simply remember to loop your yarn rather loosely as you go. And for weaving in ends, I always pick a ridge of knitting and work vertically down it to weave in ends. Let me know if you need anything else! – Heidi
Thanks so much for this tutorial. I did this with my kindergarten class as a holiday gift. While some found it tricky at first, all made beautiful scarves to give away. I also did some traditional weaving and read a bunch of books about weaving. It was fabulous!
That’s so awesome! I’m glad to hear it worked with younger kids too!
Wow, that was a terrific tutorial! I cannot wait to share it with my colleagues since we are starting a new unit on clothing at school. Thank you!
Thank you so much for this clear and thorough tutorial. I have just gone through it with my 7 year old daughter and we’ve just made her first loom together and she’s excitedly knitting away now. Your photos are very clear too – thank you. PS, we used a wide selloptape/packing tape inner tube, which is very sturdy.
What a great idea! I had to share the link on my FB page, I hope that’s okay. Thank you for the time you invested into this tutorial.
No problem :)
wow! cute i love it!
Very good first time doing this I crochet very easy had a scarf made n less than an hour thank you so much
You’re welcome! <3
I loved this post! Thank you.
Great tutorial, many years later! Thanks for sharing ♥
You’re welcome! This is an all time favorite tutorial of mine. ☺️