• 0 items$0.00
  • Skip to primary navigation
  • Skip to main content
  • Skip to primary sidebar
  • Skip to footer

Hands Occupied

Colorful knitting, crochet, latch hook and macrame from craft book author & designer Heidi Gustad.

  • BLOG
    • Knitting
    • Crochet
    • Latch Hook
    • Macramé
    • Punch Needle
  • ABOUT
  • Shop
  • Nav Social Menu

    • Instagram
    • Pinterest
    • RSS
    • TikTok
    • YouTube

I’m Thankful for a Husband Who Can Bake PIES!

November 22, 2012 Leave a Comment

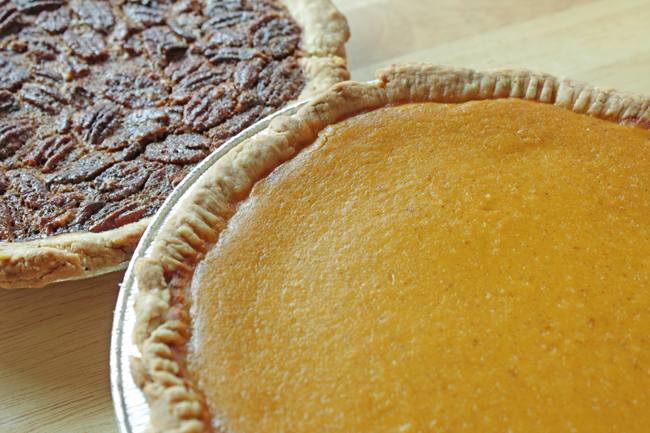
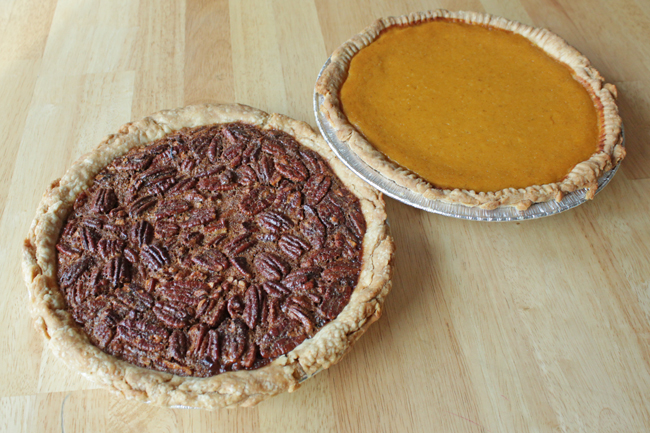
In just a couple of hours, I’ll be sitting down to a late afternoon Thanksgiving dinner with a big group of friends (and plenty of holiday drinks). The husb and I are brining pies, which my husband immediately volunteered to bring. My contribution was the table runner and placemats I shared here a couple weeks ago. As I sat around, knitting, Instagramming and watching TV, my husband was busy in the kitchen creating these glorious masterpieces:
Thanksgiving Pies & Recipes | HandsOccupied.com

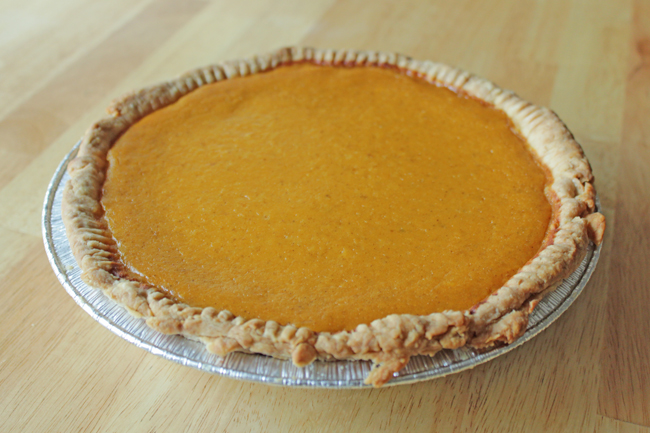
One, of course, is pumpkin and the other is pecan. The crusts are from scratch. Read on for the recipes my pie-talented husband used for today’s desserts, and have a very merry Thanksgiving and holiday season!

Flaky Piecrust 

from Mark Bittman’s How to Cook Everything

Yield: 1 pie crust

Introduction

For any single-crust pie, 8 to 10 inches in diameter. Double the recipe for a two-crust pie.

1…› cups (about 5 ounces) all-purpose flour, plus some for dusting work surface

½ tsp. salt

1 tsp. sugar

8 Tbsp. (1 stick) cold unsalted butter, cut into about 8 pieces

About 3 Tbsp. ice water, plus more as needed

Steps

  1. Combine the flour, salt, and sugar in the container of a food processor; pulse once or twice. Add the butter and turn on the machine; process until the butter and flour are blended and the mixture looks like cornmeal, about 10 seconds.
  2. Place the mixture in a bowl and sprinkle 3 tablespoons of water over it. Use a wooden spoon or a rubber spatula to gradually gather the mixture into a ball; if the mixture seems dry, add another ½ tablespoon ice water. When you can make the mixture into a ball with your hands, do so. Wrap in plastic wrap, flatten into a small disk, and freeze the dough for 10 minutes (or refrigerate for 30 minutes); this will ease rolling. (You can also refrigerate the dough for a day or two, or freeze it almost indefinitely.)
  3. You can roll the dough between two sheets of plastic wrap, usually quite successfully; sprinkle both sides of it with a little more flour, then proceed. Or sprinkle a countertop or large board with flour. Unwrap the dough and place it on the work surface; sprinkle its top with flour. If the dough is hard, let it rest for a few minutes; it should give a little when you press your fingers into it.
  4. Roll with light pressure, from the center out. (If the dough seems very sticky at first, add flour liberally; but if it becomes sticky only after you roll it for a few minutes, return it to the refrigerator for 10 minutes before proceeding.) Continue to roll, adding small amounts of flour as necessary, rotating the dough occasionally, and turning it over once or twice during the process. (Use ragged edges of dough to repair any tears, adding a drop of water while you press the patch into place.) When the dough is about 10 inches in diameter (it will be less than ¼-inch thick), place your pie plate upside down over it to check the size.
  5. Move the dough into the pie plate by draping it over the rolling pin or by folding it into quarters, then moving it into the plate and unfolding it. When the dough is in the plate, press it firmly into the bottom, sides, and junction of bottom and sides. Trim the excess dough to about ½ inch all around, then tuck it under itself around the edge of the plate. Decorate the edges with a fork or your fingers. Freeze the dough for 10 minutes (or refrigerate it for 30 minutes).
  6. When you’re ready to bake, prick it all over with a fork.
Thanksgiving Pies & Recipes | HandsOccupied.com

Pumpkin Pie 

from Mark Bittman’s How to Cook Everything

Essentially a custard pie with lots of added spice and, of course, pumpkin. Precooking the crust and filling makes the bottom of the pie nice and crisp. […]

1 flaky piecrust, fitted into a 9-inch pie pan and chilled

3 eggs

3/4 cup sugar

1/2 teaspoon ground cinnamon

1/8 teaspoon freshly grated nutmeg

1/2 teaspoon ground ginger

pinch ground cloves

pinch salt

2 cups canned or fresh pumpkin puree

2 cups half-and-half, cream, or whole milk

  1. Prebake the crust and start filling while the crust is in the oven. When the crust is done, turn the oven to 375 F.
  2. Beat the eggs with the sugar, then add the spices and salt. Stir in the pumpkin puree and then the half-and-half. While the crust is baking, warm this mixture in a medium saucepan over medium-low heat, stirring occasionally, until it is hot to the touch; do not boil.
  3. Put the pie plate on a baking sheet. Pur the pumpkin misture into the still-hot crust and bake for 30 to 40 minutes, until the misture shakes like Jell-O but is still quite moist. Cool on a rack and serve warm or at room temperature.
[See book for variations on this recipe.]

Thanksgiving Pies & Recipes | HandsOccupied.com

Pecan Pie 

recipe from the Karo Syrup Bottle 

Prep Time: 5 minutes
Bake Time: 60 to 70 minutes
Chill Time: 2 hours
Yield: 8 servings

  • 1 cup Karo® Light OR Dark Corn Syrup
  • 3 eggs
  • 1 cup sugar
  • 2 tablespoons butter, melted
  • 1 teaspoon Spice Islands® Pure Vanilla Extract
  • 1-1/2 cups (6 ounces) pecans
  • 1 (9-inch) unbaked or frozen** deep-dish pie crust
    1. Preheat oven to 350°F.
    2. Mix corn syrup, eggs, sugar, butter and vanilla using a spoon. Stir in pecans. Pour filling into pie crust.
    3. Bake on center rack of oven for 60 to 70 minutes (see tips for doneness, below). Cool for 2 hours on wire rack before serving.

**To use prepared frozen pie crust: Place cookie sheet in oven and preheat oven as directed. Pour filling into frozen crust and bake on preheated cookie sheet.
RECIPE TIPS: Pie is done when center reaches 200°F. Tap center surface of pie lightly – it should spring back when done. For easy clean up, spray pie pan with cooking spray before placing pie crust in pan. If pie crust is overbrowning, cover edges with foil.
NUTRITION TIP: To reduce calories, substitute new Karo® Lite Syrup for the Karo® Light or Dark Corn Syrup.
High Altitude Adjustments: Reduce sugar to 2/3 cup and increase butter to 3 tablespoons. Reduce oven temperature to 325°F.
VARIATION: coarsely chopped walnuts may be substituted for pecans to make a walnut pie.

Filed Under: Recipes, Thanksgiving Tagged With: dessert, desserts, pecan, pie, pumpkin, thankful, thanksgiving

About Heidi

Heidi Gustad is a craft book author, designer & creator specializing in yarn crafts like knitting, crochet, latch hook & macramé. Her first book, Latch Hook: 12 Projects for the Modern Maker, is out now.

Previous Post: « Vegetarian Thanksgiving Tips & Ideas
Next Post: Black Friday/Cyber Monday Deals »

Reader Interactions

DID YOU LIKE THIS POST?
Visit similar articles...

  • Giant Friendship Bracelet Table Runner for FriendsgivingGiant Friendship Bracelet Table Runner for Friendsgiving
  • Smiling Jack-o’-Lantern Knitting Chart for HalloweenSmiling Jack-o’-Lantern Knitting Chart for Halloween
  • Picks of the WeekPicks of the Week
  • Picks of the WeekPicks of the Week

DON’T MISS ANOTHER UPDATE

Leave a Reply Cancel reply

Your email address will not be published. Required fields are marked *

This site uses Akismet to reduce spam. Learn how your comment data is processed.

Primary Sidebar

Heidi Gustad from Hands Occupied / Craft Book Author and Knitting, Crochet, Latch Hook and Macrame Designer

Hi! I’m Heidi (she/her/hers), a craft book author & pattern designer specializing in knitting, crochet, latch hook & macrame. Really anything with yarn! ❤️  My work combines vintage and modern design elements, featuring bold colors and graphic motifs.

EMAIL NEWSLETTER

Never miss a tutorial with these short & sweet monthly updates.

Find Me on Social Media

  • Instagram
  • Pinterest
  • TikTok
  • YouTube
Latch Hook by Heidi GustadDiscover Unique Items

Footer

INSTAGRAM

handsoccupied

Craft book author, designer & creator specializing in yarn crafts like knitting, crochet, latch hook & macramé
❤️ Email preferred

Heidi Gustad 🧶✂️
Learn how to do the magic loop method for knitting Learn how to do the magic loop method for knitting in the round in 90 seconds. / Using the magic loop allows knitters to work in the round with a single, long circular needle at a range of circumferences. 
.
For a longer, full-width & more detailed overview of magic loop knitting, check out my u2be & b1og, the 🔗🔗 are where you’d think. 🧶
.
#handsoccupied #magicloop #knitting #howtoknit #learntoknit #knitter #knittinginspiration #knittinginstagram #knittingintheround
Since it won’t be clean for long, swipe to see w Since it won’t be clean for long, swipe to see what my home studio looks like these days. Nothing will ever quite be like the old Hands Occupied Studio, but I’m pretty pleased with how I shoehorned everything in this space. Function over form + a layer of yarn cuteness-meets-chaos is how I’d describe my creative space needs. 😆 When I was still renting the studio, those needs included “doesn’t rain suspicious brown water from a crack in the ceiling for a year,” so this is an improvement! 😆
.
For a time lapse of the studio organizing and tszuj-ing process, scroll down a couple posts on my feed. (There’s also a video or two featuring the old studio if you’re curious.) Happy June, friends! 
.
#handsoccupied #handsoccupiedstudio #knitdesigner #craftdesign #yarncrafts #latchhook #makerlife #heidigustad #chicagocrafter
Who doesn’t love magic loop knitting? Who doesn’t know what it is? How about when circular needles were invented?
.
In todays new bl0g post + video tutorial, you’ll learn about the magic loop method for knitting in the round, how to do it and why to use it, and when it came to be. The 🔗 is in my b1o. 🧶 
.
#handsoccupied #magicloop #knitting #howtoknit #knittinginspiration #knittingintheround
Finally organizing & putting the finishing touches Finally organizing & putting the finishing touches on my home studio. After losing my studio space last fall, it’s feels really great to *occupy* this new space all the way. 😉
.
I started by removing general clutter & returning straggler supplies from various WIPs, videos & design deadlines to their homes. Next, I hung a third peg board in the space - this one is mostly for display and less for organizing tools or projects. For the first time ever, I’m displaying projects from my book, plus a couple other faves. (The best thing about designing more yarn crafts besides knit & crochet is that I have some really fun -and delightfully pettable 😆- samples around.) I finished by adding a square dowel to my small supply storage tower to keep it from tipping over, plus re-arranging and de-cluttering the closet. 
.
This cleaner space already has me feeling so much more creative and less overwhelmed. Now to find a safe spot in the basement for the tower of project samples in Rubbermaid tubs I liberated from my WIPs closet. Also why are there five?! 
.
Here’s to keeping it clean for a few weeks! 🧶 
.
#handsocupied #handsoccupiedstudio #craftroom #craftroomorganization #craftroomstorage #yarncraft #knitter #crocheter #latchhook #latchhookbook
It’s a disaster in here and my video microphone It’s a disaster in here and my video microphone isn’t cooperating, but it could be worse! How’s your day? 
.
(If we haven’t yet met, I’m Heidi and I’m a pattern designer and tutorial creator specializing in yarn crafts like knitting & latch hook. You can learn more about my work and regularly find new tutorials in my profile. ☺️👋🏻)
.
#handsoccupied #craftstudio #knitter #yarncrafter
Load More... Follow on Instagram

Copyright © 2023 / Foodie Pro Theme On Genesis Framework / Branding by Ink + Mortar
All Site & Shop Policies / Privacy Policy / Cookie Policy