• 0 items$0.00
  • Skip to primary navigation
  • Skip to main content
  • Skip to primary sidebar
  • Skip to footer

Hands Occupied

Colorful knitting, crochet, latch hook and macrame from craft book author & designer Heidi Gustad.

  • BLOG
    • Knitting
    • Crochet
    • Latch Hook
    • Macramé
    • Punch Needle
  • ABOUT
  • Shop
  • Nav Social Menu

    • Instagram
    • Pinterest
    • RSS
    • TikTok
    • YouTube

Punch Needle Rug Hooking Basics

March 14, 2019 6 Comments

Yarn pictured was provided by Shepherd’s Lamb.

Also known as punch hooking, punch needle is an easy-to-learn technique for making your own rugs, tapestries and more! Get to know the basics with this quickstart tutorial.

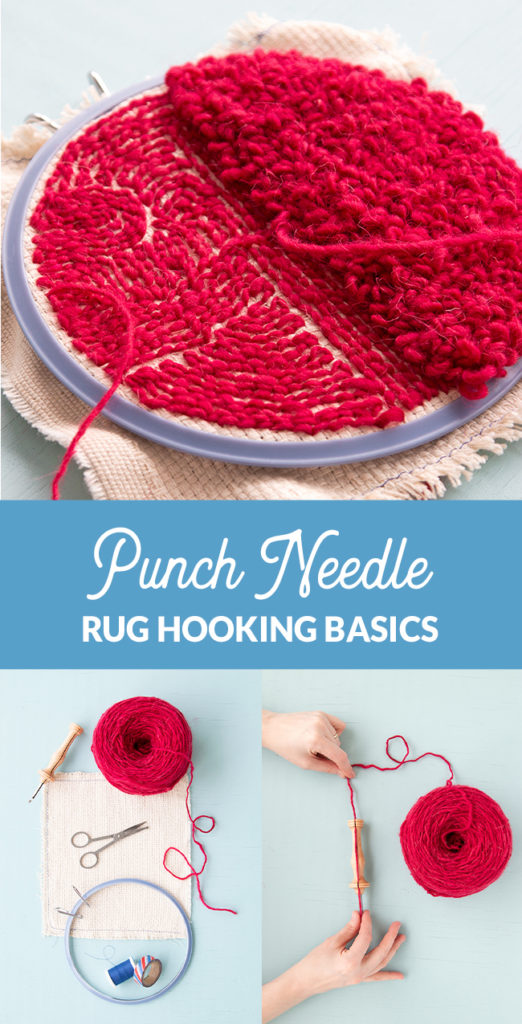
One of the trendiest yarn crafts around these days appears to be punch needle, a rug making & embroidery method. Using a special punch needle tool, makers create loops of yarn through canvas stretched on a frame or hoop. One loop at a time, it’s easy to create embroidery-like wall hangings and fluffy cushion covers without a huge amount of skill. That’s right – the learning curve for beginning punch needle is shallow, so this is a low-risk way to try your hands at another yarn craft!

A couple quick notes:

  • For the purposes of this tutorial, we’re focusing on the rug making version of punch needle.
  • This post is designed for first time punch needlers to help get you started on your first project.
  • Keep your eyes peeled for the next post in our punch needle series: basic punch needle project finishing. 

Basic Punch Needle Project Setup
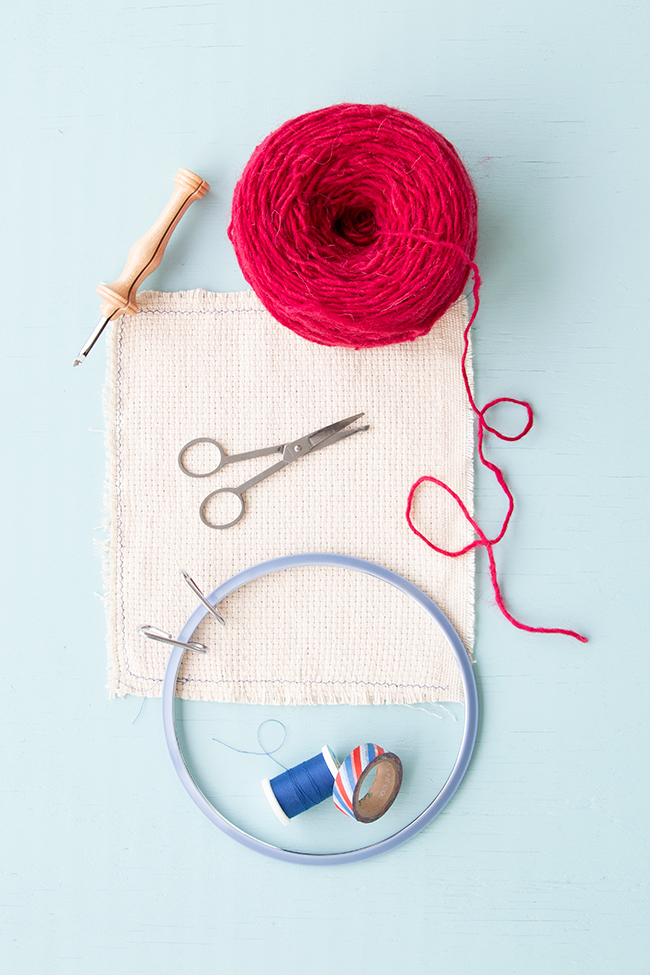
Supplies
scissors
iron (optional)
canvas (shown: monk’s cloth)
masking tape OR a sewing machine with thread in a color contrasting with your canvas
embroidery hoop

Also known as punch hooking, punch needle is an easy-to-learn technique for making your own rugs, tapestries and more! Get to know the basics with this quickstart tutorial.

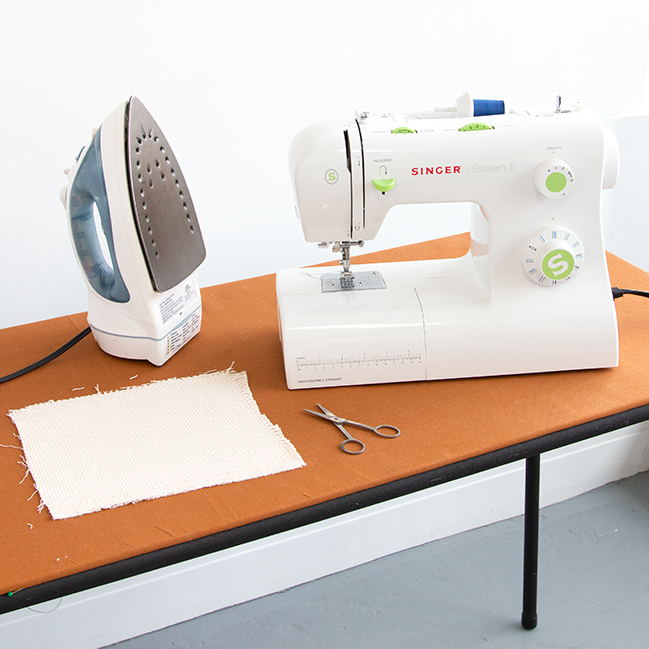
Begin by cutting a piece of canvas to a size that suits your project. For the sake of demonstration, the canvas pictured is about an inch-and-a-half wider than the widest point of my embroidery hoop. Before prepping the canvas any further, I like to iron my punch needle canvas to ensure the fabric is laying nice and straight before prepping any further. This is optional.

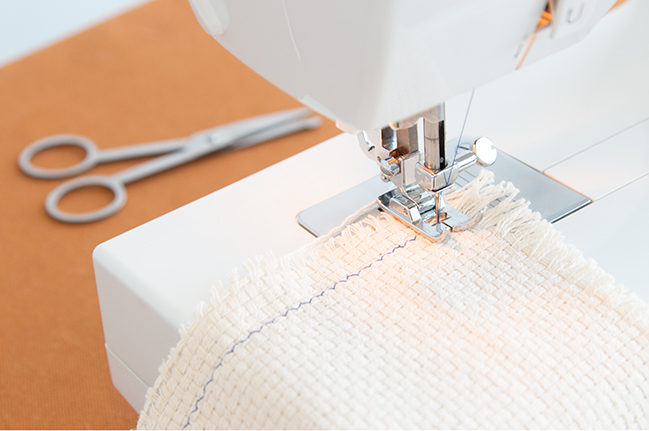
Canvas prep option 1: Sew along the raw edge to prevent fraying

Using a long zig zag stitch*, sew all the way around your canvas, parallel to the raw edge. If any of the edges of your canvas include a selvage edge, you don’t need to sew along that edge because it won’t fray.

*And if you have a serger at home, you’re in luck! You can easily use that to prepare your canvas edges instead of the zig zag stitch on a regular sewing machine. 

Also known as punch hooking, punch needle is an easy-to-learn technique for making your own rugs, tapestries and more! Get to know the basics with this quickstart tutorial.

Canvas prep option 2: Just use masking tape 

Also known as punch hooking, punch needle is an easy-to-learn technique for making your own rugs, tapestries and more! Get to know the basics with this quickstart tutorial.

You can simply cover the raw edges of your punch needle canvas with masking or washi tape to prevent your canvas from fraying. (Personally, I prefer the sewn method because it’s softer. The masking tape edge feels a little crunchy in on my hands as I work, so it’s a sensory type thing.) Either option does the job just fine!
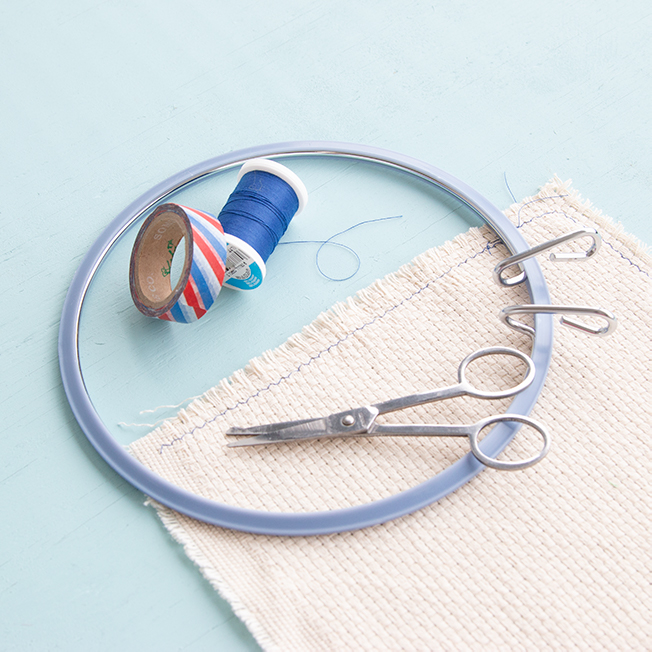
Also known as punch hooking, punch needle is an easy-to-learn technique for making your own rugs, tapestries and more! Get to know the basics with this quickstart tutorial.

Stretch your canvas

As much as serious punch needle artists and hobbyists have special frames for working their rug hooking projects, an embroidery hoop does the job well, especially if you’re just looking to try the technique on for size to see if it’s for you.

Also known as punch hooking, punch needle is an easy-to-learn technique for making your own rugs, tapestries and more! Get to know the basics with this quickstart tutorial.

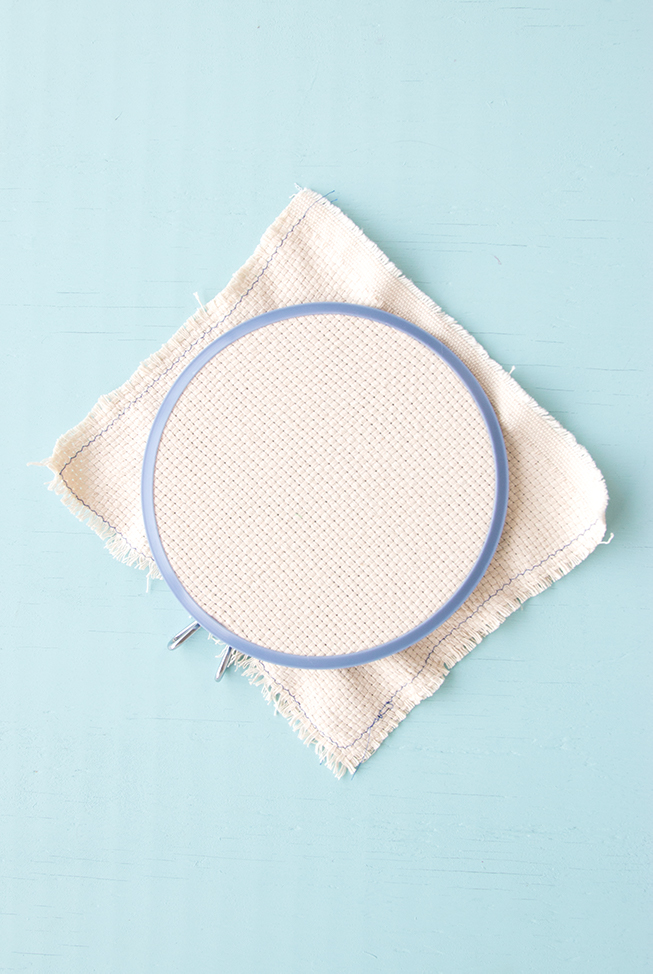
The last step before actually punching loops to create your project is to gently stretch your canvas over a frame and then secure that stretch in place. If you’re using an embroidery hoop, it’s just like setting up to work a cross-stitch or embroidery project. You stretch the canvas across one hoop before securing it with a second, tightening hoop.

How to Punch Needle

Supplies
punch needle tool (shown: Oxford #10 punch needle)
wool yarn (shown: Shepherd’s Lamb Churro Yarn)
scissors
prepped punch needle project canvas (be it monk’s cloth, burlap, aida cloth, etc.)

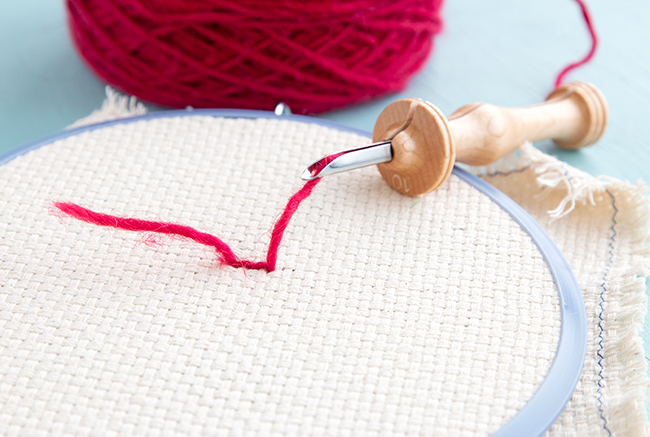
Thread your punch needle tool

Also known as punch hooking, punch needle is an easy-to-learn technique for making your own rugs, tapestries and more! Get to know the basics with this quickstart tutorial.
An Oxford Punch Needle tool, size #10.

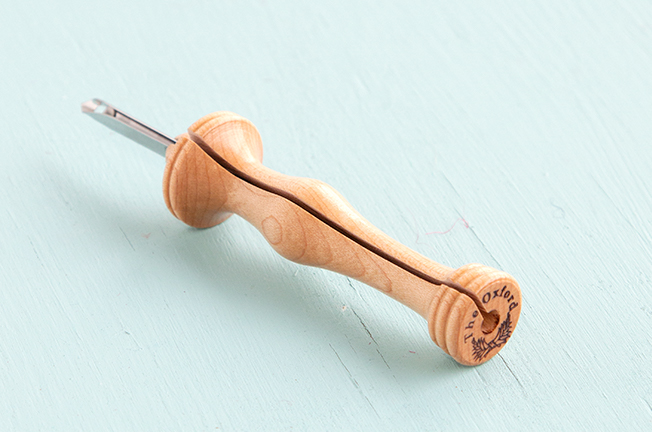
Punch needle tools work almost like a sewing machine needle. There’s a hole near the pointy end. To thread it, you insert the tail end of a ball of yarn through the eye of the needle. In punch needle, the eye of that needle is at the end of a hollow channel that runs the length of the tool.

Also known as punch hooking, punch needle is an easy-to-learn technique for making your own rugs, tapestries and more! Get to know the basics with this quickstart tutorial.

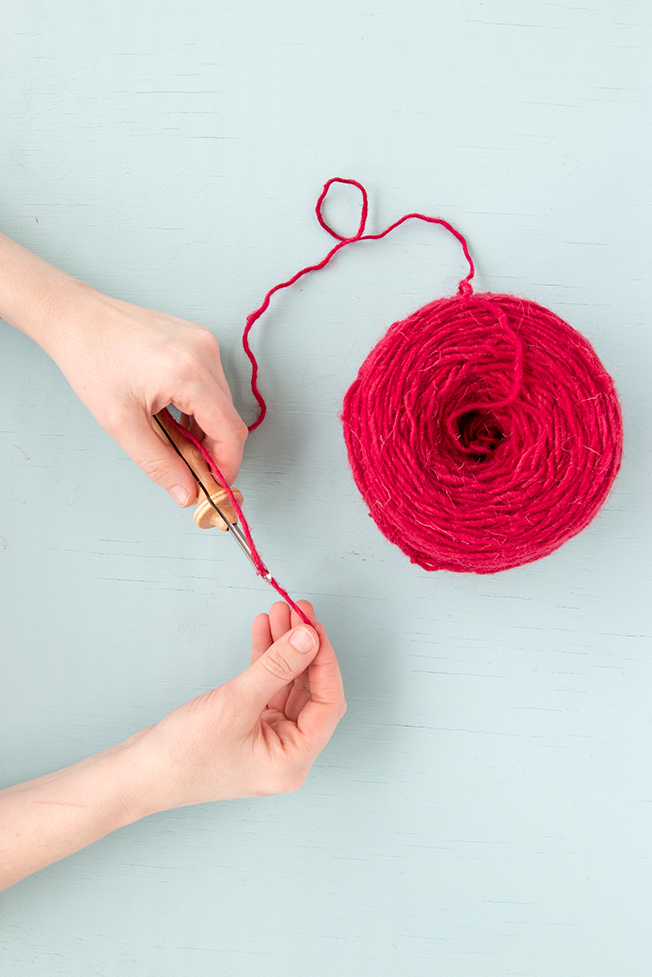
Once threaded, ease the ball end of your yarn into the channel of your punch needle, as shown below. As you work your punch needle project, the yarn will run from the ball, through the punch needle tool, and into your project canvas, one loop at a time.

Also known as punch hooking, punch needle is an easy-to-learn technique for making your own rugs, tapestries and more! Get to know the basics with this quickstart tutorial.

How to punch a loop with your punch needle tool

Also known as punch hooking, punch needle is an easy-to-learn technique for making your own rugs, tapestries and more! Get to know the basics with this quickstart tutorial.
I love a good gif.

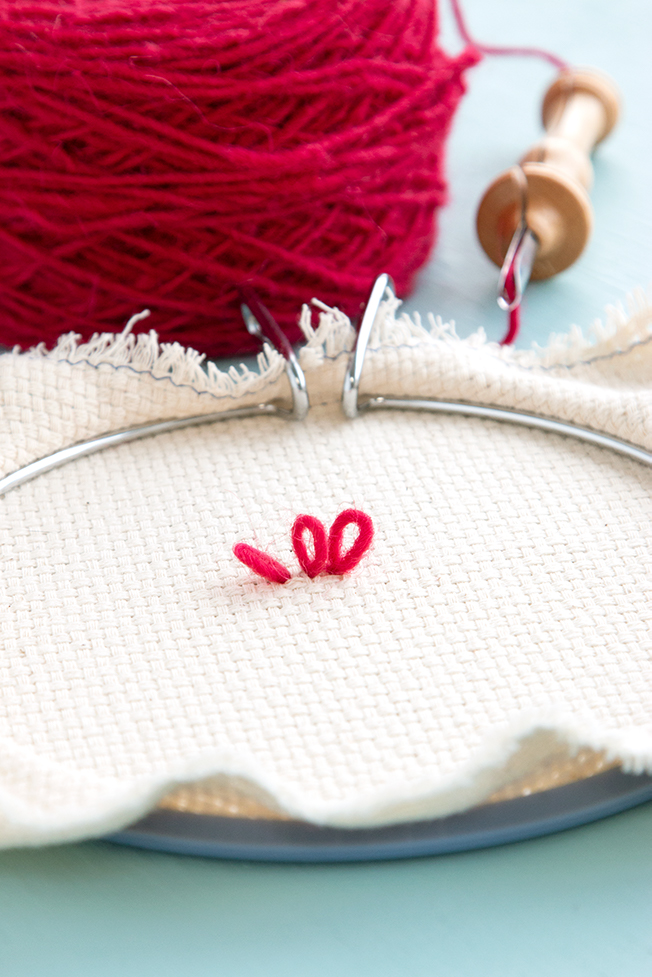
Hold your punch needle as you would a writing utensil. Use your non-dominant hand to hold the tail end of your yarn to keep your tool threaded as you create the first loop. Insert the pointy end of the needle into your project canvas (which should already be prepped and framed, per the instructions above). Insert the tool until the tool’s handle hits your canvas, then draw it straight back up through the canvas. A loop will now be formed at the back of your work.

Being careful to avoid pulling your yarn from the tool, insert your punch needle tool into your canvas again, slightly away from your initial loop. When the tool handle hits the canvas, draw it back up, and voila! You’ve created a second loop that should be approximately the same size as the first.

Also known as punch hooking, punch needle is an easy-to-learn technique for making your own rugs, tapestries and more! Get to know the basics with this quickstart tutorial.

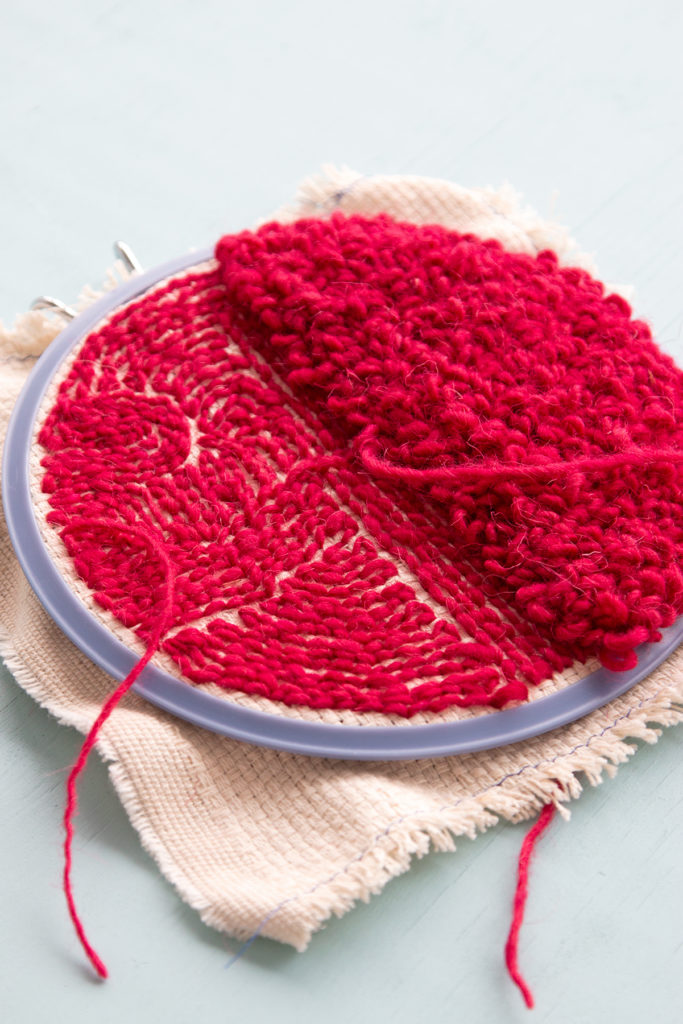
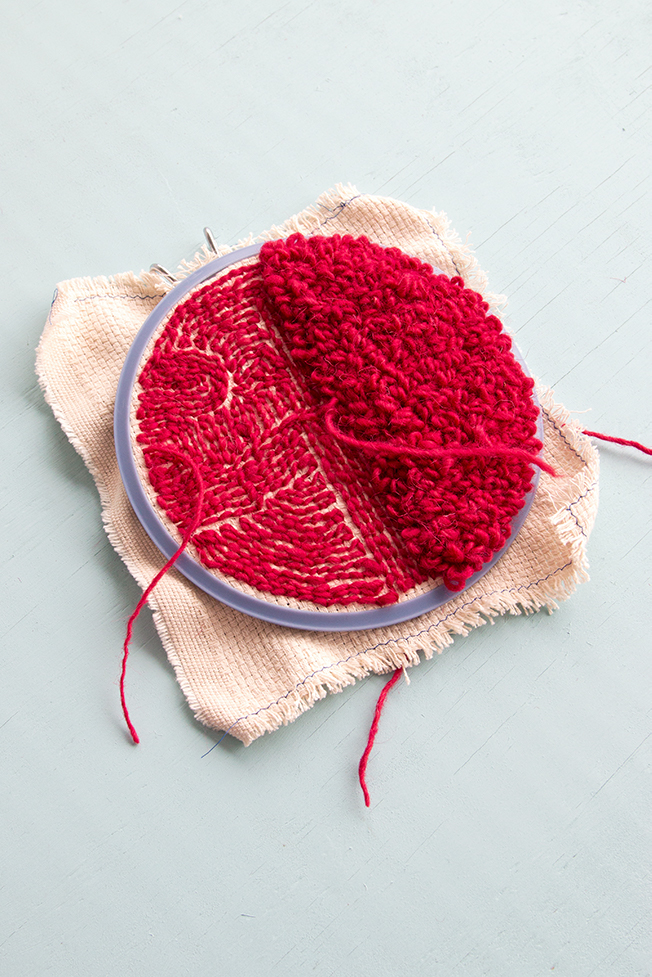
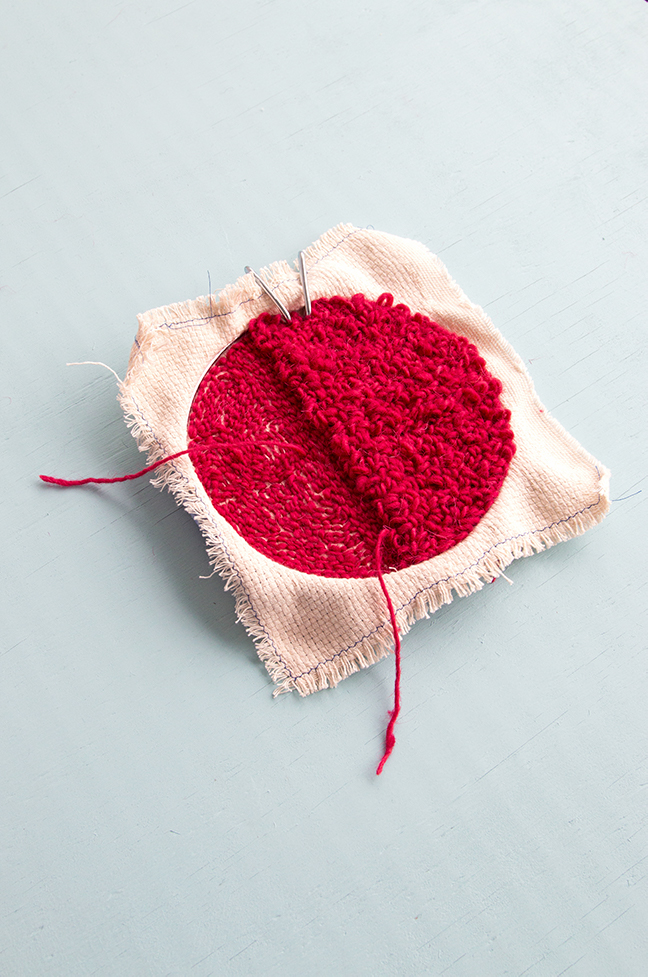
Which one is the right side?

Whichever one you want it to be, my friend! Some folks prefer the running stitch look of the working side of a punch needle project (the non-loop side). And some prefer the loops. You can also experiment with combining the two. For your first punch needle project, I recommend putting together a little sampler like the one pictured for this tutorial. That will allow you to play with your technique on something small, experimenting also with textures, shapes and what more vs. less dense loops look like. Just remember to pair the right yarn with the right tool and canvas, and you’ll be on your way to having fun with this rug making method!

Don’t forget to keep your eyes peeled for the next post in our punch needle series: basic punch needle project finishing!  

Also known as punch hooking, punch needle is an easy-to-learn technique for making your own rugs, tapestries and more! Get to know the basics with this quickstart tutorial.
One side of my sampler for this tutorial. Less dense stitching is on the left, and very densely packed loops are on the right.
Also known as punch hooking, punch needle is an easy-to-learn technique for making your own rugs, tapestries and more! Get to know the basics with this quickstart tutorial.
The other side of my sampler. Dense stitching is on the left, and less dense loops are on the right.
Also known as punch hooking, punch needle is an easy-to-learn technique for making your own rugs, tapestries and more! Get to know the basics with this quickstart tutorial.

Yarn pictured was provided by Shepherd’s Lamb.

Filed Under: Punch Needle, Yarn Crafts Tagged With: punch hooking, punch needle, punch rug, rug hooking, rug making

About Heidi

Heidi Gustad (she/her) is a craft book author & designer specializing in yarn crafts. Her work combines vintage and modern design elements, prioritizing color and graphic motifs. Her first book, Latch Hook: 12 Projects for the Modern Maker, is out now.

Previous Post: « Picks of the Week
Next Post: Picks of the Week »

Reader Interactions

DID YOU LIKE THIS POST?
Visit similar articles...

  • Planetary Punch Needle PillowsPlanetary Punch Needle Pillows
  • Whip Stitch Binding in Latch HookWhip Stitch Binding in Latch Hook
  • How to Finish Nooks & Crannies in Latch HookHow to Finish Nooks & Crannies in Latch Hook
  • How to Weave in Punch Needle EndsHow to Weave in Punch Needle Ends

Comments

  1. Sindy Smith

    January 25, 2020 at 5:48 am

    Hi Heidi can you please explain to me how do I punch needle a large rug. I’m from South Africa and can’t find anything in our country regarding punch needle. I want to make a large punch needle rug for my dining room.
    Have a nice weekend.
    Looking forward to hearing from you soon.
    Take care.
    Sindy

    Reply
    • Heidi

      March 28, 2020 at 1:04 pm

      I’ve never made a large punch needle rug. For something larger in scale like this, I would recommend looking at one of the many new books available on punch needle. With the trend as popular as it’s become, I’ve seen at least a half dozen books ranging from small projects for beginners to somewhat larger scale tapestries. I’d start with an online search for “punch needle books 2019” as that’s the publication year for many of these titles. Best of luck! -Heidi

      Reply
    • sheila

      July 10, 2020 at 1:17 pm

      I was looking at this because I used to make large hooked rug wall hangings I began with masking tape around the edges to give me something to hold onto when starting -hopefully that will help you.

      Reply
    • Michele

      April 30, 2023 at 10:04 pm

      Sindy, you can make your own frame with wood and screws from Lowes or Home Depot type stores. Also purchase carpet tack strip and secure that to the wood frame after you make it. That’s what I did and I can make 25″x25″ rugs. Go for it

      Reply
  2. Leela

    April 23, 2022 at 7:04 am

    Hello Heidi, your tutorial was a great help. I was confused at how to hold the punch needle . Your explanation was very clear.
    Thank you.

    Reply

Trackbacks

  1. Home Decor Items to Help You Stay Warm Without Running Heat – Humble Home Flow says:
    January 2, 2024 at 2:25 pm

    […] whipping up a punch needle rug for a cozy piece of home decor that also keeps your space warmer. Use thicker wool yarn for a fast […]

    Reply

Leave a Reply Cancel reply

Your email address will not be published. Required fields are marked *

This site uses Akismet to reduce spam. Learn how your comment data is processed.

Primary Sidebar

Heidi Gustad from Hands Occupied / Craft Book Author and Knitting, Crochet, Latch Hook and Macrame Designer

Hi! I’m Heidi (she/her/hers), and I’ve been helping yarn crafters untangle various techniques on the internet since 2010. I got my start here, as a blogger, and since then I’ve shared more than a few tutorials here and on YouTube as I’ve grown as a pattern designer. 🧶 

learn more / work with me

Find Me on Social Media

  • Instagram
  • Pinterest
  • TikTok
  • YouTube
Latch Hook by Heidi Gustad

Footer

INSTAGRAM

Heidi Gustad 🧶 knitting & yarn crafts

handsoccupied

Knitting & yarn crafts designer 🧶
.
Stay up-to-date 💌 & shop new patterns ⤵️

POV: Showing you how my new Bevelled Tank pattern POV: Showing you how my new Bevelled Tank pattern fits with no ease vs. 4” of positive ease. There’s a bit more length to the cotton (brighter color) sample, but both are cropped and feature shoulder seams designed to sit an inch back onto the shoulder instead of on top, giving it a little swing. Length is easily adjustable for folks looking for less of a crop. 
.
Pattern: Bevelled Tank by @handsoccupied for @pompommag x @hobbii_yarn summer 2024. Available for free from Hobbii at the 🔗 in my profile.
Yarn pictured: @kelbournewoolens Skipper and Camper. 
Dress form is adjusted to a 36” chest and ~5’3”ish in height. 
Human has a 40” chest and is 5’5”.
Both skirts are vintage.
.
#pompomxhobbiisummer2024 #handsoccupied #intarsia #handmade #knitting #colorwork
Let’s talk about fit and ease! . During the Beve Let’s talk about fit and ease!
.
During the Bevelled Tank design process for @pompommag, I knit 2 samples using 2 different @KelbourneWoolens yarns. One was in Skipper (100% cotton, second photo) and the other was in Camper (100% 2 ply wool). The Skipper sample was knit for a 36” bust, which measures in at 40” with 4” of positive ease. And I knit the Camper Sample for my 40” bust with a 44” finished measurement. (BTW, I’m 5’5” for folks that find that measurement helpful in visualizing fit.)
.
Based on the size chart for the Bevelled Tank, that means I knit one size 3 sample and one size 4. As designed, I conveniently fit a size 4 as intended with 4” of positive ease. When I wear the 3, there is no ease at all because the garment and my body are both 40” in size. Comparing the 2 garments, you can see how the fiber content (cotton vs. wool) and fit (no ease vs. 4” of positive ease) makes a difference in the look and feel of the finished garment. 
.
These samples are a great way to compare what ease looks like on different bodies. While I can fit both a size 3 and 4, the garment with no ease feels more like pajamas or a bralette when I wear it. On the other hand, when I wear the one with 4” of positive ease, I feel comfortable enough to wear it to work, even as a crop top. Plus, it leaves me with enough room to layer it with a nice button down if I’m not feeling the cropped look one day. 
.
I’m curious - how would you style this tank? Would you modify it with a few stockinette rows for added length? I’m so curious now that this pattern is finally out in the world. :) 
.
#pompomxhobbiisummer2024 #bevelledtank #handsoccupied #knitting #intarisa #handmade #kelbournewoolens #croppedsweater #summerknits
After a 6 month hiatus, I am happy to say I’m ba After a 6 month hiatus, I am happy to say I’m back with a brand new pattern in 9 sizes, and it’s FREE as part of @pompommag x @hobbii_yarn’s summer design collection! (Link is in my bio.)
.
In my December newsletter, I announced that I was soliciting test knitters for a pattern that had originally been selected for the summer ’24 issue of Pom Pom Quarterly magazine. However, the magazine ceased publication after its spring ’24 issue, leaving in-progress designs unpublished. (It happens.) As a result, I’d begun the long process of editing, testing, and photographing the pattern for independent release through the Hands Occupied pattern shop and Ravelry.
.
Before I was done with that process, Pom Pom Quarterly’s former editors reached out with an exciting proposal for the pattern. Post-magazine, they’ve begun to partner with yarn companies to produce high quality pattern collections. They wanted to include designs from the would-be current issue of Pom Pom Quarterly in a new collection for Hobbii yarn, including my Bevelled Tank. I worked with the same technical editors I would have for the magazine on this one, and as you can see from the photos, Pom Pom’s team did an amazing job of styling the garment to the beautiful standards they’re known for.
.
You can learn more about the pattern on my blog and get the free pattern from Hobbii yarn - links to both in my profile. I’ll post sizing info in the comments for quick reference too. 🧶
.
#pompomxhobbiisummer2024 #knitting #intarsia #sponsored #colorworkknitting 
.
Photos: @dianascarrunz 
Model: @angel.jade_
Here’s a nice throwback for you: my take on a vi Here’s a nice throwback for you: my take on a vintage knitting pattern from 1938 called the Fernlace Pullover. A pattern so nice, I knit it twice.
.
Yellow version 💛: knit with Despondent Dyes’ Vintage Vixen Sport after attending a @squidneyknits vintage knitting retreat in 2019 & learning *so much*. Paired with a self-drafted circle skirt pattern. 
.
Blue version 💙: knit with @eweeweyarns Ewe So Sporty in Sky Blue. Paired with the 1940s Boardwalk Duet sewing pattern from @decades_of_style 
.
Head to my stories for 🔗🔗 to the handmade wardrobe blog posts I wrote about each take on the Fernlace Pullover, working with a vintage pattern, where to find vintage patterns (including the one I used), & some thoughts on sizing. 
.
Image descriptions available in alt text. 
.
#handsoccupied #handmadewardrobe #fernlacepullover #vintageknitting #vintageknittingpatterns #knitting_inspiration
Frogging is a word in the knitting world that mean Frogging is a word in the knitting world that means to rip out your knitting. It’s called frogging because frogs say “ribbit,” and when you’re tearing out your knitting, you will “rip it” out, and that sounds like ribbit. No really. 🐸 Did you know this fun fact? 
.
P.S. I did like this design concept, but to make the pattern more knitter friendly as well as more wearable, I am making some tweaks to the construction. Excited to share when it’s ready! 🥰🧶
.
Yarn: @blueskyfibers Woolstok North in Morning Frost & Highland Fleece 
.
#handsoccupied #knitting #frogging #blueskyfibers #knittersofinstagram #blueskymakers #knittingvocabulary #bsfmakers #knitdesign
Load More... Follow on Instagram

Copyright © 2025 / Foodie Pro Theme On Genesis Framework / Branding by Ink + Mortar
All Site & Shop Policies / Privacy Policy / Cookie Policy