• 0 items$0.00
  • Skip to primary navigation
  • Skip to main content
  • Skip to primary sidebar
  • Skip to footer

Hands Occupied

Colorful knitting, crochet, latch hook and macrame from craft book author & designer Heidi Gustad.

  • BLOG
    • Knitting
    • Crochet
    • Latch Hook
    • Macramé
    • Punch Needle
  • ABOUT
  • Shop
  • Nav Social Menu

    • Instagram
    • Pinterest
    • RSS
    • TikTok
    • YouTube

How-to: Spooky Eyeball Garland

September 26, 2013 5 Comments

How-to: Spooky Eyeball Garland - Hands Occupied

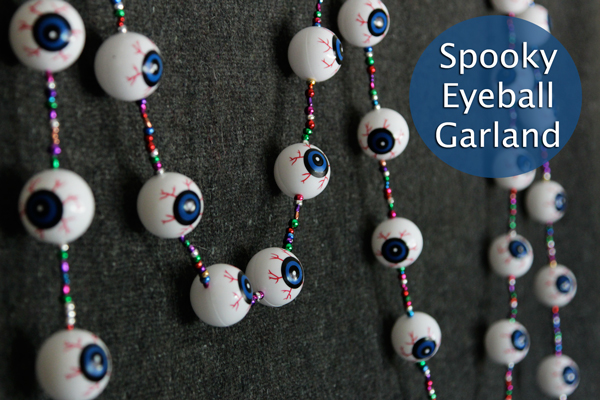
How much fun is this garland, you guys?! I had originally planned to make an eyeball garland with painted ping pong balls for Halloween this year. Then I was perusing the seasonal section at the party store last week, and they totally had plastic eyeball favors for sale! What luck! The premade eyeballs are super cute on this garland, and the colorful beads, which I happened to have on hand, smack just a little bit of Dia de los Muertos. I just love projects that come together so adorably and serendipitously like this!
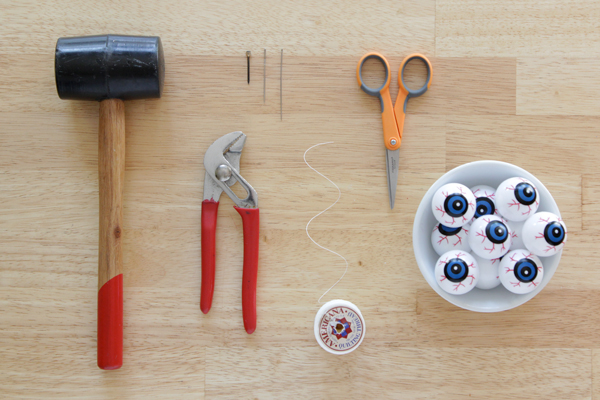
Supplies

plastic eyeballs (or painted ping pong balls)
shiny beads
heavy duty thread
small nail
mallet/hammer
pliers
scissors
needles in several sizes, including one longer than the widest part of your eyeballs

How-to: Spooky Eyeball Garland - Hands Occupied

Directions

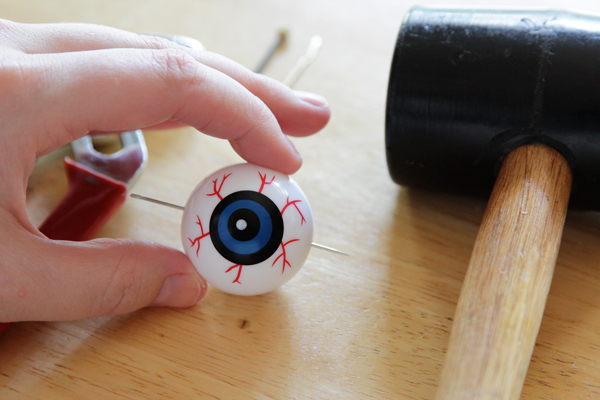
The vast majority of the time that goes into this project is converting your eyeballs basically into giant beads. Working from the thickest to the thinnest nail/needle, pound two holes into each eyeball straight across from each other. I eyeballed the second hole’s location on each, and all but a couple miraculously became successful beads on the first try.

How-to: Spooky Eyeball Garland - Hands Occupied

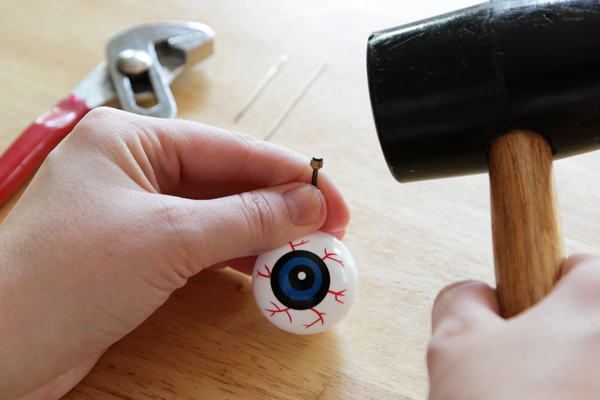
If your needle or nails get stuck in the eye, use a pair of pliers to pull them out. In the course of pounding two holes into 80 eyeballs, only two of them split in half, and not a single one cracked. You can be pretty aggressive when pounding holes into these.

How-to: Spooky Eyeball Garland - Hands Occupied

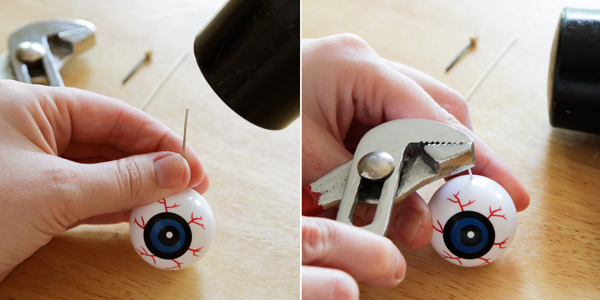
After you hammer the two holes, use the needle that’s longer than your eyeball to ensure the holes are aligned. Keep hammering until all of the eyeballs you’ll need are beadified.

How-to: Spooky Eyeball Garland - Hands Occupied

Using the long needle, alternate threading an eyeball and several beads onto a long piece of heavy duty thread to form the garland. Secure both ends with good knots, hang and enjoy!

How-to: Spooky Eyeball Garland - Hands Occupied

On a tangential note…

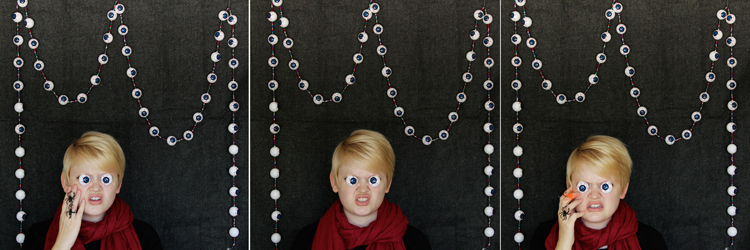
For fun I decided to take some photobooth style pics with my crazy garland and the two eyeballs I managed to pop in half when I was turning the rest of them into beads. I hadn’t intended to do more than text the shots to my husband when he was in meetings, but they’re super glorious (if a bit out of focus). Full disclosure, the only people home when I took these were me and my dogs.

How-to: Spooky Eyeball Garland - Hands Occupied

This post was not actually brought to you by any party store. 

—

PS:

You know what I just realized? (I promise I’m not making this up for the sake of internet!) I’m pretty sure these eyeballs exist to mostly be used for spoOOo-ooh-ky beer pong. This is JUST LIKE the time I thought the dudes at the midnight showing of Pink Floyd’s The Wall were drinking pop. “Why would they bring Jones Soda to the movies? The glass bottles are so loud!” True story.

Filed Under: Halloween, How-to, Parties Tagged With: beads, beer pong, decor, eyeball garland, festive, garland, halloween craft, halloween crafts, parties, ping pong balls

About Heidi

Heidi Gustad (she/her) is a craft book author & designer specializing in yarn crafts. Her work combines vintage and modern design elements, prioritizing color and graphic motifs. Her first book, Latch Hook: 12 Projects for the Modern Maker, is out now.

Previous Post: « Best Balloon Ideas
Next Post: Weekly Reader »

Reader Interactions

DID YOU LIKE THIS POST?
Visit similar articles...

  • How-to: Bat Place CardsHow-to: Bat Place Cards
  • Halloween 2013 Project RoundupHalloween 2013 Project Roundup
  • How-to: Make a Perfect Paper PinwheelHow-to: Make a Perfect Paper Pinwheel
  • Picks of the WeekPicks of the Week

Comments

  1. thezenofmaking

    September 26, 2013 at 11:03 am

    So, next time we’re in the same place, you’re bringing these for a game of crafty beer pong, right? (Also a true story: Despite having attended a Big 10 school, I’ve still never played beer pong.)

    Reply
    • Heidi

      September 26, 2013 at 3:48 pm

      Totally! What would be the craft equivalent of a red Solo cup for shooting into?

      PS: I played beer pong like once at MSU. It was fine, but I was bad at it. Like awful bad.

      Reply
  2. Charlene

    October 5, 2013 at 9:06 pm

    Hey! I type in “eyeball garland” into a google image search and here I am. Love the colorful beads. Thanks for the link to the pre-made eyeballs and your great idea. I think I will try a small drill for the holes.

    Reply
  3. doro von Hand zu Hand

    October 18, 2013 at 3:51 am

    a really cool garland!

    I linked to your tutorial on my blog – thanks for sharing!

    ♥, doro von Hand zu Hand

    Reply
    • Heidi

      October 18, 2013 at 2:47 pm

      Thanks for sharing it on your blog!

      Reply

Leave a Reply Cancel reply

Your email address will not be published. Required fields are marked *

This site uses Akismet to reduce spam. Learn how your comment data is processed.

Primary Sidebar

Heidi Gustad from Hands Occupied / Craft Book Author and Knitting, Crochet, Latch Hook and Macrame Designer

Hi! I’m Heidi (she/her/hers), and I’ve been helping yarn crafters untangle various techniques on the internet since 2010. I got my start here, as a blogger, and since then I’ve shared more than a few tutorials here and on YouTube as I’ve grown as a pattern designer. 🧶 

learn more / work with me

Find Me on Social Media

  • Instagram
  • Pinterest
  • TikTok
  • YouTube
Latch Hook by Heidi Gustad

Footer

INSTAGRAM

handsoccupied

Knitting & yarn crafts designer 🧶
.
Stay up-to-date 💌 & shop new patterns ⤵️

POV: Showing you how my new Bevelled Tank pattern POV: Showing you how my new Bevelled Tank pattern fits with no ease vs. 4” of positive ease. There’s a bit more length to the cotton (brighter color) sample, but both are cropped and feature shoulder seams designed to sit an inch back onto the shoulder instead of on top, giving it a little swing. Length is easily adjustable for folks looking for less of a crop. 
.
Pattern: Bevelled Tank by @handsoccupied for @pompommag x @hobbii_yarn summer 2024. Available for free from Hobbii at the 🔗 in my profile.
Yarn pictured: @kelbournewoolens Skipper and Camper. 
Dress form is adjusted to a 36” chest and ~5’3”ish in height. 
Human has a 40” chest and is 5’5”.
Both skirts are vintage.
.
#pompomxhobbiisummer2024 #handsoccupied #intarsia #handmade #knitting #colorwork
Let’s talk about fit and ease! . During the Beve Let’s talk about fit and ease!
.
During the Bevelled Tank design process for @pompommag, I knit 2 samples using 2 different @KelbourneWoolens yarns. One was in Skipper (100% cotton, second photo) and the other was in Camper (100% 2 ply wool). The Skipper sample was knit for a 36” bust, which measures in at 40” with 4” of positive ease. And I knit the Camper Sample for my 40” bust with a 44” finished measurement. (BTW, I’m 5’5” for folks that find that measurement helpful in visualizing fit.)
.
Based on the size chart for the Bevelled Tank, that means I knit one size 3 sample and one size 4. As designed, I conveniently fit a size 4 as intended with 4” of positive ease. When I wear the 3, there is no ease at all because the garment and my body are both 40” in size. Comparing the 2 garments, you can see how the fiber content (cotton vs. wool) and fit (no ease vs. 4” of positive ease) makes a difference in the look and feel of the finished garment. 
.
These samples are a great way to compare what ease looks like on different bodies. While I can fit both a size 3 and 4, the garment with no ease feels more like pajamas or a bralette when I wear it. On the other hand, when I wear the one with 4” of positive ease, I feel comfortable enough to wear it to work, even as a crop top. Plus, it leaves me with enough room to layer it with a nice button down if I’m not feeling the cropped look one day. 
.
I’m curious - how would you style this tank? Would you modify it with a few stockinette rows for added length? I’m so curious now that this pattern is finally out in the world. :) 
.
#pompomxhobbiisummer2024 #bevelledtank #handsoccupied #knitting #intarisa #handmade #kelbournewoolens #croppedsweater #summerknits
After a 6 month hiatus, I am happy to say I’m ba After a 6 month hiatus, I am happy to say I’m back with a brand new pattern in 9 sizes, and it’s FREE as part of @pompommag x @hobbii_yarn’s summer design collection! (Link is in my bio.)
.
In my December newsletter, I announced that I was soliciting test knitters for a pattern that had originally been selected for the summer ’24 issue of Pom Pom Quarterly magazine. However, the magazine ceased publication after its spring ’24 issue, leaving in-progress designs unpublished. (It happens.) As a result, I’d begun the long process of editing, testing, and photographing the pattern for independent release through the Hands Occupied pattern shop and Ravelry.
.
Before I was done with that process, Pom Pom Quarterly’s former editors reached out with an exciting proposal for the pattern. Post-magazine, they’ve begun to partner with yarn companies to produce high quality pattern collections. They wanted to include designs from the would-be current issue of Pom Pom Quarterly in a new collection for Hobbii yarn, including my Bevelled Tank. I worked with the same technical editors I would have for the magazine on this one, and as you can see from the photos, Pom Pom’s team did an amazing job of styling the garment to the beautiful standards they’re known for.
.
You can learn more about the pattern on my blog and get the free pattern from Hobbii yarn - links to both in my profile. I’ll post sizing info in the comments for quick reference too. 🧶
.
#pompomxhobbiisummer2024 #knitting #intarsia #sponsored #colorworkknitting 
.
Photos: @dianascarrunz 
Model: @angel.jade_
Here’s a nice throwback for you: my take on a vi Here’s a nice throwback for you: my take on a vintage knitting pattern from 1938 called the Fernlace Pullover. A pattern so nice, I knit it twice.
.
Yellow version 💛: knit with Despondent Dyes’ Vintage Vixen Sport after attending a @squidneyknits vintage knitting retreat in 2019 & learning *so much*. Paired with a self-drafted circle skirt pattern. 
.
Blue version 💙: knit with @eweeweyarns Ewe So Sporty in Sky Blue. Paired with the 1940s Boardwalk Duet sewing pattern from @decades_of_style 
.
Head to my stories for 🔗🔗 to the handmade wardrobe blog posts I wrote about each take on the Fernlace Pullover, working with a vintage pattern, where to find vintage patterns (including the one I used), & some thoughts on sizing. 
.
Image descriptions available in alt text. 
.
#handsoccupied #handmadewardrobe #fernlacepullover #vintageknitting #vintageknittingpatterns #knitting_inspiration
Frogging is a word in the knitting world that mean Frogging is a word in the knitting world that means to rip out your knitting. It’s called frogging because frogs say “ribbit,” and when you’re tearing out your knitting, you will “rip it” out, and that sounds like ribbit. No really. 🐸 Did you know this fun fact? 
.
P.S. I did like this design concept, but to make the pattern more knitter friendly as well as more wearable, I am making some tweaks to the construction. Excited to share when it’s ready! 🥰🧶
.
Yarn: @blueskyfibers Woolstok North in Morning Frost & Highland Fleece 
.
#handsoccupied #knitting #frogging #blueskyfibers #knittersofinstagram #blueskymakers #knittingvocabulary #bsfmakers #knitdesign
Follow on Instagram

Copyright © 2025 / Foodie Pro Theme On Genesis Framework / Branding by Ink + Mortar
All Site & Shop Policies / Privacy Policy / Cookie Policy