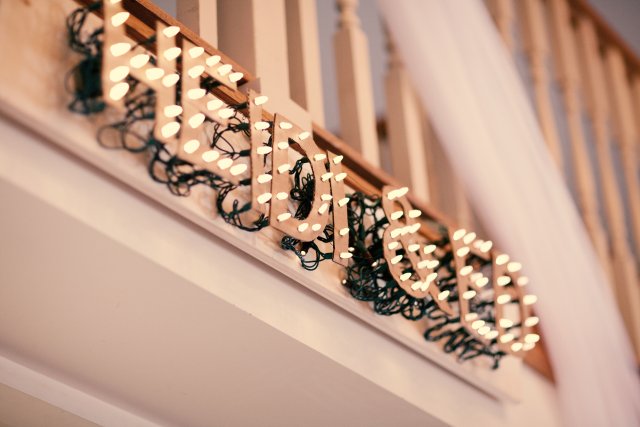
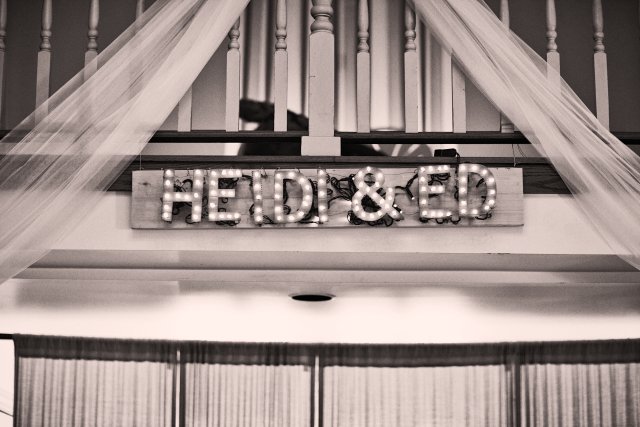
Inspired by the sign hanging in Venice, CA and vintage carnival signs, I decided to make a light-up banner for my wedding (which is 5 months away as of tomorrow!). We’re having a non-denominational ceremony and have decided to add a couple of personal touches to the ceremony, this sign being one of them. The sign will remain dark until we’re officially wed, and then we’ll turn it on using a foot switch.
Here’s how to make one of your own:
Gather your supplies: set of 100 LED Christmas lights, an old cardboard box, straight pins, all of the letters you’ll need (I printed mine from the computer, but you could stencil them too), x-acto knife, sharpened pencil (non-mechanical), scissors, floral wire, wire cutter
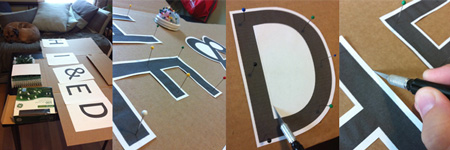 Cut out your letters and straight pin them to your cardboard. I folded one of the former tops of my cardboard box under the cardboard to which I was pinning my letters to protect my work surface.
Using an x-acto knife, cut around your letters, but don’t cut through the entire sheet of cardboard. Just cut through the top few layers. If you’ve got stencils, the above process is much less complicated. Just trace and go over your traced lines with an x-acto knife, cutting only the top few cardboard layers.
Cut around the outside edges of your cardboard using a scissors. The complicated step comes next when cutting out characters, like an ampersand or a “d” for instance, that involve cutting out pieces from their centers.
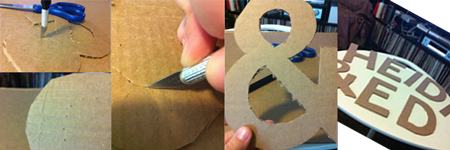 Poke holes all the way through your cardboard using the x-acto knife. Flip your letter-in-progress over and connect the dots using your knife to finish cutting out your letters. Check out the three pictures on the left above for guidance.
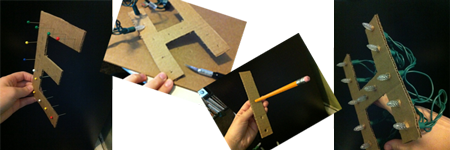 Using straight pins, poke holes through your cardboard where you’d like a light to go.
Flip your letter over. Using the x-acto knife, poke tiny crosses through your cardboard letter from the back to the front. Then, use your pencil to enlarge the holes. Poke your Christmas lights from the back through to the front.
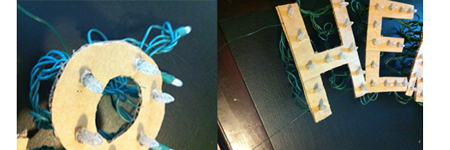 Once your lights are all in place, you’ll probably notice that it’s hard to get your letters to stay in place. I had some floral wire lying around from when I made my bouquet. Thread your letters like beads on a necklace using the floral wire. Use two separate pieces of wire, threading the letters at both approximately an inch from the top and bottom of your letters (see right-hand picture above). The cool thing about using an old box is that the cardboard is corrugated, so threading the letters really is just like threading a giant bead on a string.
You’re all done! The finished product is a little heavy, so be careful when you hang it. I mounted mine to a piece of spare wood with staples and hung it with eye screws. In all honesty the LED lights are so bright, it didn’t matter what the thing it hung on looked like.



Leave a Reply