• 0 items$0.00
  • Skip to primary navigation
  • Skip to main content
  • Skip to primary sidebar
  • Skip to footer

Hands Occupied

Colorful knitting, crochet, latch hook and macrame from craft book author & designer Heidi Gustad.

  • BLOG
    • Knitting
    • Crochet
    • Latch Hook
    • Macramé
    • Punch Needle
  • ABOUT
  • Shop
  • Nav Social Menu

    • Instagram
    • Pinterest
    • RSS
    • TikTok
    • YouTube

Knit Candy Cane Ornament

December 4, 2017 4 Comments

Trim your tree with this free candy cane ornament knitting pattern! Knit flat and seamed, you can quickly make this keepsake ornament with yarn scraps and pipe cleaners.
What Christmas tree is complete without a candy cane? The perfect red and clear white hues come together to make a classic candy cane. Visually striking against the needles of an evergreen, you could make a whole gaggle of these to pepper your tree or holiday mantle. If you’re not scared of grafting, you can tackle this 6 row pattern over and over between now and the holidays. Maybe it’s just me who lives for the idea of including knit and crochet gift toppers on every present one day, but this candy cane definitely seems like a doable gift topper idea for everyone on my list.

Get an inexpensive, printable, ad-free PDF of this pattern here, or you can continue scrolling to see the pattern now.

Trim your tree with this free candy cane ornament knitting pattern! Knit flat and seamed, you can quickly make this keepsake ornament with yarn scraps and pipe cleaners.

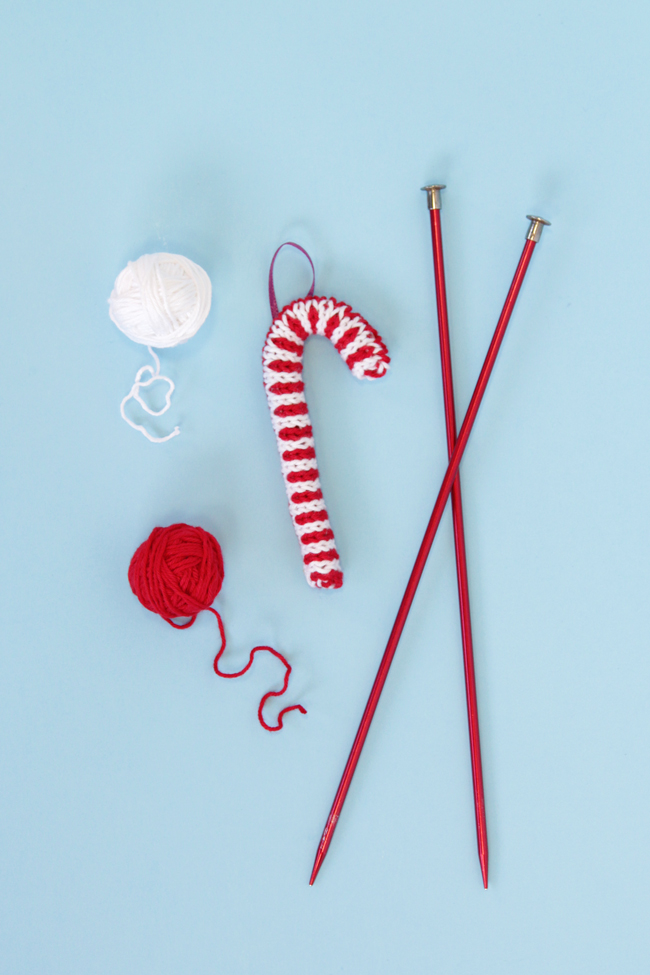
Knit Candy Cane Ornament Pattern

A note about this ornament: It’s hard to believe that we haven’t yet done a candy cane in our ornament series, isn’t it? I had actually started playing with candy cane designs for this series from practically day one, but getting the stripes just right kept proving elusive. The crochet version kept ending up too chunky looking. An early knit version ended up with weird tension issues from the various color change techniques I was hoping for. But then this year I realized I was overthinking everything – the old KISS (keep it simple, stupid!) adage came to mind. When I went with a version knit with basic stranded colorwork and grafting, and poof! A candy cane ornament I could get behind sharing with you all. :)

Updated 12/8/18.

Skill level: easy

Supplies
1 pack Lion Brand Yarn Bonbons in Beach, which comes with 8 mini skeins. – You need less than a skein of red and white to complete the ornament.
size US 3 (3.25 mm) knitting needles
scissors
tapestry needle
scrap ribbon
sewing needle & thread
1 red or white pipe cleaner

Abbreviations & Terms
CO – cast on
sts – stitches
Clr A – color A (white)
provisional cast on – a cast on that gives you access to your stitches later in your project. Here’s a tutorial.
RS – right side
sl 1 wyif – slip 1 st purlwise with yarn in front
k – knit
Clr B – color B (red)
rep from * – repeat the instructions following the asterisk as directed
WS – wrong side
kitchener stitch – a seaming technique used to graft live sts together. Here is a tutorial.

Gauge & dimensions: 22 sts & 28 rows over 4 inches, knit in stockinette stitch. Finished ornament measures 5.5 inches from tip to tip before bending into candy cane shape.

Trim your tree with this free candy cane ornament knitting pattern! Knit flat and seamed, you can quickly make this keepsake ornament with yarn scraps and pipe cleaners.

Looking for a printer-friendly version of this pattern? Grab an inexpensive, ad-free PDF of this pattern right here.

The Pattern

CO 36 sts in Clr A using a provisional cast on.
row 1. (RS) sl 1 wyif A, *k1B, k1A; rep from * 17 times, k1B.
row 2. (WS) sl 1 wyif B, *p1A, p1B; rep from * 17 times, k1B.
row 3. sl 1 wyif B, *k1B, k1A; rep from * 17 times, k1A.
row 4. sl 1 wyif A, *p1A, p1B; rep from * 17 times, k1A.
row 5. sl 1 wyif A, *k1B, k1A; rep from * 17 times, k1B.
row 6. Rep row 2.
Using Clr B, join ends using kitchener stitch.

Finishing
Weave in all ends. Cut a 6-inch length of red or white pipe cleaner. Fold each end of the pipe cleaner down 1/4 of an inch to protect sharp points. Feed your pipe cleaner into the tube you knit and bend into a candy cane shape.

Using a needle & thread, sew a scrap of ribbon to the back of your finished ornament to hang.

Remember to share your ornaments in progress and finished ornaments using #handsoccupiedhohoho on Instagram & Twitter – I can’t wait to see how you make these your own!

Yarn was provided by Lion Brand Yarn.

Filed Under: Christmas, Free Patterns, Knitting Tagged With: 12 ornaments of christmas, candy cane, candy cane ornament, knit ornament, knitting pattern, ornaments of christmas

About Heidi

Heidi Gustad is a craft book author, designer & creator specializing in yarn crafts like knitting, crochet, latch hook & macramé. Her first book, Latch Hook: 12 Projects for the Modern Maker, is out now.

Previous Post: « Picks of the Week
Next Post: Lopi Tote – Free Knitting Pattern »

Reader Interactions

DID YOU LIKE THIS POST?
Visit similar articles...

  • A look at ALL of the Ornaments of Christmas (and a surprise 25% off sale!)A look at ALL of the Ornaments of Christmas (and a surprise 25% off sale!)
  • Knit Stocking OrnamentKnit Stocking Ornament
  • Crochet Orange OrnamentCrochet Orange Ornament
  • Knit Candle OrnamentKnit Candle Ornament

DON’T MISS ANOTHER UPDATE

Comments

  1. Evelyn Dicker

    December 3, 2019 at 10:16 am

    I don’t understand how to start off the first row after casting on 36 sts using the provisional cast on. Do you slip the first stitch onto the knitting needle and then proceed with the instructions? How do you begin with the knitting part of the pattern? I am new to using the provisional cast on. Any help would be greatly appreciated! Thank you.

    Reply
  2. Evelyn Dicker

    December 3, 2019 at 12:40 pm

    I have knitted all six rows and at the end of the pattern, it says to join ends using the kitchener stitch. Do I have to cast off all 36 stitches first in order to do that? What do I do with the provisional cast on stitches? This is my first time trying this technique and I can’t find a video tutorial for this on youtube. Any help would be greatly appreciated!

    Thank you.

    Reply
    • Heidi

      December 3, 2019 at 6:18 pm

      Hi Evelyn,

      Check out my blog post with video tutorial on how to work a provisional cast on. You don’t bind off at all in this pattern, which is accomplished thanks to the provisional cast on and finishing with the kitchener stitch. Another useful tutorial with video will be this one on how to work the kitchener stitch.

      Take a look, give it a try, and you should be all set. If you run into major issues, let me know!
      Yours in yarn,
      Heidi

      Reply
  3. Evelyn Dicker

    December 4, 2019 at 7:05 am

    Thank you so much for sending me the video tutorial! It was very easy to follow! I am so excited to see the finished product!!! :)

    Reply

Leave a Reply Cancel reply

Your email address will not be published. Required fields are marked *

This site uses Akismet to reduce spam. Learn how your comment data is processed.

Primary Sidebar

Heidi Gustad from Hands Occupied / Craft Book Author and Knitting, Crochet, Latch Hook and Macrame Designer

Hi! I’m Heidi (she/her/hers), a craft book author & pattern designer specializing in knitting, crochet, latch hook & macrame. Really anything with yarn! ❤️  My work combines vintage and modern design elements, featuring bold colors and graphic motifs.

EMAIL NEWSLETTER

Never miss a tutorial with these short & sweet monthly updates.

Find Me on Social Media

  • Instagram
  • Pinterest
  • TikTok
  • YouTube
Latch Hook by Heidi GustadDiscover Unique Items

Footer

INSTAGRAM

handsoccupied

Craft book author, designer & creator specializing in yarn crafts like knitting, crochet, latch hook & macramé
❤️ Email preferred

Heidi Gustad 🧶✂️
Weekend knitting design aftermath. Remember kids, Weekend knitting design aftermath. Remember kids, it’s always good to stop, swatch and block it. 🧶
.
#stopswatchandblockit #handsoccupied
Learn how to do the magic loop method for knitting Learn how to do the magic loop method for knitting in the round in 90 seconds. / Using the magic loop allows knitters to work in the round with a single, long circular needle at a range of circumferences. 
.
For a longer, full-width & more detailed overview of magic loop knitting, check out my u2be & b1og, the 🔗🔗 are where you’d think. 🧶
.
#handsoccupied #magicloop #knitting #howtoknit #learntoknit #knitter #knittinginspiration #knittinginstagram #knittingintheround
Since it won’t be clean for long, swipe to see w Since it won’t be clean for long, swipe to see what my home studio looks like these days. Nothing will ever quite be like the old Hands Occupied Studio, but I’m pretty pleased with how I shoehorned everything in this space. Function over form + a layer of yarn cuteness-meets-chaos is how I’d describe my creative space needs. 😆 When I was still renting the studio, those needs included “doesn’t rain suspicious brown water from a crack in the ceiling for a year,” so this is an improvement! 😆
.
For a time lapse of the studio organizing and tszuj-ing process, scroll down a couple posts on my feed. (There’s also a video or two featuring the old studio if you’re curious.) Happy June, friends! 
.
#handsoccupied #handsoccupiedstudio #knitdesigner #craftdesign #yarncrafts #latchhook #makerlife #heidigustad #chicagocrafter
Who doesn’t love magic loop knitting? Who doesn’t know what it is? How about when circular needles were invented?
.
In todays new bl0g post + video tutorial, you’ll learn about the magic loop method for knitting in the round, how to do it and why to use it, and when it came to be. The 🔗 is in my b1o. 🧶 
.
#handsoccupied #magicloop #knitting #howtoknit #knittinginspiration #knittingintheround
Finally organizing & putting the finishing touches Finally organizing & putting the finishing touches on my home studio. After losing my studio space last fall, it’s feels really great to *occupy* this new space all the way. 😉
.
I started by removing general clutter & returning straggler supplies from various WIPs, videos & design deadlines to their homes. Next, I hung a third peg board in the space - this one is mostly for display and less for organizing tools or projects. For the first time ever, I’m displaying projects from my book, plus a couple other faves. (The best thing about designing more yarn crafts besides knit & crochet is that I have some really fun -and delightfully pettable 😆- samples around.) I finished by adding a square dowel to my small supply storage tower to keep it from tipping over, plus re-arranging and de-cluttering the closet. 
.
This cleaner space already has me feeling so much more creative and less overwhelmed. Now to find a safe spot in the basement for the tower of project samples in Rubbermaid tubs I liberated from my WIPs closet. Also why are there five?! 
.
Here’s to keeping it clean for a few weeks! 🧶 
.
#handsocupied #handsoccupiedstudio #craftroom #craftroomorganization #craftroomstorage #yarncraft #knitter #crocheter #latchhook #latchhookbook
Load More... Follow on Instagram

Copyright © 2023 / Foodie Pro Theme On Genesis Framework / Branding by Ink + Mortar
All Site & Shop Policies / Privacy Policy / Cookie Policy