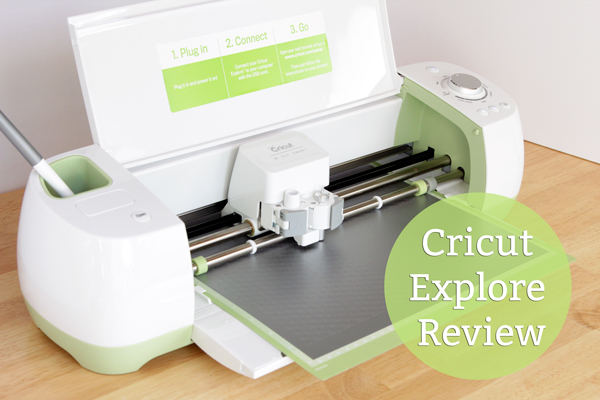
(Like what I did there with the title? ;) ) Today I want to talk with you about my experience using one of the newest and most-buzzed-about DIY tools out there, the Cricut Explore cutting machine. I’ll be covering the costs involved, machine features, lots about its design and how it compares to other machines, as well as details about when the Cricut Explore will be available to the public. I’ll also touch on what the heck a cutting machine is! :)
A couple years ago, I started working with the Cricut Mini, and it was my go-to tool for quick crafting, especially when I had a tendinitis flare-up. I didn’t design a ton of DIYs with it. It took a bit of time to figure out how to set up a project, its cutting blades would wear out faster than I liked, and it was loud during operation.
For those of you new to crafts cutting machines, they kind of work like an at-home printer, but instead of printing ink onto paper, they cut out paper that’s stuck to a special adhesive mat. You can also swap out blades with markers to draw and a few other things. I have loved having a cutting machine on hand, especially as a craft designer, since it really saves my hands a lot of pain and my workflow a lot of time when DIYing on a deadline.
The highlights
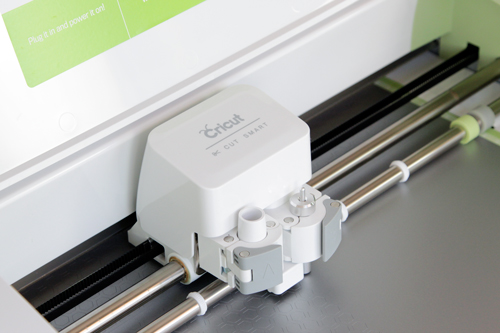
This new machine addresses all of those issues I had with my Mini. The new blade is made with a stronger, longer-lasting metal. The carriage – the thing that carries the blades/marker/embosser – now has TWO holders, so you can cut and emboss, or cut and draw, etc. on a single pass. The software you use on your computer (remember, this plugs in like a printer via USB) is web based, instead of needing to install an application to your computer. The new machine costs $299 and will be available at retail locations March 15. Right now, I *think* you can only get it during select HSN broadcasts.
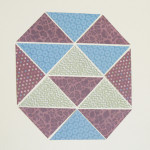
Oh, and it’s INSANELY quiet. The folks at Cricut did their research for real on this machine. For crafters who work late into the night like me sometimes, the noise factor matters. Here’s a video of the machine cutting my first project with the Cricut Explore yesterday. Not only is it cutting hexagons out of vinyl that are less than a centimeter tall, it’s SO quiet while doing it.
The Details

Right out of the box & pricing
You get a machine, USB cord, wall plug, adapter, blade, drawing pen, carrying case, cutting mat, and a variety of cutting materials with your initial $299 purchase. The web-based design software, Cricut Design Space is free. The cost on top of the machine comes in in a few ways: paying to access images to cut/draw with your machine and, of course, the physical stuff – buying more materials to cut (paper, duct tape, etc.), markers, blades, cutting mats, and more. You know what you don’t have to pay for anymore? Fonts! Fonts installed to your computer will work in Design Space, which launches to the public February 27. You can also, for the first time, cut your own images with the Explore. That’s big news. SVG, JPG, PNG, BMP, GIF and DXF files can all be uploaded and used in the design space for free.
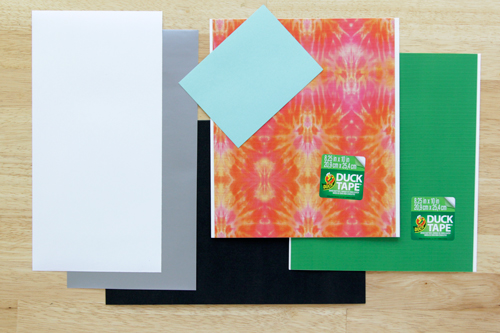
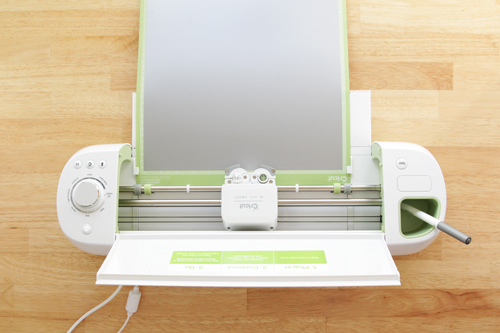
The materials that come with your machine.
The older Cricut machines started out with a cartridge system. Maybe I’m totally outing myself as a 90s kid, but the whole system reminded me of videogame cartridges. The graphic elements that you’d have your machine cut came loaded in a plastic thingy that you’d plug right into your Cricut machine, rather than getting them offline. Now you can buy all the graphics you need online, and they have a new subscription-based system that simply gives you access to Cricut’s library of images.
What about your old cartridges, right? You’ll be able to load them into your account once and access them digitally after that. Since this post is already way longer than what I usually write, I’ll link you to this FAQ page from Cricut that explains the details of their new subscription service, migrating your cartridge content, using original content. etc. for the nitty gritty.
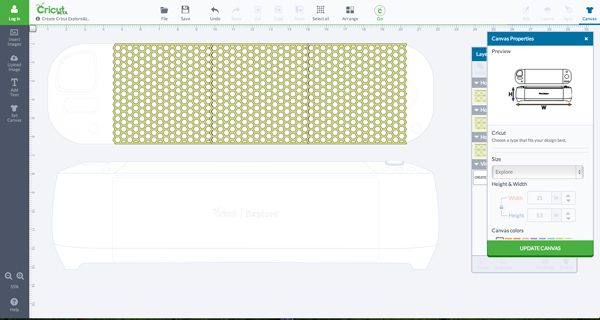
A sneak peek of the new Design Space. This was my workspace for designing a vinyl honeycomb sticker to accent my machine. Notice how you can design on a model of your finished product?
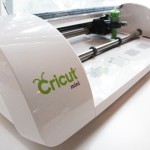
The Explore’s design is out of this world
I kid you not – my husband came home last night after I busted out my machine for the first time and literally said, “Did they hire a consultant from Apple to design this?!” He’s always been fascinated with crafty technology I have around the apartment, but he asked me, well no, he informed me that he can’t wait to play with my new machine. For real.
The Mini is cute, but the Explore is pretty. Lots of white, silver, and Cricut’s signature greens are all over this machine. The machine just physically feels like it’s of quality when you use it. The USB cable and power cable are both white to match and don’t feel cheaply made. The designers of this machine included an accessory holder on top of the machine and inside the machine as well.
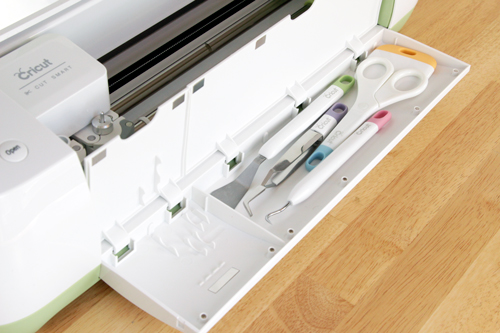
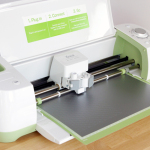
Their accessory kit is designed to fit perfectly in the larger drawer, and the second smaller drawer fits extra blades.
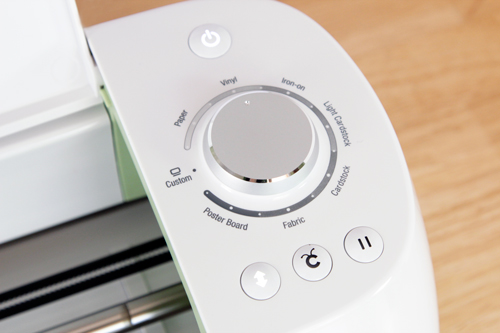
The other design element I really love is the dial. Before, you had to futz around with delicate little settings on the blade inside the machine before you could cut with it. With the Explore, you don’t need to touch the blade housings unless you’re switching to a pen or embossing thingy or replacing a blade. You just set the dial to the material being cut. (By the way – there are like a gillion different materials this machine cuts. That’s also new. Like, even wood sheets.)
Overall
I’m sure there are a bunch of things I’m forgetting, like how you’ll soon be able to buy an adapter and cut from a tablet/iPad – no USB cable needed, or that the Design Space includes a bunch of predesigned projects you can just print out, or that you can modify to fit your needs. But I only opened my Explore yesterday. This post is already so uncharacteristically long for me, so I’ll leave it here. I hope you find useful the highlights of what excited me personally as a casualish cutting machine user and what stood out to me as a DIY consumer. Considering the quality of the Explore, I genuinely think the price point is fair and totally worth the convenience of crafting that you get out of it.
This video, while obviously produced to market the new Cricut Explore, shows off a lot of the materials and applications for the new machine.
The machine, accessories and materials used in this review were provided to me by Cricut. Additionally, Cricut flew me to Salt Lake City in January to attend a product launch for the Cricut Explore machine. Opinions expressed in this review are totally my own. To learn more about the Cricut Explore, visit Cricut’s website.


Can this machine cut images you design yourself? Or only things available in it’s library of images?
Looks like you are going to have a lot of fun with it!
I knew there was something I was forgetting! I linked to an article in the pricing section of this post that goes into a bit more detail. Yes, you’ll be able to use your own images. .svg, .jpg, .png, .bmp, .gif, and .dxf files can all be uploaded and used in the design space for free. Great question. I’ll update the post with a mention of that! :)
This post makes me this machine more than ever! How fun!
Thanks! I have wanted one of these for a long time, but wanted to be able to cut out my own images.
WHAT PROGRAMS DOES A COMPUTER NEED TO HAVE TO WORK WITH THE EXPLORER? WILL WINDOWS VISTA WORK?
Yes, the Explore and Design Space work on Windows Vista with Chrome and Firefox.
I’ve had my Explore for about a month now. I also have the Cricut Expression 2 and a Silhouette Portrait. I am going to sell my Expression 2 because the Explore definitely out does it. However, there are pros and cons to the Explore and the Silhouette to make me keep both machines.
I love the Cricut Design Space because it operates on “the cloud”, so your work is always available to through your Design Space account….but you are not limited to which computer you use to access it. The Silhouette also uses software which is resident on your hard drive. I have had my computer crash at which time I had to get a “rescue download” for the Silhouette software and all the images I purchased over the last two years. You only get 3 total rescue downloads. So for this Cricut is better.
Silhouette software is much easier to learn if you use any of the Microsoft Office products, particularly PowerPoint. I use it at work all the time, so, there wasn’t any familiarization with Silhouette’s software for me…I was off and running once the download was complete. However, if you don’t use Office products, the Silhouette software is complicated. That said, I think the Cricut Explore Design Space software is HARDER to learn. I personally hate scrolling through the “how to” on the website and would much prefer to be able to print out some kind of user manual…Perhaps you can and I just haven’t found that yet.
Print and cut is hands down a winner. HOWEVER, creating your own print and cut can be challenging. Once you figure it out, you’re good to go. There is one video online which shows the manipulation of a Cricut image from a cartridge that had some printing on one of the layers. For those, the Explore automatically sets up one mat to do both print and cut. Starting from scratch is much harder. One would think “group” and “ungroup” would be the commands you’d use to create a print and cut image…the command is “attach”. It was very frustrating trying to figure this out!
Cricut Explore automatically sets up the mats for you. I hated having to hunt through the cartridges to find different layers on the Expression…Explore solves that. The pieces are organized by layer, and the pieces are colored so you know what color of paper to put on the mat, provided you want the image to be just like that pictured on the image.
I may be doing something wrong, but I cannot use all the fonts embedded on my computer to “write”…all of my fonts show up, but I cannot select write unless I have purchased the font either with a cartridge or from the design space. Oh, and loading your cartridges is simple. The licensed images are NOT on the Design Space, but you can load those cartridges, which I did for Disney and Hello Kitty. The HSN package came with 3 months of total access to the Design Space and all it’s images (aka cartridges)…for the most part the images are now what’s out on cartridges.
I still have a lot to learn about this machine. This weekend I want to try to import my own files and see how it handles them. At first I was not amused with only being able to save my files to the cloud…but, in all honesty, they’re safer there.
The problems I have had with Cricut not cutting so well seem to have been corrected with the Explore blade, which I read was made with German technology. I have not been able to find blade replacements…I am not sure if I could use the replacement blades I used with the Expression, but I figure those cut poorly sometimes, so why would I want to use them. I did purchase the deep blade housing and blade for Explore, but I haven’t seen replacements for the regular blades anywhere.
All in all I have been bragging about the Cricut Explore to friends. While I will still keep my Silhouette, there are at least 3 things Cricut Explore does that Silhouette does not: 1. Cut and write or emboss and write; 2. Create the mats by color; 3. Operate on the cloud…which means I do not have to worry about the computer I want to use.
Cricut Explore is well worth the retail of $299 IHO.
This is my first experience with Cricut. I purchased the Explore over the Expressions 2 because of the features and “ease of use” in the Cricut promos. As is so much the case today, new technology does not come with a written tutorial (remember the thick book with each computer 10 years ago). On line help replaced that which was written. Now Cricut takes it one step further by not including it in their software. It took me 6 hours and watching several “how to” videos to get some idea of the process involved in cutting vinyl letters. The Thank You note from Cricut made it seem so simple. Overall the machine is well made with quality and with features that I think will provide interesting projects once I figure out just how to do it. User friendliness for the Explore is not a number 1.
Can anyone help me with a blade issue? I just bough the Cricut Explore, I’ve never had any other machine for cutting so this is new to me. I have had it for 4 days and the blade isn’t working anymore. Started tearing up my paper and card stock last night. I have not done a whole lot of projects but have done some. About 10 cards in 3 days. Should this be happening? I need help. Also, my mats are so sticky it tends to tear my paper when I attempt to lift it. Any help is welcomed. TIA
Hi Leslie!
That blade issue seems unusual. I’ll email my helper at Cricut and see if they have any advice to offer and get back to you. Regarding the seemingly-too-sticky mat, it’s just new. This forum thread offers tips for conditioning your new mat. Like I said, I’ll get back to you asap when I hear from Cricut, which should be soon.
Talk soon,
Heidi
All right! Here’s what the Cricut pros have to say about your questions, Leslie! I hope this helps. Let me know if I can help answer questions, any time :) –
“Most cut problems can be traced to either the blade or the pressure. Adjusting the pressure and/or trying a new blade are a good place to start.
Here are a couple of suggestions to try if cuts are tearing:
1. Look closely at the blade to see if it appears to be broken or if a small piece of paper is caught on the blade.
2. Reduce the pressure by turning the dial down one notch. Too much pressure can cause the cuts to tear. You can also manually tweak the material settings after loading the mat on the cut preview screen.
3. Ensure that the material you’re using is flat against the mat. Air bubbles may cause cutting problems.
4. Call Customer Service. They’ll be happy to help out. 1-877-727-4288 | 7AM-6PM MST
If the cutting mat is too sticky, you can address this problem by placing a t-shirt on the mat and then removing it. The remaining lint will reduce the adhesive grip. Conversely, if your mat is not sticky enough, you can scrape debris off the mat with a plastic scraper (or old credit card) and then rinse it under warm water and let it dry. Make sure to keep the mat covered with the plastic cover when not in use.
Hopefully that will help address the issue.”
Hi I’m really hoping you can help me. I bought my Cricut Explore and have cut one of the preset projects on it. I have not had a cricut before, I have upgraded from a big shot. I can’t seem to find out if my mat is supposed to get cut marks in or is the blade pressing too hard? I just want to make sure this is ok before I ruin my new mat :/ xxx
My mat shows indentations when I cut with it, and I’ve been able to use it many times over, no problem.-Heidi :)
I just got the Cricut Explore, my very first Cricut. I’m trying to cut vinyl. But I think I’m doing something wrong, the computer what’s to print the image first from my regular printer, is this suppose to happen? I don’t remember them doing that on the HSN, when they showed the machine. I did get the image to come up on the computer once to the point to cut, but then it says the cricut can’t find the sensor marks. Please help, I have so many project ideas with the vinyl. And I really don’t want to send it back, I really want this to work. Thank You
Which software are you using to design your pattern? Cricut Craft Room or Design Space?
Dawn or Heidi…I am having the same problem on the vinyl – it cant read the sensor marks…..what am I doing wrong or what do I need to do to fix this?? Help!
I got the Cricut Explore, I’m using Design Space.