This post brought to you by Walmart. All opinions are 100% mine.
 Around age 14, I was the kind of kid who’d DIY weird outfits based on a theme and wear them to school as my regular clothes. I’d get really pumped when I found it in any color other than standard silver (PS: Kids these days have it made! There are tons of adorable patterns and colors of Duck Tape® out there). I ran around junior high on the regular in some worn out Delia’s boots I’d covered in silver tape. I also made over an old wallet from my childhood dress up collection with Duck Tape® to match. At age 14, I decided Duck Tape® was the best thing ever.
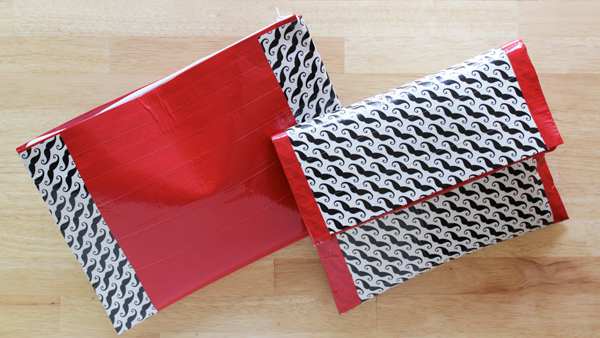
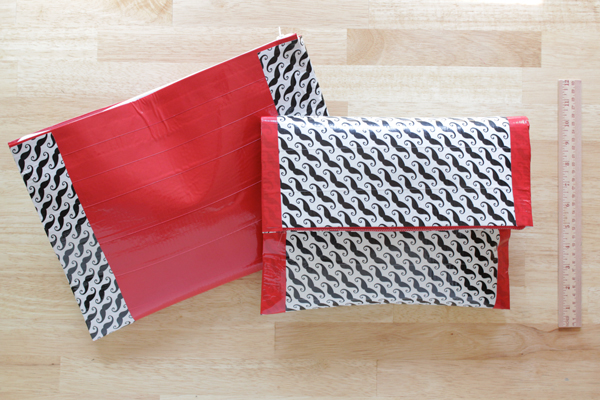
Fast forwarding to today, I’ve got two takes on a DIY Duck Tape® clutch for you. They feature a vinyl fabric lining, perfect for back to school time. The whole thing wipes clean – inside and outside. This design can be adapted to any size depending on your needs, whether that’s a tablet case, foldover clutch, pencil case, laptop sleeve, you name it.
Supplies
Duck Tape® in desired patterns & colors
vinyl fabric
zipper
scissors
fabric cutting mat (optional)
rubbing alcohol (optional)
paper towels (optional)
Directions
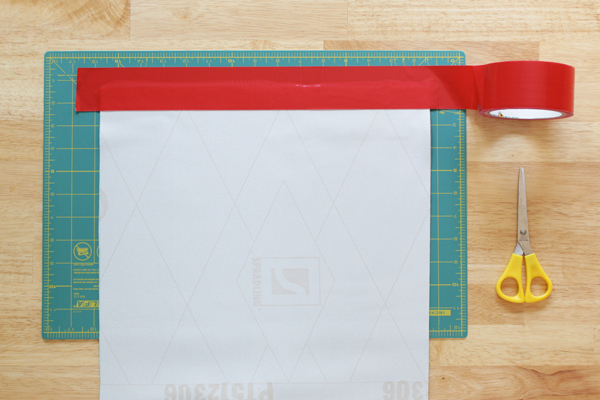
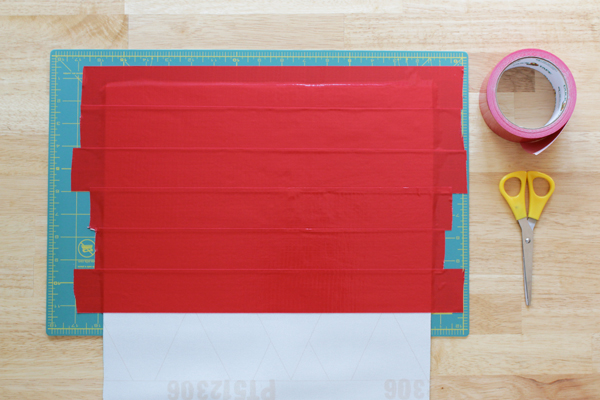
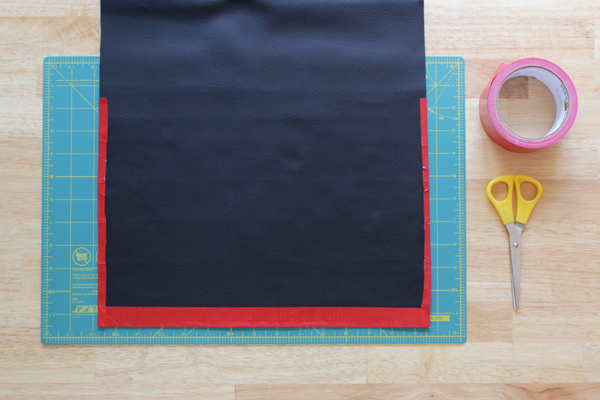
If you have a fabric cutting mat, lay it out on your work surface. If you don’t have a fabric cutting mat, just be careful not to stick your tape to a delicate work surface. The fabric cutting mat is a great way to take the worry out of Duck Tape® crafting and speed up the process while you’re at it. Begin by cutting your fabric vinyl into your desired shape. My foldover clutch is 12 by 16 inches and the tablet clutch is 15 by 10 (I left space for my power adapter and a notepad and pen). Lay your vinyl fabric, vinyl outside down, on the mat. Tape down row after row of Duck Tape® with slight overlap as shown.
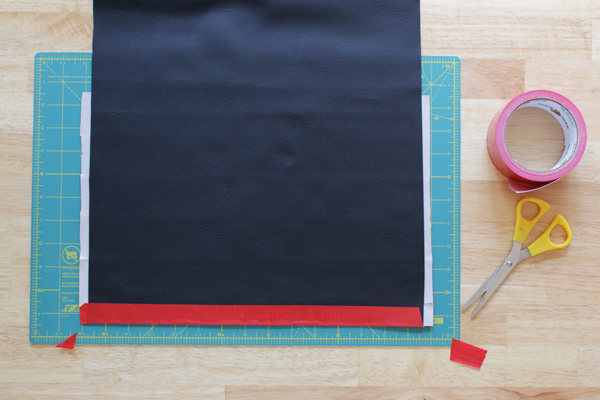
 Carefully peel the vinyl and tape from the mat (if you don’t have a fabric cutting mat, this is the step that’s a little more challenging sans-mat), and flip it over. Cut the corners from the tape as shown in the lower right of the photo below, and fold over the edge of the tape that isn’t stuck to the vinyl.
 Trim the Duck Tape® down so the edges are even, fold them over and tape them down.
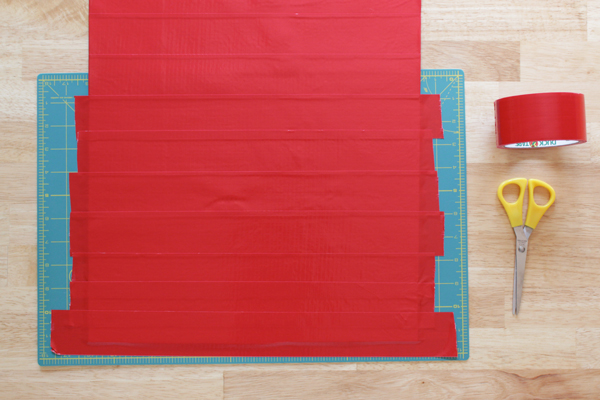
 Flip the vinyl/tape back over so it’s tape side up. Cover the remainder of the vinyl fabric in tape as before, all the way down. All of the back of the vinyl fabric should be covered in tape at this point.
 Carefully flip the vinyl/Duck Tape® back over once again. Cut the corners out, fold down the edges’ tape, trim the edges of the tape, and fold those down just like before. Your vinyl fabric will be entirely covered on one side with tape at this point.
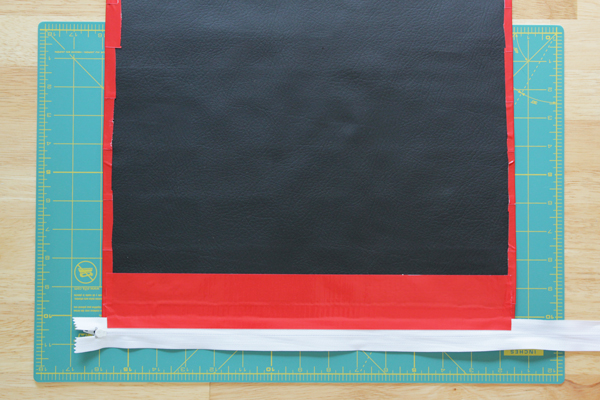
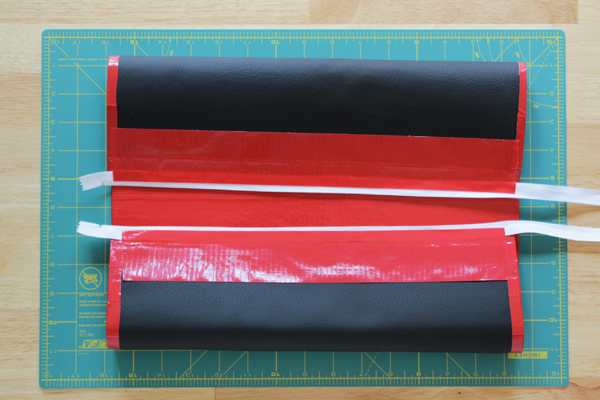
Now it’s time for the zipper…
Lay the zipper down as shown and tape it into place with Duck Tape®.
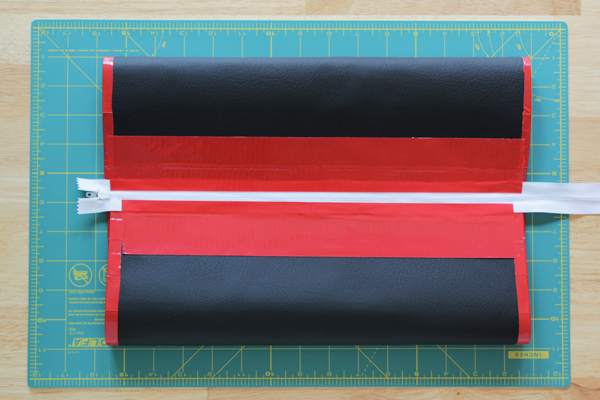
 Bring the other end up to meet the free side of the zipper and secure that end with Duck Tape® as well.
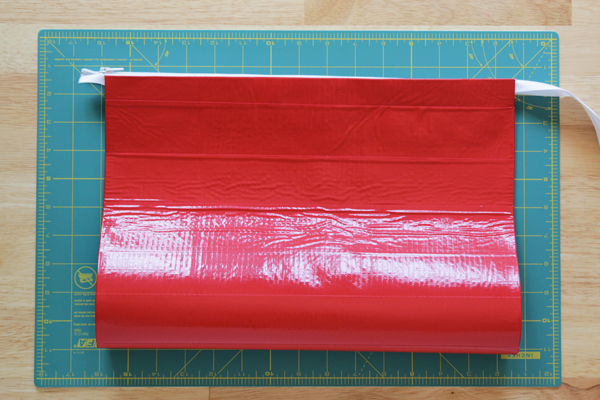
 Unzip the zipper and turn your soon-to-be clutch/pouch/case right side (Duck Tape® side) out.
 Rezip the zipper.
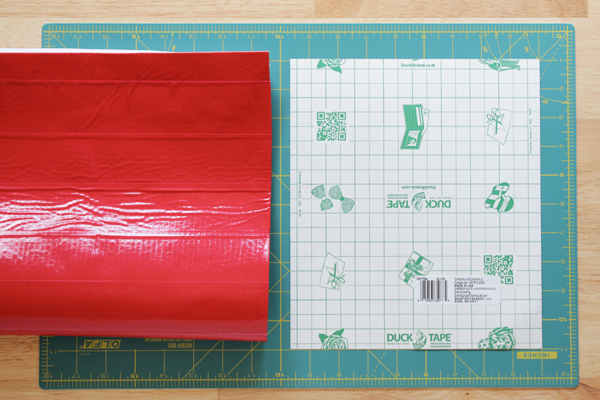
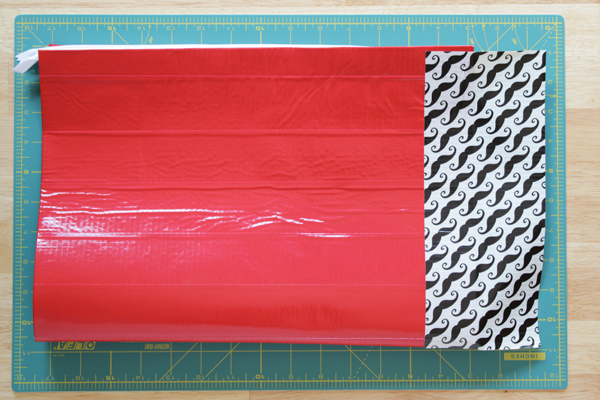
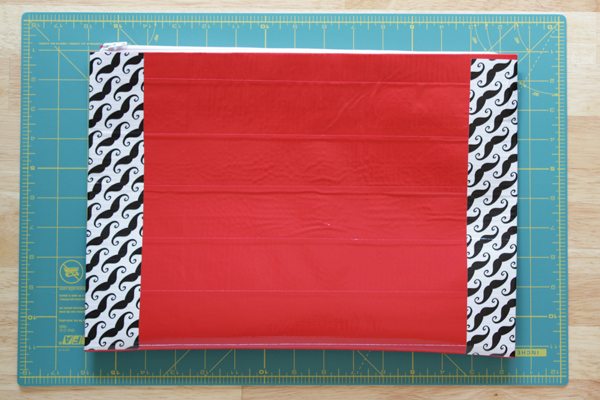
 For this last step, I used Duck Tape® sheets in a contrasting pattern, but you can use the rolls if you prefer. Just fold a piece of Duck Tape® over the open sides of the pouch to seal them as shown. I like the Duck Tape® sheets because they’ve got handy grids on the backing to help you cut straight lines as needed.
 There you go! A really straightforward, no sew pouch that can be adapted to a bazillion different needs. What would you make with this design?
 You can buy Duck Tape at Walmart in all kinds of cool patterns for back to school time. Duck Tape® should definitely be on your to-buy list because it can be used for everything from making pouches like the ones I shared today to emergency pants hemming to backpack repair to hanging posters in a dorm room. If you’re looking for more Duck Tape® project ideas, you should follow @TheDuckBrand on social media.


Leave a Reply