• 0 items$0.00
  • Skip to primary navigation
  • Skip to main content
  • Skip to primary sidebar
  • Skip to footer

Hands Occupied

Colorful knitting, crochet, latch hook and macrame from craft book author & designer Heidi Gustad.

  • BLOG
    • Knitting
    • Crochet
    • Latch Hook
    • Macramé
    • Punch Needle
  • ABOUT
  • Shop
  • Nav Social Menu

    • Instagram
    • Pinterest
    • RSS
    • TikTok
    • YouTube

How-to: Aluminum Tiered Pendant Light Fixture

April 26, 2012 4 Comments

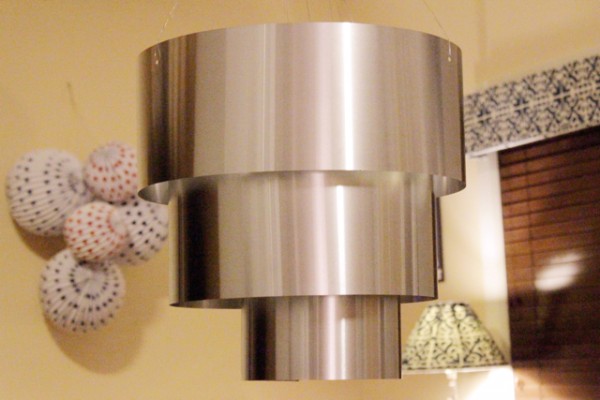
Metallics are so in this year. I had been looking to buy or make a hip, industrial light fixture for my place for awhile when I came across this tiered brass number at Urban Outfitters. Read on to check out how to make one for yourself for about $15.

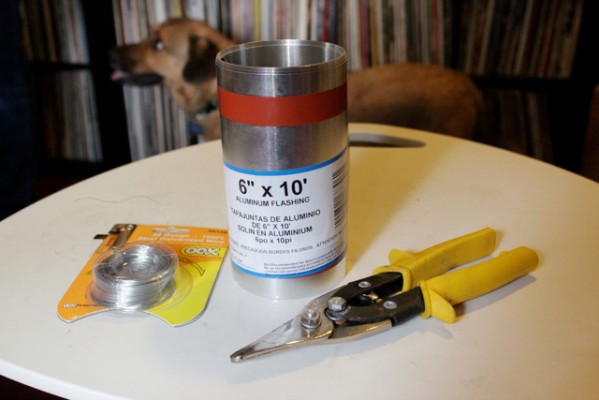
Supplies

10 ft. aluminum flashing, 6 in. tall

tin snips

tape measure

a crayon

single hole punch

wire

nail clippers
Directions

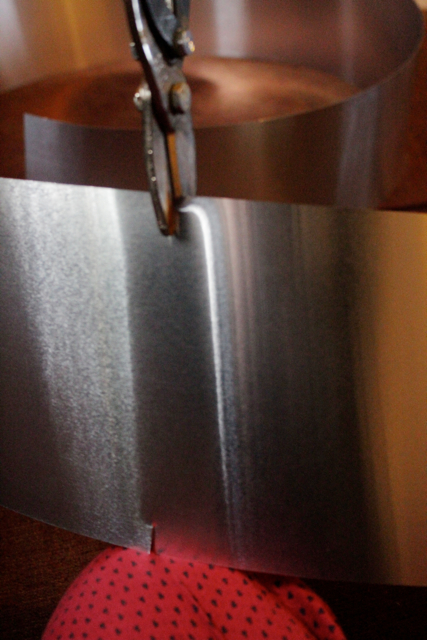
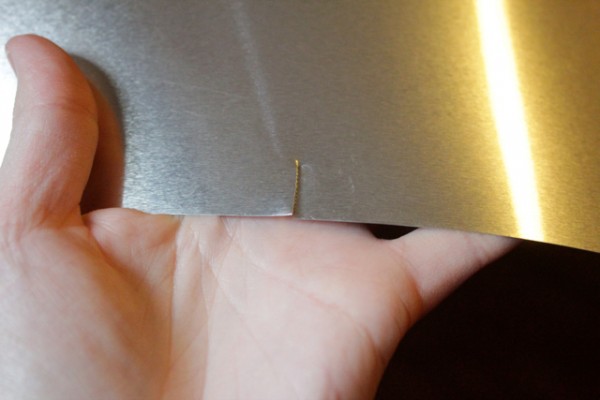
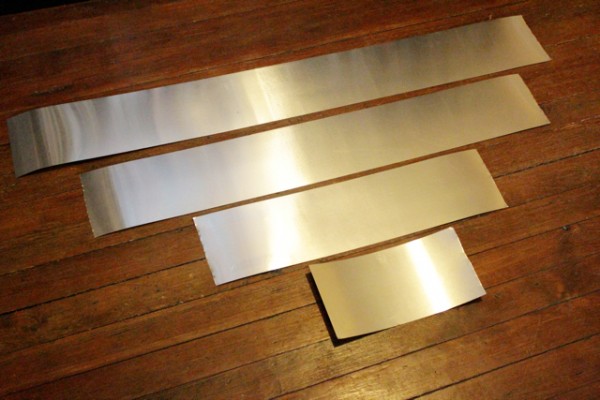
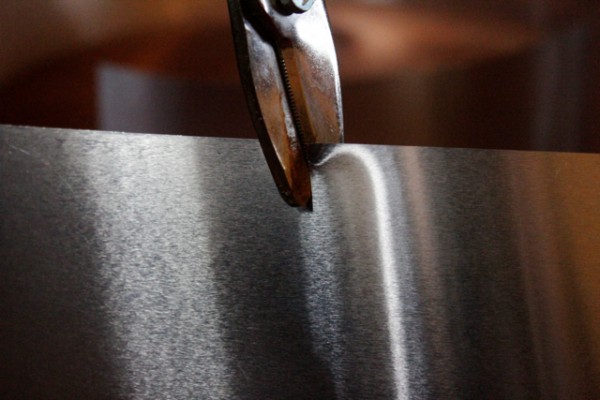
Cut your aluminum flashing into 4′, 3′, 2′ and 1′ lengths using the tin snips. I snipped a guide line at the top and bottom of my flashing as shown to help cut straight.
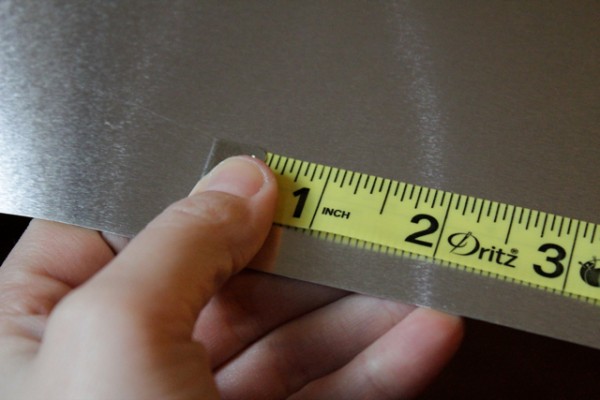
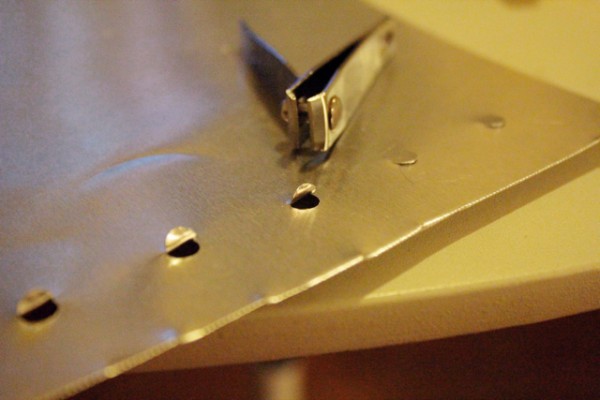
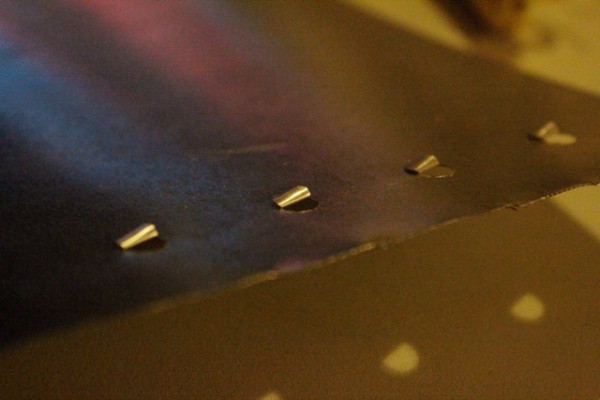
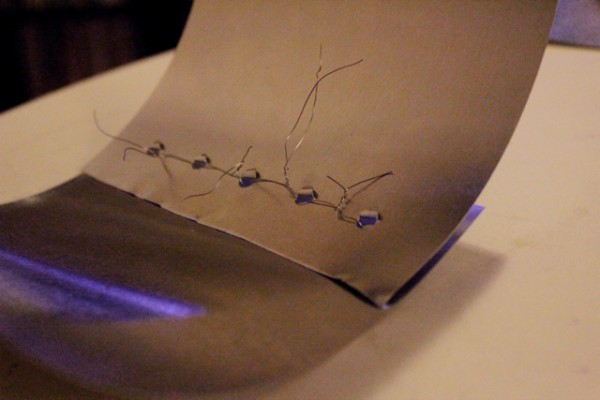
Set aside the 1 foot piece. Mark each end of each piece of aluminum. I made 5 marks, 1 inch apart with crayon. Punch holes at each marker using a paper punch (yep, a paper punch on metal!). I was only able to punch about half way through the metal. Then, I used a nail clipper to bend back the metal and flattened it the rest of the way with my thumb. Check it out:
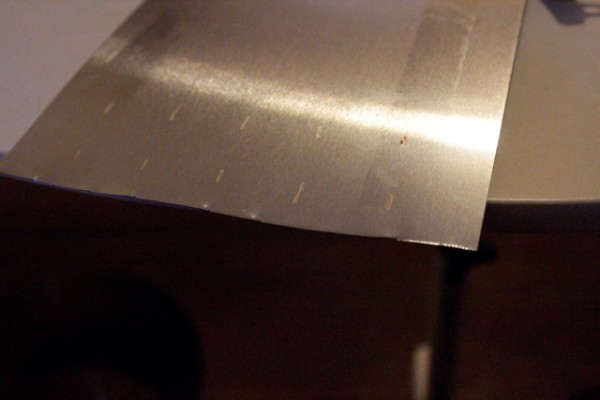
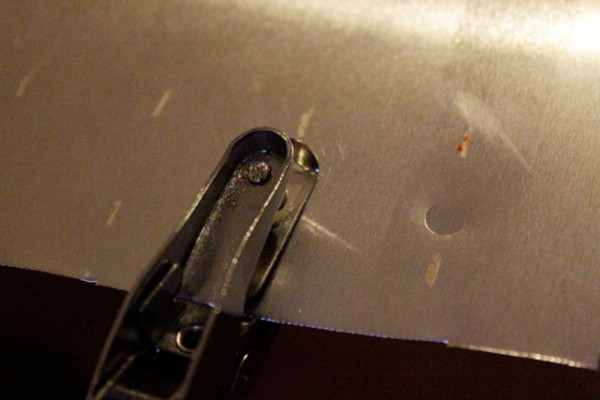
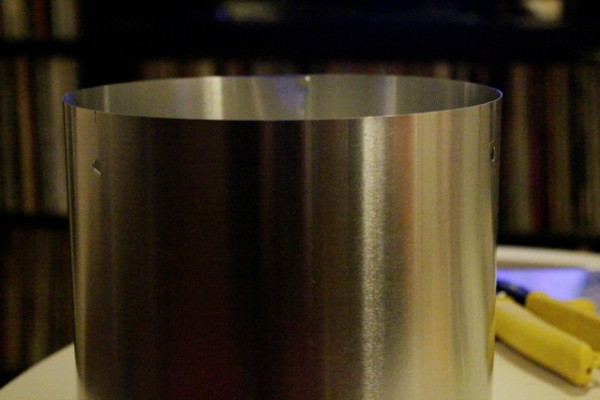
Next, cut four short lengths of wire. Thread the wire like twist ties through every two adjacent holes to create a loop with your aluminum flashing piece.
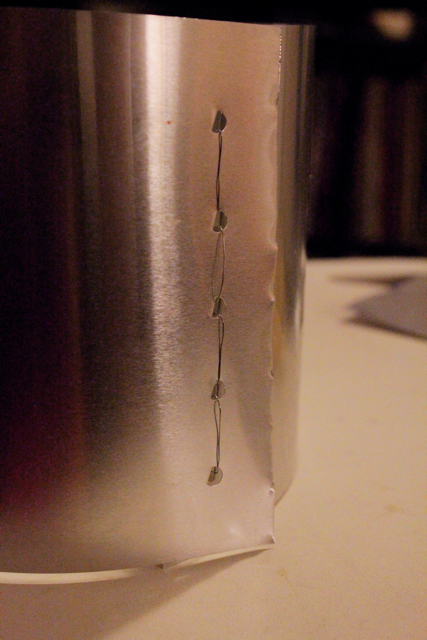
Punch three evenly-spaced holes along the top of each loop using the hole punch/nail clipper technique above.

Thread a long piece of wire through each of these new holes and hang them as shown. The hardest part is is getting them to hang level. I’m going to put three i-hooks in the ceiling around a built-in light fixture in my apartment to install this in my house. I can’t wait!
 

Filed Under: Home Decor, How-to Tagged With: aluminum flashing, diy, home decor, light fixture, tin snips, urban outfitters

About Heidi

Heidi Gustad is a craft book author, designer & creator specializing in yarn crafts like knitting, crochet, latch hook & macramé. Her first book, Latch Hook: 12 Projects for the Modern Maker, is out now.

Previous Post: « Inspiration Thursday
Next Post: How-to: Stencil with Freezer Paper »

Reader Interactions

DID YOU LIKE THIS POST?
Visit similar articles...

  • Stenciled Coffee Table MakeoverStenciled Coffee Table Makeover
  • Giant Valentine’s Day God’s EyeGiant Valentine’s Day God’s Eye
  • Style this DIY: Swiss Army BlanketStyle this DIY: Swiss Army Blanket
  • 50 Great DIY Gift Ideas50 Great DIY Gift Ideas

DON’T MISS ANOTHER UPDATE

Comments

  1. Jennifer Davey

    April 30, 2013 at 7:23 pm

    Hi Heidi,
    A Crop-a-dile makes quick work of punching through tin, chip board and other thick items. you will get a nice clean hole and can save your nail clippers for your fingers. :)

    Reply
    • Heidi

      April 30, 2013 at 10:30 pm

      Yeah- I made that before I learned about the cropadile! Thanks, lady :)

      Reply
  2. will

    November 4, 2013 at 8:24 pm

    Aluminum flashing is an awesome material for a lot of different projects. As a long-term fan of the stuff, I have some additional advice to offer about it:

    a. Like any other thin-gauge sheet metal, Aluminum flashing has EXTREMELY sharp and slightly-serrated edges when cut with anything but a wide-mouthed, industrial-grade, bench-or-floor-mounted shear. BE CAREFUL! Chain mail and a falconer’s gauntlet wouldn’t really be overkill here.

    b. If you want to cut nice straight lines in your flashing, just use a steel ruler as a straight edge and score the aluminum with any ol’ razor knife – after a few firm passes with a dull razor, flashing snaps quickly and easily. A fresh razor blade will work as well, of course, but dull is better because the Aluminum will make it an old one in approximately 5 seconds.

    c. A 1/16″ drill bit makes holes in Aluminum flashing like nobody’s business (and if you’re a crafter who’s not comfortable using a power drill, you might not want to be messing around with those aforementioned sharp edges anyhow.)

    Reply
    • Heidi

      November 4, 2013 at 8:34 pm

      Thank you! That project was my first ever using aluminum flashing- your tips will be really helpful for my next one :)

      Reply

Leave a Reply Cancel reply

Your email address will not be published. Required fields are marked *

This site uses Akismet to reduce spam. Learn how your comment data is processed.

Primary Sidebar

Heidi Gustad from Hands Occupied / Craft Book Author and Knitting, Crochet, Latch Hook and Macrame Designer

Hi! I’m Heidi (she/her/hers), a craft book author & pattern designer specializing in knitting, crochet, latch hook & macrame. Really anything with yarn! ❤️  My work combines vintage and modern design elements, featuring bold colors and graphic motifs.

EMAIL NEWSLETTER

Never miss a tutorial with these short & sweet monthly updates.

Find Me on Social Media

  • Instagram
  • Pinterest
  • TikTok
  • YouTube
Latch Hook by Heidi GustadDiscover Unique Items

Footer

INSTAGRAM

handsoccupied

Helping yarn crafters untangle various techniques on the internet since 2010
🧶 Really into intarsia
Stay up-to-date 💌 & shop the latest patterns ⤵️

Heidi Gustad 🧶 knitting & yarn crafts
Wow! I am floored by the awesome response to the S Wow! I am floored by the awesome response to the Spiral Hill Sweater Vest. Thank you. 🙏🏻❤️ If you love this pattern & didn’t know already, we are going to be doing a knit along (KAL) from October 1-29 featuring this spooky sweater vest & lots of tutorials, especially for the intarsia part. 
.
Later today my newsletter will be coming out with additional Knit Along details, so if you’re not already signed up, now is a great time - the 🔗 is in my b1o. 
.
Pictured: My Spiral Hill Sweater Vest pattern from the new Nightmare Before Christmas knitting book by @tanisknits. Model is wearing size 1 with 2” of positive ease, knit in @brooklyntweed Imbue Worsted. Vest images via @insighteditions 
.
#spiralhillsweatervest #handsoccupied #nightmarebeforechristmasknittingbook
At long last! I can share the Spiral Hill Sweater At long last! I can share the Spiral Hill Sweater Vest, my contribution to the new book Disney Tim Burton’s Nightmare Before Christmas: The Official Knitting Guide to Halloween Town and Christmas Town, out now! 🎃💀 
.
I’m hosting a knit along (KAL) October 1-29 for anyone who’d like to knit this vest along with a group & learn a little about intarsia while we’re at it. I’ve got weekly tutorials planned to help you knit this worsted weight sweater vest, and there’s a prize package giveaway at the end for KAL participants too. Details are on my site - you know where to find the 🔗 I think. 😉
.
Book by @tanisknits 
Publisher @insighteditions 
Yarn @brooklyntweed Imbue 
Find it wherever fine books are sold. 
.
#handsoccupied #nightmarebeforechristmas #intarsia #sweatervest #knittingpattern #knittingbook #spiralhill #knitting_inspiration #knitting
Since there was some interest in stills of my WIPs Since there was some interest in stills of my WIPs closet after this weekend’s quick tutorial, here are few. ✂️ The tutorial is one post back in my feed as a video.
.
As you can see, I didn’t worry about the wire hangers all being perfectly uniform, but it doesn’t matter to me. Also, this closet holds a lot! Despite that, it is already at capacity. Since the hanging bags don’t appear to be recyclable, I want to reuse them as long as possible. Who knows, maybe this will be a way to limit my WIPs? 😅
.
P.s. In the third photo you can see how I use this system to store the original swatches, scraps, yarn ball bands, & notes from a design project all together. 
.
#handsoccupied #wips #craftstorage #yarnstorage #yarncrafts #knitting_inspiration #craftstudio #craftroom #craftcloset
How to convert a closet into WIPs storage with jus How to convert a closet into WIPs storage with just a few supplies ✂️
.
When I was a librarian, we would use these hanging bags to circulate books with audiobook CDs. They came to mind when I wanted to develop a filing cabinet-like system for my differently-sized WIPs. To fit in my studio closet, a standard bedroom closet, they just needed custom hangers. 🤙🏻 
.
HOW TO MAKE THE HANGERS
1. Carefully cut approx. a 9” (23 cm) length of flexible 3 mm aluminum wire.
2. Near the end of a large knitting needle or dowel, wrap the wire around it as you would a twist tie. 
3. Bend the other end into a hook shape, perpendicular to the circle shape you just created. 
4. Hang like a hanger in a closet, as shown. 
.
#handsoccupied #handmadelife #knitting_inspiration #craftcloset #craftroom #craftroomorganization #craftroomstorage #craftroomdecor #crocheter #latchhook #knittersofinstagram #wip #wips #hangingstorage
It’s time for the monthly review and giveaway! T It’s time for the monthly review and giveaway! This go around, get to know two new sister yarns from @manosyarnsusa, Marla and Sami, and enter to win a skein of each to try for yourself. 
.
What makes these yarns sisters is that, while dyed differently, they’re the same weight and come in intentionally coordinating color palettes. For my review, I opted for a sky-inspired combo of Sami in Natural and Marla in Nube. 🌧️ 
.
Check out the full review & enter the giveaway at the link in my bio. 
.
#handsoccupied #yarnreview #manosdeluruguay #knitting_inspire #crochet #yarngiveaway #knitters #yarn #crochetersofinstagram
Load More... Follow on Instagram

Copyright © 2023 / Foodie Pro Theme On Genesis Framework / Branding by Ink + Mortar
All Site & Shop Policies / Privacy Policy / Cookie Policy