• 0 items$0.00
  • Skip to primary navigation
  • Skip to main content
  • Skip to primary sidebar
  • Skip to footer

Hands Occupied

Colorful knitting, crochet, latch hook and macrame from craft book author & designer Heidi Gustad.

  • BLOG
    • Knitting
    • Crochet
    • Latch Hook
    • Macramé
    • Punch Needle
  • ABOUT
  • Shop
  • Nav Social Menu

    • Instagram
    • Pinterest
    • RSS
    • TikTok
    • YouTube

Stenciled Coffee Table Makeover

March 19, 2014 7 Comments

Stenciled Coffee Table Makeover at Hands Occupied

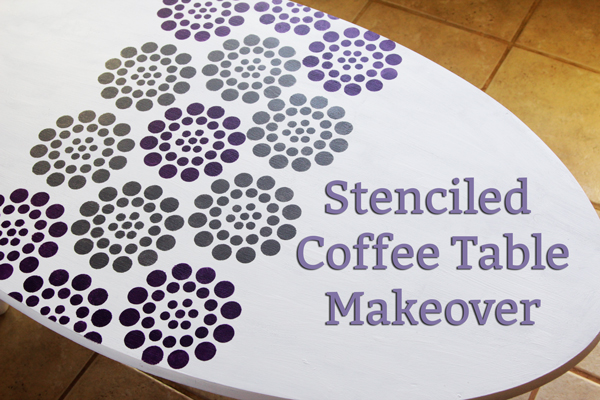
I got to try one of the new Stencil1 stencils this week, which I was really excited about because I’m a fan of Ed Roth, the designer behind the line. He’s known for bridging the gap between street artists like Banksy and craft world faves like Martha. In short, this line is right up my alley. I’ve had a sad, sad, sad coffee table lying around for years, and these larger stencils were just what the DIY doctor ordered for it.

Supplies

old coffee table
sandpaper or power sander
window scraper/razor blades (optional)
primer
FolkArt Multi-Surface Paint
sponge spouncers
waxed paper or silicon craft mat
Stencil1 Small Asian Dots Stencil (available at Jo-Ann Fabric & Craft Stores)
masking tape
measuring tape
pencil

Directions

Phase 1: Prep Table
(and a bit about my bummer of a DIY surprise) 

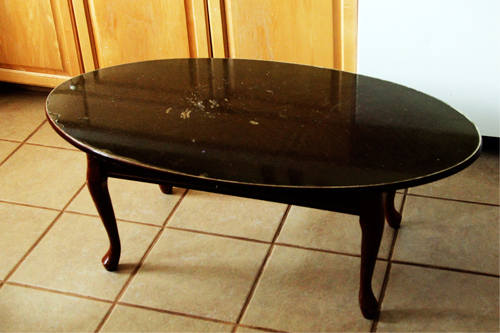
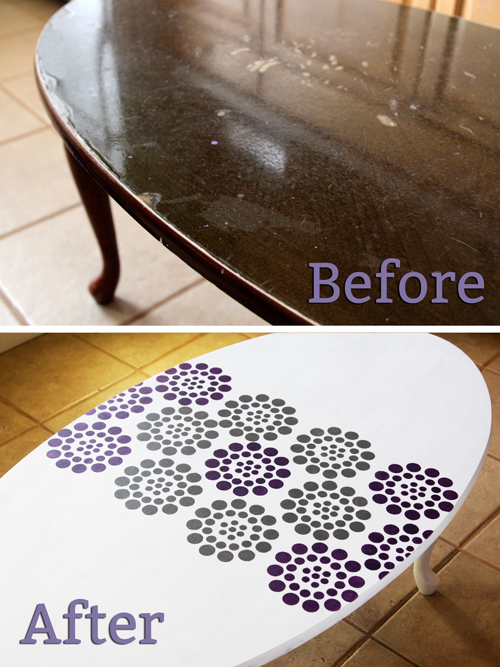
So this was my nasty table just a few days ago. Cracked, worn at the edges, some varnish worn off, a handful of paint splotches here and there… the kind of wear you’d expect out of a coffee table gotten for free in college that’s been used way too many times as a crafting surface. But I’d kept this thing on hand for a makeover project for years because it had a pretty woodgrain pattern on top.

Stenciled Coffee Table Makeover

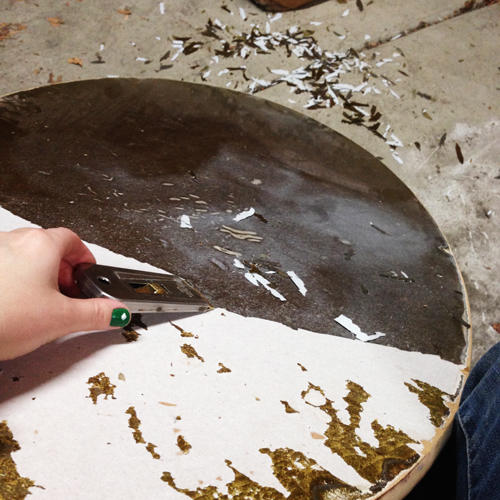
The first step was to sand off the varnish from the table. I hit a bit of a roadblock when I realized my tabletop had a weird plastic, non-varnish layer stuck HARD to it. The solution for me was a window scraper that uses razor blades. I basically needed something that could slide under the edge of the plastic and pop it off. As I worked, it became clear that the super lovely woodgrain pattern on the top of my table was just a big sticker held down by that strange plastic. Wah wah… Good thing I had a makeover planned for it in the first place!

Stenciled Coffee Table Makeover

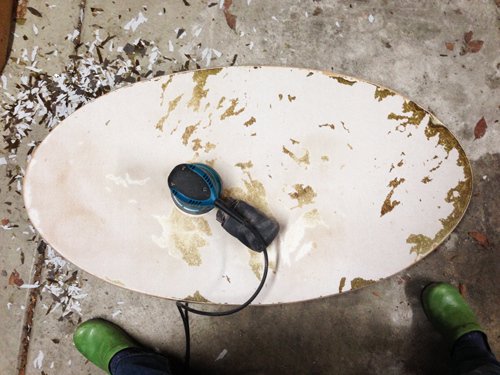
Ok, so if you are working with a normal table without strange stickers and plastic, your job will be much easier – just sand off the varnish. If you want, you can get a solution to paint on varnish to dissolve it, but I sometimes like doing a physically-involved project, so I whipped out the ole power sander.

Stenciled Coffee Table Makeover

After you’ve sanded everything off, paint your table with a layer of primer and let dry. Now you’re ready for the fun part!

Phase 2: Stencil!

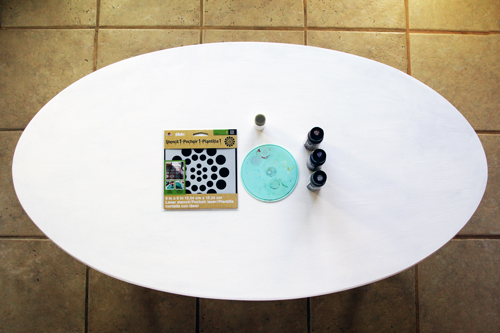
Gather your stenciling supplies.

Stenciled Coffee Table Makeover

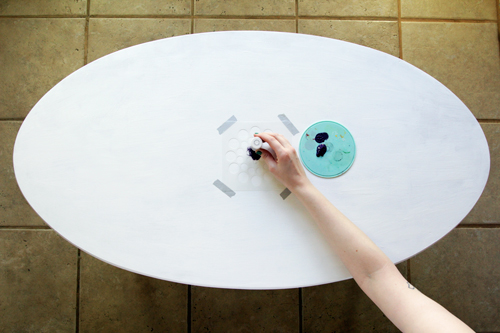
Using a tape measure, find the center of your table and lightly mark it with a pencil. Line up your stencil on it and secure with masking tape. Squirt some paint onto a mat or waxed paper, dab your spouncer in it, wipe excess paint from your spouncer onto the mat, and dab paint all over the stencil, being careful not to let paint leak under it.

Stenciled Coffee Table Makeover

Carefully remove your stencil and rinse it off, as well as the spouncer. (The stencils are mylar, so they’re super easy to rinse off, btw.) Before moving on to the next stencil, make sure your stencil and spouncer are both completely dry. As I’ve said in other stenciling tutorials, you’ve got to work with a dry spouncer every time to avoid diluting your paint and affecting how it will turn out.

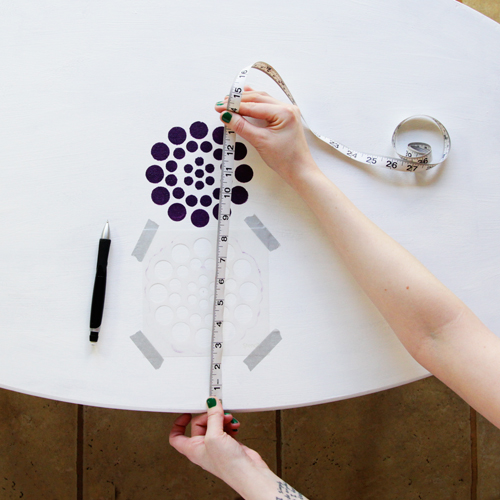
Next, measure and mark where you want your second stencil to go and again secure it with tape.

Stenciled Coffee Table Makeover

Stenciled Coffee Table Makeover

Repeat the spouncer painting, stencil and spouncer cleaning, measuring and marking until you’ve achieved a design you like for your table.

Stenciled Coffee Table Makeover

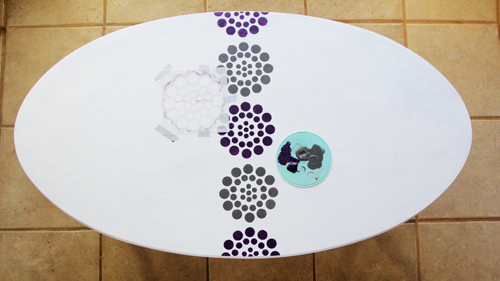
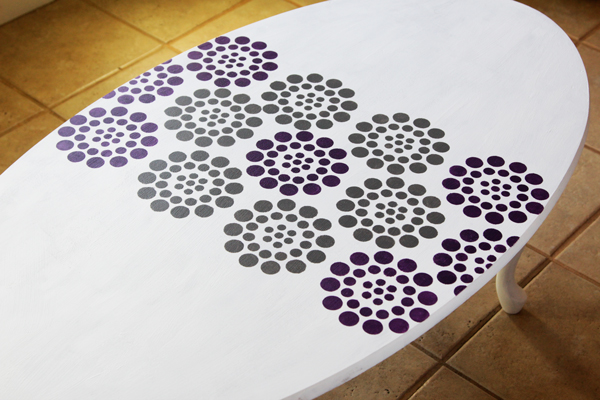
I used light gray and eggplant colors for my design, and I like how it turned out!

Stenciled Coffee Table Makeover

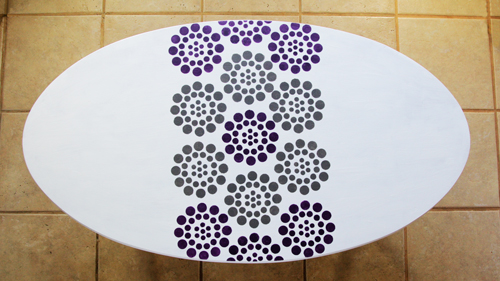
The design is kind of like an uber-modern lace detail right down the middle of my newly-not-hideous coffee table. I tried to mimic the center motif of the stencil in placing my gray circles since they made me think of flowers and beehives, which are personal faves.

Stenciled Coffee Table Makeover at Hands Occupied

Look at the difference! I can’t believe I tolerated the janky sad table as it was for so long – we’re talking like 5 years. What was I thinking?

Stenciled Coffee Table Makeover at Hands Occupied

What do you think? Love it? Hate it? What would you do differently? I love hearing inspiring ideas from you guys. :)

This post was written as part of a campaign with The Blueprint Social for Plaid Crafts. All opinions are my own. To learn more about Plaid products, check out their Plaid Palette Blog, Pinterest, Facebook,Twitter, YouTube, or Instagram!

Filed Under: Giveaways, Reviews & Sponsored, Home Decor, How-to Tagged With: banksy, coffee table, diy, ed roth, furniture, home decor, makeover, paint, refinishing, sanding, stencil1, stenciling

About Heidi

Heidi Gustad is a craft book author, designer & creator specializing in yarn crafts like knitting, crochet, latch hook & macramé. Her first book, Latch Hook: 12 Projects for the Modern Maker, is out now.

Previous Post: « How to Block a Knitting Project
Next Post: Weekly Reader »

Reader Interactions

DID YOU LIKE THIS POST?
Visit similar articles...

  • How-to: Upholstered Arm Rest End Tables | Hands OccupiedHow-to: Upholstered Arm Rest End Tables
  • Wild about woodWild about wood
  • How-to: Ginormous Metallic Canvas ArtHow-to: Ginormous Metallic Canvas Art
  • Robin’s Egg Nest BraceletRobin’s Egg Nest Bracelet

DON’T MISS ANOTHER UPDATE

Comments

  1. Carol

    March 19, 2014 at 9:59 pm

    Wow! It turned out great.

    Reply
  2. Carissa Bonham

    March 19, 2014 at 10:26 pm

    I love this! It turned out awesome

    Reply
  3. Leslie

    March 19, 2014 at 11:46 pm

    Wow! That came out awesome!!!!

    Reply
  4. Amy Anderson

    March 22, 2014 at 3:20 pm

    I LOVE this!! Such a great job!

    Reply
  5. Jennie B

    April 7, 2014 at 3:39 pm

    Love it! Would you recommend putting a layer of clear varnish over the top for added protection? I’d be worried that the paint would scratch or chip easily.

    Reply
    • Heidi

      April 7, 2014 at 4:34 pm

      Yes! That’s a great idea to make the table last!

      Reply
  6. Unique

    March 15, 2015 at 3:04 pm

    Very nice.Loved this.

    Reply

Leave a Reply Cancel reply

Your email address will not be published. Required fields are marked *

This site uses Akismet to reduce spam. Learn how your comment data is processed.

Primary Sidebar

Heidi Gustad from Hands Occupied / Craft Book Author and Knitting, Crochet, Latch Hook and Macrame Designer

Hi! I’m Heidi (she/her/hers), a craft book author & pattern designer specializing in knitting, crochet, latch hook & macrame. Really anything with yarn! ❤️  My work combines vintage and modern design elements, featuring bold colors and graphic motifs.

EMAIL NEWSLETTER

Never miss a tutorial with these short & sweet monthly updates.

Find Me on Social Media

  • Instagram
  • Pinterest
  • TikTok
  • YouTube
Latch Hook by Heidi GustadDiscover Unique Items

Footer

INSTAGRAM

handsoccupied

Helping yarn crafters untangle various techniques on the internet since 2010
🧶 Really into intarsia
Stay up-to-date 💌 & shop the latest patterns ⤵️

Heidi Gustad 🧶 knitting & yarn crafts
It’s time for the monthly review and giveaway! T It’s time for the monthly review and giveaway! This go around, get to know two new sister yarns from @manosyarnsusa, Marla and Sami, and enter to win a skein of each to try for yourself. 
.
What makes these yarns sisters is that, while dyed differently, they’re the same weight and come in intentionally coordinating color palettes. For my review, I opted for a sky-inspired combo of Sami in Natural and Marla in Nube. 🌧️ 
.
Check out the full review & enter the giveaway at the link in my bio. 
.
#handsoccupied #yarnreview #manosdeluruguay #knitting_inspire #crochet #yarngiveaway #knitters #yarn #crochetersofinstagram
If only knitting a whole project took 39 seconds… 😮‍💨 
.
In this video, you can see how the Intarsia Flower Pillow pattern knits up - two flat panels, one with intarsia, both are blocked, and then they’re seamed. Find the pattern on @hi.ravelry & my website, just search Intarsia Flower Pillow. 🌸 
.
P.S. I’m really smiling in this video while seaming the pillow, so I guess I’m proving last week’s claim that I truly enjoy that sometimes-dreaded task. 😆🫣
In knitting, a Left Lifted Increase (LLI) lets you In knitting, a Left Lifted Increase (LLI) lets you add a stitch in between two columns of stitches that leans to the left. Similar to an M1L, LLIs allow you to increase nearly invisibly.
.
To learn more about lifted increases, including when to use them and how they differ from Make 1s, head to the 🔗 in my profle. 
.
Have you ever used lifted increases? I used M1’s almost exclusively for a long time when I needed to inc between stitches, but when I designed the Intarsia Flower Pillow pattern, I needed something that would allow me to increase a lot near my cast on, and M1’s resulted in edge curling. The more you know! 🌈 
.
Yarn: @lionbrandyarn Wool Ease from my Stash / Neddles: @boyeyarncrafts - Just remembered these are the needles I learned to knit on at age 8. 😂
.
#handsoccupied #knitting #learntoknit #howtoknit #sweaterknitting #knitinspiration #knittersofinstagram #liftedincreases
Last week I got to hang out with my family & helpe Last week I got to hang out with my family & helped babysit my red-headed niece and nephew. So here’s some plane knitting, and a couple pictures (shared with permission) of my babysitting adventures.
.
Lessons learned: 1️⃣ Trying to knit around 2 toddlers, 2 cats & 2 large dogs is pretty hard. 2️⃣ I learned during water color time that pink and black make “colorful black.” 🩷🖤 3️⃣ Toddlers do NOT care about your rainbow sorting of their toys. 4️⃣ Toddlers are very good at finding mischief in a very short amount of time, what a surprise. 😂
.
#handsoccupied #knitting #placesyoucanknit #knitters #knitinpublic #handmadelife #knitting_inspiration
Weaving in ends & seaming with mattress stitch are Weaving in ends & seaming with mattress stitch are both so useful for garment knitting! But for me, weaving in ends can feel like a chore while the latter feels like I’ve successfully done magic. 🧙🏻‍♀️ Does anybody else run into this phenomenon? Are you the opposite? Any theories as to why they feel different? 
.
In this video, I’m finishing my brand new Intarsia Flower Pillow. 🌸 I’m working with @universal_yarn Uni Merino & the pattern is available at the 🔗 in my b1o. 
.
#handsoccupied #intarsiaflowerpillow #intarsia #intarsiaknitting #knitting #colorwork #knitpillow #knittinginspiration #knittersofinstagram
Load More... Follow on Instagram

Copyright © 2023 / Foodie Pro Theme On Genesis Framework / Branding by Ink + Mortar
All Site & Shop Policies / Privacy Policy / Cookie Policy