• 0 items$0.00
  • Skip to primary navigation
  • Skip to main content
  • Skip to primary sidebar
  • Skip to footer

Hands Occupied

Colorful knitting, crochet, latch hook and macrame from craft book author & designer Heidi Gustad.

  • BLOG
    • Knitting
    • Crochet
    • Latch Hook
    • Macramé
    • Punch Needle
  • ABOUT
  • Shop
  • Nav Social Menu

    • Instagram
    • Pinterest
    • RSS
    • YouTube

How-to: Chainmaille 101 & Chainmaille Earrings

February 18, 2013 Leave a Comment

How-to: Chainmaille 101 & Chainmaille Earrings | HandsOccupied.com

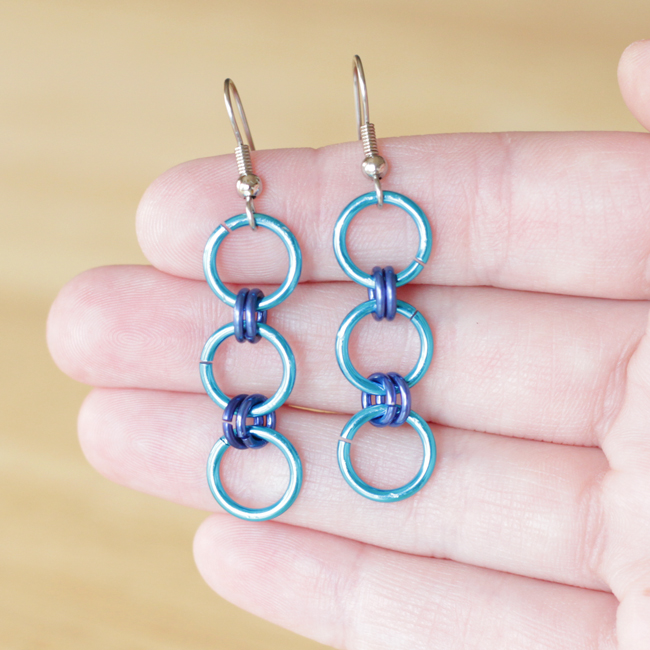
A couple weeks ago, I decided to sit down and learn how to do chaimaille. My friend Darlene is a chainmaille artist with an Etsy shop, and I’ve had the privilege of watching her work on some chainmaille projects in person. Watching her work is what sparked my interest in trying chainmaille for myself. It’s a fascinating art that can be challenging, but the results are beautiful. Today, I want to share some basic tips with you and show you how to make a very easy set of earrings. Even beginners can make these in just a few minutes!

Chainmaille 101

How to properly open a jump ring

How-to: Chainmaille 101 & Chainmaille Earrings | HandsOccupied.com

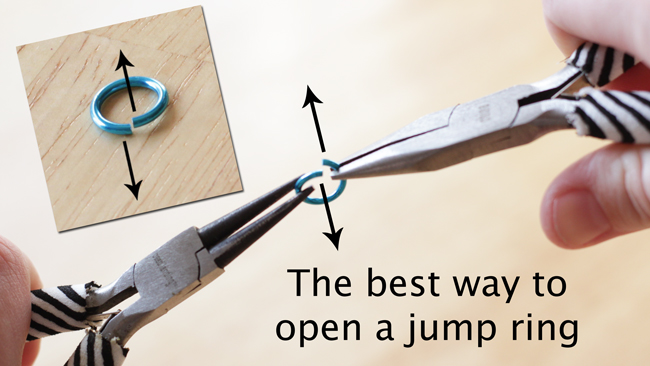
The first and biggest lesson to learn if you’re new to chainmaille (or jump rings) is that you’re not trying to break out of prison. You want to bend the ring as little as possible and in the directions shown above. If you open your ring horizontally, or perpendicular to the way shown, you’re weakening the metal of your ring. The more metal is bent, the weaker it gets. Keep that in mind on any chainmaille project. You can also check out more chainmaille tips and tricks here.

Easy Chainmaille Earrings
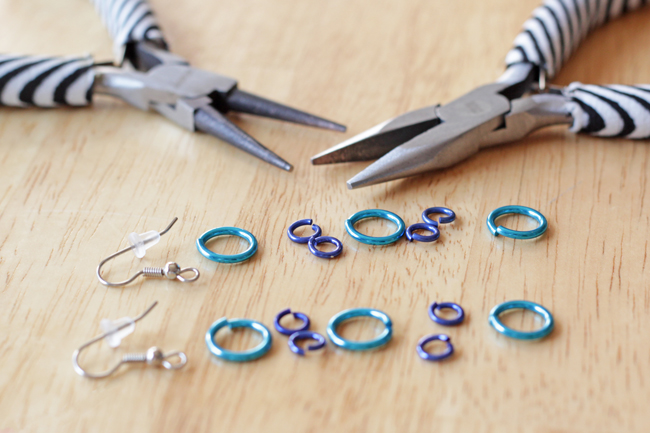
Supplies

2 earwires
6 large jump rings
8 small jump rings
two chainmaille pliers, available here

How-to: Chainmaille 101 & Chainmaille Earrings | HandsOccupied.com

Directions

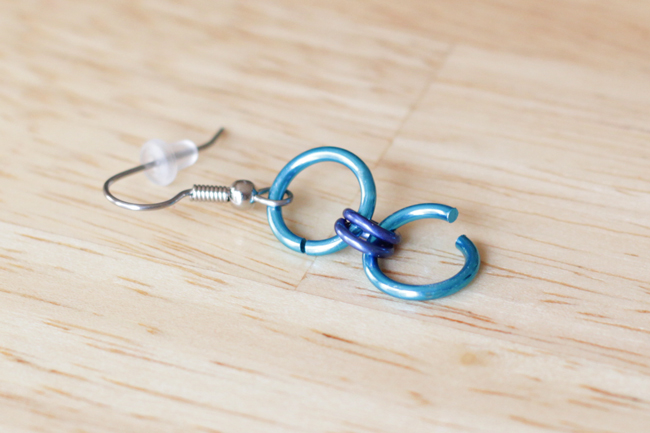
Begin by opening all six of your large rings. Grab one large, open ring and place two small rings and an ear wire onto it, as shown. Close the large ring.

How-to: Chainmaille 101 & Chainmaille Earrings | HandsOccupied.com

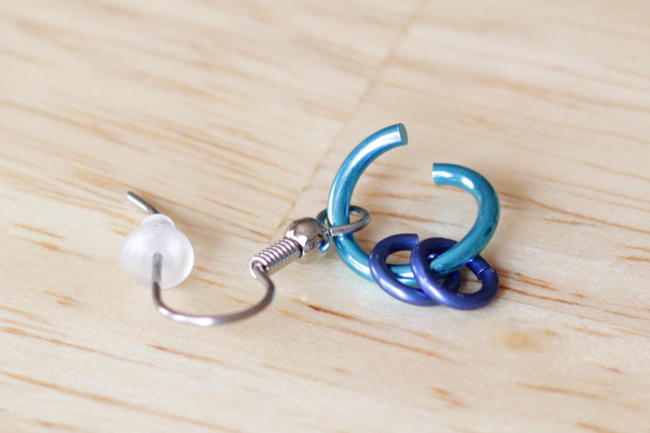
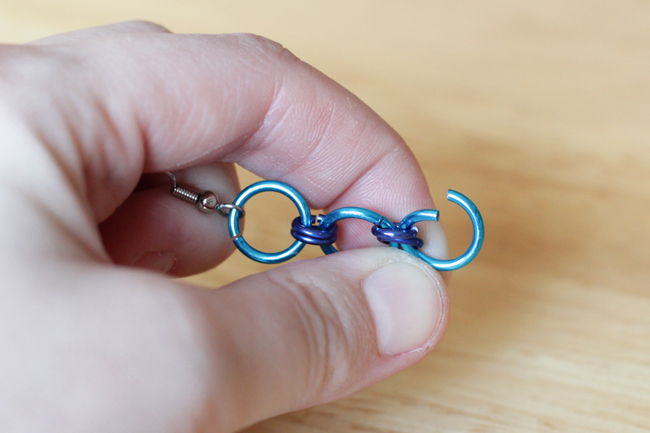
Attach another large, open ring to the two small rings.

How-to: Chainmaille 101 & Chainmaille Earrings | HandsOccupied.com

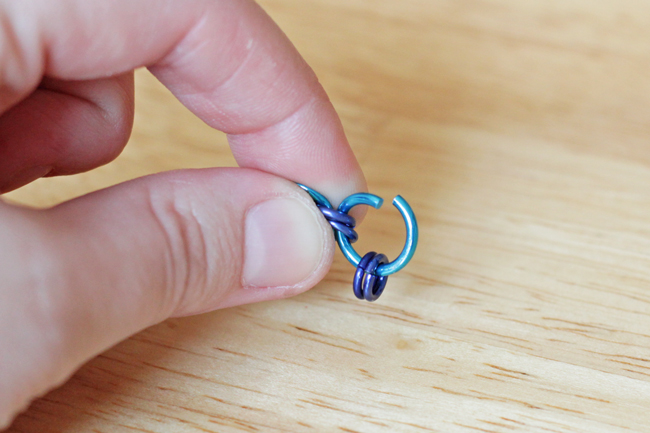
Holding your project as shown, pinching the first two small rings, add two more small rings to the open ring and close it.

How-to: Chainmaille 101 & Chainmaille Earrings | HandsOccupied.com

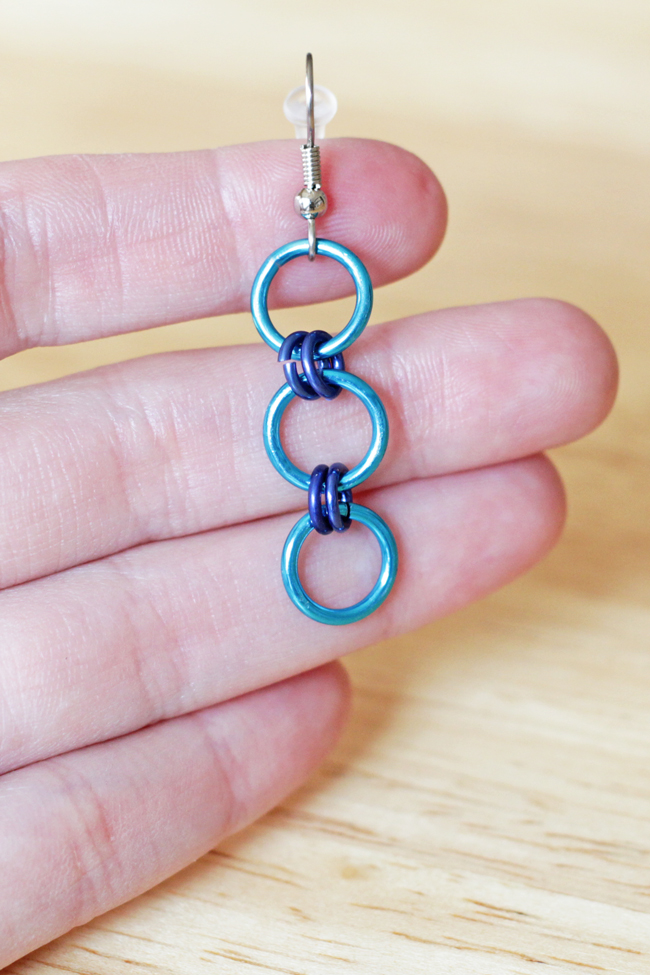
Hook a final large ring onto the last two small rings and close it. One earring down! Repeat the whole process for your second earring.

How-to: Chainmaille 101 & Chainmaille Earrings | HandsOccupied.com

How-to: Chainmaille 101 & Chainmaille Earrings | HandsOccupied.com

I want to give a shout out to Chicago’s Blue Buddha Boutique, who provided the supplies and its founder, Rebecca Mojica, who shared her design for this project with us. Tune in Wednesday for more chainmaille goodness! 

Filed Under: DIY Style, How-to Tagged With: 101, blue buddha boutique, chainmaille, chicago, diy, do bats eat cats, earrings, jewelry, jump rings, style

About Heidi

Heidi Gustad is a craft book author & content creator in love with primary colors & vintage vibes. She specializes in knitting, crochet, latch hook and macramé, and her first book, Latch Hook: 12 Projects for the Modern Maker, is out now!

Previous Post: « Snowflake Candles
Next Post: Blue Buddha Boutique Giveaway! »

Reader Interactions

DID YOU LIKE THIS POST?
Visit similar articles...

  • Blue Buddha Boutique Giveaway!Blue Buddha Boutique Giveaway!
  • 10 DIY Knotted Jewelry Projects10 DIY Knotted Jewelry Projects
  • How-to: Washi Tape Statement NecklaceHow-to: Washi Tape Statement Necklace
  • Blue Buddha Boutique Jewelry Kit Winner! Blue Buddha Boutique Jewelry Kit Winner!

DON’T MISS ANOTHER UPDATE

Leave a Reply Cancel reply

Your email address will not be published. Required fields are marked *

This site uses Akismet to reduce spam. Learn how your comment data is processed.

Primary Sidebar

Heidi Gustad from Hands Occupied / Craft Book Author and Knitting, Crochet, Latch Hook and Macrame Designer

Hi! I’m Heidi (she/her/hers), a craft book author & pattern designer specializing in knitting, crochet, latch hook & macrame. Really anything with yarn! ❤️  My work combines vintage and modern design elements, featuring bold colors and graphic motifs.

UPDATES BY EMAIL

Monthly highlights sent to your inbox.

Find Me Elsewhere, If You’re There

  • Instagram
  • Pinterest
  • YouTube
Latch Hook by Heidi GustadDiscover Unique Items

Footer

INSTAGRAM

handsoccupied

Craft book author & pattern designer ❤️💛💙
knitting, crochet, latch hook & macramé
.
Please email for pattern support. 🧶

Heidi Gustad 🧶✂️
How to do a one-step provisional knitting cast on How to do a one-step provisional knitting cast on / a.k.a. crochet provisional cast on, scrap yarn cast on
.
I read recently that tiktok and Instagram are being used as search engines more and more. 🤔 I thought since I’m going to all the work of making tutorials on YouTube, I should experiment with making a quick version of them for other platforms. There are obvious teaching limitations to vertical video, short-form content like this, but I think I covered the gist of this cast on in a minute. The YouTube version also covers how to unzip this cast on because there was time for it 👍🏻 L1nk is in my profile. 
.
I’m very much looking for feedback as I continue to make instructional knitting & craft videos. Sometimes good tutorials are hard to find, and (ideally polite) feedback helps me improve. 
.

#handsoccupied #provisionalcaston #knitting #knititngtutorial #knittersofinstagram #crochethook #knittingtutorial
For the first time in a long time, there’s a new For the first time in a long time, there’s a new tutorial from Hands Occupied! 🎉 The video is live on YouTube & the blog. 
.
The post covers what provisional cast ons are & how they differ, and the video covers how to work a one-step provisional cast on using scrap yarn and a crochet hook. (This is a great one to save for future reference.)
.
I learned several names for this method while researching this video & post. Crochet provisional cast on, one-step cast on, scrap yarn cast on - if you know even more names for this technique, please share! 
.
#handsoccupied #provisionalcaston #knitting #scrapyarn #crochethook
Working on a sample for some upcoming videos. It’s an overcast day with intermittent sunshine & I have a scruffy little sidecar. 🐶 Can’t complain! 
.
What’s on your needles this week? 
.
Yarn: @debbieblissknits Cashmerino Aran 
.
#handsoccupied #knitting #knittinglife
Peg boards and craft room organization go together Peg boards and craft room organization go together like peanut butter and jelly. So, as you can see, do latch hook tools and screwdriver organizers! 🪛 
.
I think this trick translates to any tool with a thick handle, so leather working tools, punch needles, print making tools, etc. should work! What other tools am I, a needlecrafter, blanking on right now? 
.
#craftorganization #handsoccupied #latchhook #latchhooking
Pegboard storage is my favorite for craft supplies Pegboard storage is my favorite for craft supplies, so getting a few hung in my new studio has been a priority. Here’s my first attempt. 🔨 
.
Details: This pegboard panel is for organizing my knitting needles, latch hook tools, sewing thread, etc. It doesn’t need to hold much weight, so I didn’t anchor this into a stud - just used basic drywall anchors. I’ve also got a set of two 2’x4’ panels for another spot in my studio, and those will need a stud/more than 3 drywall anchors. Wish me luck! 
.
[description: video features a woman hanging a panel of pegboard using a square dowel and drill]
Load More... Follow on Instagram

Copyright © 2023 / Foodie Pro Theme On Genesis Framework / Branding by Ink + Mortar
All Site & Shop Policies / Privacy Policy / Cookie Policy