• 0 items$0.00
  • Skip to primary navigation
  • Skip to main content
  • Skip to primary sidebar
  • Skip to footer

Hands Occupied

Colorful knitting, crochet, latch hook and macrame from craft book author & designer Heidi Gustad.

  • BLOG
    • Knitting
    • Crochet
    • Latch Hook
    • Macramé
    • Punch Needle
  • ABOUT
  • Shop
  • Nav Social Menu

    • Instagram
    • Pinterest
    • RSS
    • TikTok
    • YouTube

How-to: DIY Wool Swiss Army Blanket

January 24, 2013 Leave a Comment

How-to: DIY Wool Swiss Army Blanket | HandsOccupied.com

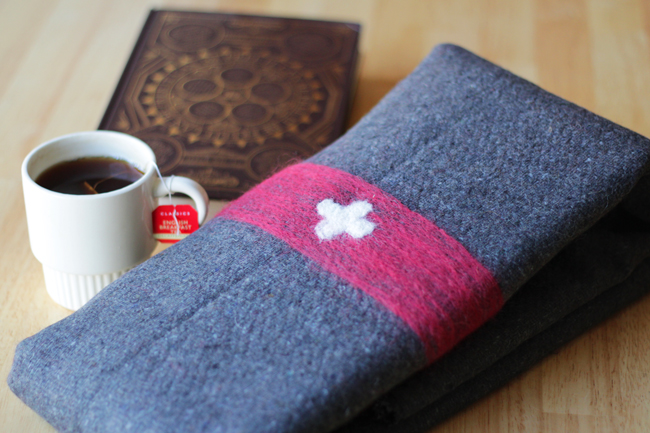
Today’s project is a toasty wool blanket – perfect for the uber cold weather we’ve been having in Chicago. This blanket is definitely stylish, but its real beauty lies in a few factors: 1) It’s easy to make. 2) You can do most of this project with the blanket on your lap, keeping you warm. 3) This is a DIY that will run you around $30, and the authentic blankets that inspired this project cost up to $300, depending on where you get them.

If you’re not convinced to do this project yet, I’m not sure we can be friends. No really, if you’ve literally never done a craft, you can do this project. I’m not kidding.
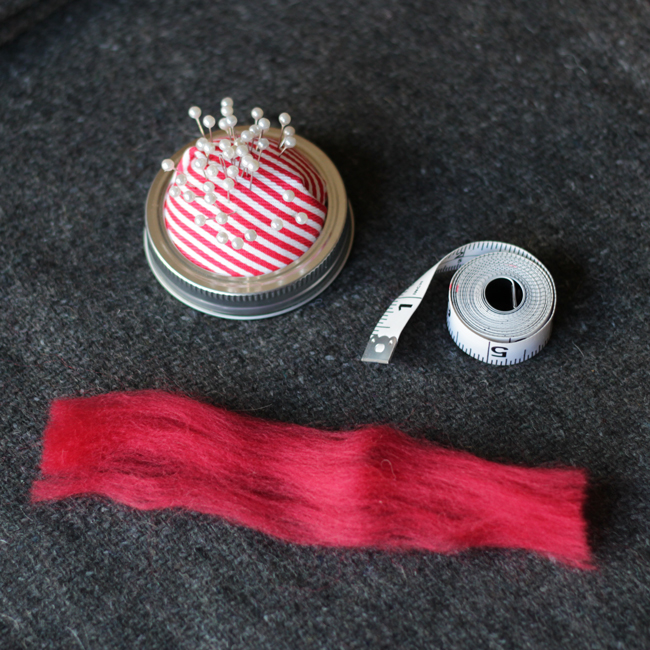
Supplies

a wool army surplus blanket (Mine was $4 at the Fleet Farm in my hometown.)
ruler/tape measure
a few pins or chalk
red & white roving – $10-15
needle felting mat – $10-20
needle felting tool – ~$15

Directions

Unwrap/unroll your wool blanket. It has to be wool for it to really look like a Swiss Army blanket. Also, it has to be wool for the needle felting to work. PS: Needle felting is the name of the crafting technique used for this project.

My sweet $4 blanket is wool blended with some artificial material that reeked of gasoline when it came out of the package. I didn’t let mine air out and wound up with a headache from the smell, so I recommend giving it 24 hours to detox before starting the project. My blanket doesn’t smell at all after a couple weeks out of the package.

To start, lay your blanket out on a clean floor. My blanket is about 60 by 80 inches, so I had to move some furniture to have enough space. Using a ruler and chalk or pins, make a line all the way down your blanket on its shortest side. Your line can be wherever you want, but if you’re going for accuracy, it should be relatively near the edge of the blanket, probably 12 or 16 inches from the edge. I’ve seen several variations in stripe style on Swiss Army blankets, so I honestly just picked a number and went with it. Once your first line is pinned or chalked, make another line parallel to it. Again, you can arbitrarily pick a width. The width I personally went with was 4 inches. So if your first line was 16 inches from the edge of the blanket, your second line should be 20 total inches from that same edge. Let me know by dropping a comment if you get stuck or want help picking measurements – I’m happy to help!

How-to: DIY Wool Swiss Army Blanket | HandsOccupied.com

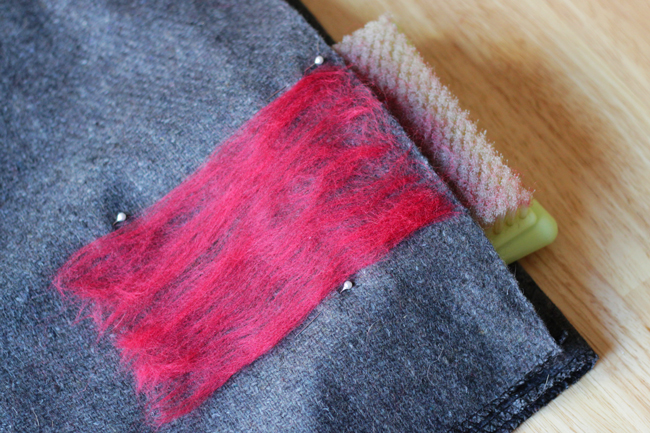
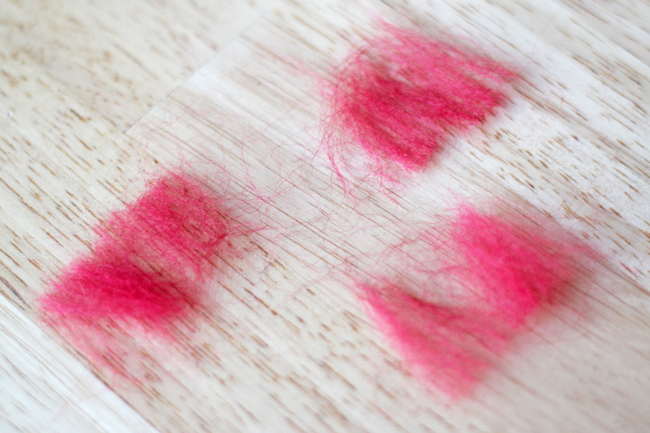
Next, unfold your red roving and separate it into long pieces. Lay your roving out on your blanket, spreading it so its evenly laid out between your pins or chalk markings, as shown.

Note that the pictures in this tutorial are just a swatch to demonstrate how the whole needle felting process works. In actuality, you’ll have a long strip of roving all the way down your blanket. If your roving isn’t as long as your blanket is wide, never fear! I’ll show you how to blend more roving in to cover any patches or add length. It’s easy, I promise.

How-to: DIY Wool Swiss Army Blanket | HandsOccupied.com

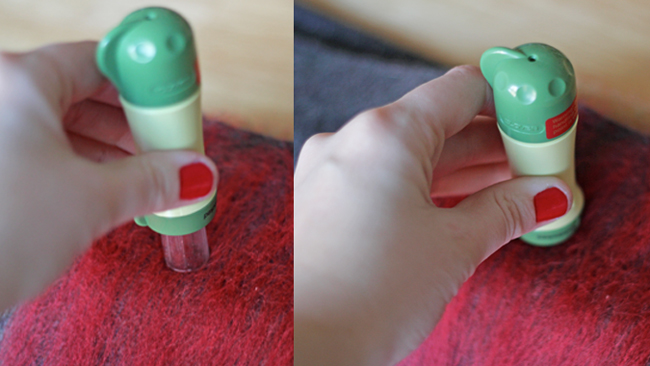
An intro to your needle felting tools

Since this might be your first needle felting project, here’s how a needle felting tool works. Most are spring-powered and come with a plastic safety guard and a lock. Needle felting needles are super sharp and have little barbs on them to help force the roving into the wool you’re working on (or into itself if that’s the kind of project you’re doing – see my beginning needle felting tutorial for an example of another way to needle felt). Follow the package directions for how to unlock, lock and clean your specific needle felting tool.

How-to: DIY Wool Swiss Army Blanket | HandsOccupied.com

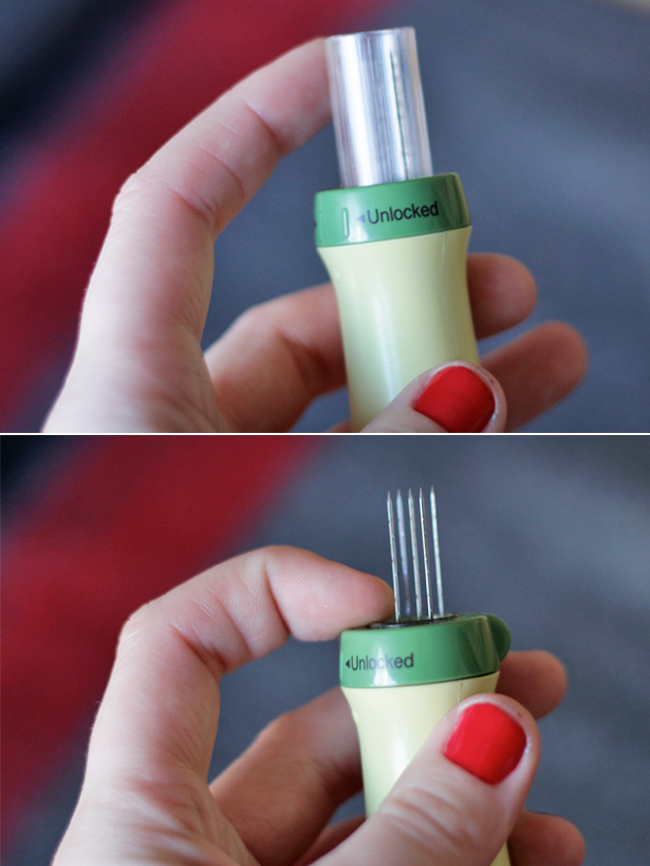
You can also check out this video from Clover, the company whose needle felting tools I own. The video is great because it shows you just what needle felting looks like in action.

Back to the project.

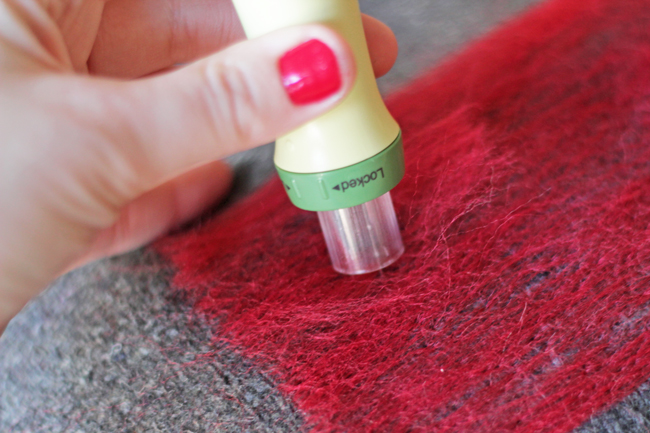
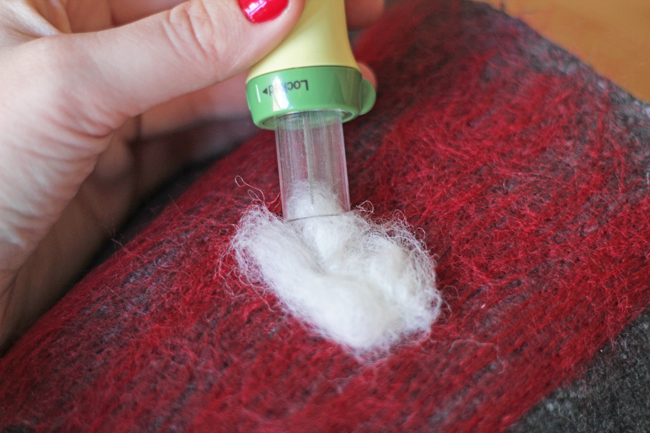
Once your roving is laid out and you’ve mastered your needle felting tool, grab your needle felting mat. Place it under your wool blanket, grab your needle felting tool, and start stabbing! Just stab all over that red stripe, all the way up and down, side to side until the roving is throughly blended into the blanket.

How-to: DIY Wool Swiss Army Blanket | HandsOccupied.com

After your first pass stabbing the roving into the blanket, it’ll be secure enough that you can hunker down with a movie and your needle felting mat & tool and stab away right on your lap. Just please remember to keep that mat between the blanket and your lap. For real, those needles are effing sharp!

How-to: DIY Wool Swiss Army Blanket | HandsOccupied.com

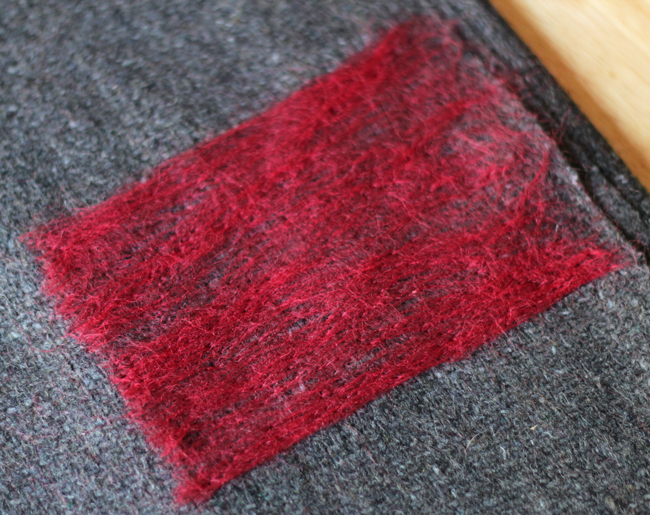
You’ll be stabbing (needling is the proper term for what you’re doing) for awhile if your blanket is large like mine. If you think you’re done, do a few more passes all the way up and down your blanket, just to make sure everything is well needled. The picture above is an example of what it will look like when you’re in good shape.

Dealing with thin patches & adding more length to your stripe

Notice my little patches where the grey blanket peeps through? Cut or tear yourself some teensy pieces of roving from your stash and thin them out a lot. Set them on top of where you’d like to thicken your stripe, put your mat underneath, and needle (stab) them into place.

How-to: DIY Wool Swiss Army Blanket | HandsOccupied.com

The fun thing about working with wool is that it’s basically like velcro – it wants to stick to itself. It also likes to blend. To add more length to your stripe, just plop down another strip of the roving like you did to begin with, overlap the new roving with the existing, and needle it until it looks like one continuous piece. How-to: DIY Wool Swiss Army Blanket | HandsOccupied.com

Adding the cross

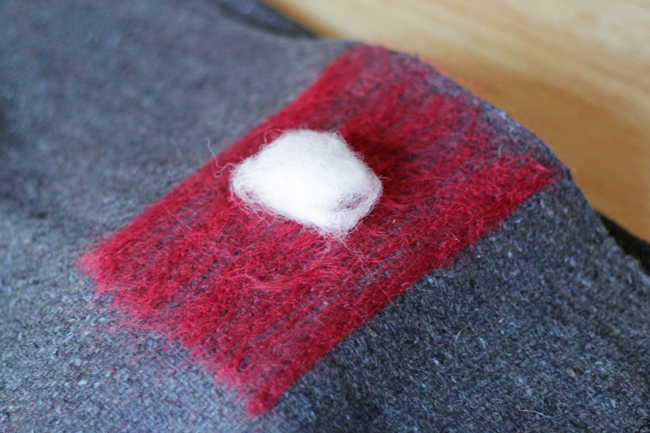
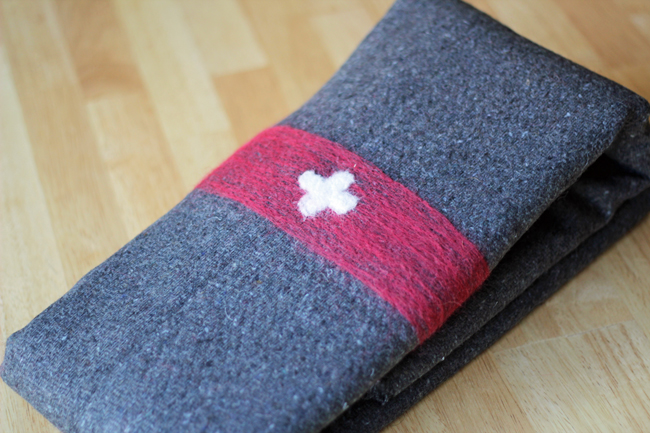
When your red stripe is all set, it’s time to add the white Swiss cross to complete the blanket, yay! Grab a little bit of white roving, pulling to thin it out, and then fold it into a little cotton ball shape. The size of the cross is, again, up to you – just like the width of the stripe. Place it in the exact center of your blanket (you’ll have to measure this for yourself), and needle it onto the red stripe with your tool & mat.

How-to: DIY Wool Swiss Army Blanket | HandsOccupied.com

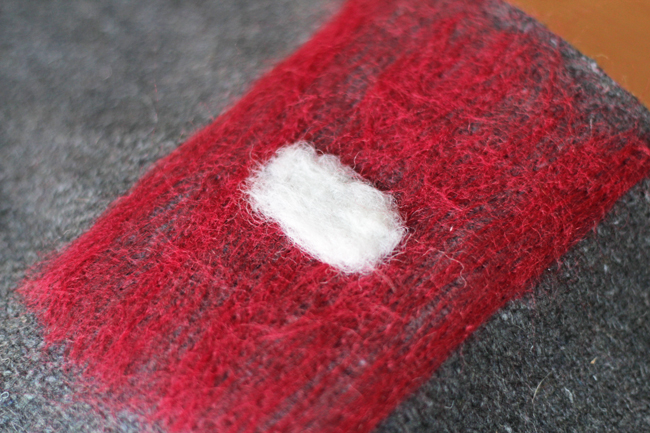
If it’s getting a little less cross-shaped, just stab it into submission. I really like doing what’s pictured below when I freehand applique shapes on to fabric with my needle felting tool. I kinda scoop pieces of roving that are sticking out wrong with the plastic safety cover of my tool, and stab them in. This works really well for me.

How-to: DIY Wool Swiss Army Blanket | HandsOccupied.com How-to: DIY Wool Swiss Army Blanket | HandsOccupied.com

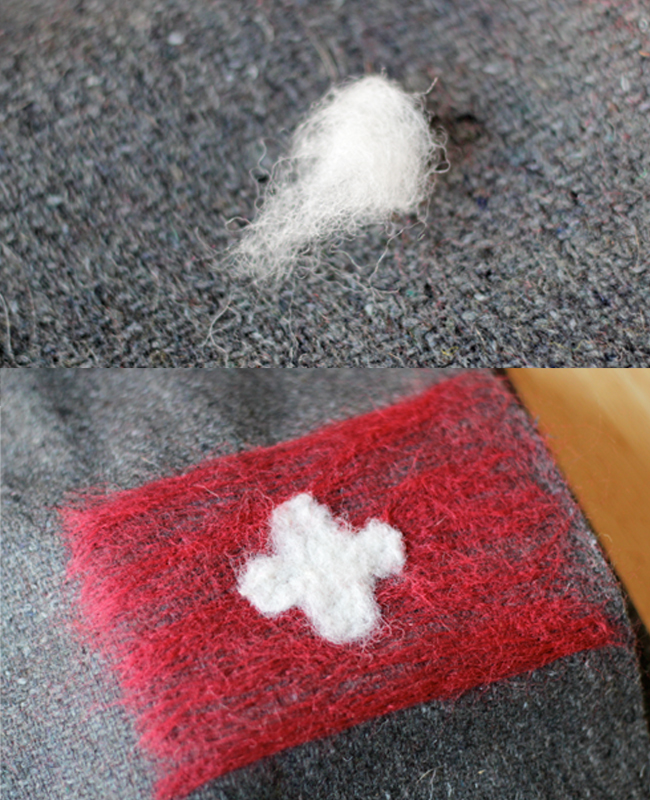
After your cross has its first stripe, it needs wings. Create an even smaller roll of white roving and pull on it so it has a thin tail as shown. Needle the thin tail onto the center of the cross, and the thick part onto the red stripe. You can patch in more white roving to help with the shape of the cross or use the scooping technique to shape it too.

How-to: DIY Wool Swiss Army Blanket | HandsOccupied.com Ta da! You’re now a needle felting wizard. Also, you just saved yourself at least a hundo on a throw for your apartment.

How-to: DIY Wool Swiss Army Blanket | HandsOccupied.com

I wasn’t compensated for this project by any of the companies I linked to. I just linked to some supplies I know are available at my local craft stores.

Filed Under: Home Decor, How-to Tagged With: 101, beginner, diy, easy, home decor, needle felting, roving, stabbing, style, swiss army, thrifty, vintage

About Heidi

Heidi Gustad (she/her) is a craft book author & designer specializing in yarn crafts. Her work combines vintage and modern design elements, prioritizing color and graphic motifs. Her first book, Latch Hook: 12 Projects for the Modern Maker, is out now.

Previous Post: « New Product Faves from the CHA Conference
Next Post: What to do with a Swiss Army blanket »

Reader Interactions

DID YOU LIKE THIS POST?
Visit similar articles...

  • How-to: Decorate with Glue DotsHow-to: Decorate with Glue Dots
  • Twinkle in Your Eye Sunglasses Twinkle in Your Eye Sunglasses
  • Giant Valentine’s Day God’s EyeGiant Valentine’s Day God’s Eye
  • DIY FYI: Finger KnittingDIY FYI: Finger Knitting

Leave a Reply Cancel reply

Your email address will not be published. Required fields are marked *

This site uses Akismet to reduce spam. Learn how your comment data is processed.

Primary Sidebar

Heidi Gustad from Hands Occupied / Craft Book Author and Knitting, Crochet, Latch Hook and Macrame Designer

Hi! I’m Heidi (she/her/hers), and I’ve been helping yarn crafters untangle various techniques on the internet since 2010. I got my start here, as a blogger, and since then I’ve shared more than a few tutorials here and on YouTube as I’ve grown as a pattern designer. 🧶 

learn more / work with me

Find Me on Social Media

  • Instagram
  • Pinterest
  • TikTok
  • YouTube
Latch Hook by Heidi Gustad

Footer

INSTAGRAM

handsoccupied

Knitting & yarn crafts designer 🧶
.
Stay up-to-date 💌 & shop new patterns ⤵️

Surprise, I had a baby 3 weeks ago! The pregnancy Surprise, I had a baby 3 weeks ago! The pregnancy was high risk, so I chose to be quiet about it online until recently.

My son was born on Saturday 8/30. My water broke at 2 am, and he was born at 11:26 am, which the nurses kept telling us was very fast for a first labor. He weighed 5 lbs 14.2 oz and was 18.5” long. 

My husband & I both put so much effort into educating ourselves about pregnancy and natural childbirth, and when we found out an induction was highly likely, we embraced the lack of control we had in favor of hoping the baby would arrive healthy. To our surprise, he arrived spontaneously at 37 weeks + 4 days, and the labor progressed so quickly, we did end up with a natural labor experience (which I was glad I was prepared for! 😮‍💨😅).

We’re all happy and healthy. June has become his little nanny dog and makes sure we know when he’s crying or has a dirty diaper. We are very grateful for all the love and support we’ve already received from friends and family. Much love to everyone! ❤️❤️❤️
POV: Showing you how my new Bevelled Tank pattern POV: Showing you how my new Bevelled Tank pattern fits with no ease vs. 4” of positive ease. There’s a bit more length to the cotton (brighter color) sample, but both are cropped and feature shoulder seams designed to sit an inch back onto the shoulder instead of on top, giving it a little swing. Length is easily adjustable for folks looking for less of a crop. 
.
Pattern: Bevelled Tank by @handsoccupied for @pompommag x @hobbii_yarn summer 2024. Available for free from Hobbii at the 🔗 in my profile.
Yarn pictured: @kelbournewoolens Skipper and Camper. 
Dress form is adjusted to a 36” chest and ~5’3”ish in height. 
Human has a 40” chest and is 5’5”.
Both skirts are vintage.
.
#pompomxhobbiisummer2024 #handsoccupied #intarsia #handmade #knitting #colorwork
Let’s talk about fit and ease! . During the Beve Let’s talk about fit and ease!
.
During the Bevelled Tank design process for @pompommag, I knit 2 samples using 2 different @KelbourneWoolens yarns. One was in Skipper (100% cotton, second photo) and the other was in Camper (100% 2 ply wool). The Skipper sample was knit for a 36” bust, which measures in at 40” with 4” of positive ease. And I knit the Camper Sample for my 40” bust with a 44” finished measurement. (BTW, I’m 5’5” for folks that find that measurement helpful in visualizing fit.)
.
Based on the size chart for the Bevelled Tank, that means I knit one size 3 sample and one size 4. As designed, I conveniently fit a size 4 as intended with 4” of positive ease. When I wear the 3, there is no ease at all because the garment and my body are both 40” in size. Comparing the 2 garments, you can see how the fiber content (cotton vs. wool) and fit (no ease vs. 4” of positive ease) makes a difference in the look and feel of the finished garment. 
.
These samples are a great way to compare what ease looks like on different bodies. While I can fit both a size 3 and 4, the garment with no ease feels more like pajamas or a bralette when I wear it. On the other hand, when I wear the one with 4” of positive ease, I feel comfortable enough to wear it to work, even as a crop top. Plus, it leaves me with enough room to layer it with a nice button down if I’m not feeling the cropped look one day. 
.
I’m curious - how would you style this tank? Would you modify it with a few stockinette rows for added length? I’m so curious now that this pattern is finally out in the world. :) 
.
#pompomxhobbiisummer2024 #bevelledtank #handsoccupied #knitting #intarisa #handmade #kelbournewoolens #croppedsweater #summerknits
After a 6 month hiatus, I am happy to say I’m ba After a 6 month hiatus, I am happy to say I’m back with a brand new pattern in 9 sizes, and it’s FREE as part of @pompommag x @hobbii_yarn’s summer design collection! (Link is in my bio.)
.
In my December newsletter, I announced that I was soliciting test knitters for a pattern that had originally been selected for the summer ’24 issue of Pom Pom Quarterly magazine. However, the magazine ceased publication after its spring ’24 issue, leaving in-progress designs unpublished. (It happens.) As a result, I’d begun the long process of editing, testing, and photographing the pattern for independent release through the Hands Occupied pattern shop and Ravelry.
.
Before I was done with that process, Pom Pom Quarterly’s former editors reached out with an exciting proposal for the pattern. Post-magazine, they’ve begun to partner with yarn companies to produce high quality pattern collections. They wanted to include designs from the would-be current issue of Pom Pom Quarterly in a new collection for Hobbii yarn, including my Bevelled Tank. I worked with the same technical editors I would have for the magazine on this one, and as you can see from the photos, Pom Pom’s team did an amazing job of styling the garment to the beautiful standards they’re known for.
.
You can learn more about the pattern on my blog and get the free pattern from Hobbii yarn - links to both in my profile. I’ll post sizing info in the comments for quick reference too. 🧶
.
#pompomxhobbiisummer2024 #knitting #intarsia #sponsored #colorworkknitting 
.
Photos: @dianascarrunz 
Model: @angel.jade_
Here’s a nice throwback for you: my take on a vi Here’s a nice throwback for you: my take on a vintage knitting pattern from 1938 called the Fernlace Pullover. A pattern so nice, I knit it twice.
.
Yellow version 💛: knit with Despondent Dyes’ Vintage Vixen Sport after attending a @squidneyknits vintage knitting retreat in 2019 & learning *so much*. Paired with a self-drafted circle skirt pattern. 
.
Blue version 💙: knit with @eweeweyarns Ewe So Sporty in Sky Blue. Paired with the 1940s Boardwalk Duet sewing pattern from @decades_of_style 
.
Head to my stories for 🔗🔗 to the handmade wardrobe blog posts I wrote about each take on the Fernlace Pullover, working with a vintage pattern, where to find vintage patterns (including the one I used), & some thoughts on sizing. 
.
Image descriptions available in alt text. 
.
#handsoccupied #handmadewardrobe #fernlacepullover #vintageknitting #vintageknittingpatterns #knitting_inspiration
Follow on Instagram

Copyright © 2025 / Foodie Pro Theme On Genesis Framework / Branding by Ink + Mortar
All Site & Shop Policies / Privacy Policy / Cookie Policy