• 0 items$0.00
  • Skip to primary navigation
  • Skip to main content
  • Skip to primary sidebar
  • Skip to footer

Hands Occupied

Colorful knitting, crochet, latch hook and macrame from craft book author & designer Heidi Gustad.

  • BLOG
    • Knitting
    • Crochet
    • Latch Hook
    • Macramé
    • Punch Needle
  • ABOUT
  • Shop
  • Nav Social Menu

    • Instagram
    • Pinterest
    • RSS
    • YouTube

How-to: Glow in the Dark Key Toppers

March 18, 2013 Leave a Comment

How-to: Glow-in-the-Dark Key Toppers at HandsOccupied

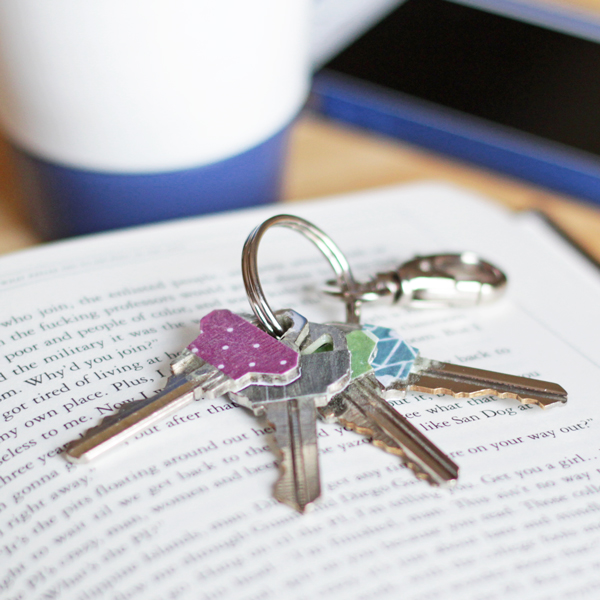
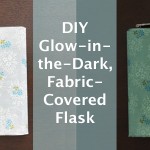
I first tried Glow-in-the-Dark Mod Podge for Halloween last fall thinking I’d make some fun holiday decor with it. But then I realized there might be some practical uses for it. In the same vein of my GITD flask project, these key toppers utilize the glowing properties of the Mod Podge to help you find your keys in the bottom of a deep, dark bag.
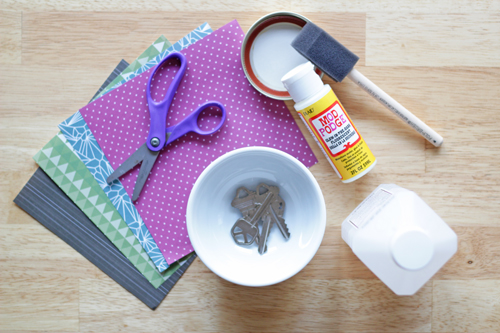
Supplies
Glow-in-the-Dark Mod Podge
sponge brush
keys
rubbing alcohol
paper towels
waxed paper/aluminum foil
scrapbook paper
scissors
x-acto knife
acrylic sealer or clear nail polish

How-to: Glow-in-the-Dark Key Toppers at HandsOccupied

Directions

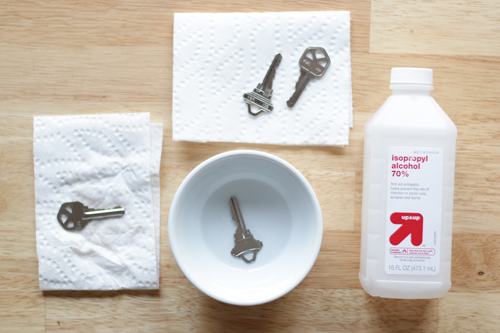
Clean your keys with rubbing alcohol and let dry.

How-to: Glow-in-the-Dark Key Toppers at HandsOccupied

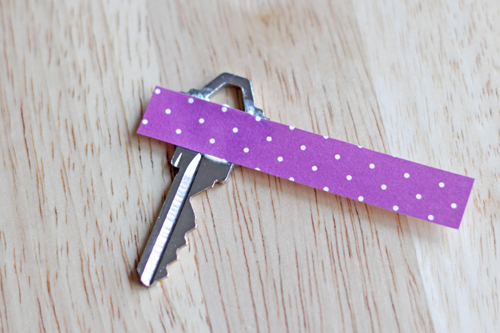
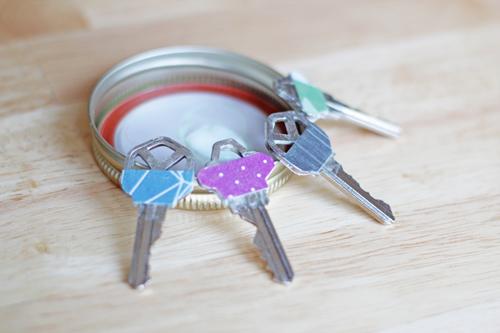
Cut your paper into strips that are about 3/4 of a centimeter by two inches. Apply a thick layer of Mod Podge to the top of one side of a key with a sponge brush.

How-to: Glow-in-the-Dark Key Toppers at HandsOccupied

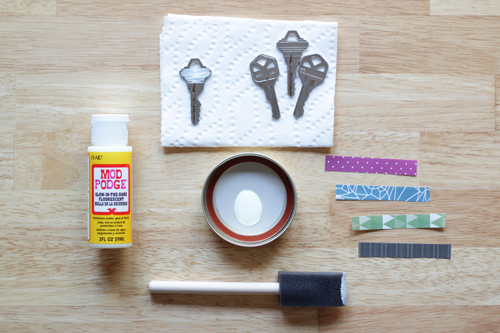
Stick a rectangle of paper onto the Mod Podge, adjusting to keep the hole of the key uncovered.

How-to: Glow-in-the-Dark Key Toppers at HandsOccupied

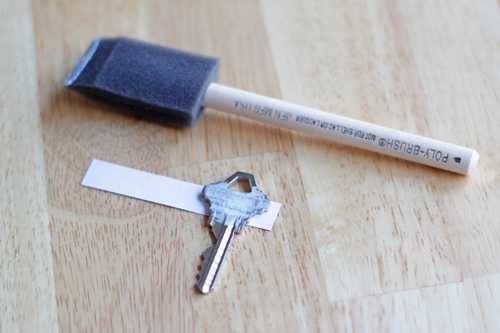
Flip the key & paper over, apply another layer of Mod Podge, and fold the paper in half to cover the back of the key.

How-to: Glow-in-the-Dark Key Toppers at HandsOccupied

How-to: Glow-in-the-Dark Key Toppers at HandsOccupied

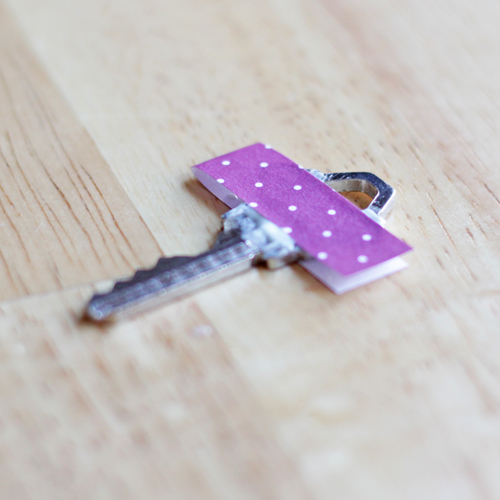
Paint the whole top of the key (both sides) with Mod Podge and let dry. I recommend letting these dry on waxed paper rather than aluminum foil like I did in the pictures, but I was out of the former when I sat down to topper my keys. If you use foil, remember to rotate your keys as they dry so they don’t stick to the foil and get ruined. Believe me, it happens :).

How-to: Glow-in-the-Dark Key Toppers at HandsOccupied

Use an x-acto knife with a fresh blade to carefully cut away the excess paper from each key, as shown.

How-to: Glow-in-the-Dark Key Toppers at HandsOccupied

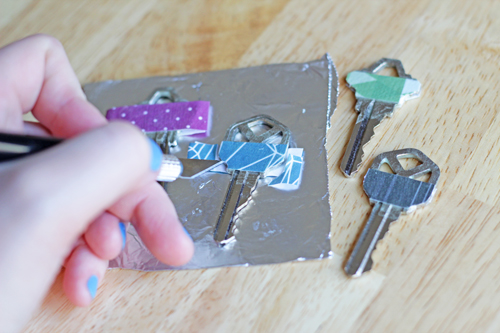
Apply another thick coat of Mod Podge over each key, particularly on the edges of the key to seal the cut edges you just created. When your keys are completely dry, use an acrylic sealant or clear nail polish to seal them.

How-to: Glow-in-the-Dark Key Toppers at HandsOccupied

Quick tip about using Glow-in-the-Dark Mod Podge: If you’re finding your keys aren’t glowing enough, set them in the sun for a couple hours to “charge” them. Also, the more GITD Mod Podge you use, the better the glow will be!

How-to: Glow-in-the-Dark Key Toppers at HandsOccupied

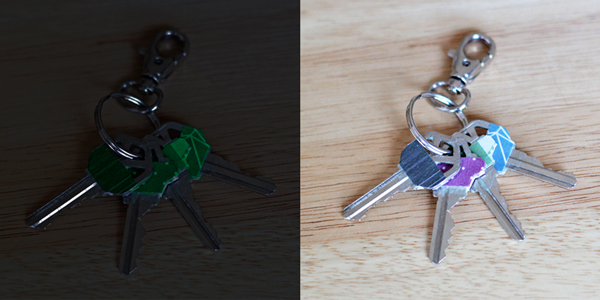
Since there wasn’t enough light to capture the glow-in-the-dark effect in action, the above left image was digitally altered. 

Please note: I first posted this project at Mod Podge Rocks in February and thought y’all would like this idea too. Did you know I contribute to Mod Podge Rocks once a month? Check out MPR on Facebook, Pinterest & Twitter for awesome Podgey ideas.

Filed Under: Decoupage, How-to, My Work Elsewhere Tagged With: diy, glow in the dark, key toppers, mod podge, mod podge rocks, practical, simple

About Heidi

Heidi Gustad is a craft book author & content creator in love with primary colors & vintage vibes. She specializes in knitting, crochet, latch hook and macramé, and her first book, Latch Hook: 12 Projects for the Modern Maker, is out now!

Previous Post: « No Sew Pin Cushion
Next Post: A Giant Surprise »

Reader Interactions

DID YOU LIKE THIS POST?
Visit similar articles...

  • Glitter Polka Dot NotebookGlitter Polka Dot Notebook
  • How-to: Radioactive JarsHow-to: Radioactive Jars
  • How-to: Glow-in-the-Dark, Fabric-Covered Flask How-to: Glow-in-the-Dark, Fabric-Covered Flask
  • Twinkle in Your Eye Sunglasses Twinkle in Your Eye Sunglasses

DON’T MISS ANOTHER UPDATE

Leave a Reply Cancel reply

Your email address will not be published. Required fields are marked *

This site uses Akismet to reduce spam. Learn how your comment data is processed.

Primary Sidebar

Heidi Gustad from Hands Occupied / Craft Book Author and Knitting, Crochet, Latch Hook and Macrame Designer

Hi! I’m Heidi (she/her/hers), a craft book author & pattern designer specializing in knitting, crochet, latch hook & macrame. Really anything with yarn! ❤️  My work combines vintage and modern design elements, featuring bold colors and graphic motifs.

UPDATES BY EMAIL

Monthly highlights sent to your inbox.

Find Me Elsewhere, If You’re There

  • Instagram
  • Pinterest
  • YouTube
Latch Hook by Heidi GustadDiscover Unique Items

Footer

INSTAGRAM

handsoccupied

Craft book author & pattern designer ❤️💛💙
knitting, crochet, latch hook & macramé
.
Please email for pattern support. 🧶

Heidi Gustad 🧶✂️
Working on a sample for some upcoming videos. It’s an overcast day with intermittent sunshine & I have a scruffy little sidecar. 🐶 Can’t complain! 
.
What’s on your needles this week? 
.
Yarn: @debbieblissknits Cashmerino Aran 
.
#handsoccupied #knitting #knittinglife
Peg boards and craft room organization go together Peg boards and craft room organization go together like peanut butter and jelly. So, as you can see, do latch hook tools and screwdriver organizers! 🪛 
.
I think this trick translates to any tool with a thick handle, so leather working tools, punch needles, print making tools, etc. should work! What other tools am I, a needlecrafter, blanking on right now? 
.
#craftorganization #handsoccupied #latchhook #latchhooking
Pegboard storage is my favorite for craft supplies Pegboard storage is my favorite for craft supplies, so getting a few hung in my new studio has been a priority. Here’s my first attempt. 🔨 
.
Details: This pegboard panel is for organizing my knitting needles, latch hook tools, sewing thread, etc. It doesn’t need to hold much weight, so I didn’t anchor this into a stud - just used basic drywall anchors. I’ve also got a set of two 2’x4’ panels for another spot in my studio, and those will need a stud/more than 3 drywall anchors. Wish me luck! 
.
[description: video features a woman hanging a panel of pegboard using a square dowel and drill]
It’s time for the annual Hands Occupied new year It’s time for the annual Hands Occupied new year update, and for the first time in years, I feel like I have some clarity about what I’m doing next. ❤️ Head to the blog to read all about it, the 1ink is where you’d think. 
.
#handsoccupied #knitting #creativeburnout
June’s face is giving, “What fresh heck is thi June’s face is giving, “What fresh heck is this?” 😆
.
June’s big ears can get cold in winter, so I’m improvising a doggie ear warmer/hood for her. What are the odds she tries to shred it immediately when it’s done? 
.
#knitting #knittingfordogs #handsoccupied #schneagle #wipwednesday #wip
Load More... Follow on Instagram

Copyright © 2023 / Foodie Pro Theme On Genesis Framework / Branding by Ink + Mortar
All Site & Shop Policies / Privacy Policy / Cookie Policy