• 0 items$0.00
  • Skip to primary navigation
  • Skip to main content
  • Skip to primary sidebar
  • Skip to footer

Hands Occupied

Colorful knitting, crochet, latch hook and macrame from craft book author & designer Heidi Gustad.

  • BLOG
    • Knitting
    • Crochet
    • Latch Hook
    • Macramé
    • Punch Needle
  • ABOUT
  • Shop
  • Nav Social Menu

    • Instagram
    • Pinterest
    • RSS
    • YouTube

How-to: Radioactive Jars

October 14, 2013 1 Comment

How-to: Radioactive Jars - Hands Occupied

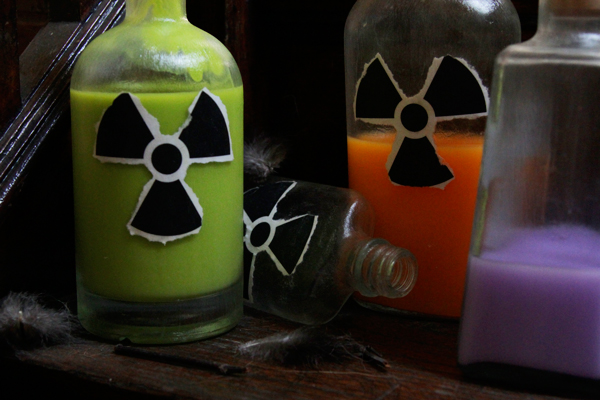
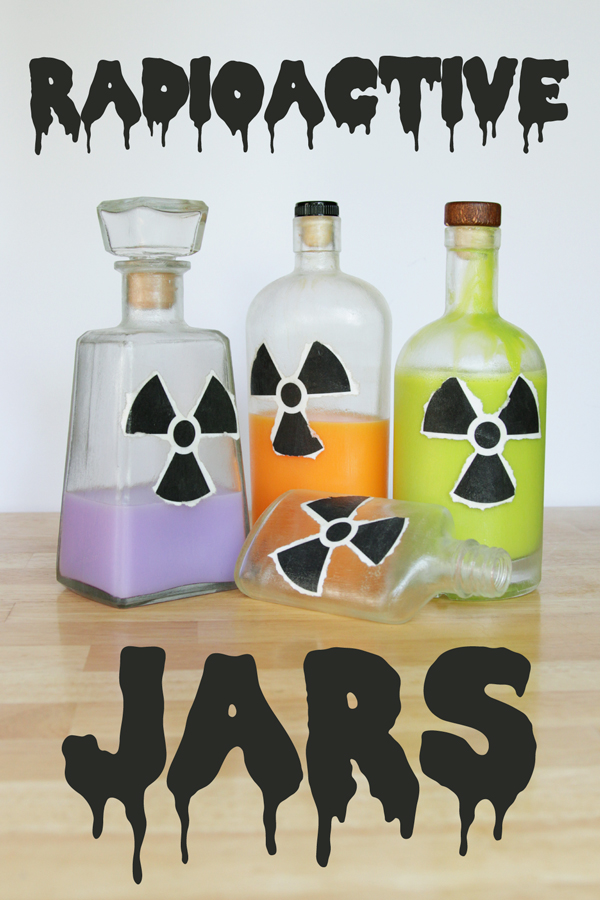
As a Teen Librarian, I read a lot of teen books, and the hottest trend in teen lit right now is dystopian settings. (So like, The Hunger Games, Divergent, or the TV show Revolution – anything set in a future world where the future ain’t so bright.) Today’s project was inspired by all of the dystopian books and shows I’ve been devouring. These bottles glow in the dark and feature weathered radioactive symbols, plus you can fill them with neon liquid if you want to make them extra radioactive looking. They also make the most of Outdoor Mod Podge‘s weather-resistant properties and are designed for outdoor use.
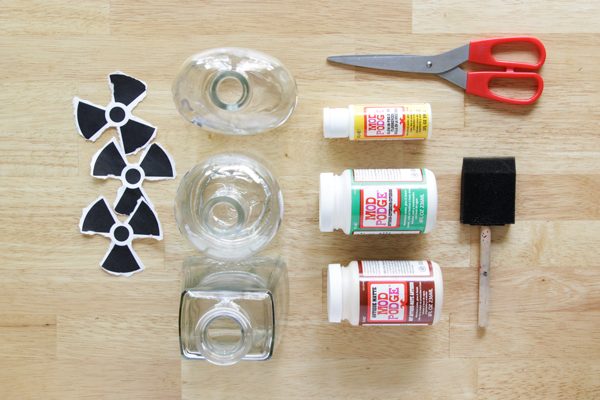
Supplies

radioactive symbol picture
computer printer
several glass bottles, cleaned & without labels
sponge brush
paint brush
wet rag
Antique Matte Mod Podge
Glow-in-the-Dark Mod Podge
Outdoor Mod Podge
neon paint (optional)

Directions

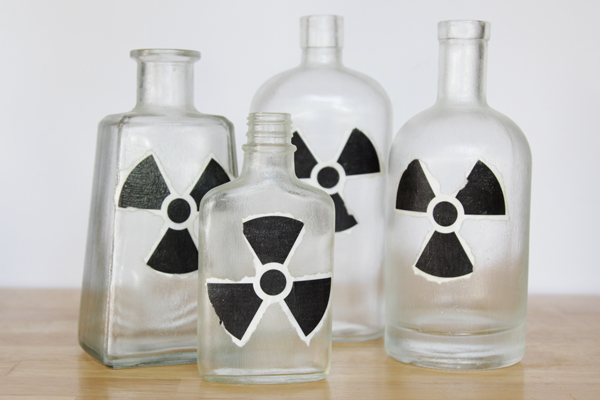
Print out one radioactive symbol per bottle you’ll be making. Carefully tear each symbol from your paper by hand. Since you’re tearing them out to make them look more weathered, it’s ok if you tear into the symbols themselves a bit.

How-to: Radioactive Jars - Hands Occupied

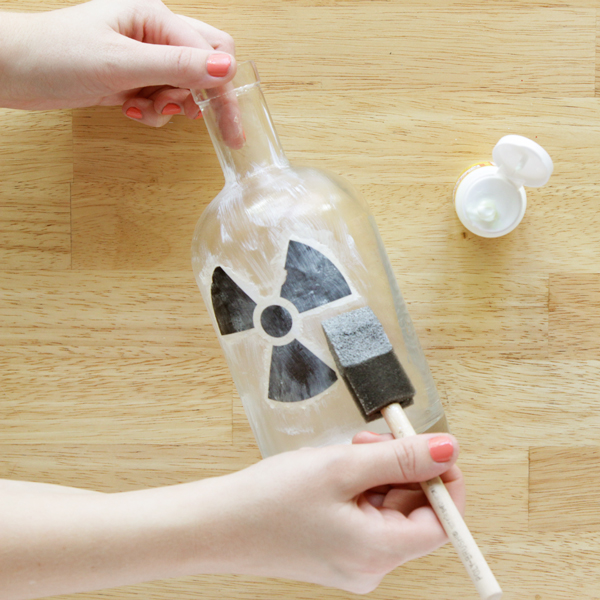
Paint a layer of Antique Matte Mod Podge onto your bottle, place your radioactive symbol over it, paint another layer of Antique Matte Mod Podge over the top of your symbol, and then use a wet rag to wipe excess Mod Podge from around the symbol. Let dry. (I used a paint brush for this step because it’s easier to keep the excess Podge around your symbol to a minimum, so you don’t need to spend time wiping away tons of excess Podge. FYI.)

How-to: Radioactive Jars - Hands Occupied Using a sponge brush paint a layer of Glow-in-the-Dark Mod Podge over the entire outside of the bottle. Let dry, and then paint a second layer of Glow-in-the-Dark Mod Podge all over your bottle. Let dry again.

How-to: Radioactive Jars - Hands Occupied

Paint 3 thin layers of Outdoor Mod Podge over the whole bottle, applying one at a time and letting each dry for 15-20 minutes in between applications. When all layers have been applied, let your bottles dry for 72 hours before placing outdoors.

How-to: Radioactive Jars - Hands Occupied

How-to: Radioactive Jars - Hands Occupied

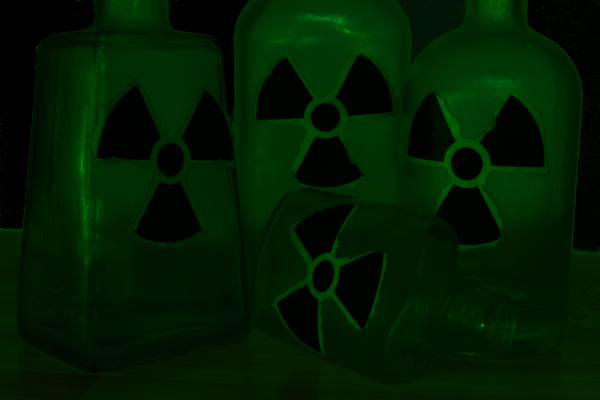
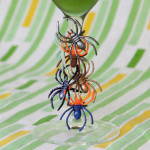
The above image was edited to show the glow-in-the-dark factor, which is basically impossible to photograph (not enough light). 

If you want to fill your bottles with radioactive-looking liquid, you can dilute neon paint in water and fill your jars with them. You’ll want to plug up your jars with corks to avoid neon spillage before putting outside.

How-to: Radioactive Jars - Hands Occupied

—-

This post was brought to you by Plaid & The Blueprint Social.

  • Get ideas from fellow crafters on Plaid’s Facebook Page.
  • Follow Plaid for Inspiration on Pinterest.

Filed Under: Decoupage, Giveaways, Reviews & Sponsored, Halloween, How-to Tagged With: bottles, crafts, diy, dystopian, glow in the dark, halloween craft, mod podge, radioactive, spooky

About Heidi

Heidi Gustad is a craft book author & content creator in love with primary colors & vintage vibes. She specializes in knitting, crochet, latch hook and macramé, and her first book, Latch Hook: 12 Projects for the Modern Maker, is out now!

Previous Post: « Weekly Reader
Next Post: 10 Awesome, Uncommon Gift Ideas »

Reader Interactions

DID YOU LIKE THIS POST?
Visit similar articles...

  • How-to: Bat Place CardsHow-to: Bat Place Cards
  • Weekly ReaderWeekly Reader
  • Weekly ReaderWeekly Reader
  • How-to: Spider Ring Drink Markers How-to: Spider Ring Drink Markers

DON’T MISS ANOTHER UPDATE

Comments

  1. Rachel | 52 Weeks Project

    October 17, 2013 at 7:55 pm

    So cool Heidi! Pinning now :)

    Reply

Leave a Reply Cancel reply

Your email address will not be published. Required fields are marked *

This site uses Akismet to reduce spam. Learn how your comment data is processed.

Primary Sidebar

Heidi Gustad from Hands Occupied / Craft Book Author and Knitting, Crochet, Latch Hook and Macrame Designer

Hi! I’m Heidi (she/her/hers), a craft book author & pattern designer specializing in knitting, crochet, latch hook & macrame. Really anything with yarn! ❤️  My work combines vintage and modern design elements, featuring bold colors and graphic motifs.

UPDATES BY EMAIL

Monthly highlights sent to your inbox.

Find Me Elsewhere, If You’re There

  • Instagram
  • Pinterest
  • YouTube
Latch Hook by Heidi GustadDiscover Unique Items

Footer

INSTAGRAM

handsoccupied

Craft book author & pattern designer ❤️💛💙
knitting, crochet, latch hook & macramé
.
Please email for pattern support. 🧶

Heidi Gustad 🧶✂️
Working on a sample for some upcoming videos. It’s an overcast day with intermittent sunshine & I have a scruffy little sidecar. 🐶 Can’t complain! 
.
What’s on your needles this week? 
.
Yarn: @debbieblissknits Cashmerino Aran 
.
#handsoccupied #knitting #knittinglife
Peg boards and craft room organization go together Peg boards and craft room organization go together like peanut butter and jelly. So, as you can see, do latch hook tools and screwdriver organizers! 🪛 
.
I think this trick translates to any tool with a thick handle, so leather working tools, punch needles, print making tools, etc. should work! What other tools am I, a needlecrafter, blanking on right now? 
.
#craftorganization #handsoccupied #latchhook #latchhooking
Pegboard storage is my favorite for craft supplies Pegboard storage is my favorite for craft supplies, so getting a few hung in my new studio has been a priority. Here’s my first attempt. 🔨 
.
Details: This pegboard panel is for organizing my knitting needles, latch hook tools, sewing thread, etc. It doesn’t need to hold much weight, so I didn’t anchor this into a stud - just used basic drywall anchors. I’ve also got a set of two 2’x4’ panels for another spot in my studio, and those will need a stud/more than 3 drywall anchors. Wish me luck! 
.
[description: video features a woman hanging a panel of pegboard using a square dowel and drill]
It’s time for the annual Hands Occupied new year It’s time for the annual Hands Occupied new year update, and for the first time in years, I feel like I have some clarity about what I’m doing next. ❤️ Head to the blog to read all about it, the 1ink is where you’d think. 
.
#handsoccupied #knitting #creativeburnout
June’s face is giving, “What fresh heck is thi June’s face is giving, “What fresh heck is this?” 😆
.
June’s big ears can get cold in winter, so I’m improvising a doggie ear warmer/hood for her. What are the odds she tries to shred it immediately when it’s done? 
.
#knitting #knittingfordogs #handsoccupied #schneagle #wipwednesday #wip
Load More... Follow on Instagram

Copyright © 2023 / Foodie Pro Theme On Genesis Framework / Branding by Ink + Mortar
All Site & Shop Policies / Privacy Policy / Cookie Policy