• 0 items$0.00
  • Skip to primary navigation
  • Skip to main content
  • Skip to primary sidebar
  • Skip to footer

Hands Occupied

Contemporary yarn crafts by Heidi Gustad. Knitting, crochet, latch hook and macrame.

  • BLOG
    • Knitting
    • Crochet
    • Latch Hook
    • Macramé
  • ABOUT
  • Shop
  • Studio
  • Nav Social Menu

    • Facebook
    • Instagram
    • Pinterest
    • RSS
    • Twitter
    • YouTube

How to Knit a Chain Edge

April 25, 2016 15 Comments

Learn how to knit a chain edge, an easy knitting trick to make your finished projects look amazing!

I mentioned this in the newsletter this week, but in case you missed it, I’ve got 2 new patterns ready to launch in the coming weeks! One feature both patterns have in common is a chain edge, and I realized a great way to tease the new releases would be to share my how I knit my chain edges!

Learn how to knit a chain edge, an easy knitting trick to make your finished projects look amazing!

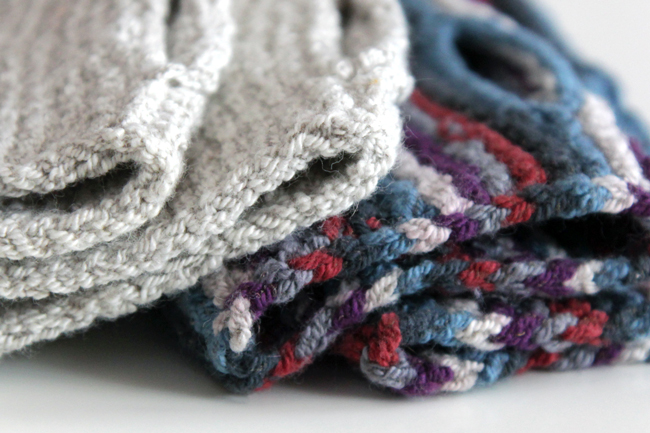
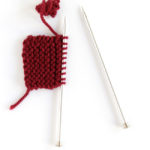
To create a chain edge while working flat, each row of knitting begins and ends with a twisted stitch. The slipping of each row’s first stitch with the yarn in front and knitting through the back loop of the last stitch results in a braid-like edge. I love using a chain edge in garter stitch for a smooth, finished look. So often in garter, the edges of your work end up uneven or loose, which isn’t the cutest. Even if you try to tighten your edge loops as you go, simply tightening my edge loops was my go-to garter edge solution for years, it’s impossible to get the crisp, squared off look that comes from a chain edge.

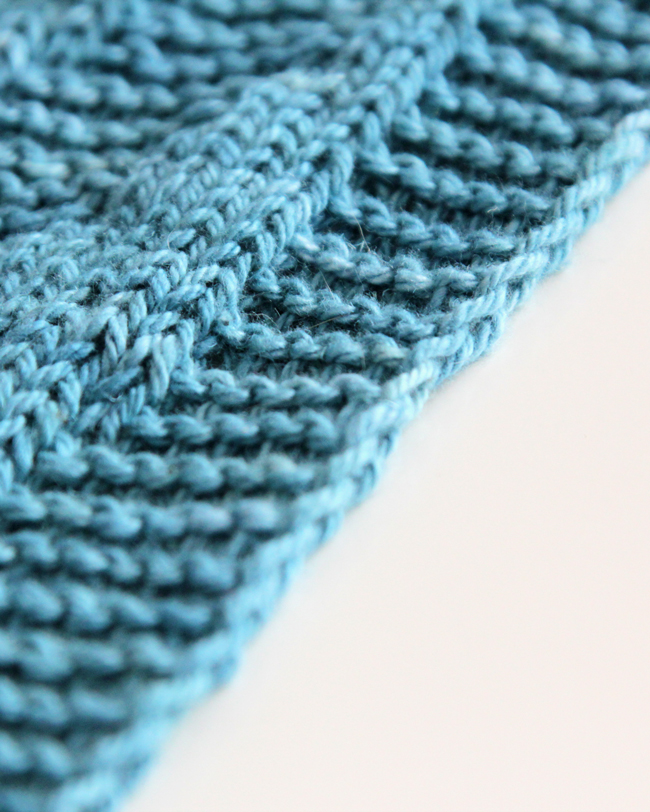
There you have it! When you’re working flat, just slip the first stitch of each row with yarn in front, and knit the last stitch through the back loop, and your chain edge is set. It’s that easy!

How to knit a chain edge

Filed Under: Knitting, Knitting & Crochet Tagged With: chain edge, garter stitch, knit neat edges, knitting tip, neat edges

About Heidi

Heidi Gustad is an artist, author and crafts designer specializing in knitting, crochet, latch hook and macrame. In addition to running the Hands Occupied Blog and Pattern Shop, you can find her making videos & co-hosting the Very Serious Crafts podcast.

Previous Post: « Picks of the Week
Next Post: Things to Knit »

Reader Interactions

DID YOU LIKE THIS POST?
Visit similar articles...

  • Big Old Bias Knit ScarfBig Old Bias Knit Scarf
  • Picks of the Week for January 20, 2017 | Hands OccupiedPicks of the Week
  • How to Count Garter Stitch RowsHow to Count Garter Stitch Rows
  • 12 Patterns to Help Stitch Away Stress12 Patterns to Help Stitch Away Stress

DON’T MISS ANOTHER UPDATE

Comments

  1. Sue Anna

    April 25, 2016 at 12:14 pm

    Heidi,
    How can I pin this for later?
    Thanks

    Reply
    • Heidi

      April 26, 2016 at 7:14 am

      When you hover over images, a Pinterest icon appears. If you click that you can pin it. You can also visit my Pinterest at Pinterest.com/handsoccupied and repin the post from my page. Here’s a direct URL as well: http://pin.it/hVSePY2.

      Reply
  2. Sue Anna

    April 26, 2016 at 10:44 am

    Thanks so much Heidi. Got it!

    Reply
  3. Tracy Strother

    May 6, 2016 at 11:24 am

    Do you slip the first stitch as if to knit or purl?

    Reply
    • Heidi

      May 6, 2016 at 12:04 pm

      Slip as if to purl with yarn in front. :)

      Reply
  4. Denise

    May 6, 2016 at 12:00 pm

    Heidi, would you need to add 2 stitches to your pattern in order to end up with the stitches needed to create the braided edge? I realize a lot of patterns would not have you doing anything other than knit or purl at the beginning but just wondering. This way of doing the edge looks a lot neater and tighter than just slipping each 1st stitch. Thanks for sharing!

    Reply
    • Heidi

      May 6, 2016 at 12:07 pm

      In the pattern I just released and the one I’m about to release next week, I write this chain edge into the pattern. As you have noticed, most patterns don’t include this. :) You don’t need to add extra stitches, just work the first and last sitch of each row using the slip/tbl tricks from this post. On the other hand, if there’s a lot of ornamentation near the edges, you could absolutely add an extra stitch in each row if you prefer that look.

      Reply
  5. Fiidele

    May 6, 2016 at 9:25 pm

    I’m having trouble figuring out how to slip the first stitch WITH YARN IN FRONT.
    Is there another way to describe this?

    Reply
    • Heidi

      May 7, 2016 at 9:21 pm

      At the 0:41 mark, this video demonstrates how to slip the first stitch of a row wyif: https://m.youtube.com/watch?v=393N4z5mmPU

      Reply
    • Beth

      May 7, 2017 at 9:02 pm

      As I understand it…. At the beginning of each row, bring yarn to the front as if to purl, slip your first stitch purlwise, then move yarn to the back and begin knitting. On the last stitch of each row, knit into the back of that stitch.

      Thank you, Heidi! This works very nicely for very clean and even edges. No more uneven or sloppy looking edges.

      Reply
      • Heidi

        May 25, 2017 at 3:59 pm

        You’re welcome!

        Reply
  6. S.S.Smith

    May 22, 2016 at 9:06 pm

    I have a question on the baby basket weave blanket. You say on rows 2-4 k3 p3 and on 5-7 p3k3…on row 1 knit and then you say to repeat the patten..does this include every first row you know….or do you do something different?

    Reply
    • Heidi

      May 23, 2016 at 8:24 am

      You work row 1 only once. For the rest of the blanket, you work rows 2-7 over and over.

      Reply
  7. Lola

    January 22, 2019 at 12:00 pm

    Thanks for this great tip. Does it make the edge less stretchy than the body of the work, and if so, does working that edge stitch loosely help?

    Reply
    • Heidi

      January 22, 2019 at 3:20 pm

      Chain edges do affect gauge since there’s one less stitch-worth of yarn worked in every row. Working the stitch loosely can help, but many knitters find it challenging to do that consistently.

      Reply

Leave a Reply to Denise Cancel reply

Your email address will not be published. Required fields are marked *

This site uses Akismet to reduce spam. Learn how your comment data is processed.

Primary Sidebar

Heidi Gustad from Hands Occupied / Craft Book Author and Knitting, Crochet, Latch Hook and Macrame Designer

Hi! I’m Heidi, an author, yarn craft designer and content creator specializing in knitting, crochet, latch hook & macrame. My work unapologetically features primary colors and vintage-meets-modern style. My first book, Latch Hook: 12 Projects for the Modern Maker, is now available!

work with heidi

UPDATES BY EMAIL

Get a free pattern + biweekly updates sent to your inbox.

Let’s be friends!

  • Facebook
  • Instagram
  • Pinterest
  • Twitter
  • YouTube
Latch Hook by Heidi Gustad

Footer

INSTAGRAM

handsoccupied

Craft book author & content creator in love with primary colors & vintage vibes. / #latchhookbook out now!
.
knitting, crochet, latch hook & macramé

Heidi Gustad 🧶✂️
There’s an update on the blog today, & it’s ab There’s an update on the blog today, & it’s about how I’m going to take the next 2 weeks off to rest & recharge. ☺️🧶 No new content for y’all means I can also take a moment to zoom out & plan what’s next. Link is in bio. 
.
.
A note on Very Serious Crafts: In the post I discuss stepping away from the @seriouscrafts podcast to give myself more time to devote to some minor medical issues. Don’t you worry - my health will be fine, & @molliejohanson @redhandledscissors and I are still pals, and after a short break of their own, the podcast will be back! Just sans moi. 💁🏼‍♀️😆 
.
.
See you in a couple weeks! ✌🏻#handsoccupied #knitdesign #craftdesign #sofadedsweater
Been a little quiet this holiday week, as it shoul Been a little quiet this holiday week, as it should be. ☺️🎄The past few days have been filled with a lot of catching up on festive zoom calls & raising toasts to the camera. 🥂 Connecting with people has been a welcome change of pace! Now I’m feeling ready to meet my inevitable end-of-year deadlines. 😆
.
.
Warmest wishes for the season, my friends! ❤️💛💙
Hi, I’m Heidi, the craft book author & maker beh Hi, I’m Heidi, the craft book author & maker behind Hands Occupied! 👋🏻 I’ve been enjoying making Reels a lot lately, but I wanted to bop in to share a regular photo & say hello. 🤓 
.
.
rather than giving you my bio right now, I have a question. I just got this new sweater & I can’t stop imaging how funny it would be to wear this to a knitting class ... is that bad? 🤣🤣🤣
.
.
Pictured: a blond woman with glasses wearing a sweater that reads “all your sweaters are ugly” standing in front of a Christmas tree.
Wet blocking, also called immersive blocking, is o Wet blocking, also called immersive blocking, is one of the most common methods for finishing a knitting project and helping ensure its final size and shape. Learn basic blocking for absolute beginners in an easy-to-follow (non-Reel!) video tutorial! Catch the tutorial on YouTube or the Hands Occupied Blog, link is in bio. 🧶 #handsoccupied #stopswatchandblockit #KPAmbassadorsDec20 #sponsored
Had to share this perfect capture of one of my fav Had to share this perfect capture of one of my favorite weird homemade Christmas ornaments: a simple macramé Santa face with beads for the eyes and nose! My Great-Grandma made it too. 🎄
.
Might have to try making a quickie Reel tutorial for this guy - I think it’s the perfect project for it, don’t you? 🎅🏼 #handsoccupied #macrame
Load More... Follow on Instagram

Copyright © 2021 / Foodie Pro Theme On Genesis Framework / Branding by Ink + Mortar
All Site & Shop Policies / Privacy Policy / Cookie Policy