• 0 items$0.00
  • Skip to primary navigation
  • Skip to main content
  • Skip to primary sidebar
  • Skip to footer

Hands Occupied

Colorful knitting, crochet, latch hook and macrame from craft book author & designer Heidi Gustad.

  • BLOG
    • Knitting
    • Crochet
    • Latch Hook
    • Macramé
    • Punch Needle
  • ABOUT
  • Shop
  • Nav Social Menu

    • Instagram
    • Pinterest
    • RSS
    • YouTube

How-to: Recycled Ribbon Trivet

April 22, 2013 3 Comments

ribbontrivet9How-to: Recycled Ribbon Trivet at HandsOccupied.com

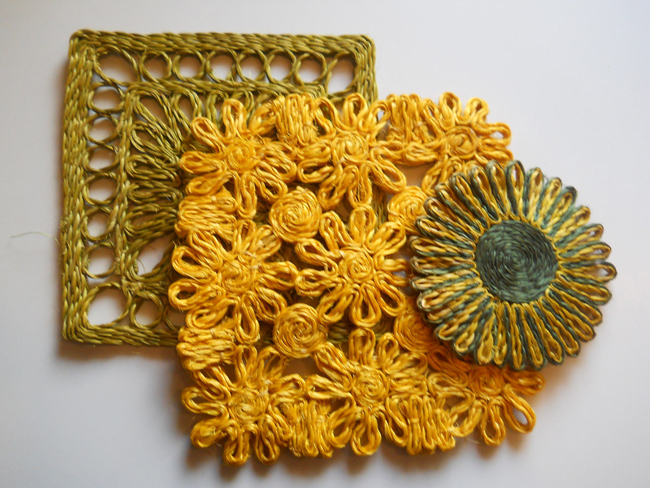
Happy Earth Day! I mulled over several ideas for today, but this idea came to me as I spent most of last week stuck at home due to Chicago flooding. I finally disassembled the ribbon wall photo booth backdrop from my wedding and found myself with a bunch of 70 inch pieces of ribbon, mostly grosgrain ribbon that’s all the same width. Rolling up all of the ribbon for storage, I couldn’t get over how pretty it all was (I even Instagrammed it). Particularly, the ribbon made me think of vintage jute trivets, but this finished project is definitely more elegant than kitschy.

Vintage Jute Trivets via Etsy

vintage jute trivets via etsy

Supplies

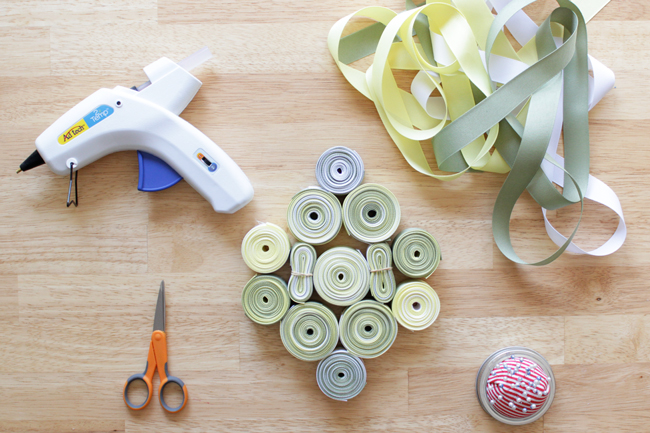
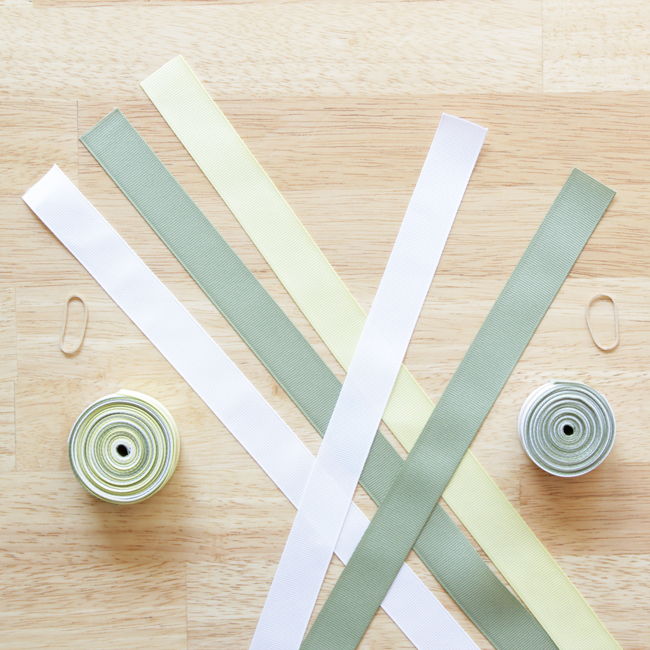
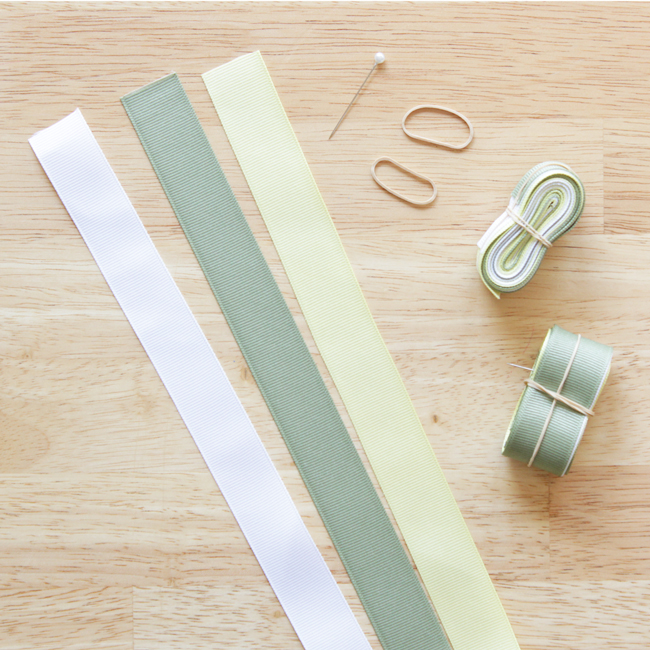
lots (as in dozens of yards) of grosgrain ribbon, cut into 70-inch lengths
rubber bands
hot glue gun
straight pins
scissors

Directions

How-to: Recycled Ribbon Trivet at HandsOccupied.com

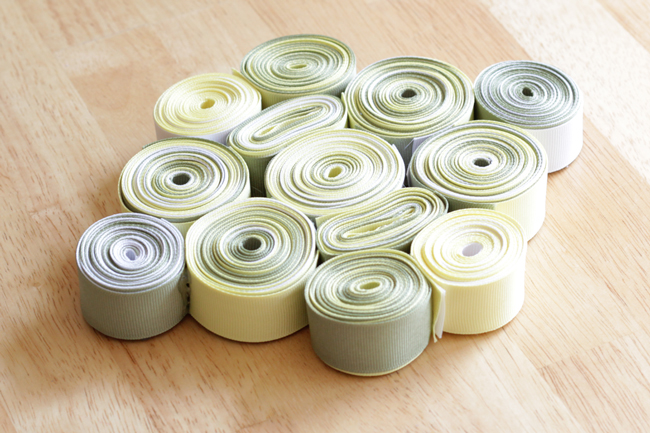
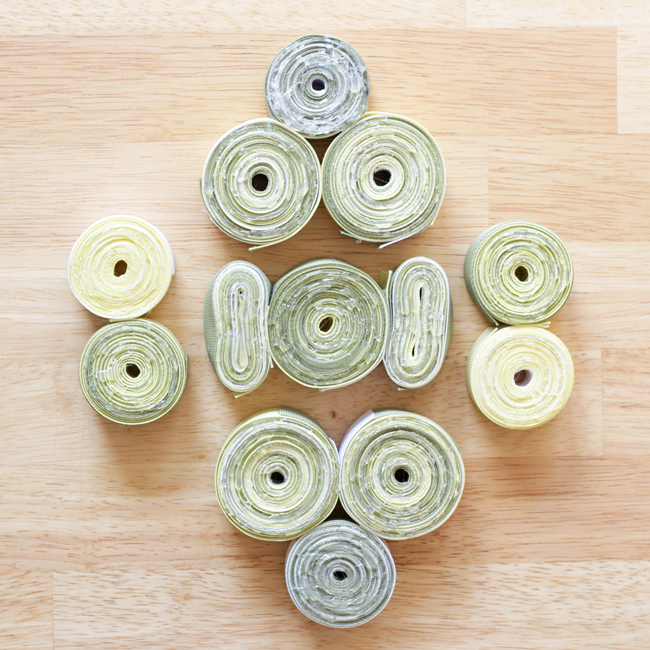
Bundle your pieces of ribbon into little rolls. To make the big circles you see above, hold three pieces of ribbon together and wind them up together like you’re putting away a tape measure. Secure with a single rubber band around the outside.

To make the smaller circles, do the same winding, but with two pieces of ribbon rather than one.

How-to: Recycled Ribbon Trivet at HandsOccupied.com

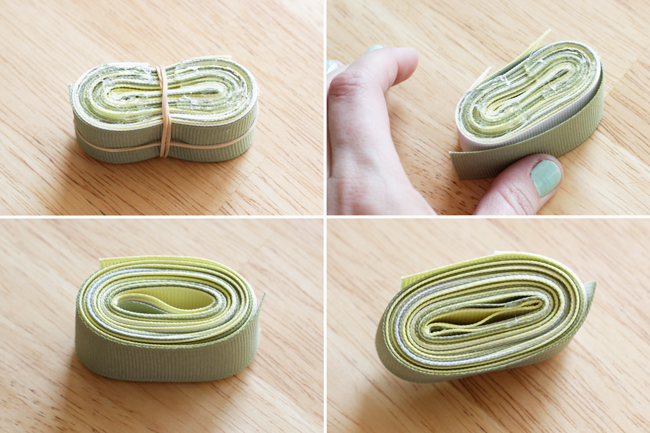
The hardest bundles to make of those I used for my trivet are the oblong ones. I held together three pieces of 70-inch ribbon and cut them in half, to 35 inches in length. Hold together one set of three, 35-inch ribbons. Fold down one end about 1 inch and pin to secure. Then, wind the rest of the ribbon all the way around and secure with two rubber bands in a plus sign, as shown.

How-to: Recycled Ribbon Trivet at HandsOccupied.com

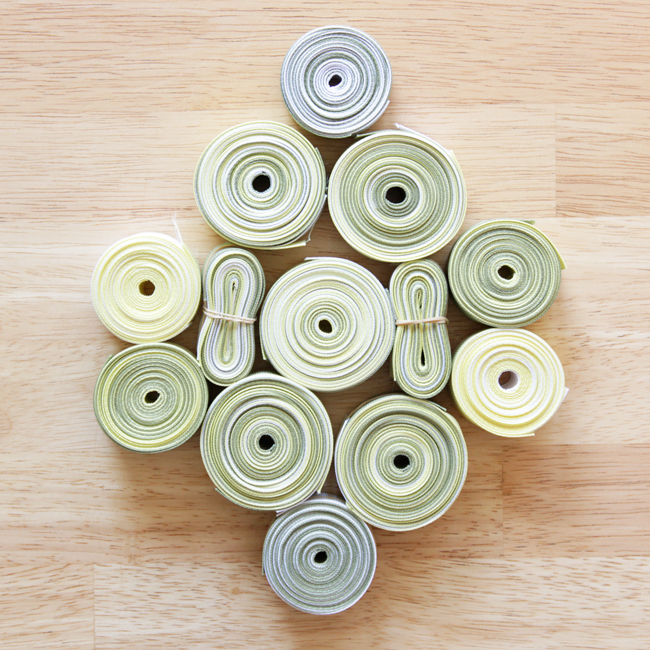
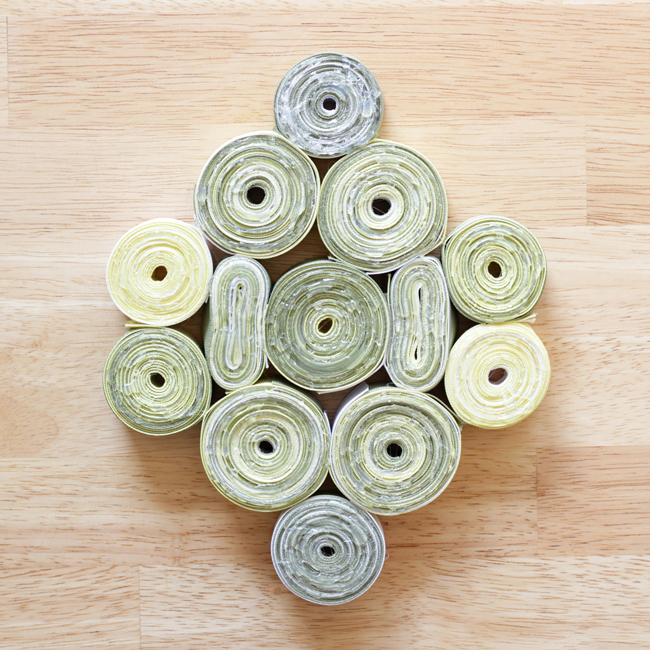
When all of your ribbon bundles are wound and rubber banded, arrange them however you like. I spent a fair bit of time playing with how the arrangement looked before I was satisfied. The oblong bundles actually came about when I realized a couple of those would help my trivet come together.

How-to: Recycled Ribbon Trivet at HandsOccupied.com

Heat up your glue gun. To secure all circular bundles, I pretty much covered their bottoms with hot glue before trimming and gluing down the ends of each ribbon in the bundle.

How-to: Recycled Ribbon Trivet at HandsOccupied.com

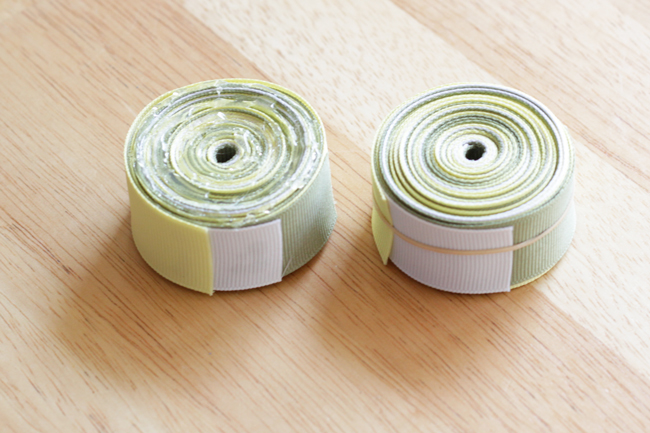
The oblong pieces were again the most challenging to glue. I hot glued around the rubber band covering the bottom of each piece, let the glue dry, removed the rubber band, and filled in the gap in the glue on the bottom. Then I glued down the ribbon ends, flipped the oblong piece right-side up, and glued the center shut. Like this:

How-to: Recycled Ribbon Trivet at HandsOccupied.com

When the bundles are all set, start gluing your trivet together, tackling it in logical chunks. I recommend starting by gluing the middle together and then gluing obvious chunks together. This helps ensure all bundles stay properly lined up as you go.

How-to: Recycled Ribbon Trivet at HandsOccupied.com

Finally, glue all of your chunks together, let dry completely, and you’re good to go.

How-to: Recycled Ribbon Trivet at HandsOccupied.com

How-to: Recycled Ribbon Trivet at HandsOccupied.com

Filed Under: DIY Wedding, How-to Tagged With: hot glue, jute, recycle, ribbon, trivet, vintage

About Heidi

Heidi Gustad is a craft book author & content creator in love with primary colors & vintage vibes. She specializes in knitting, crochet, latch hook and macramé, and her first book, Latch Hook: 12 Projects for the Modern Maker, is out now!

Previous Post: « Little Fox Embroidery (with pattern!)
Next Post: Werther’s Original Sugar Free »

Reader Interactions

DID YOU LIKE THIS POST?
Visit similar articles...

  • Picks of the Week for December 23, 2016 | Hands OccupiedPicks of the Week
  • Picks of the WeekPicks of the Week
  • InspireInspire
  • DIY Eggshell Tea LightsDIY Eggshell Tea Lights

DON’T MISS ANOTHER UPDATE

Comments

  1. Tan of Squirrelly Minds

    April 22, 2013 at 1:48 pm

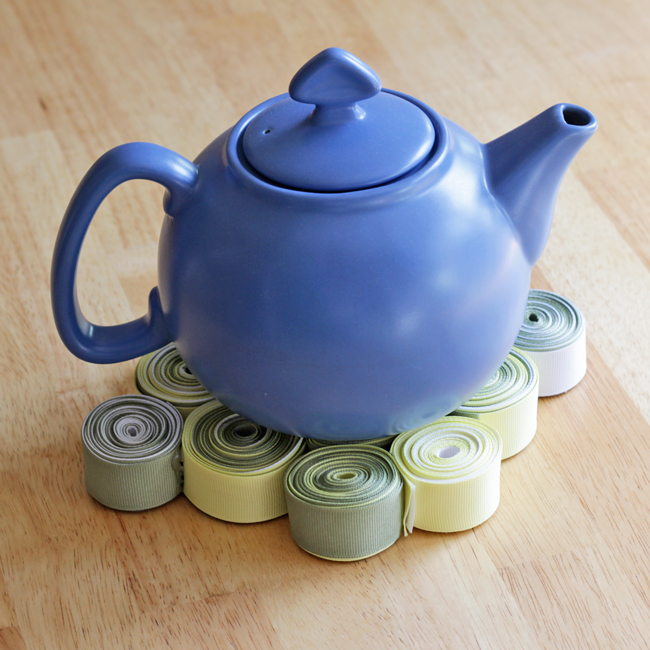
    How clever and cute!

    Reply
    • Heidi

      April 22, 2013 at 3:40 pm

      Thanks!!

      Reply

Trackbacks

  1. One Material, Many Ways – 7 Ribbon DIY Projects | Whimseybox says:
    September 20, 2013 at 1:33 pm

    […] Trivet via Hands Occupied […]

    Reply

Leave a Reply Cancel reply

Your email address will not be published. Required fields are marked *

This site uses Akismet to reduce spam. Learn how your comment data is processed.

Primary Sidebar

Heidi Gustad from Hands Occupied / Craft Book Author and Knitting, Crochet, Latch Hook and Macrame Designer

Hi! I’m Heidi (she/her/hers), a craft book author & pattern designer specializing in knitting, crochet, latch hook & macrame. Really anything with yarn! ❤️  My work combines vintage and modern design elements, featuring bold colors and graphic motifs.

UPDATES BY EMAIL

Monthly highlights sent to your inbox.

Find Me Elsewhere, If You’re There

  • Instagram
  • Pinterest
  • YouTube
Latch Hook by Heidi GustadDiscover Unique Items

Footer

INSTAGRAM

handsoccupied

Craft book author & pattern designer ❤️💛💙
knitting, crochet, latch hook & macramé
.
Please email for pattern support. 🧶

Heidi Gustad 🧶✂️
Working on a sample for some upcoming videos. It’s an overcast day with intermittent sunshine & I have a scruffy little sidecar. 🐶 Can’t complain! 
.
What’s on your needles this week? 
.
Yarn: @debbieblissknits Cashmerino Aran 
.
#handsoccupied #knitting #knittinglife
Peg boards and craft room organization go together Peg boards and craft room organization go together like peanut butter and jelly. So, as you can see, do latch hook tools and screwdriver organizers! 🪛 
.
I think this trick translates to any tool with a thick handle, so leather working tools, punch needles, print making tools, etc. should work! What other tools am I, a needlecrafter, blanking on right now? 
.
#craftorganization #handsoccupied #latchhook #latchhooking
Pegboard storage is my favorite for craft supplies Pegboard storage is my favorite for craft supplies, so getting a few hung in my new studio has been a priority. Here’s my first attempt. 🔨 
.
Details: This pegboard panel is for organizing my knitting needles, latch hook tools, sewing thread, etc. It doesn’t need to hold much weight, so I didn’t anchor this into a stud - just used basic drywall anchors. I’ve also got a set of two 2’x4’ panels for another spot in my studio, and those will need a stud/more than 3 drywall anchors. Wish me luck! 
.
[description: video features a woman hanging a panel of pegboard using a square dowel and drill]
It’s time for the annual Hands Occupied new year It’s time for the annual Hands Occupied new year update, and for the first time in years, I feel like I have some clarity about what I’m doing next. ❤️ Head to the blog to read all about it, the 1ink is where you’d think. 
.
#handsoccupied #knitting #creativeburnout
June’s face is giving, “What fresh heck is thi June’s face is giving, “What fresh heck is this?” 😆
.
June’s big ears can get cold in winter, so I’m improvising a doggie ear warmer/hood for her. What are the odds she tries to shred it immediately when it’s done? 
.
#knitting #knittingfordogs #handsoccupied #schneagle #wipwednesday #wip
Load More... Follow on Instagram

Copyright © 2023 / Foodie Pro Theme On Genesis Framework / Branding by Ink + Mortar
All Site & Shop Policies / Privacy Policy / Cookie Policy