• 0 items$0.00
  • Skip to primary navigation
  • Skip to main content
  • Skip to primary sidebar
  • Skip to footer

Hands Occupied

Contemporary yarn crafts by Heidi Gustad. Knitting, crochet, latch hook and macrame.

  • BLOG
    • Knitting
    • Crochet
    • Latch Hook
    • Macramé
  • ABOUT
  • Shop
  • Studio
  • Nav Social Menu

    • Facebook
    • Instagram
    • Pinterest
    • RSS
    • Twitter
    • YouTube

How-to: Stenciled Leaf Mug

November 11, 2013 6 Comments

Stenciled Leaf Mug DIY | Hands Occupied

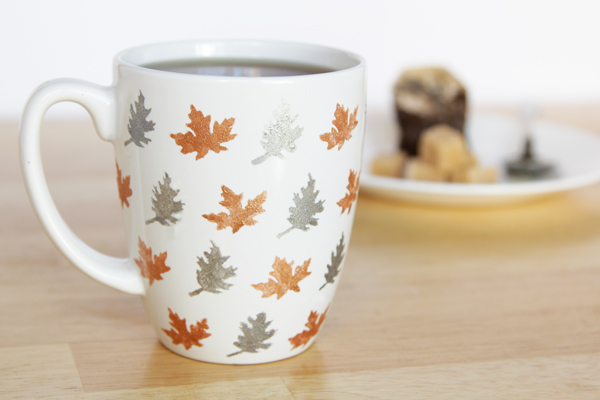
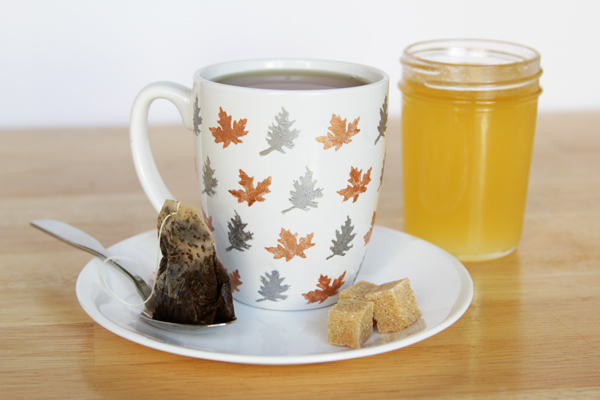
Metallics are so huge for autumn and Thanksgiving decor this year, and I’m into it. Leaves seem to be particularly hot too (even more than usual for fall). My take on these trends is this sweet mug that I’ve been super excited to sip tea from at least once a day. This time of year I basically don’t drink water – a nice cup of tea is my preferred method of hydration and my favorite way to stay warm when I’m strapped to my computer all day.
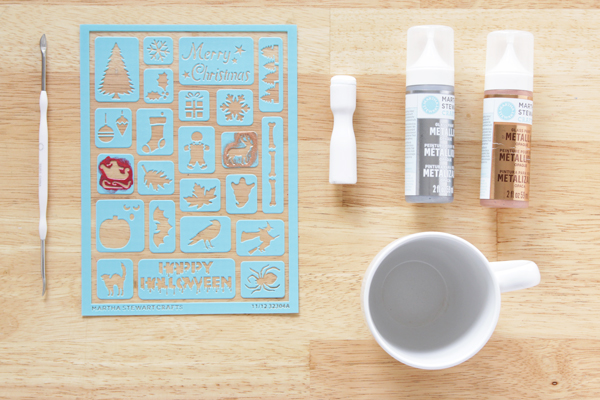
Supplies

glass paint in copper and pewter
paint daubers
paint brush
self-adhesive leaf stencils
scraper/razor blade (optional – for fixing mess ups)
plain mug
craft mat/waxed paper 

Stenciled Leaf Mug DIY | Hands Occupied

Directions

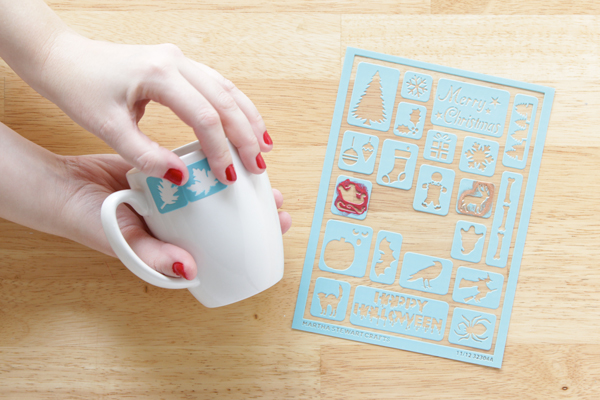
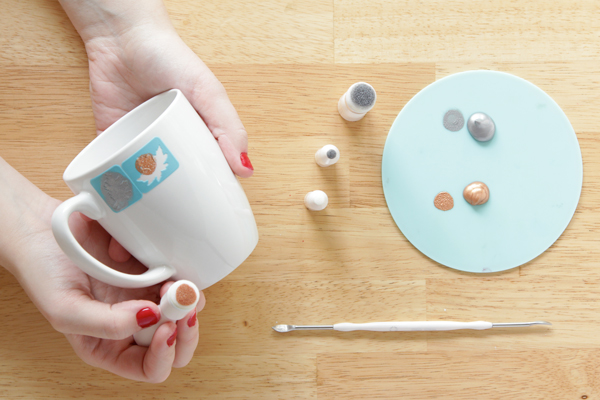
Clean and dry your mug to start. Then, place your leaf stencil(s) on the mug, smoothing down all edges.

Stenciled Leaf Mug DIY | Hands Occupied

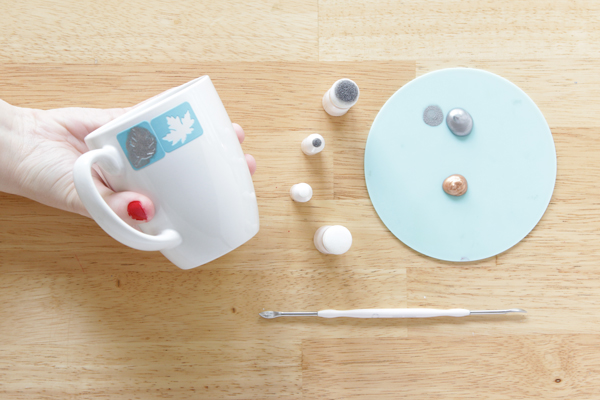
Squirt a bit of each color of your glass paint onto a crafting mat or some waxed paper. Dip a paint dauber into the paint, and dab it onto a dry spot on your craft mat to remove excess paint. Once the excess paint is removed, carefully apply the paint to a leaf stencil.

Stenciled Leaf Mug DIY | Hands Occupied

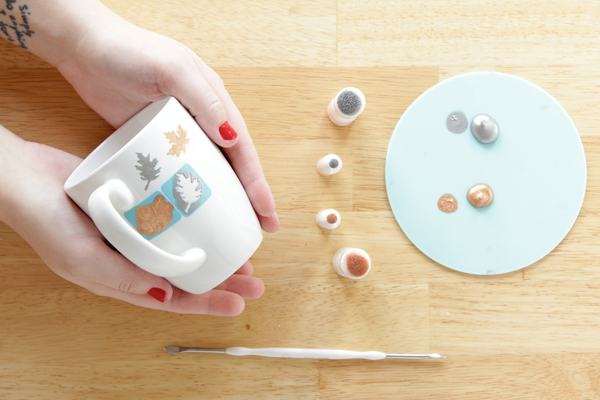
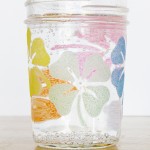
I alternated colors and stencils creating a checkerboard pattern all over my mug. I made all of my maple leaves copper and all of my other leaves pewter (I have no idea what species the other leaf stencil is).

Stenciled Leaf Mug DIY | Hands Occupied

Some tips for stenciling success:

  • Dab your daub… Dab off excess paint from your dauber before applying it to the stencil. Too much paint is going to make successfully stenciling harder.
  • Don’t forget the nooks and crannies… If necessary, use a paint brush or smaller dauber to cover every nook and cranny with paint.
  • You messed up, so what? A razor blade, used carefully of course, can easily slice off one of your stenciled leaves if you’re not happy with the placement of your leaf.
  • Keep your stencils clean… If you’re alternating just a couple stencils like I did, the paint will build up every few applications. Wash off your stencils, scraping away excess paint, when that happens. Your leaves will turn into misshapen blobs if the paint builds up within the stencil.
  • Don’t let the paint dry before removing the stencil. No really – the paint I used tended to stick to the stencil, pulling off the whole leaf design in a sheet. Pull off that stencil when the paint is still a little damp before reusing it to stencil your next leaf.

Stenciled Leaf Mug DIY | Hands Occupied When your whole mug is stenciled, you’ll need to cure it to make the paint permanent, dish washerable, etc. The paints I used can be left out to air cure for 21 days or oven baked following these instructions.

Stenciled Leaf Mug DIY | Hands Occupied

All of the supplies I used happen to be from the Martha Stewart line of glass paints, tools & stencils, but this isn’t a sponsored post. 

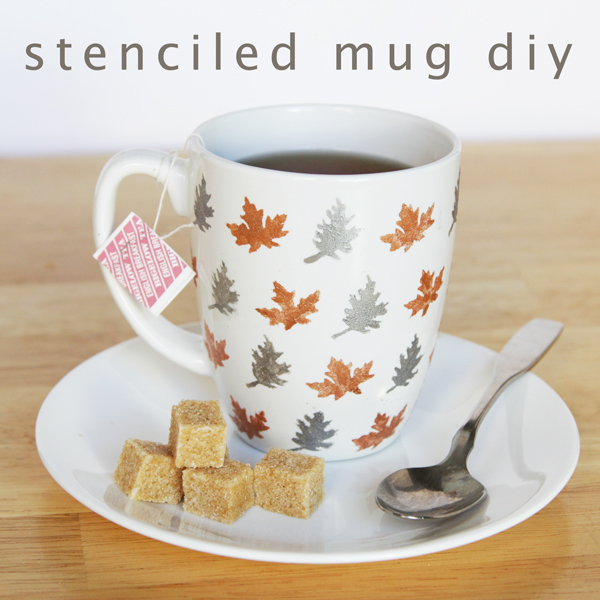
And, in case you want to save this for later, here’s a pin-friendly image for you:

Stenciled Leaf Mug DIY | Hands Occupied

Filed Under: How-to, Thanksgiving Tagged With: autumn, copper, craft, craft paint, crafts, diy, fall mug, glass paint, leaf mug, martha stewart, mug craft, pewter, stenciled mug

About Heidi

Heidi Gustad is an artist, author and crafts designer specializing in knitting, crochet, latch hook and macrame. In addition to running the Hands Occupied Blog and Pattern Shop, you can find her making videos & co-hosting the Very Serious Crafts podcast.

Previous Post: « Weekly Reader
Next Post: DIY FYI: Duct Tape Crafting Tip »

Reader Interactions

DID YOU LIKE THIS POST?
Visit similar articles...

  • Fun-mazing Jewelry DIYsFun-mazing Jewelry DIYs
  • Rainbow Shamrocks GlassRainbow Shamrocks Glass
  • DIY Library Pockets DIY Library Pockets
  • Top 10 DIYs of 2013Top 10 DIYs of 2013

DON’T MISS ANOTHER UPDATE

Comments

  1. Rachel | 52 Weeks Project

    November 11, 2013 at 6:41 pm

    You are a trooper! I feel like I would have given up after the first two leaves. Looks great :)

    Reply
    • Heidi

      November 12, 2013 at 9:19 am

      Thanks! I watched 1.5 movies while working on it ;)

      Reply
  2. Sivonne

    November 12, 2013 at 8:59 pm

    This is fantastic – so worth the effort!

    Makes me want to make one with summery things on it.

    Reply
  3. Kathleen

    November 13, 2013 at 8:22 pm

    The other leaf you have stenciled is an oak leaf, which I am particularly fond of :)

    Reply
  4. Leanne Porter

    November 18, 2016 at 5:19 pm

    I love the look of leaves. I have a several leaf cookie cutters to be able too use with clay & other materials that I can use to make these ornaments/

    Reply

Trackbacks

  1. Manualidades para niños para un divertido OtoñoNosolobebes | proyectos, vivencias, decoración,… cosas de niños y bebés says:
    September 28, 2014 at 8:21 pm

    […] Estas hojas no se han caído de ningún árbol, pero quedan genial en la taza!! Todos los pasos en Handsoccupied. […]

    Reply

Leave a Reply Cancel reply

Your email address will not be published. Required fields are marked *

This site uses Akismet to reduce spam. Learn how your comment data is processed.

Primary Sidebar

Heidi Gustad from Hands Occupied / Craft Book Author and Knitting, Crochet, Latch Hook and Macrame Designer

Hi! I’m Heidi, an author, yarn craft designer and content creator specializing in knitting, crochet, latch hook & macrame. My work unapologetically features primary colors and vintage-meets-modern style. My first book, Latch Hook: 12 Projects for the Modern Maker, is now available!

Professionally I’m most known for: advanced intarsia knitting design & modern latch hook design.

work with heidi

UPDATES BY EMAIL

Get a free pattern + biweekly updates sent to your inbox.

Let’s be friends!

  • Facebook
  • Instagram
  • Pinterest
  • Twitter
  • YouTube
Latch Hook by Heidi Gustad

Footer

INSTAGRAM

handsoccupied

Craft book author & content creator in love with primary colors & vintage vibes. / #latchhookbook out now!
.
knitting, crochet, latch hook & macramé

Heidi Gustad 🧶✂️
Head to the link in bio for an update on my 2021 p Head to the link in bio for an update on my 2021 plans for Hands Occupied. The two words that best describe this post are self-care and boundaries. 😜 
.
.
Much love to everyone who sent supportive messages about taking time off and creative burnout. I often deflect with humor, but it was genuinely touching to connect with folks who understand. I’ll have something new for y’all later this week, so stay tuned! ❤️💛💙 
#handsoccupied 
.
.
Pictured: An unblocked pile of four striped sweater panels in primary colors sitting on a blanket in my lap.
There’s an update on the blog today, & it’s ab There’s an update on the blog today, & it’s about how I’m going to take the next 2 weeks off to rest & recharge. ☺️🧶 No new content for y’all means I can also take a moment to zoom out & plan what’s next. Link is in bio. 
.
.
A note on Very Serious Crafts: In the post I discuss stepping away from the @seriouscrafts podcast to give myself more time to devote to some minor medical issues. Don’t you worry - my health will be fine, & @molliejohanson @redhandledscissors and I are still pals, and after a short break of their own, the podcast will be back! Just sans moi. 💁🏼‍♀️😆 
.
.
See you in a couple weeks! ✌🏻#handsoccupied #knitdesign #craftdesign #sofadedsweater
Been a little quiet this holiday week, as it shoul Been a little quiet this holiday week, as it should be. ☺️🎄The past few days have been filled with a lot of catching up on festive zoom calls & raising toasts to the camera. 🥂 Connecting with people has been a welcome change of pace! Now I’m feeling ready to meet my inevitable end-of-year deadlines. 😆
.
.
Warmest wishes for the season, my friends! ❤️💛💙
Hi, I’m Heidi, the craft book author & maker beh Hi, I’m Heidi, the craft book author & maker behind Hands Occupied! 👋🏻 I’ve been enjoying making Reels a lot lately, but I wanted to bop in to share a regular photo & say hello. 🤓 
.
.
rather than giving you my bio right now, I have a question. I just got this new sweater & I can’t stop imaging how funny it would be to wear this to a knitting class ... is that bad? 🤣🤣🤣
.
.
Pictured: a blond woman with glasses wearing a sweater that reads “all your sweaters are ugly” standing in front of a Christmas tree.
Wet blocking, also called immersive blocking, is o Wet blocking, also called immersive blocking, is one of the most common methods for finishing a knitting project and helping ensure its final size and shape. Learn basic blocking for absolute beginners in an easy-to-follow (non-Reel!) video tutorial! Catch the tutorial on YouTube or the Hands Occupied Blog, link is in bio. 🧶 #handsoccupied #stopswatchandblockit #KPAmbassadorsDec20 #sponsored
Load More... Follow on Instagram

Copyright © 2021 / Foodie Pro Theme On Genesis Framework / Branding by Ink + Mortar
All Site & Shop Policies / Privacy Policy / Cookie Policy