• 0 items$0.00
  • Skip to primary navigation
  • Skip to main content
  • Skip to primary sidebar
  • Skip to footer

Hands Occupied

Colorful knitting, crochet, latch hook and macrame from craft book author & designer Heidi Gustad.

  • BLOG
    • Knitting
    • Crochet
    • Latch Hook
    • Macramé
    • Punch Needle
  • ABOUT
  • Shop
  • Nav Social Menu

    • Instagram
    • Pinterest
    • RSS
    • TikTok
    • YouTube

Rainbow Shamrocks Glass

March 10, 2014 Leave a Comment

Stenciled Rainbow Shamrocks Glass for St. Patrick's Day

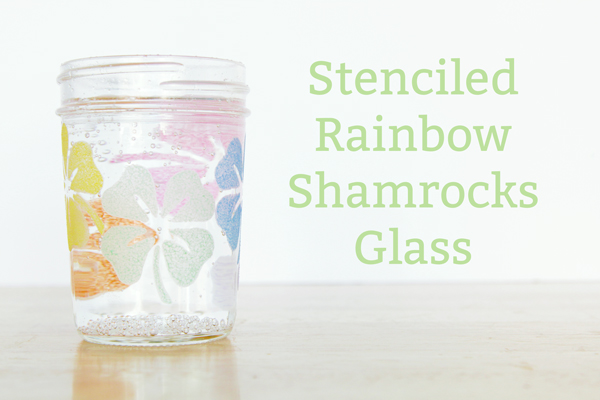
St. Patrick’s Day is just around the corner, but there’s still time to get your rainbowy/gold/leprechaun/shamrock crafting on! I like this project because it’s a festive craft that’s pretty easy to accomplish without investing an obscene amount of time. It’s also a great way to practice your stenciling, which I find to be a pretty handy DIY skill for everything from home decor to party crafts to handmade jewelry.
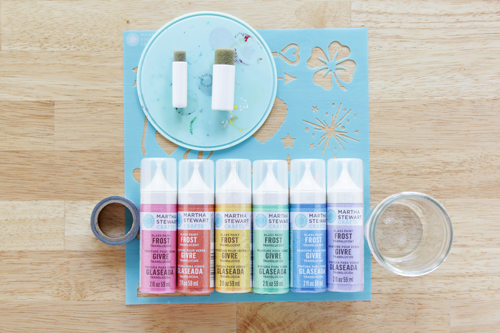
Supplies

plain glass or jar
shamrock stencil 
glass paint in green, pink, orange, yellow, blue & violet
sponge pouncers
masking tape
silicon craft mat (optional)

Stenciled Rainbow Shamrocks Glass for St. Patrick's Day

Directions

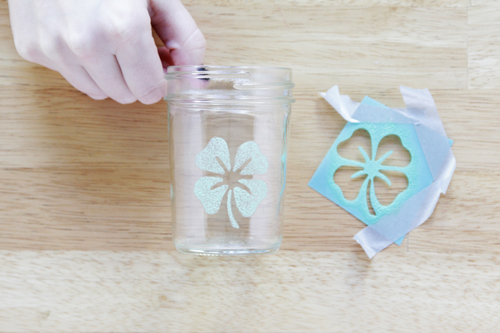
Clean and dry your glass or jar, place your shamrock stencil, and secure with masking tape.

Stenciled Rainbow Shamrocks Glass for St. Patrick's Day

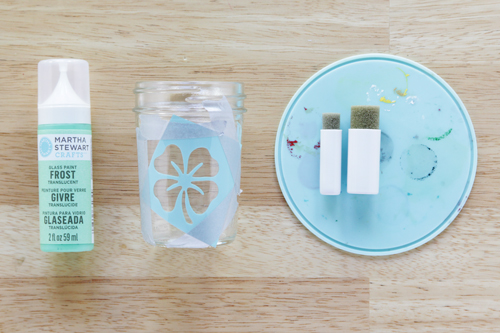
Squirt a small amount of glass paint in your desired color onto a crafting mat or other resuable/disposable surface. If you’re using nonadhesive stencils like me, you have to be careful during the painting process. It’s easy to mess up non-adhesive stencils and get paint under them, ruining the pattern.

Stenciled Rainbow Shamrocks Glass for St. Patrick's Day

Tips for Success with Nonadhesive Stencils

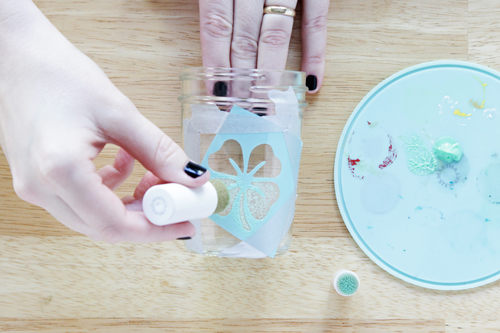
  1. Always remove excess paint from your brush before applying paint to your surface. Too much paint is the number 1 way to mess up a stencil project.
  2. If your desired paint color is too light after applying one layer of paint, add one or two more. Allow each layer to dry for just a few minutes (3-5) between layers.
  3. Remove your stencil from your surface while the paint is still wet, but do so carefully to avoid smudging the paint.
  4. Try to wash all stencils, crafting mats* and brushes/sponges while the paint is still wet to be able to clean them fully.

Stenciled Rainbow Shamrocks Glass for St. Patrick's Day

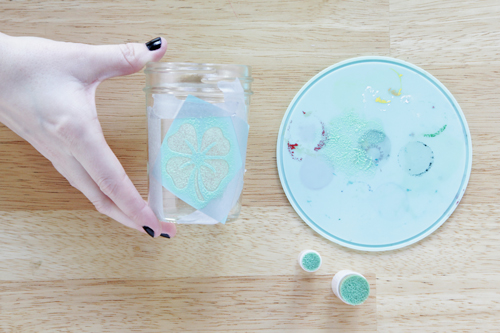
*See all the stains on my mat? That’s what happens when you leave paint on it too long. Since it’s just a crafting mat, I’m super okay with it.

Stenciled Rainbow Shamrocks Glass for St. Patrick's Day

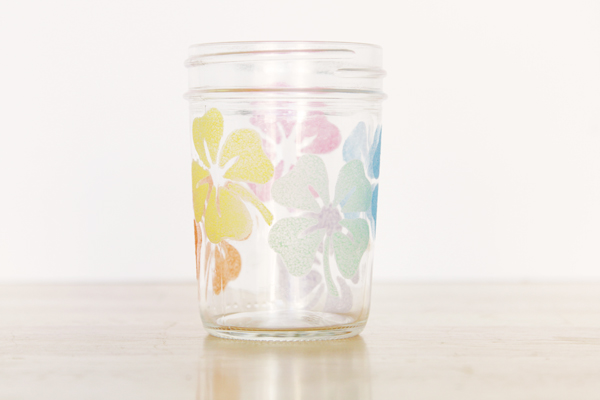
For the glass I made today, I simply reused the same stencil for each of the 6 shamrocks you see. To accomplish this on your own, just remember to let each shamrock dry completely before applying a new one, and clean all supplies fully before reuse. Also remember to let your sponge or brush dry after washing before using them again – if they’re full of too much water, you’ll dilute your glass paint, and it will affect the finished project.

Stenciled Rainbow Shamrocks Glass for St. Patrick's Day

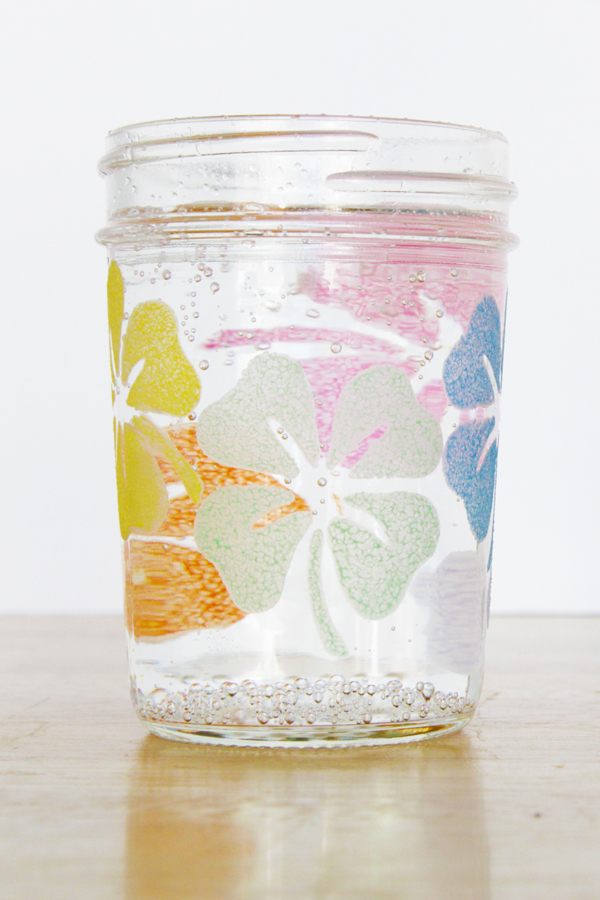
The pastel colors were so hard to get a good snap of, but I hope you get the idea from these shots! I think I’ll use this cutesy glass as my go-to whiskey chalice on St. Patrick’s Day next week. This would also make a super cute votive holder – how would you use this fun DIY? 

Stenciled Rainbow Shamrocks Glass for St. Patrick's Day

Filed Under: How-to, St. Patrick's Day Tagged With: clover, craft, diy, drinking glass, glass paint, shamrock, st patrick, st. patrick's day, stenciled rainbow shamrocks glass, stenciling

About Heidi

Heidi Gustad is a craft book author, designer & creator specializing in yarn crafts like knitting, crochet, latch hook & macramé. Her first book, Latch Hook: 12 Projects for the Modern Maker, is out now.

Previous Post: « Weekly Reader
Next Post: Glitter Polka Dot Notebook »

Reader Interactions

DID YOU LIKE THIS POST?
Visit similar articles...

  • Pinch Me Pendant for St. Patrick’s DayPinch Me Pendant for St. Patrick’s Day
  • Weekly ReaderWeekly Reader
  • How-to: Stenciled Leaf MugHow-to: Stenciled Leaf Mug
  • Twinkle in Your Eye Sunglasses Twinkle in Your Eye Sunglasses

DON’T MISS ANOTHER UPDATE

Leave a Reply Cancel reply

Your email address will not be published. Required fields are marked *

This site uses Akismet to reduce spam. Learn how your comment data is processed.

Primary Sidebar

Heidi Gustad from Hands Occupied / Craft Book Author and Knitting, Crochet, Latch Hook and Macrame Designer

Hi! I’m Heidi (she/her/hers), a craft book author & pattern designer specializing in knitting, crochet, latch hook & macrame. Really anything with yarn! ❤️  My work combines vintage and modern design elements, featuring bold colors and graphic motifs.

EMAIL NEWSLETTER

Never miss a tutorial with these short & sweet monthly updates.

Find Me on Social Media

  • Instagram
  • Pinterest
  • TikTok
  • YouTube
Latch Hook by Heidi GustadDiscover Unique Items

Footer

INSTAGRAM

handsoccupied

Craft book author, designer & creator specializing in yarn crafts like knitting, crochet, latch hook & macramé
❤️ Email preferred

Heidi Gustad 🧶✂️
Weekend knitting design aftermath. Remember kids, Weekend knitting design aftermath. Remember kids, it’s always good to stop, swatch and block it. 🧶
.
#stopswatchandblockit #handsoccupied
Learn how to do the magic loop method for knitting Learn how to do the magic loop method for knitting in the round in 90 seconds. / Using the magic loop allows knitters to work in the round with a single, long circular needle at a range of circumferences. 
.
For a longer, full-width & more detailed overview of magic loop knitting, check out my u2be & b1og, the 🔗🔗 are where you’d think. 🧶
.
#handsoccupied #magicloop #knitting #howtoknit #learntoknit #knitter #knittinginspiration #knittinginstagram #knittingintheround
Since it won’t be clean for long, swipe to see w Since it won’t be clean for long, swipe to see what my home studio looks like these days. Nothing will ever quite be like the old Hands Occupied Studio, but I’m pretty pleased with how I shoehorned everything in this space. Function over form + a layer of yarn cuteness-meets-chaos is how I’d describe my creative space needs. 😆 When I was still renting the studio, those needs included “doesn’t rain suspicious brown water from a crack in the ceiling for a year,” so this is an improvement! 😆
.
For a time lapse of the studio organizing and tszuj-ing process, scroll down a couple posts on my feed. (There’s also a video or two featuring the old studio if you’re curious.) Happy June, friends! 
.
#handsoccupied #handsoccupiedstudio #knitdesigner #craftdesign #yarncrafts #latchhook #makerlife #heidigustad #chicagocrafter
Who doesn’t love magic loop knitting? Who doesn’t know what it is? How about when circular needles were invented?
.
In todays new bl0g post + video tutorial, you’ll learn about the magic loop method for knitting in the round, how to do it and why to use it, and when it came to be. The 🔗 is in my b1o. 🧶 
.
#handsoccupied #magicloop #knitting #howtoknit #knittinginspiration #knittingintheround
Finally organizing & putting the finishing touches Finally organizing & putting the finishing touches on my home studio. After losing my studio space last fall, it’s feels really great to *occupy* this new space all the way. 😉
.
I started by removing general clutter & returning straggler supplies from various WIPs, videos & design deadlines to their homes. Next, I hung a third peg board in the space - this one is mostly for display and less for organizing tools or projects. For the first time ever, I’m displaying projects from my book, plus a couple other faves. (The best thing about designing more yarn crafts besides knit & crochet is that I have some really fun -and delightfully pettable 😆- samples around.) I finished by adding a square dowel to my small supply storage tower to keep it from tipping over, plus re-arranging and de-cluttering the closet. 
.
This cleaner space already has me feeling so much more creative and less overwhelmed. Now to find a safe spot in the basement for the tower of project samples in Rubbermaid tubs I liberated from my WIPs closet. Also why are there five?! 
.
Here’s to keeping it clean for a few weeks! 🧶 
.
#handsocupied #handsoccupiedstudio #craftroom #craftroomorganization #craftroomstorage #yarncraft #knitter #crocheter #latchhook #latchhookbook
Load More... Follow on Instagram

Copyright © 2023 / Foodie Pro Theme On Genesis Framework / Branding by Ink + Mortar
All Site & Shop Policies / Privacy Policy / Cookie Policy