• 0 items$0.00
  • Skip to primary navigation
  • Skip to main content
  • Skip to primary sidebar
  • Skip to footer

Hands Occupied

Colorful knitting, crochet, latch hook and macrame from craft book author & designer Heidi Gustad.

  • BLOG
    • Knitting
    • Crochet
    • Latch Hook
    • Macramé
    • Punch Needle
  • ABOUT
  • Shop
  • Nav Social Menu

    • Instagram
    • Pinterest
    • RSS
    • YouTube

How-to: Vintage Style Santa

November 27, 2013 2 Comments

How-to: Vintage Style Santa | Hands Occupied

When I was home for Christmas last year, I was smart and remembered to pack my camera. After the preparation whatnot of my parents’ hosting Christmas Day guests, I helped my mom take down the tree and realized she’s (of course) holding on to all of the really amazing handmade Christmas ornaments and decorations made by my Great-Grandmothers or she and the other women in her family.

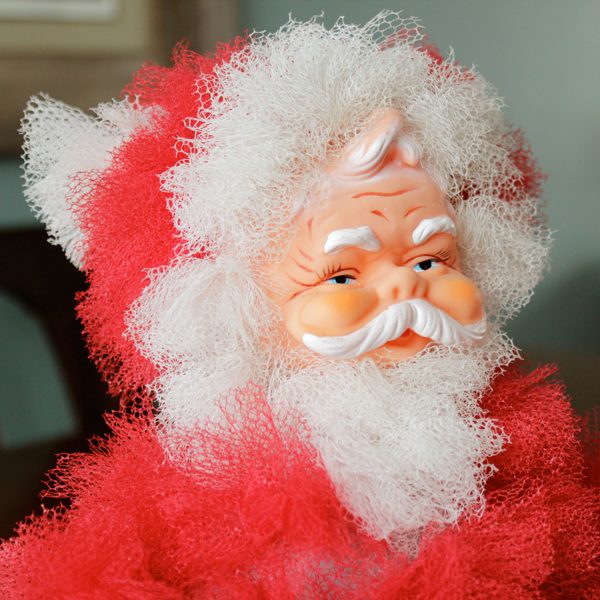
A couple years ago, I shared twelve ornament ideas for Christmas, which you can check out here. This year, I want to share my top seven picks from among my mom’s stash of holiday DIYs. Today I want to start off with this TOTALLY CRAZY Santa made from an old bleach bottle. This somewhat creepy dude is probably at least 50 years old, made by my Great Grandma in the 1960s. According to my mom, there just didn’t used to be a whole lot of Christmas home decor items readily available in stores back then, so that was part of why people made things themselves, often out of upcycled items. My Great-Grandma was born in 1900 and lived until 2002 (she was even at home for her 100th birthday), so she lived through two World Wars, the Great Depression and even 9/11. She knew very well how to make things stretch, and she loved crafting.

Supplies

empty bleach bottle with handle (for a chubbier Santa, you could try a milk jug)
x-acto knife
red and white tulle
scissors
black felt
gold paper
styrofoam ball
white pipe cleaners
Santa doll face (I found some here.)
needle
thread
styrofoam-safe glue
wooden skewer (optional)
straight pins

Directions

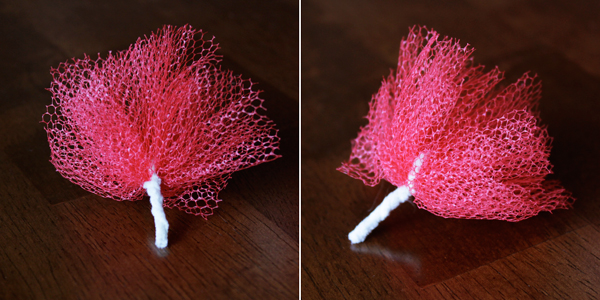
Cut your tulle into several squares, and cut your pipe cleaners into several 4 inch lengths. Gather a piece of tulle into a bundle, fold a pipe cleaner piece around the bundle’s center and fold the pipe cleaner in half. Twist the ends of the pipe cleaner together.
How-to: Vintage Style Santa | Hands Occupied

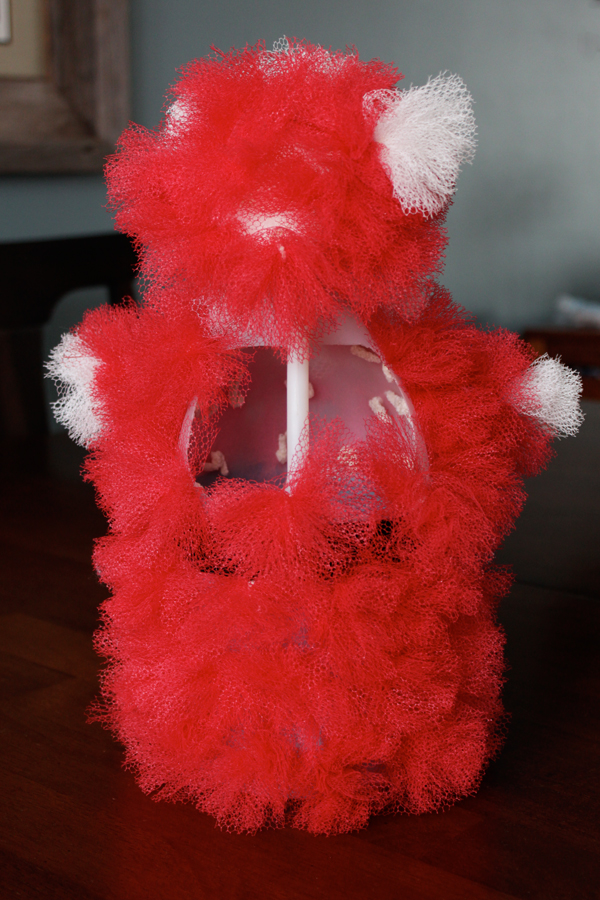
Carefully cut a hole in the back of your bleach bottle as shown using an x-acto knife.

My mom tells me bleach bottles were a very popular craft supply when she was a kid. She also had an Easter bunny and a troll doll bassinet (that I eventually played with when I was a kid), made from bleach bottles too. 
How-to: Vintage Style Santa | Hands Occupied

Attach your styrofoam ball to the threaded top of the bottle and secure with styrofoam safe glue. (Here‘s a guide for selecting the right glue.) Let dry. Then, attach the Santa face to your styrofoam ball using straight pins.* Poke several pilot holes in your styrofoam ball and poke some tulle and pipe cleaner bundles into those holes to create Santa’s hat. For the tip of the hat, you’ll use longer pipe cleaners to add some shape to it.

*Back then adhesives weren’t as great as they are today – according to Mom, they used pins a lot in crafting.
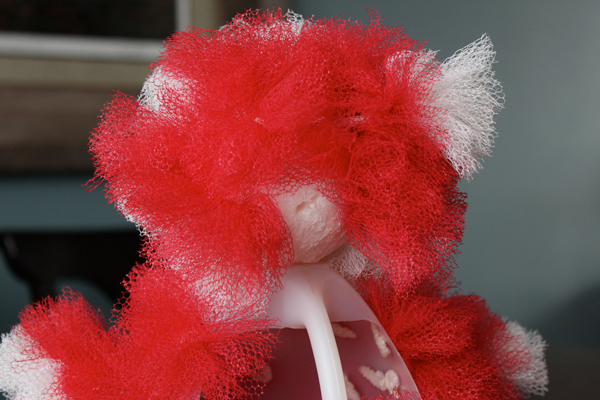
How-to: Vintage Style Santa | Hands Occupied

Poke holes all over the body of your bottle with an x-acto knife, and poke a tulle bundle through the hole, bending the pipe cleaner down inside the bottle to secure.
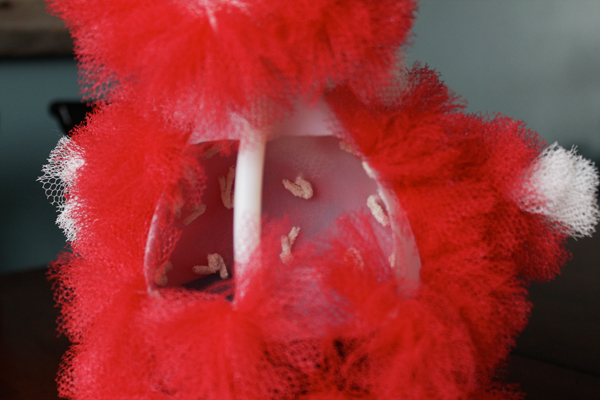
How-to: Vintage Style Santa | Hands Occupied

For the arms and hat of your Santa, you’ll need to create special pipe cleaner and tulle bundles. The red bits need to be attached to longer pieces of pipe cleaner and tipped with white tulle.

Cut two feet out of black felt. Poke two holes into the bottom of the bottle per foot (4 holes total). Attach the feet to the bottom of the bottle with one pipe cleaner piece each. You’ll have to reach inside the bottle to twist together and fold down the pipe cleaners to lock in the feet.
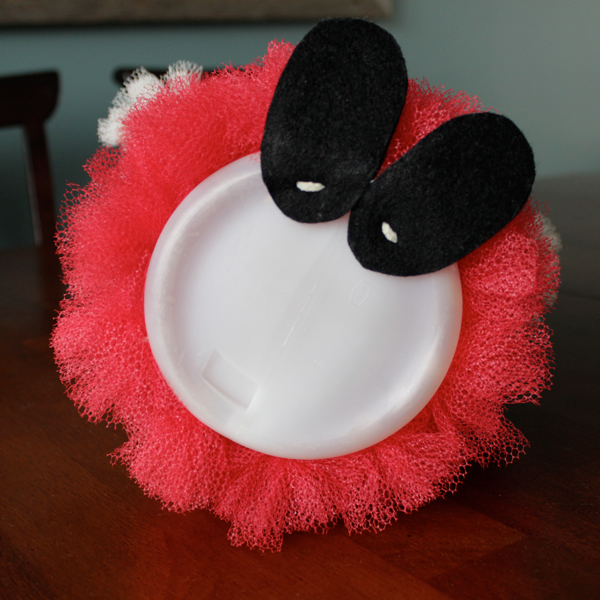
How-to: Vintage Style Santa | Hands Occupied

Cut a strip of black felt to use for Santa’s belt. Cut a belt buckle shape out of gold paper and thread it onto the felt. Wrap the belt around Santa’s waist and glue it together behind Santa’s back to attach. You’ll notice the belt buckle on my mom’s vintage Santa is the one part not doing so hot after a few decades of use.
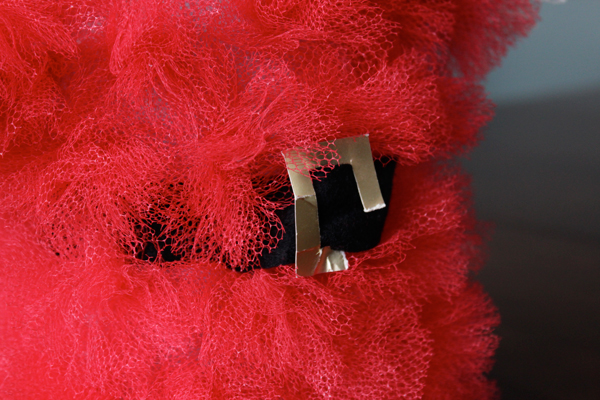
How-to: Vintage Style Santa | Hands Occupied

If your Santa’s getup is looking a little sparse, you can always poke more holes and add more packets of tulle to fill it in.
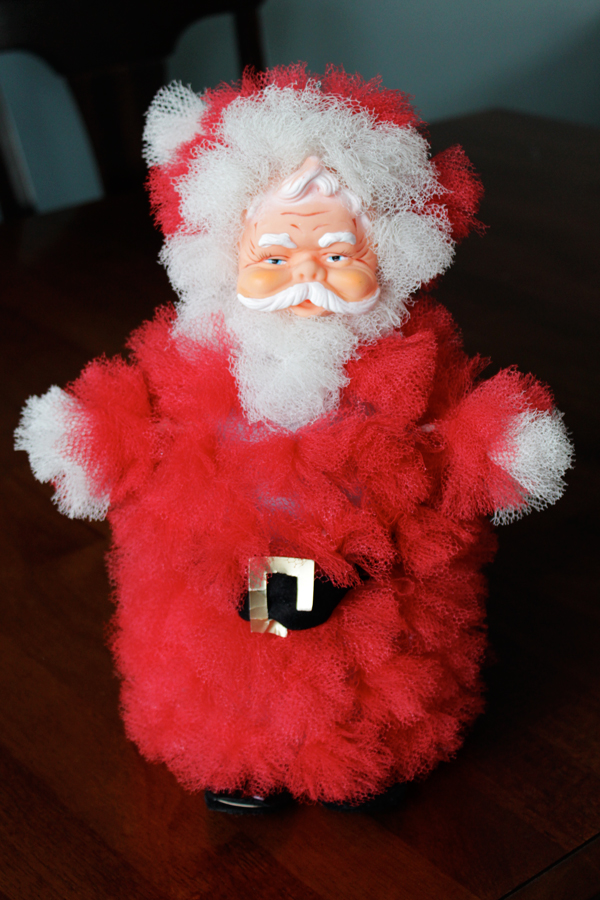
How-to: Vintage Style Santa | Hands Occupied

I realize this Santa is totally weird, but that’s why I love him. Heck, that’s why I love so many midcentury crafts. They were weird, funky, funny and didn’t always make any sense. The other crafts I photographed for this series are all significantly less weird, I promise. :)
Filed Under: Christmas, How-to, Vintage Crafts Tagged With: bleach bottle, christmas, craft, diy, holiday decor, midcentury, santa, santa craft, upcycle, vintage crafts, vintage diy

About Heidi

Heidi Gustad is a craft book author & content creator in love with primary colors & vintage vibes. She specializes in knitting, crochet, latch hook and macramé, and her first book, Latch Hook: 12 Projects for the Modern Maker, is out now!

Previous Post: « How-to: DIY a Wide Belt
Next Post: Weekly Reader »

Reader Interactions

DID YOU LIKE THIS POST?
Visit similar articles...

  • 6 Beautiful Vintage Holiday Decorations6 Beautiful Vintage Holiday Decorations
  • Weekly ReaderWeekly Reader
  • How to Make Fabric YarnHow to Make Fabric Yarn
  • Twinkle in Your Eye Sunglasses Twinkle in Your Eye Sunglasses

DON’T MISS ANOTHER UPDATE

Comments

  1. Barb Brower

    November 29, 2013 at 9:42 pm

    I remember that Santa well. Thanks for keeping family memories alive!

    Reply
  2. sasha ressetar

    July 26, 2014 at 1:04 am

    I had one of these but the body was made from plastic hawaiian leis.
    and since i saw this one i decided to make one……… let me know if you want to see. but thanks a lot for posting this!

    Reply

Leave a Reply Cancel reply

Your email address will not be published. Required fields are marked *

This site uses Akismet to reduce spam. Learn how your comment data is processed.

Primary Sidebar

Heidi Gustad from Hands Occupied / Craft Book Author and Knitting, Crochet, Latch Hook and Macrame Designer

Hi! I’m Heidi (she/her/hers), a craft book author & pattern designer specializing in knitting, crochet, latch hook & macrame. Really anything with yarn! ❤️  My work combines vintage and modern design elements, featuring bold colors and graphic motifs.

UPDATES BY EMAIL

Monthly highlights sent to your inbox.

Find Me Elsewhere, If You’re There

  • Instagram
  • Pinterest
  • YouTube
Latch Hook by Heidi GustadDiscover Unique Items

Footer

INSTAGRAM

handsoccupied

Craft book author & pattern designer ❤️💛💙
knitting, crochet, latch hook & macramé
.
Please email for pattern support. 🧶

Heidi Gustad 🧶✂️
How to to knit throwing (a.k.a. English) style . How to to knit throwing (a.k.a. English) style 
.
In knitting, there are a few common knitting styles. Most often you’re going to encounter continental style and English (throwing) style on your knitting journey. I recently had an old video teaching continental style get a lot of views. Based on the comments, it was clear the people wanted to also see a throwing tutorial, so here you go! 🧶
.
Please note that there is a LOT of variation in knitting styles, and one isn’t necessarily better than another. Most often, I’ve found it comes down to two things: how you were taught and whether or not you’re really into colorwork knitting (which can involve a mix of styles). 
.
Longer-term knitters who’ve made it this far: do you prefer one over the other? And why? 
.
#handsoccupied #englishknitting #learntoknit #knitting #howtoknit #knittersofinstagram #knitting_inspiration
How to do a one-step provisional knitting cast on How to do a one-step provisional knitting cast on / a.k.a. crochet provisional cast on, scrap yarn cast on
.
I read recently that tiktok and Instagram are being used as search engines more and more. 🤔 I thought since I’m going to all the work of making tutorials on YouTube, I should experiment with making a quick version of them for other platforms. There are obvious teaching limitations to vertical video, short-form content like this, but I think I covered the gist of this cast on in a minute. The YouTube version also covers how to unzip this cast on because there was time for it 👍🏻 L1nk is in my profile. 
.
I’m very much looking for feedback as I continue to make instructional knitting & craft videos. Sometimes good tutorials are hard to find, and (ideally polite) feedback helps me improve. 
.

#handsoccupied #provisionalcaston #knitting #knititngtutorial #knittersofinstagram #crochethook #knittingtutorial
For the first time in a long time, there’s a new For the first time in a long time, there’s a new tutorial from Hands Occupied! 🎉 The video is live on YouTube & the blog. 
.
The post covers what provisional cast ons are & how they differ, and the video covers how to work a one-step provisional cast on using scrap yarn and a crochet hook. (This is a great one to save for future reference.)
.
I learned several names for this method while researching this video & post. Crochet provisional cast on, one-step cast on, scrap yarn cast on - if you know even more names for this technique, please share! 
.
#handsoccupied #provisionalcaston #knitting #scrapyarn #crochethook
Working on a sample for some upcoming videos. It’s an overcast day with intermittent sunshine & I have a scruffy little sidecar. 🐶 Can’t complain! 
.
What’s on your needles this week? 
.
Yarn: @debbieblissknits Cashmerino Aran 
.
#handsoccupied #knitting #knittinglife
Peg boards and craft room organization go together Peg boards and craft room organization go together like peanut butter and jelly. So, as you can see, do latch hook tools and screwdriver organizers! 🪛 
.
I think this trick translates to any tool with a thick handle, so leather working tools, punch needles, print making tools, etc. should work! What other tools am I, a needlecrafter, blanking on right now? 
.
#craftorganization #handsoccupied #latchhook #latchhooking
Load More... Follow on Instagram

Copyright © 2023 / Foodie Pro Theme On Genesis Framework / Branding by Ink + Mortar
All Site & Shop Policies / Privacy Policy / Cookie Policy