• 0 items$0.00
  • Skip to primary navigation
  • Skip to main content
  • Skip to primary sidebar
  • Skip to footer

Hands Occupied

Colorful knitting, crochet, latch hook and macrame from craft book author & designer Heidi Gustad.

  • BLOG
    • Knitting
    • Crochet
    • Latch Hook
    • Macramé
    • Punch Needle
  • ABOUT
  • Shop
  • Nav Social Menu

    • Instagram
    • Pinterest
    • RSS
    • YouTube

Weaving in Intarsia Ends & Tips for Finishing

October 9, 2018 2 Comments

This tutorial is part of our Read Along Knit Along series & is brought to you by LoveKnitting, Eucalan & Knitter’s Pride. Learn about our sponsors and enter to win the RALKAL prize pack here. 

Many people find weaving in ends to be one of the most frustrating parts of intarsia knitting. Click through for a video tutorial that walks you through how to weave in all of those pesky ends, specifically for intarsia colorwork.
Intarsia can be an intimidating knitting technique. If you’re here, you might be finding yourself in this boat: You’ve mastered the technique and are SO excited because you’re almost done with your project… And then you remember how many ends you’ve got to weave in. So many folks find weaving in ends to be one of the most frustrating parts of the skill, and with all colorwork, ends are a necessary part of the process. Let’s walk you through how to weave in all of those pesky ends, specifically for intarsia colorwork.

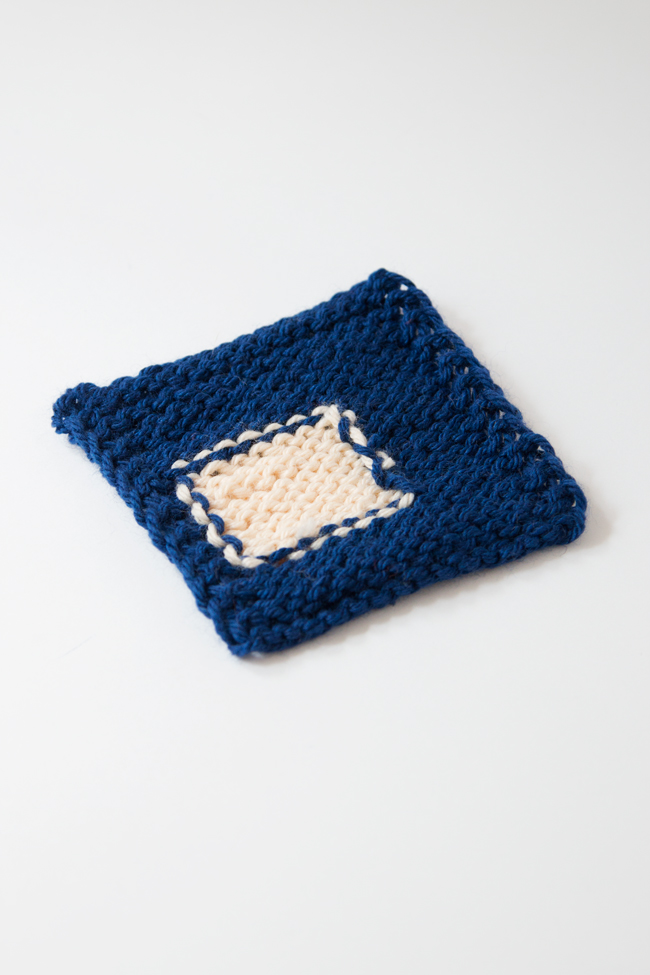
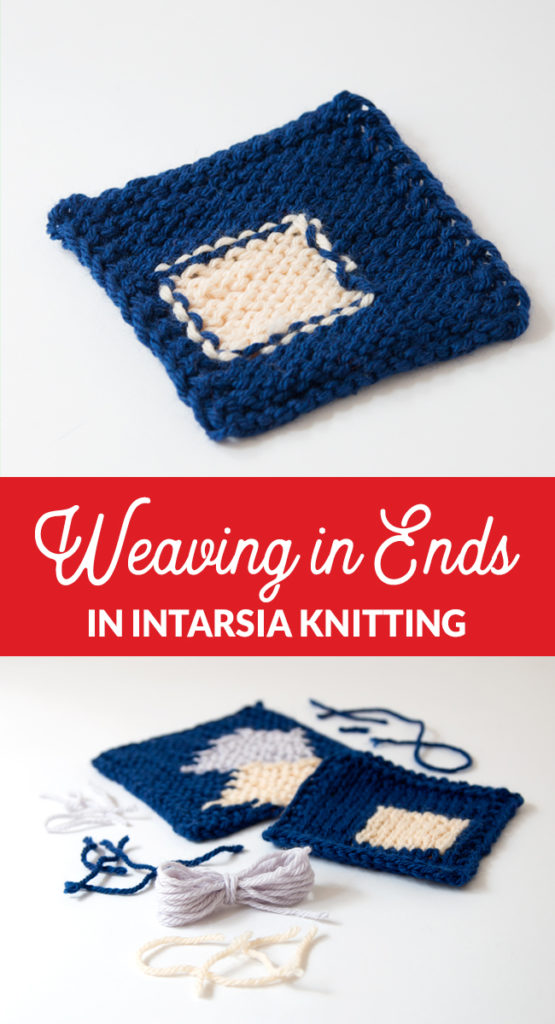
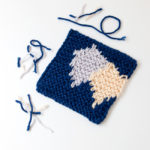
How to Weave in Intarsia Ends + Tips for Intarsia Finishing

Concepts Covered:

  • weaving ends into intarsia joins
  • duplicate stitch for weaving in ends
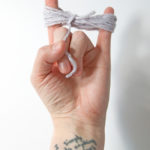
  • dry blocking
  • wet blocking

Many people find weaving in ends to be one of the most frustrating parts of intarsia knitting. Click through for a video tutorial that walks you through how to weave in all of those pesky ends, specifically for intarsia colorwork.

This tutorial is part of our Read Along Knit Along series & is brought to you by LoveKnitting, Eucalan & Knitter’s Pride. Learn about our sponsors and enter to win the RALKAL prize pack here. 

Filed Under: Knit Along, Knitting Tagged With: intarsia, intarsia mountain, ralkal, read along knit along, weaving in ends

About Heidi

Heidi Gustad is a craft book author & content creator in love with primary colors & vintage vibes. She specializes in knitting, crochet, latch hook and macramé, and her first book, Latch Hook: 12 Projects for the Modern Maker, is out now!

Previous Post: « Picks of the Week
Next Post: A peek inside Improper Cross-Stitch by Haley Pierson-Cox »

Reader Interactions

DID YOU LIKE THIS POST?
Visit similar articles...

  • More Intarsia Mountain Color Palettes!More Intarsia Mountain Color Palettes!
  • Advanced Intarsia Knitting TipsAdvanced Intarsia Knitting Tips
  • How to Knit Intarsia Without Bobbins or ButterfliesHow to Knit Intarsia Without Bobbins or Butterflies
  • How to Estimate & Manage Yarn Tails in Intarsia KnittingHow to Estimate & Manage Yarn Tails in Intarsia Knitting

DON’T MISS ANOTHER UPDATE

Comments

  1. Melinda

    June 11, 2019 at 11:58 pm

    Thanks for the helpful videos – you’re a life saver! I just finished my Intarsia Mountains blanket and I’m at the daunting point of weaving in ends. Can you clarify what you would do with all the little tails? More specifically- after you weave in the ends and have maybe 1 or 2 inches left on the tail, do you simply cut those short? Or do you weave until you can’t weave any further? Thanks!

    Reply
    • Heidi

      June 12, 2019 at 8:56 am

      Great questions! I weave them in, ideally in the intarsia joins because it’s faster in my opinion and adds less bulk than duplicate stitch. I like to weave in at least 2-4 inches and leave the little tails on until after I’ve blocked a finished piece. Then if the ends shift during blocking, you’ve got some wiggle room there. Then I trim my tails as the very last step. :)

      Reply

Leave a Reply Cancel reply

Your email address will not be published. Required fields are marked *

This site uses Akismet to reduce spam. Learn how your comment data is processed.

Primary Sidebar

Heidi Gustad from Hands Occupied / Craft Book Author and Knitting, Crochet, Latch Hook and Macrame Designer

Hi! I’m Heidi (she/her/hers), a craft book author & pattern designer specializing in knitting, crochet, latch hook & macrame. Really anything with yarn! ❤️  My work combines vintage and modern design elements, featuring bold colors and graphic motifs.

UPDATES BY EMAIL

Monthly highlights sent to your inbox.

Find Me Elsewhere, If You’re There

  • Instagram
  • Pinterest
  • YouTube
Latch Hook by Heidi GustadDiscover Unique Items

Footer

INSTAGRAM

handsoccupied

Craft book author & pattern designer ❤️💛💙
knitting, crochet, latch hook & macramé
.
Please email for pattern support. 🧶

Heidi Gustad 🧶✂️
How to do a one-step provisional knitting cast on How to do a one-step provisional knitting cast on / a.k.a. crochet provisional cast on, scrap yarn cast on
.
I read recently that tiktok and Instagram are being used as search engines more and more. 🤔 I thought since I’m going to all the work of making tutorials on YouTube, I should experiment with making a quick version of them for other platforms. There are obvious teaching limitations to vertical video, short-form content like this, but I think I covered the gist of this cast on in a minute. The YouTube version also covers how to unzip this cast on because there was time for it 👍🏻 L1nk is in my profile. 
.
I’m very much looking for feedback as I continue to make instructional knitting & craft videos. Sometimes good tutorials are hard to find, and (ideally polite) feedback helps me improve. 
.

#handsoccupied #provisionalcaston #knitting #knititngtutorial #knittersofinstagram #crochethook #knittingtutorial
For the first time in a long time, there’s a new For the first time in a long time, there’s a new tutorial from Hands Occupied! 🎉 The video is live on YouTube & the blog. 
.
The post covers what provisional cast ons are & how they differ, and the video covers how to work a one-step provisional cast on using scrap yarn and a crochet hook. (This is a great one to save for future reference.)
.
I learned several names for this method while researching this video & post. Crochet provisional cast on, one-step cast on, scrap yarn cast on - if you know even more names for this technique, please share! 
.
#handsoccupied #provisionalcaston #knitting #scrapyarn #crochethook
Working on a sample for some upcoming videos. It’s an overcast day with intermittent sunshine & I have a scruffy little sidecar. 🐶 Can’t complain! 
.
What’s on your needles this week? 
.
Yarn: @debbieblissknits Cashmerino Aran 
.
#handsoccupied #knitting #knittinglife
Peg boards and craft room organization go together Peg boards and craft room organization go together like peanut butter and jelly. So, as you can see, do latch hook tools and screwdriver organizers! 🪛 
.
I think this trick translates to any tool with a thick handle, so leather working tools, punch needles, print making tools, etc. should work! What other tools am I, a needlecrafter, blanking on right now? 
.
#craftorganization #handsoccupied #latchhook #latchhooking
Pegboard storage is my favorite for craft supplies Pegboard storage is my favorite for craft supplies, so getting a few hung in my new studio has been a priority. Here’s my first attempt. 🔨 
.
Details: This pegboard panel is for organizing my knitting needles, latch hook tools, sewing thread, etc. It doesn’t need to hold much weight, so I didn’t anchor this into a stud - just used basic drywall anchors. I’ve also got a set of two 2’x4’ panels for another spot in my studio, and those will need a stud/more than 3 drywall anchors. Wish me luck! 
.
[description: video features a woman hanging a panel of pegboard using a square dowel and drill]
Load More... Follow on Instagram

Copyright © 2023 / Foodie Pro Theme On Genesis Framework / Branding by Ink + Mortar
All Site & Shop Policies / Privacy Policy / Cookie Policy