• 0 items$0.00
  • Skip to primary navigation
  • Skip to main content
  • Skip to primary sidebar
  • Skip to footer

Hands Occupied

Colorful knitting, crochet, latch hook and macrame from craft book author & designer Heidi Gustad.

  • BLOG
    • Knitting
    • Crochet
    • Latch Hook
    • Macramé
    • Punch Needle
  • ABOUT
  • Shop
  • Nav Social Menu

    • Instagram
    • Pinterest
    • RSS
    • TikTok
    • YouTube

DIY Comic Book Compact

March 5, 2014 4 Comments

DIY Comic Book Compact at Hands Occupied

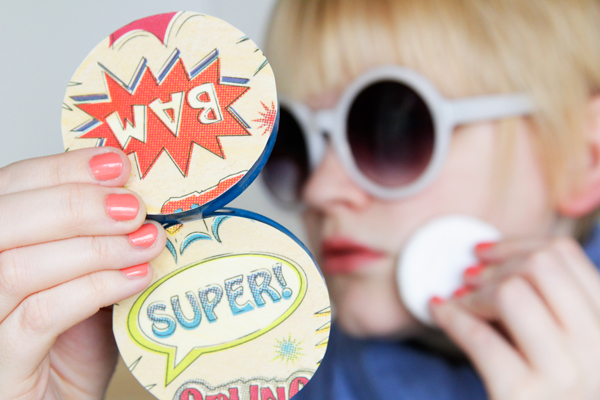
Inspired by a love of action movies and lifelong wish to BE Sydney Bristow, this made-over compact makes me smile every time I reach for it in my purse. I used to carry around a vintage gold compact for powdering my nose, but the wear and tear on it was no good. Then I switched to a plastic, non-vintage compact, so it was ok when it got scratched up by keys or other purse ephemera. But it was looking pretty bad. The solution? Bust out the Mod Podge!
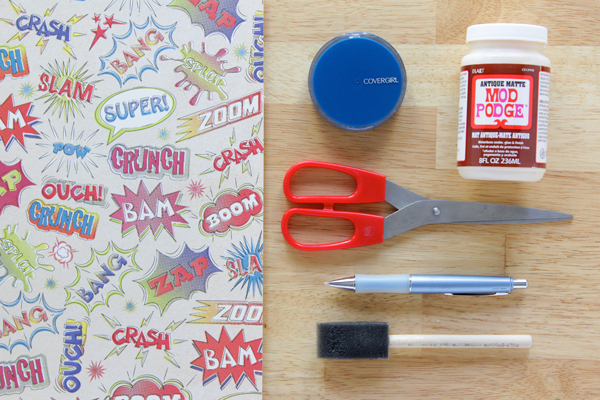
Supplies

scrapbooking paper (I like my comic book paper, but any design is fine!)
pencil
scissors
antique matte or regular Mod Podge
sponge brush
acrylic sealant (optional)

DIY Comic Book Compact

Directions

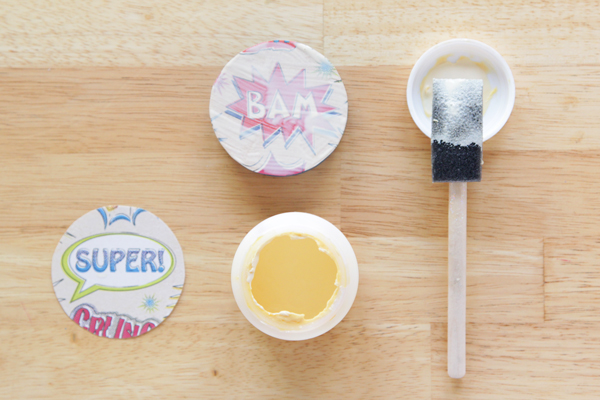
First off, take a moment to drink in how freaking fun this BOOM, ZAP, POW comic book paper is. Next, trace around the compact with a pencil, and cut out a circle to cover the top and bottom of the compact.

DIY Comic Book Compact

Paint a layer of Mod Podge onto one side of your compact. If you’re using thick paper like me, you’ll want to be a little generous with the Podge.

DIY Comic Book Compact

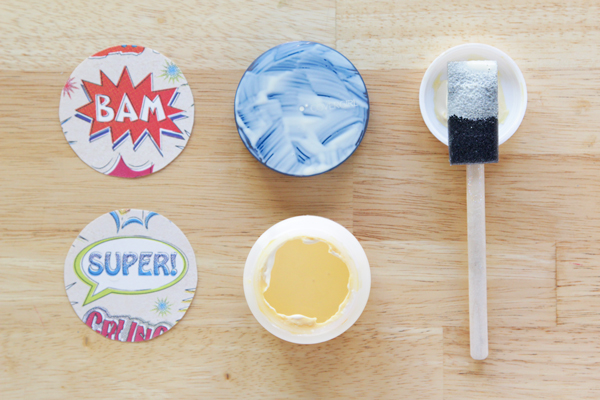
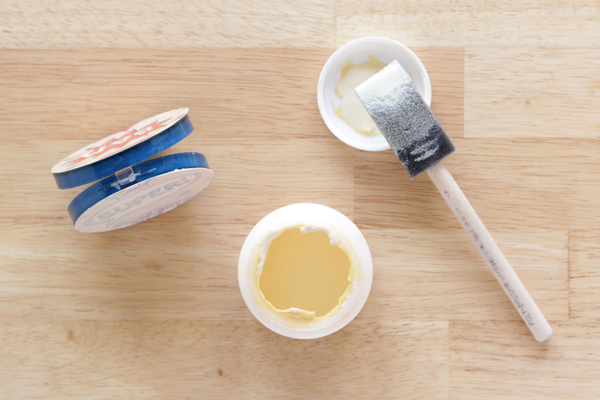
Place one paper circle on the Mod Podge, lining it up however you like. Remember that when you open your compact, it might read upside down – or right side up – depending on how you’ve placed the circle!

DIY Comic Book Compact

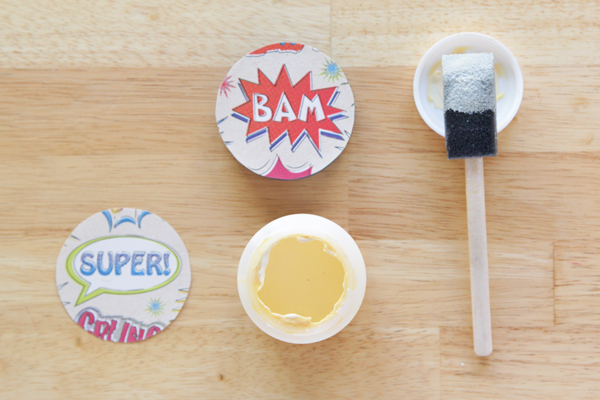
Paint another layer of Mod Podge over your circle on the compact.

DIY Comic Book Compact

Let dry, and repeat the Mod Podge layer + circle placement + top layer of Mod Podge process a final time. Let dry completely.

DIY Comic Book Compact

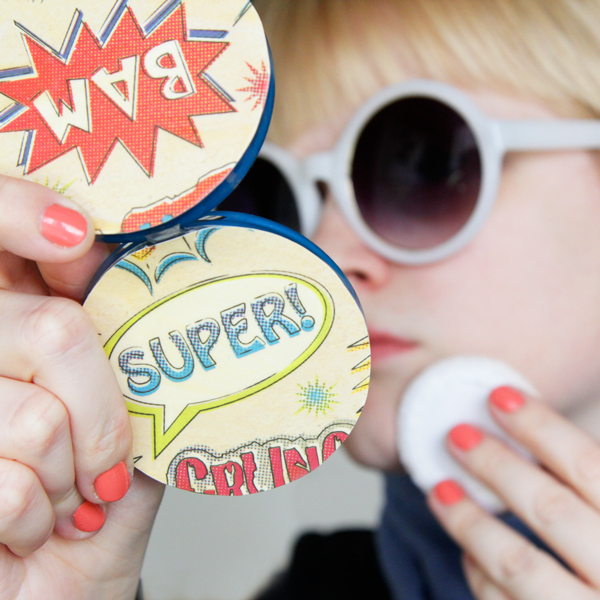
If you feel like your finished compact is a little sticky to the touch, you can seal it with an acrylic spray. I love having this fun & colorful compact in my bag. What do you think – would you do comic book paper or are you into more subtle patterns? Remember – there’s almost no wrong way to DIY!

DIY Comic Book Compact

This project was originally posted at my girl Amy’s blog Mod Podge Rocks! …because, well, Mod Podge does rock ;) 

Filed Under: Decoupage, DIY Style, How-to, My Work Elsewhere Tagged With: comic book compact, comic book craft, comic books, diy, diy style, easy, mod podge, super hero craft

About Heidi

Heidi Gustad is a craft book author, designer & creator specializing in yarn crafts like knitting, crochet, latch hook & macramé. Her first book, Latch Hook: 12 Projects for the Modern Maker, is out now.

Previous Post: « Simple Basketweave Baby Blanket
Next Post: Weekly Reader »

Reader Interactions

DID YOU LIKE THIS POST?
Visit similar articles...

  • Twinkle in Your Eye Sunglasses Twinkle in Your Eye Sunglasses
  • Dimensional Easter Egg EarringsDimensional Easter Egg Earrings
  • How-to: Lantern-style Votive LuminariesHow-to: Lantern-style Votive Luminaries
  • Easy No Slip HangersEasy No Slip Hangers

DON’T MISS ANOTHER UPDATE

Comments

  1. Katie

    March 6, 2014 at 8:04 am

    Holy DIY Batman! lol

    This is a such a cute project. I love the way it turned out and I liked how you used the antique matte mod podge. Personally, I would use either comic book paper or some type of food print scrapbooking paper (if I was making my own compacts).

    Thanks For Sharing :)

    -Katie

    Reply
  2. Tan of Squirrelly Minds

    March 6, 2014 at 9:20 am

    Hah love that pic of you. Such an awesome DIY Heidi!

    Reply
    • Heidi

      March 6, 2014 at 1:56 pm

      lol, thanks!

      Reply
  3. Rebecca

    March 12, 2014 at 11:40 pm

    That comic book scrapbook paper is terrific! This would also be really fun to do with an antique comic book!

    Reply

Leave a Reply Cancel reply

Your email address will not be published. Required fields are marked *

This site uses Akismet to reduce spam. Learn how your comment data is processed.

Primary Sidebar

Heidi Gustad from Hands Occupied / Craft Book Author and Knitting, Crochet, Latch Hook and Macrame Designer

Hi! I’m Heidi (she/her/hers), a craft book author & pattern designer specializing in knitting, crochet, latch hook & macrame. Really anything with yarn! ❤️  My work combines vintage and modern design elements, featuring bold colors and graphic motifs.

EMAIL NEWSLETTER

Never miss a tutorial with these short & sweet monthly updates.

Find Me on Social Media

  • Instagram
  • Pinterest
  • TikTok
  • YouTube
Latch Hook by Heidi GustadDiscover Unique Items

Footer

INSTAGRAM

handsoccupied

Helping yarn crafters untangle various techniques on the internet since 2010
🧶 Really into intarsia
Stay up-to-date 💌 & shop the latest patterns ⤵️

Heidi Gustad 🧶 knitting & yarn crafts
How to convert a closet into WIPs storage with jus How to convert a closet into WIPs storage with just a few supplies ✂️
.
When I was a librarian, we would use these hanging bags to circulate books with audiobook CDs. They came to mind when I wanted to develop a filing cabinet-like system for my differently-sized WIPs. To fit in my studio closet, a standard bedroom closet, they just needed custom hangers. 🤙🏻 
.
HOW TO MAKE THE HANGERS
1. Carefully cut approx. a 9” (23 cm) length of flexible 3 mm aluminum wire.
2. Near the end of a large knitting needle or dowel, wrap the wire around it as you would a twist tie. 
3. Bend the other end into a hook shape, perpendicular to the circle shape you just created. 
4. Hang like a hanger in a closet, as shown. 
.
#handsoccupied #handmadelife #knitting_inspiration #craftcloset #craftroom #craftroomorganization #craftroomstorage #craftroomdecor #crocheter #latchhook #knittersofinstagram #wip #wips #hangingstorage
It’s time for the monthly review and giveaway! T It’s time for the monthly review and giveaway! This go around, get to know two new sister yarns from @manosyarnsusa, Marla and Sami, and enter to win a skein of each to try for yourself. 
.
What makes these yarns sisters is that, while dyed differently, they’re the same weight and come in intentionally coordinating color palettes. For my review, I opted for a sky-inspired combo of Sami in Natural and Marla in Nube. 🌧️ 
.
Check out the full review & enter the giveaway at the link in my bio. 
.
#handsoccupied #yarnreview #manosdeluruguay #knitting_inspire #crochet #yarngiveaway #knitters #yarn #crochetersofinstagram
If only knitting a whole project took 39 seconds… 😮‍💨 
.
In this video, you can see how the Intarsia Flower Pillow pattern knits up - two flat panels, one with intarsia, both are blocked, and then they’re seamed. Find the pattern on @hi.ravelry & my website, just search Intarsia Flower Pillow. 🌸 
.
P.S. I’m really smiling in this video while seaming the pillow, so I guess I’m proving last week’s claim that I truly enjoy that sometimes-dreaded task. 😆🫣
In knitting, a Left Lifted Increase (LLI) lets you In knitting, a Left Lifted Increase (LLI) lets you add a stitch in between two columns of stitches that leans to the left. Similar to an M1L, LLIs allow you to increase nearly invisibly.
.
To learn more about lifted increases, including when to use them and how they differ from Make 1s, head to the 🔗 in my profle. 
.
Have you ever used lifted increases? I used M1’s almost exclusively for a long time when I needed to inc between stitches, but when I designed the Intarsia Flower Pillow pattern, I needed something that would allow me to increase a lot near my cast on, and M1’s resulted in edge curling. The more you know! 🌈 
.
Yarn: @lionbrandyarn Wool Ease from my Stash / Neddles: @boyeyarncrafts - Just remembered these are the needles I learned to knit on at age 8. 😂
.
#handsoccupied #knitting #learntoknit #howtoknit #sweaterknitting #knitinspiration #knittersofinstagram #liftedincreases
Last week I got to hang out with my family & helpe Last week I got to hang out with my family & helped babysit my red-headed niece and nephew. So here’s some plane knitting, and a couple pictures (shared with permission) of my babysitting adventures.
.
Lessons learned: 1️⃣ Trying to knit around 2 toddlers, 2 cats & 2 large dogs is pretty hard. 2️⃣ I learned during water color time that pink and black make “colorful black.” 🩷🖤 3️⃣ Toddlers do NOT care about your rainbow sorting of their toys. 4️⃣ Toddlers are very good at finding mischief in a very short amount of time, what a surprise. 😂
.
#handsoccupied #knitting #placesyoucanknit #knitters #knitinpublic #handmadelife #knitting_inspiration
Load More... Follow on Instagram

Copyright © 2023 / Foodie Pro Theme On Genesis Framework / Branding by Ink + Mortar
All Site & Shop Policies / Privacy Policy / Cookie Policy