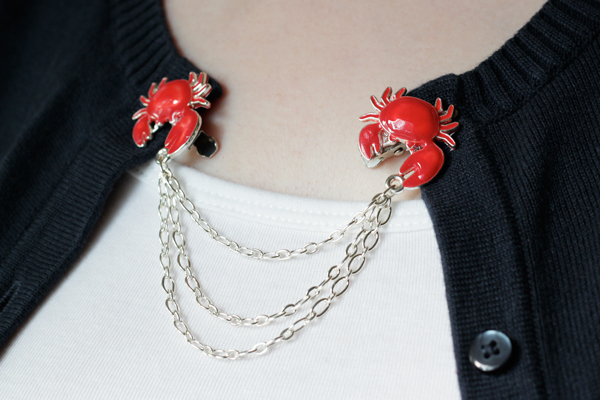
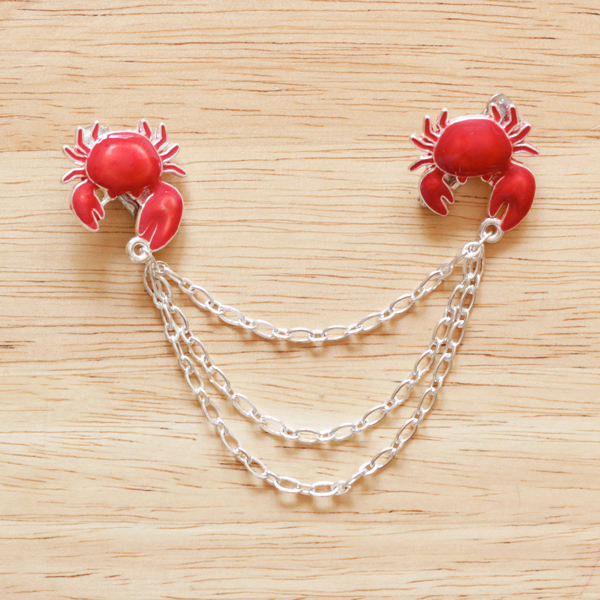
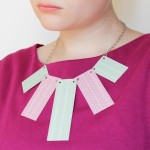
Also known as sweater guards, sweater chains are an accessory that’s nearly been lost to the passage of time. This is unfortunate for cardigan lovers like myself. They’re a nice alternative to stretched out buttonholes, and as someone who works in public service, it’s nice to have something to keep your, umm, chest covered from the occasional creeper.
Also, aren’t those little crabs holding the chain super cute? I’ll admit it, I’m down for making a project for cuteness’ sake alone!
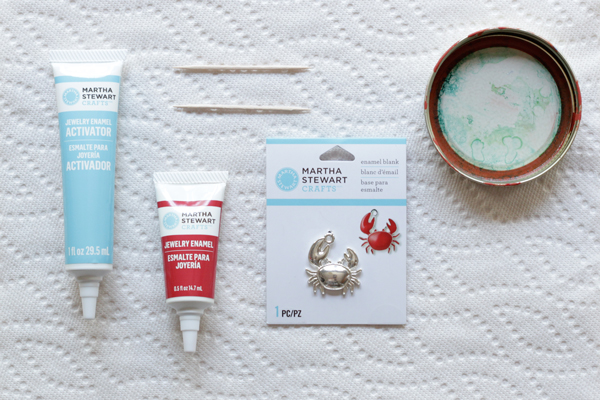
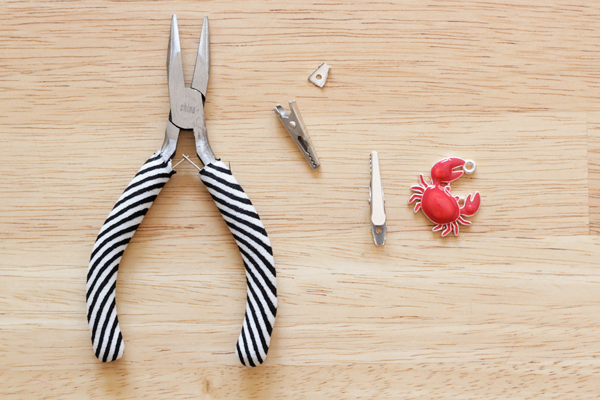
Supplies
2 Martha Stewart Crafts enamel blanks
Martha Stewart Crafts jewelry enamel
Martha Stewart Crafts jewelry enamel activator
toothpicks
jewelry chain
ruler
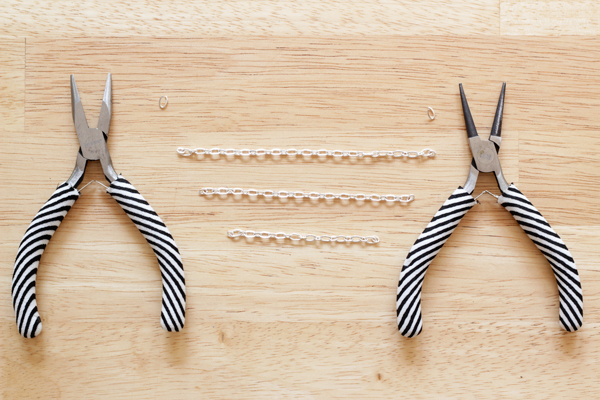
2 jewelry pliers
2 jewelry clips
E6000 craft adhesive
Directions
Apply enamel
Following packaged directions, mix 1 part enamel and 2 parts activator on a safe surface.
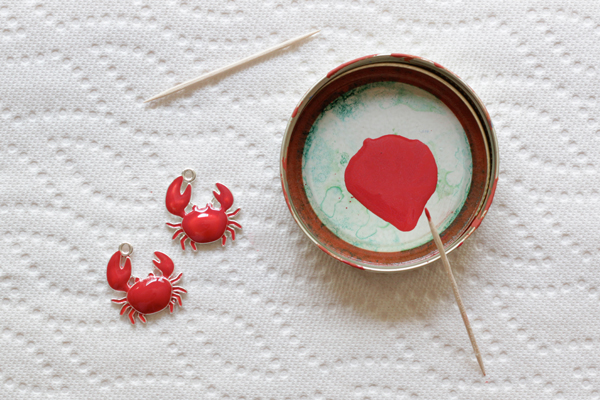
Use a toothpick to very carefully apply a layer of the enamel to your enamel blanks. I used the cute crabs from the Martha Stewart line for this project, but you can really use any enamel blanks you like. They don’t even have to match – I just think those crabs are adorable.
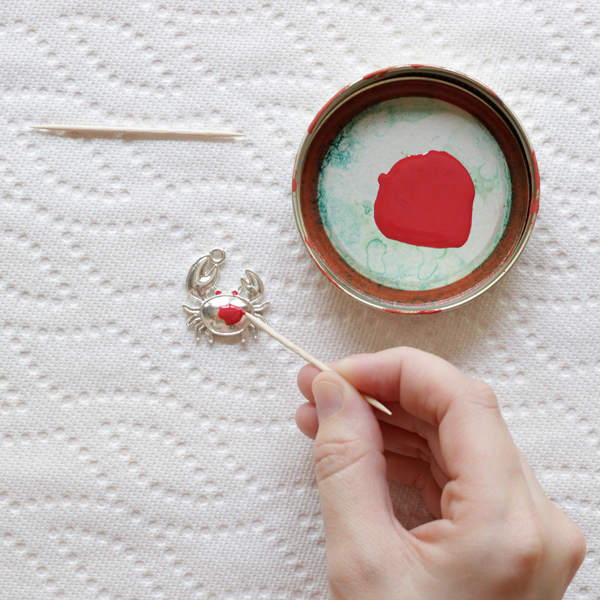
Letting each layer of enamel dry for 72 hours between application, apply 2 or 3 layers to completely cover your blanks. My big tip? Be careful when applying the additional layers. After my first layers, I had some enamel overflow, and it was really hard to clean up.
Assemble sweater chain
When your blanks are all set and completely dry, you’re ready for part 2 of this project. Begin by using jewelry pliers to bend and snap off the long ends of two jewelry clips.
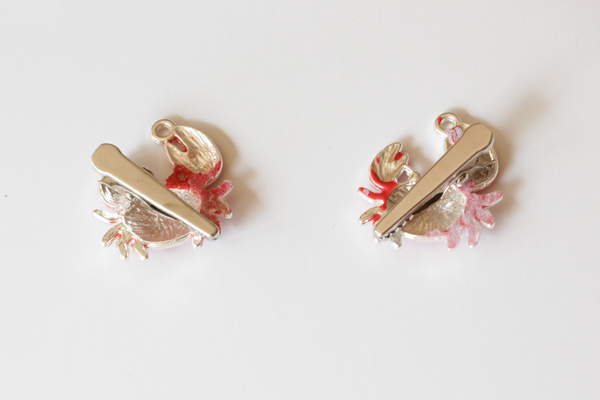
Glue the clips, sharp side toward the back of your charms, to the charms with E6000 craft adhesive. Check out the next photo for how to place the clips. Instead of the charms hanging from a chain, the chain will be hanging from the charms. Remember that when you’re determining the placement of your clips. Let the E6000 dry for 24 hours.
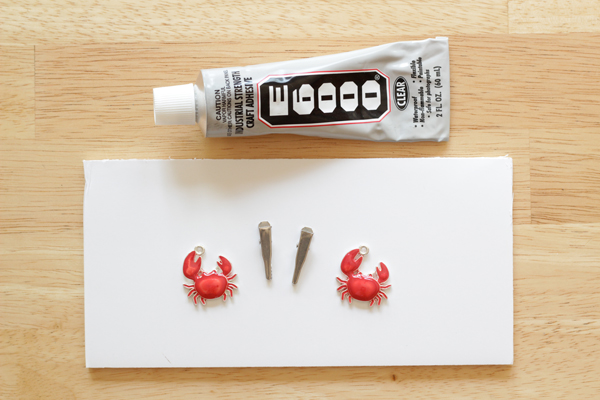
I’m really embarrassed by the next picture since it shows off the effect of my enamel accident. But it shows the right placement of the clips, which is important to get right since the E6000 will dry HARD. There are pluses and minuses to working with industrial strength adhesives. (And jewelry enamel, apparently.)
Use jewelry pliers to break your jewelry chain into three pieces: one 3″, one 4″, and one 5″ in length. Save two open pieces of the chain to use in a minute.
Connect the three pieces of chain to one of the open chain rings and close the ring, with the chains attached, to the ring of your charm.
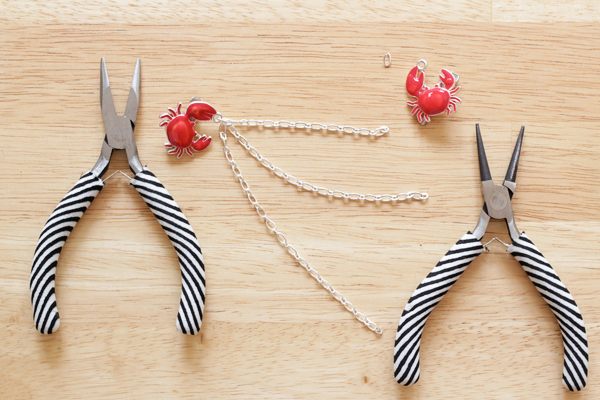
Using another chain ring, connect the other end of the chains and attach them to the second charm. Then you’re done!


Great tutorial, this is super cute!
This is such an adorable project! A friend of mine will love this. Thanks for the inspiration! And for submitting to stylegawker!
No problem! Thanks for commenting, Nicole :)