• 0 items$0.00
  • Skip to primary navigation
  • Skip to main content
  • Skip to primary sidebar
  • Skip to footer

Hands Occupied

Colorful knitting, crochet, latch hook and macrame from craft book author & designer Heidi Gustad.

  • BLOG
    • Knitting
    • Crochet
    • Latch Hook
    • Macramé
    • Punch Needle
  • ABOUT
  • Shop
  • Nav Social Menu

    • Instagram
    • Pinterest
    • RSS
    • TikTok
    • YouTube

How-to: Hot Air Balloon Party Decorations

August 27, 2012 2 Comments

Two of my favorite people on the planet (Tuesday of Muggy Tuesday and Jess of Milton & Margie’s Soy Wax Candles) and I have recently started a new business designing and making party decorations for everything from arts benefits to first birthday parties. This weekend was the first birthday party for one of our favorite clients, and it was HOT AIR BALLOON-themed. So, so, so cute! We made 15 unique hot air balloons, party bunting, and a photo booth backdrop for this party, and today, I want to show you how we made the hot air balloon decorations.

How-to: Hot Air Balloon Party Decorations | HandsOccupied.com

Supplies

Chinese lanterns

acrylic paint

paint brush

string/fishing line

yarn or tapestry needle

ruler

scissors

packing tape

paper cut into a square (or origami paper, which comes square)

push pin

Directions

Paint your lantern however you like with acrylic craft paint. For the first birthday party, Tuesday chose our color palette, and we used different patterns and color combinations on each of the 15 lanterns we were commissioned to make. When your lanterns are painted, you’ll need to create paper baskets for them using square paper, packing tape, and string. Here’s how to make the baskets I designed…

How-to: Hot Air Balloon Party Decorations | HandsOccupied.com

Fold your square piece of paper in thirds one way, and then the other, creating a tic tac toe board shape. I measured and marked where the exact lines should be so my thirds were perfectly even on both sides.

How-to: Hot Air Balloon Party Decorations | HandsOccupied.com How-to: Hot Air Balloon Party Decorations | HandsOccupied.com

Fold a diagonal line within each corner’s square on the sheet of paper, as shown.

How-to: Hot Air Balloon Party Decorations | HandsOccupied.com

How-to: Hot Air Balloon Party Decorations | HandsOccupied.com

How-to: Hot Air Balloon Party Decorations | HandsOccupied.com

Fold the paper into a cube shape, securing the “basket” with packing tape.

How-to: Hot Air Balloon Party Decorations | HandsOccupied.com

How-to: Hot Air Balloon Party Decorations | HandsOccupied.com

How-to: Hot Air Balloon Party Decorations | HandsOccupied.com

Use a bulletin board push pin to poke four holes on each of two sides of your basket. They should be the sides that aren’t thickened by the folded corners and tape (this will make your life easier – believe me, I made 15 of these).

How-to: Hot Air Balloon Party Decorations | HandsOccupied.com

Sew your string through two of the holes, diagonally across the bottom and up the far side of the basket. I used some catfish-specific fishing line, but I realize not everyone has that stuff just laying around. Sturdy thread will work just fine too. Sew the other side, forming an “x” across the bottom of the basket.

How-to: Hot Air Balloon Party Decorations | HandsOccupied.com

How-to: Hot Air Balloon Party Decorations | HandsOccupied.com

Then, tie the basket to the base of the lantern. The way I designed the string on the baskets makes them incredibly adjustable in case the baskets are looking crooked to you when they’re hung. The adjustable design totally saved our butts when we hung the lanterns since they were transported across Chicago in my car. The back seat was literally full to the ceiling with these cute bad boys!

How-to: Hot Air Balloon Party Decorations | HandsOccupied.com How-to: Hot Air Balloon Party Decorations | HandsOccupied.com

Setting up the party space

Tuesday and I handled setting up our decorations at the party venue, a perfectly weathered white space. Tuesday’s dress matched our ladder. :)

How-to: Hot Air Balloon Party Decorations | HandsOccupied.com

How-to: Hot Air Balloon Party Decorations | HandsOccupied.com

How-to: Hot Air Balloon Party Decorations | HandsOccupied.com

While we were both operating on significantly less sleep than anyone should use a ladder on, we had so much fun seeing everything come together. Check out some shots from our setup, and our sleepy attempts at making the most of the adorable photo booth backdrop Jess made for the event.

How-to: Hot Air Balloon Party Decorations | HandsOccupied.com

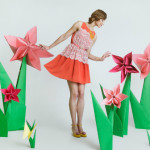
This is me being all “I haven’t slept like at all, but I’m trying to not look like I’m dying!”

How-to: Hot Air Balloon Party Decorations | HandsOccupied.com

Tuesday, equally tired, being way more adorable than I!

I can’t wait to see the professional photo booth and event photos! If I get permission, I’ll share some of the highlights. :)

Filed Under: Home Decor, How-to Tagged With: balloon party, chinese lanterns, hot air balloons, origami, paint, paper crafts

About Heidi

Heidi Gustad (she/her) is a craft book author & designer specializing in yarn crafts. Her work combines vintage and modern design elements, prioritizing color and graphic motifs. Her first book, Latch Hook: 12 Projects for the Modern Maker, is out now.

Previous Post: « Meet Jumbo Jibbles
Next Post: Meet // Peace // Love // Vegetables // »

Reader Interactions

DID YOU LIKE THIS POST?
Visit similar articles...

  • Style Meets Craft in Ruche’s Latest FeatureStyle Meets Craft in Ruche’s Latest Feature
  • Robin’s Egg Nest BraceletRobin’s Egg Nest Bracelet
  • Stenciled Coffee Table MakeoverStenciled Coffee Table Makeover
  • Weekly ReaderWeekly Reader

Trackbacks

  1. 4.7.13 – Emily’s Baby Shower | phillypott says:
    April 9, 2013 at 3:19 pm

    […] Hot air balloon tutorial: Hands Occupied […]

    Reply
  2. Adventure Party Time | Make and Bake It says:
    May 13, 2013 at 8:11 pm

    […] going with the “Up” inspiration, I wanted to do some hot air balloon decorations. This site had a really helpful tutorial. All I had to buy was some paper lanterns and some string. I changed […]

    Reply

Leave a Reply Cancel reply

Your email address will not be published. Required fields are marked *

This site uses Akismet to reduce spam. Learn how your comment data is processed.

Primary Sidebar

Heidi Gustad from Hands Occupied / Craft Book Author and Knitting, Crochet, Latch Hook and Macrame Designer

Hi! I’m Heidi (she/her/hers), and I’ve been helping yarn crafters untangle various techniques on the internet since 2010. I got my start here, as a blogger, and since then I’ve shared more than a few tutorials here and on YouTube as I’ve grown as a pattern designer. 🧶 

learn more / work with me

Find Me on Social Media

  • Instagram
  • Pinterest
  • TikTok
  • YouTube
Latch Hook by Heidi Gustad

Footer

INSTAGRAM

Heidi Gustad 🧶 knitting & yarn crafts

handsoccupied

Knitting & yarn crafts designer 🧶
.
Stay up-to-date 💌 & shop new patterns ⤵️

POV: Showing you how my new Bevelled Tank pattern POV: Showing you how my new Bevelled Tank pattern fits with no ease vs. 4” of positive ease. There’s a bit more length to the cotton (brighter color) sample, but both are cropped and feature shoulder seams designed to sit an inch back onto the shoulder instead of on top, giving it a little swing. Length is easily adjustable for folks looking for less of a crop. 
.
Pattern: Bevelled Tank by @handsoccupied for @pompommag x @hobbii_yarn summer 2024. Available for free from Hobbii at the 🔗 in my profile.
Yarn pictured: @kelbournewoolens Skipper and Camper. 
Dress form is adjusted to a 36” chest and ~5’3”ish in height. 
Human has a 40” chest and is 5’5”.
Both skirts are vintage.
.
#pompomxhobbiisummer2024 #handsoccupied #intarsia #handmade #knitting #colorwork
Let’s talk about fit and ease! . During the Beve Let’s talk about fit and ease!
.
During the Bevelled Tank design process for @pompommag, I knit 2 samples using 2 different @KelbourneWoolens yarns. One was in Skipper (100% cotton, second photo) and the other was in Camper (100% 2 ply wool). The Skipper sample was knit for a 36” bust, which measures in at 40” with 4” of positive ease. And I knit the Camper Sample for my 40” bust with a 44” finished measurement. (BTW, I’m 5’5” for folks that find that measurement helpful in visualizing fit.)
.
Based on the size chart for the Bevelled Tank, that means I knit one size 3 sample and one size 4. As designed, I conveniently fit a size 4 as intended with 4” of positive ease. When I wear the 3, there is no ease at all because the garment and my body are both 40” in size. Comparing the 2 garments, you can see how the fiber content (cotton vs. wool) and fit (no ease vs. 4” of positive ease) makes a difference in the look and feel of the finished garment. 
.
These samples are a great way to compare what ease looks like on different bodies. While I can fit both a size 3 and 4, the garment with no ease feels more like pajamas or a bralette when I wear it. On the other hand, when I wear the one with 4” of positive ease, I feel comfortable enough to wear it to work, even as a crop top. Plus, it leaves me with enough room to layer it with a nice button down if I’m not feeling the cropped look one day. 
.
I’m curious - how would you style this tank? Would you modify it with a few stockinette rows for added length? I’m so curious now that this pattern is finally out in the world. :) 
.
#pompomxhobbiisummer2024 #bevelledtank #handsoccupied #knitting #intarisa #handmade #kelbournewoolens #croppedsweater #summerknits
After a 6 month hiatus, I am happy to say I’m ba After a 6 month hiatus, I am happy to say I’m back with a brand new pattern in 9 sizes, and it’s FREE as part of @pompommag x @hobbii_yarn’s summer design collection! (Link is in my bio.)
.
In my December newsletter, I announced that I was soliciting test knitters for a pattern that had originally been selected for the summer ’24 issue of Pom Pom Quarterly magazine. However, the magazine ceased publication after its spring ’24 issue, leaving in-progress designs unpublished. (It happens.) As a result, I’d begun the long process of editing, testing, and photographing the pattern for independent release through the Hands Occupied pattern shop and Ravelry.
.
Before I was done with that process, Pom Pom Quarterly’s former editors reached out with an exciting proposal for the pattern. Post-magazine, they’ve begun to partner with yarn companies to produce high quality pattern collections. They wanted to include designs from the would-be current issue of Pom Pom Quarterly in a new collection for Hobbii yarn, including my Bevelled Tank. I worked with the same technical editors I would have for the magazine on this one, and as you can see from the photos, Pom Pom’s team did an amazing job of styling the garment to the beautiful standards they’re known for.
.
You can learn more about the pattern on my blog and get the free pattern from Hobbii yarn - links to both in my profile. I’ll post sizing info in the comments for quick reference too. 🧶
.
#pompomxhobbiisummer2024 #knitting #intarsia #sponsored #colorworkknitting 
.
Photos: @dianascarrunz 
Model: @angel.jade_
Here’s a nice throwback for you: my take on a vi Here’s a nice throwback for you: my take on a vintage knitting pattern from 1938 called the Fernlace Pullover. A pattern so nice, I knit it twice.
.
Yellow version 💛: knit with Despondent Dyes’ Vintage Vixen Sport after attending a @squidneyknits vintage knitting retreat in 2019 & learning *so much*. Paired with a self-drafted circle skirt pattern. 
.
Blue version 💙: knit with @eweeweyarns Ewe So Sporty in Sky Blue. Paired with the 1940s Boardwalk Duet sewing pattern from @decades_of_style 
.
Head to my stories for 🔗🔗 to the handmade wardrobe blog posts I wrote about each take on the Fernlace Pullover, working with a vintage pattern, where to find vintage patterns (including the one I used), & some thoughts on sizing. 
.
Image descriptions available in alt text. 
.
#handsoccupied #handmadewardrobe #fernlacepullover #vintageknitting #vintageknittingpatterns #knitting_inspiration
Frogging is a word in the knitting world that mean Frogging is a word in the knitting world that means to rip out your knitting. It’s called frogging because frogs say “ribbit,” and when you’re tearing out your knitting, you will “rip it” out, and that sounds like ribbit. No really. 🐸 Did you know this fun fact? 
.
P.S. I did like this design concept, but to make the pattern more knitter friendly as well as more wearable, I am making some tweaks to the construction. Excited to share when it’s ready! 🥰🧶
.
Yarn: @blueskyfibers Woolstok North in Morning Frost & Highland Fleece 
.
#handsoccupied #knitting #frogging #blueskyfibers #knittersofinstagram #blueskymakers #knittingvocabulary #bsfmakers #knitdesign
Load More... Follow on Instagram

Copyright © 2025 / Foodie Pro Theme On Genesis Framework / Branding by Ink + Mortar
All Site & Shop Policies / Privacy Policy / Cookie Policy