• 0 items$0.00
  • Skip to primary navigation
  • Skip to main content
  • Skip to primary sidebar
  • Skip to footer

Hands Occupied

Colorful knitting, crochet, latch hook and macrame from craft book author & designer Heidi Gustad.

  • BLOG
    • Knitting
    • Crochet
    • Latch Hook
    • Macramé
    • Punch Needle
  • ABOUT
  • Shop
  • Nav Social Menu

    • Instagram
    • Pinterest
    • RSS
    • TikTok
    • YouTube

Robin’s Egg Nest Bracelet

April 9, 2014 3 Comments

Robin's Egg Nest Bracelet at Hands Occupied

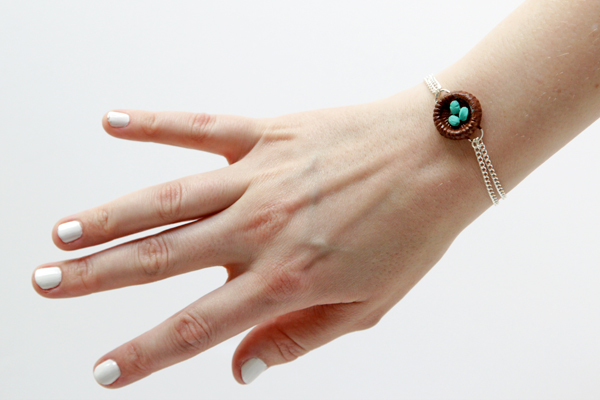
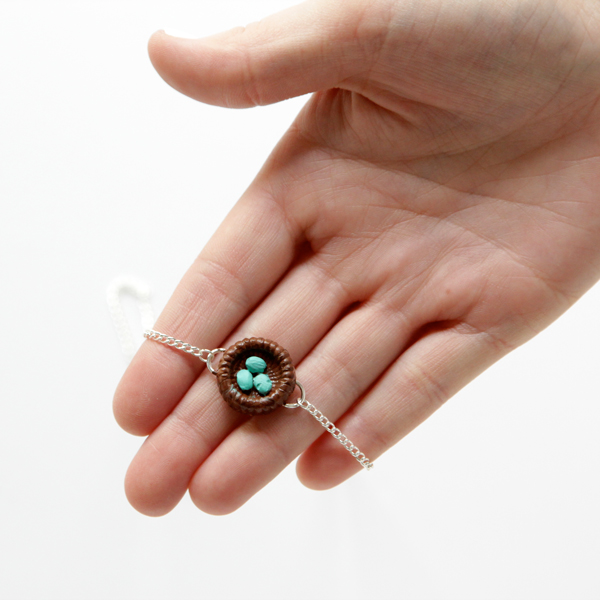
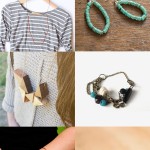
I love how well this little bracelet turned out! Sometimes you envision a DIY project and are a little like, “this will proooooobably look good??” And then the clouds part and the finished project ends up lovely. Maybe this is just the plight of every DIYer out there. :)

Musings on craft design aside, I just don’t have enough springy jewelry in my wardrobe, and this subtle, colorful bracelet makes me think of something I’d find at an indie craft fair or on an indie online shop. You know, a bold piece you don’t see a gillion variations of walking down the street. And that’s just my style!
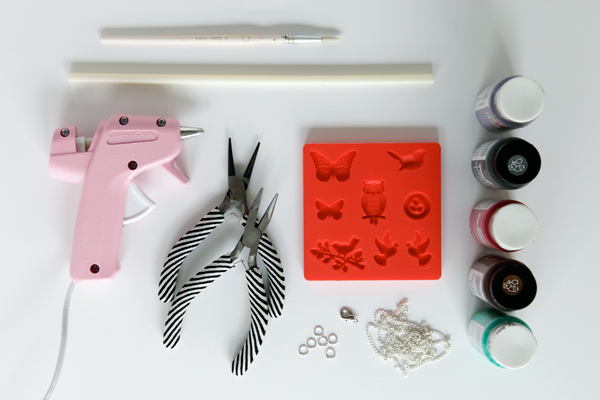
Supplies

Mod Melts nature mold
Mod Melts sticks
high temp glue gun
6 or 7mm jump rings
4mm jump rings
lobster clasp
jewelry chain
jewelry pliers (2)
acrylic craft paint in blue and brown
paint brush

Robin's Egg Nest Bracelet at Hands Occupied

Directions

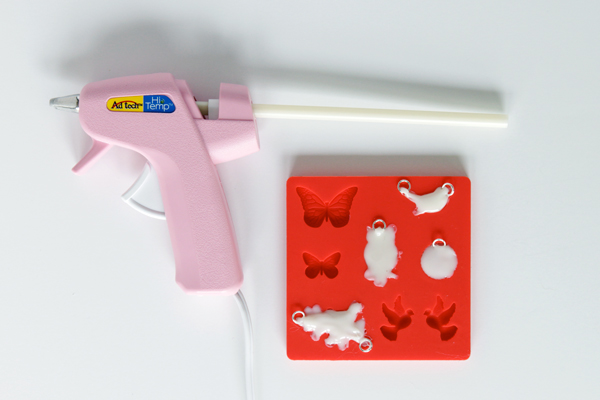
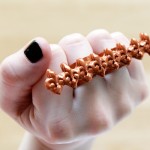
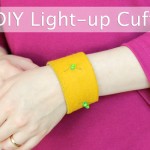
Heat up a Mod Melt stick in a high temp glue gun. Fill one of the space in a mod melts mold to the brim, and while it’s still wet, place two 7mm jump rings in the mold, one of each across from each other. I obviously filled the bird’s nest mold for today’s project, but pictured below was an early experiment for this project. (I forgot to take a picture of the procedure when I molded my robin’s egg with the two jump rings – sorry!)

Robin's Egg Nest Bracelet

When your mold has hardened completely, paint it however you like (or like a robin’s egg nest like I did – it was pretty easy and I suck at painting!). Let dry.

Robin's Egg Nest Bracelet

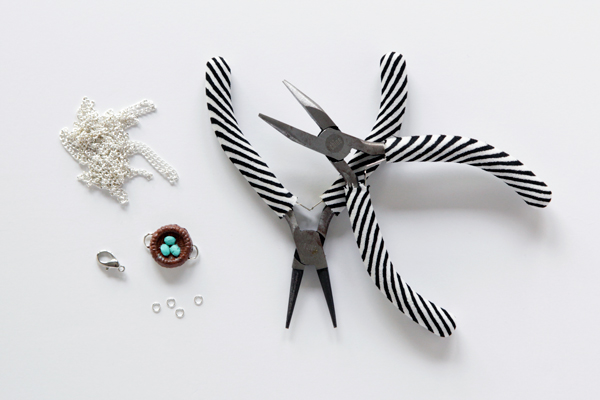
Break your chain into two pieces, each long enough to just barely wrap around your wrist. Attach a piece of chain to each side of your nest with a 4mm jump ring.

Robin's Egg Nest Bracelet at Hands Occupied

Fold your chain exactly in half and attach the other raw end to the nest with another 4mm ring. Repeat for the other side.

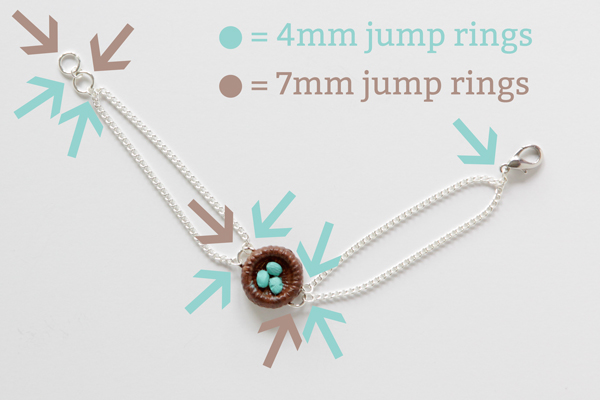
Attach your lobster clasp to the center of one piece of the chain with a 4mm ring. Make a chain of jump rings: 1 7mm, 1 4mm, 1 7 mm, and 1 4mm ring, and attach the second 4mm ring to the center of the non-lobster clasp side of your bracelet.

A visual of how to attach the chain and clasp to the nest charm:

Robin's Egg Nest Bracelet

That’s it! A pretty straightforward and adorable little bracelet for spring & Easter.

Robin's Egg Nest Bracelet at Hands Occupied

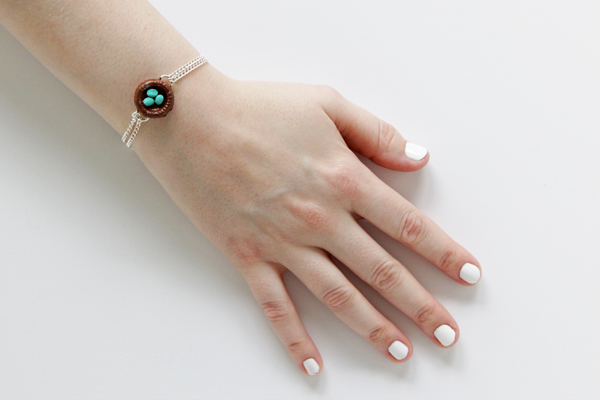
What outfit would you pair a bracelet like this with? I’m leaning toward something floral…

Filed Under: DIY Style, Easter, How-to Tagged With: bracelet, diy, diy jewelry, jump rings, mod melts, paint, robins egg, robins egg nest

About Heidi

Heidi Gustad is a craft book author, designer & creator specializing in yarn crafts like knitting, crochet, latch hook & macramé. Her first book, Latch Hook: 12 Projects for the Modern Maker, is out now.

Previous Post: « Crochet Trinket Basket
Next Post: Weekly Reader »

Reader Interactions

DID YOU LIKE THIS POST?
Visit similar articles...

  • Fleur de lis Bar Ring Fleur de lis Bar Ring
  • Fun-mazing Jewelry DIYsFun-mazing Jewelry DIYs
  • Stenciled Coffee Table MakeoverStenciled Coffee Table Makeover
  • DIY Light-Up Cuff BraceletDIY Light-Up Cuff Bracelet

DON’T MISS ANOTHER UPDATE

Comments

  1. Pauline Molinari

    April 9, 2014 at 1:10 pm

    I love this!

    Reply
  2. Rachel Garber

    April 9, 2014 at 3:48 pm

    That is so cute! HAVE to make it!

    Reply
  3. onel

    April 11, 2014 at 3:35 am

    Love it! Delicate and so pretty :)

    Reply

Leave a Reply Cancel reply

Your email address will not be published. Required fields are marked *

This site uses Akismet to reduce spam. Learn how your comment data is processed.

Primary Sidebar

Heidi Gustad from Hands Occupied / Craft Book Author and Knitting, Crochet, Latch Hook and Macrame Designer

Hi! I’m Heidi (she/her/hers), a craft book author & pattern designer specializing in knitting, crochet, latch hook & macrame. Really anything with yarn! ❤️  My work combines vintage and modern design elements, featuring bold colors and graphic motifs.

EMAIL NEWSLETTER

Never miss a tutorial with these short & sweet monthly updates.

Find Me on Social Media

  • Instagram
  • Pinterest
  • TikTok
  • YouTube
Latch Hook by Heidi GustadDiscover Unique Items

Footer

INSTAGRAM

handsoccupied

Craft book author, designer & creator specializing in yarn crafts like knitting, crochet, latch hook & macramé
❤️ Email preferred

Heidi Gustad 🧶✂️
If only knitting a whole project took 39 seconds… 😮‍💨 
.
In this video, you can see how the Intarsia Flower Pillow pattern knits up - two flat panels, one with intarsia, both are blocked, and then they’re seamed. Find the pattern on @hi.ravelry & my website, just search Intarsia Flower Pillow. 🌸 
.
P.S. I’m really smiling in this video while seaming the pillow, so I guess I’m proving last week’s claim that I truly enjoy that sometimes-dreaded task. 😆🫣
In knitting, a Left Lifted Increase (LLI) lets you In knitting, a Left Lifted Increase (LLI) lets you add a stitch in between two columns of stitches that leans to the left. Similar to an M1L, LLIs allow you to increase nearly invisibly.
.
To learn more about lifted increases, including when to use them and how they differ from Make 1s, head to the 🔗 in my profle. 
.
Have you ever used lifted increases? I used M1’s almost exclusively for a long time when I needed to inc between stitches, but when I designed the Intarsia Flower Pillow pattern, I needed something that would allow me to increase a lot near my cast on, and M1’s resulted in edge curling. The more you know! 🌈 
.
Yarn: @lionbrandyarn Wool Ease from my Stash / Neddles: @boyeyarncrafts - Just remembered these are the needles I learned to knit on at age 8. 😂
.
#handsoccupied #knitting #learntoknit #howtoknit #sweaterknitting #knitinspiration #knittersofinstagram #liftedincreases
Last week I got to hang out with my family & helpe Last week I got to hang out with my family & helped babysit my red-headed niece and nephew. So here’s some plane knitting, and a couple pictures (shared with permission) of my babysitting adventures.
.
Lessons learned: 1️⃣ Trying to knit around 2 toddlers, 2 cats & 2 large dogs is pretty hard. 2️⃣ I learned during water color time that pink and black make “colorful black.” 🩷🖤 3️⃣ Toddlers do NOT care about your rainbow sorting of their toys. 4️⃣ Toddlers are very good at finding mischief in a very short amount of time, what a surprise. 😂
.
#handsoccupied #knitting #placesyoucanknit #knitters #knitinpublic #handmadelife #knitting_inspiration
Weaving in ends & seaming with mattress stitch are Weaving in ends & seaming with mattress stitch are both so useful for garment knitting! But for me, weaving in ends can feel like a chore while the latter feels like I’ve successfully done magic. 🧙🏻‍♀️ Does anybody else run into this phenomenon? Are you the opposite? Any theories as to why they feel different? 
.
In this video, I’m finishing my brand new Intarsia Flower Pillow. 🌸 I’m working with @universal_yarn Uni Merino & the pattern is available at the 🔗 in my b1o. 
.
#handsoccupied #intarsiaflowerpillow #intarsia #intarsiaknitting #knitting #colorwork #knitpillow #knittinginspiration #knittersofinstagram
I independently released a knitting pattern today, I independently released a knitting pattern today, my first in 5 years! The Intarsia Flower Pillow is a 16” (40cm) round pillow knit with an intentional combination of intarsia, stockinette, garter and seed stitch. This pillow has everything you need to level up your intarsia technique while also knitting something you can use. 
.
This pillow allows you to practice knitting intarsia while simultaneously increasing and decreasing. The Intarsia Flower Pillow pattern was designed to be a little knit-nerdy for learning and a little cute, arming you with many of the skills you'd need to knit an intarsia sweater. 
.
Intarsia Flower Pillow is available in the Hands Occupied Sh0p and on @hi.ravelry . You can read more about the pattern on the bl0g, the🔗 are where you’d think.
. 
YARN: @universal_yarn Uni Merino in Antiquity, Fjord and Conch / NEEDLES: US 2 (2.75 mm) / PATTERN: Intarsia Flower Pillow by Heidi Gustad
Load More... Follow on Instagram

Copyright © 2023 / Foodie Pro Theme On Genesis Framework / Branding by Ink + Mortar
All Site & Shop Policies / Privacy Policy / Cookie Policy