• 0 items$0.00
  • Skip to primary navigation
  • Skip to main content
  • Skip to primary sidebar
  • Skip to footer

Hands Occupied

Contemporary yarn crafts by Heidi Gustad. Knitting, crochet, latch hook and macrame.

  • BLOG
    • Knitting
    • Crochet
    • Latch Hook
    • Macramé
  • ABOUT
  • Shop
  • Studio
  • Nav Social Menu

    • Facebook
    • Instagram
    • Pinterest
    • RSS
    • Twitter
    • YouTube

How-to: Kermit Collar

November 21, 2011 9 Comments

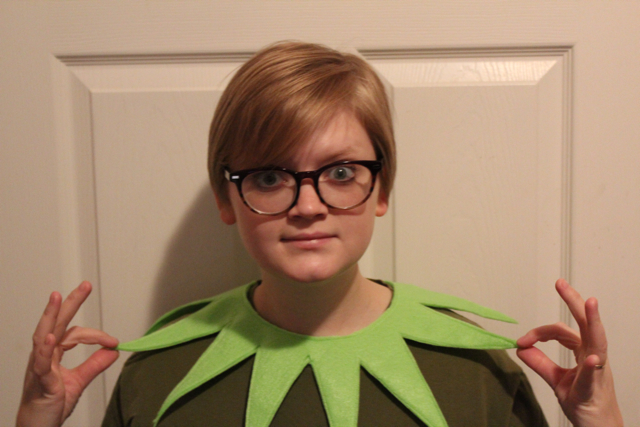
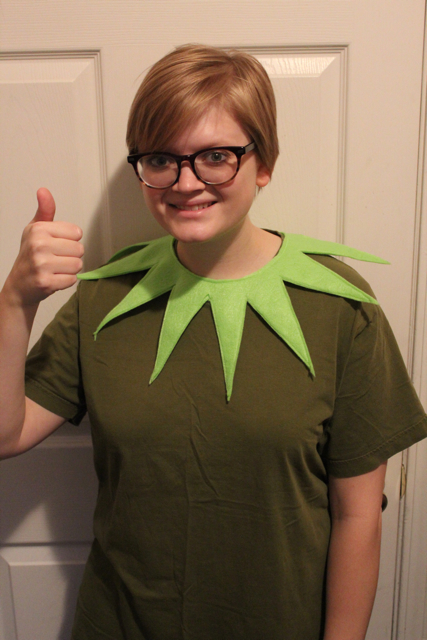
The new Muppet movie comes out Wednesday, and in that spirit, I decided to make a little accessory to wear to the theater. If you haven’t noticed, I really like making media-inspired costumes. This collar can be knocked out in about an hour if you use my pattern.

Supplies

This pattern (it fits a neck up to 18 inches around)
a printer
iron
very sharp fabric scissors
1/2 yd. eco or wool felt in lime green
coordinating thread
freezer paper
needle
sewing machine
snap closure

Directions

Download the pattern, print it and cut it out. Trace the pattern on to a piece of freezer paper. I did half of the collar at a time, but you can do it in quarters, or quadruple the pattern and make one large pattern piece using freezer paper.
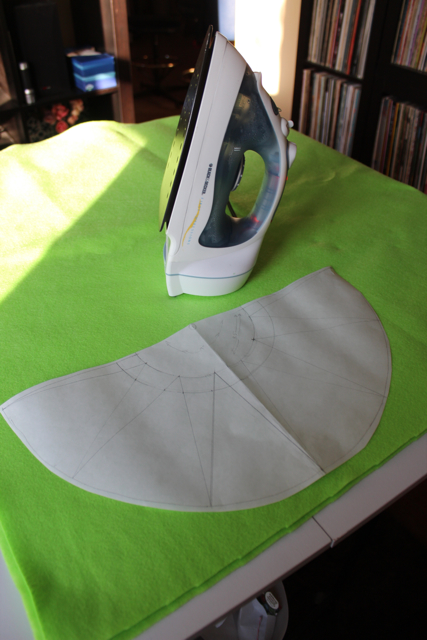
Iron your freezer paper, wax side down, on to your felt.
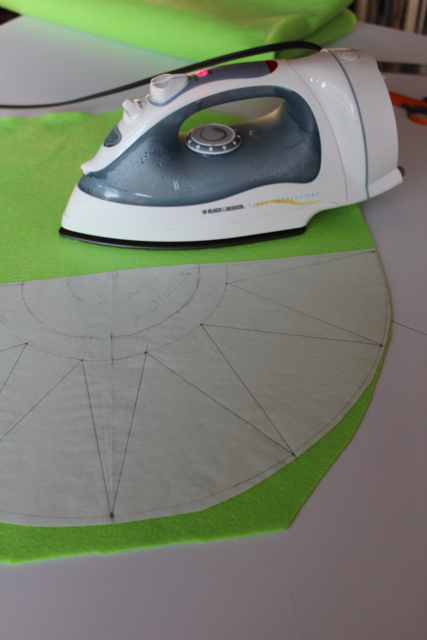
Use your sharp scissors to cut the felt, right through the freezer paper. Cut directly along the pattern lines. There is no seam allowance needed for this project.
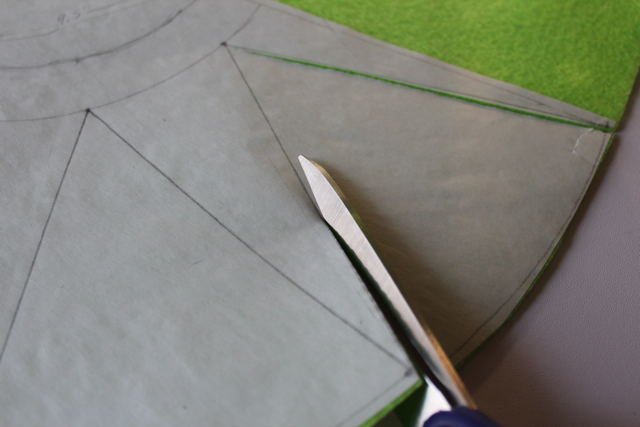
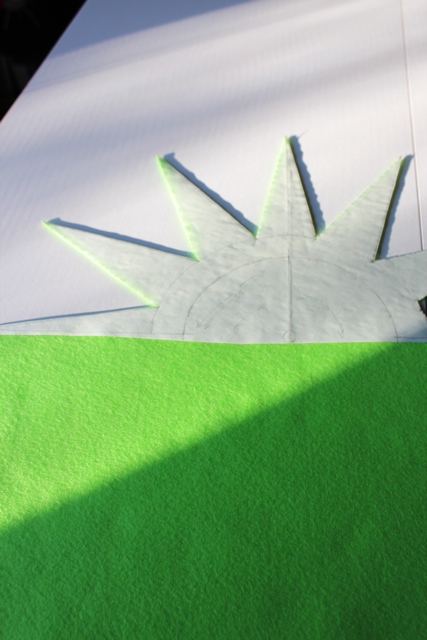
If you’re cutting out the felt in quarters or halves, like I did, you next need to gently remove the freezer paper pattern from your felt. Iron it to your felt, lining it up as carefully as possible. Cut the rest of the felt piece out. I think the finished shape can be best described as a “starburst.”
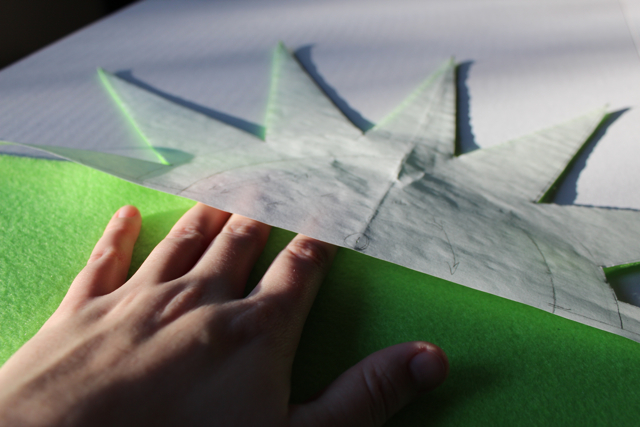
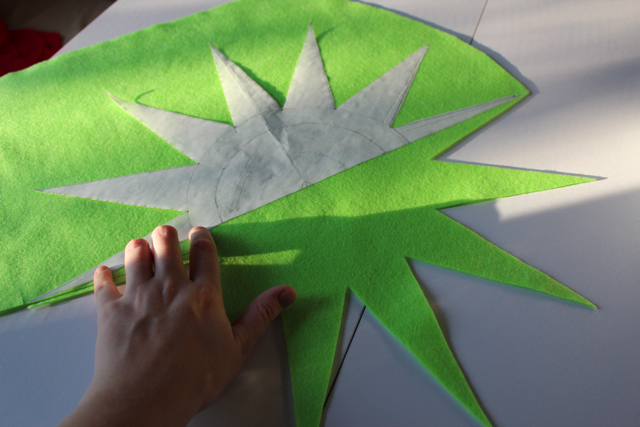
Repeat the whole process to create a second starburst.
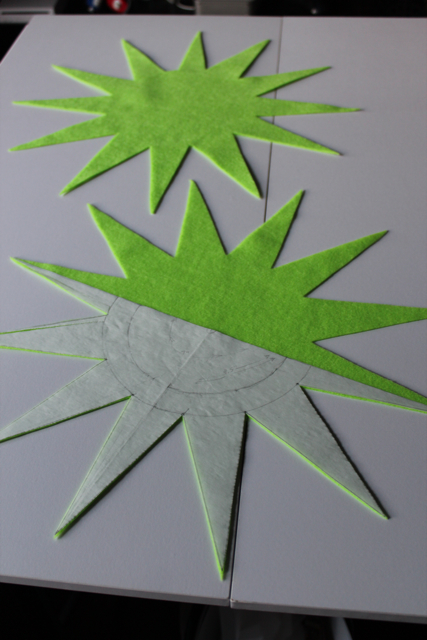
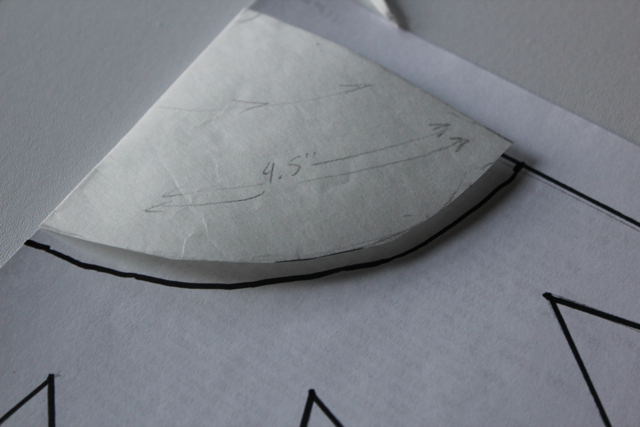
Grab your pattern. Use the quarter of a circle shape in the upper left to create a neck hole. Quadruple the quarter circle on some freezer paper, iron it to the exact center of one of the starbursts. Cut out your head hole. The pattern’s head hole fits a neck up to 18 inches around.
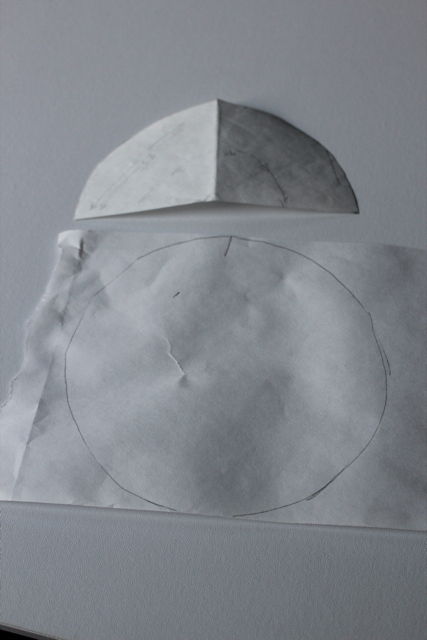
Next, line up your two starbursts. Use a basting stitch to tack the two pieces together. To make sure the pieces stay lined up, baste all the way around the starbursts, all the way to the tip of each point.
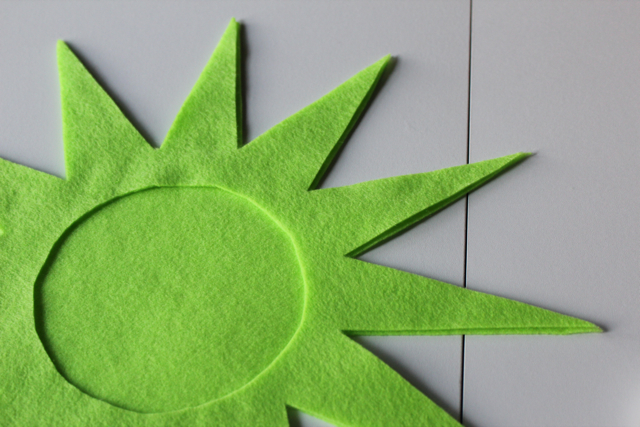
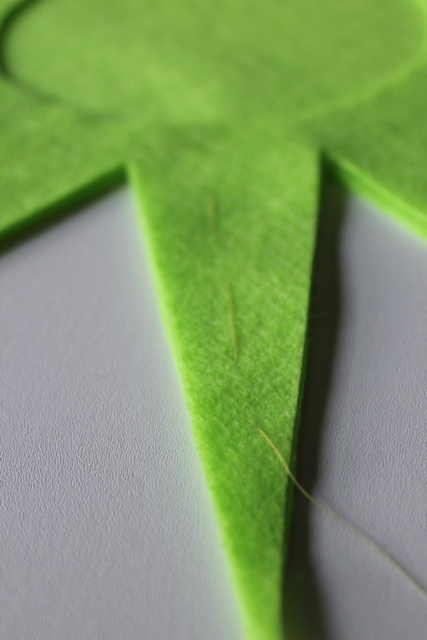
Sew along the edge of the whole garment using a sewing machine.
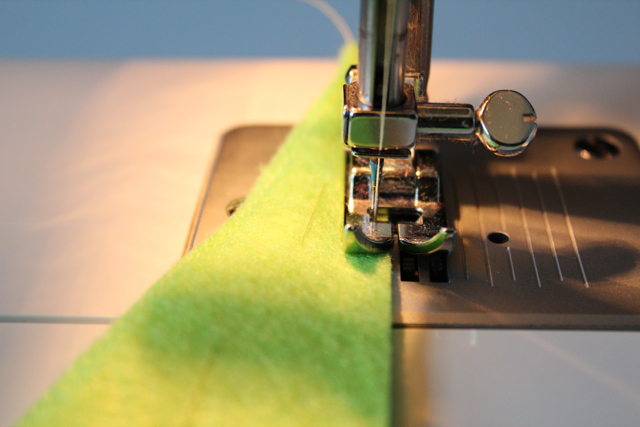
Sew around the neck hole, near the edge as shown.
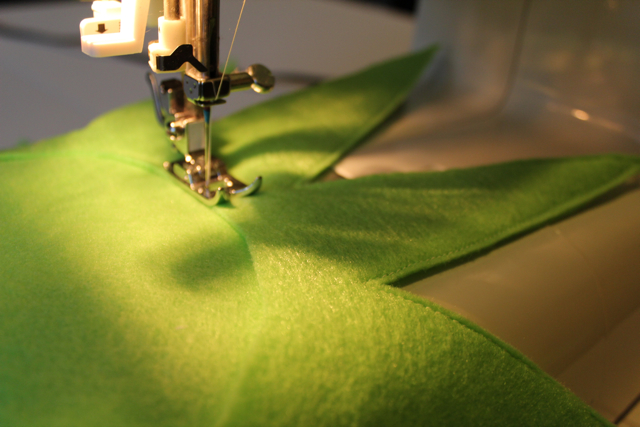
Pick a point to cut an opening in your collar. Cut the opening as shown, and then cut the head hole out of the second piece of felt.
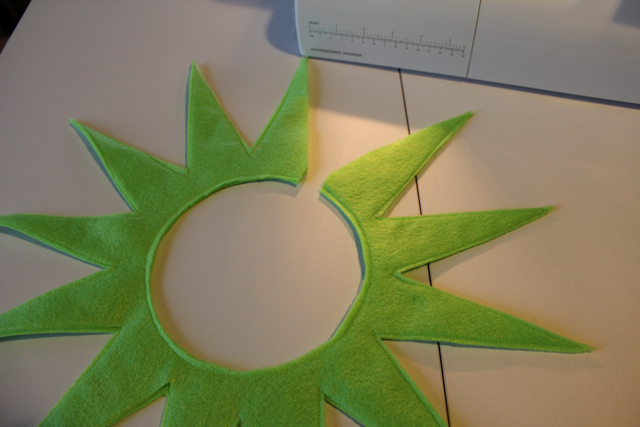
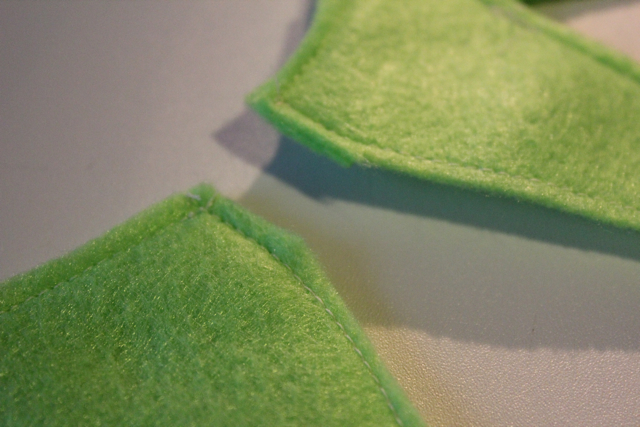
Sew remaining seams. Attach the snap closure with hand stitching.
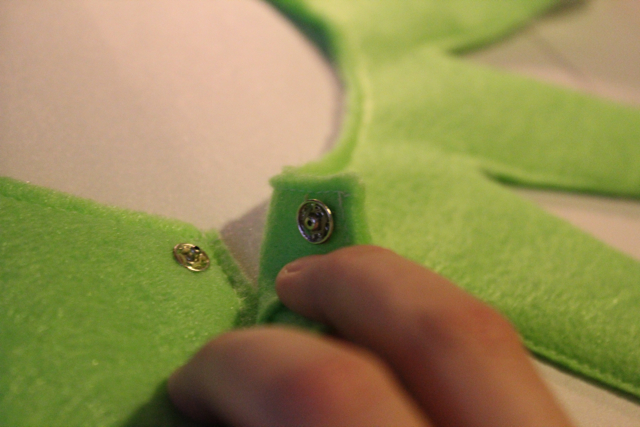
Finally throw on a green t-shirt and your collar, and you’re set to see the Muppets in style.
Filed Under: How-to, Sewing Tagged With: felt, How-to, kermit the frog, Sewing, the muppets, tutorial

About Heidi

Heidi Gustad is a craft book author & content creator in love with primary colors & vintage vibes. She specializes in knitting, crochet, latch hook and macramé, and her first book, Latch Hook: 12 Projects for the Modern Maker, is out now!

Previous Post: « Inspiration Thursday
Next Post: How-to: Mod Holiday Decor »

Reader Interactions

DID YOU LIKE THIS POST?
Visit similar articles...

  • How-to: Felt Thanksgiving WreathHow-to: Felt Thanksgiving Wreath
  • How-to: Louise Hat from Bob’s BurgersHow-to: Louise Hat from Bob’s Burgers
  • Quilted Flower Tote & English Paper PiecingQuilted Flower Tote & English Paper Piecing
  • How-to: Punk Rock Valentine’s ClutchHow-to: Punk Rock Valentine’s Clutch

DON’T MISS ANOTHER UPDATE

Comments

  1. amber

    October 20, 2013 at 7:59 pm

    thank you so much! I googled searched this and didn’t really think I would find something. You have saved my Halloween! You are very talented. Thanks again!

    Reply
    • Heidi

      October 20, 2013 at 9:31 pm

      Aww, thanks, Amber! I’m glad to have been your Halloween fairy ;) -Heidi

      Reply
  2. PAMELIA

    September 26, 2014 at 3:13 pm

    LOOKS JUST WHAT I AM LOOKING FOR CAN YOU BUY IT ALREADY MADE SURE HOPE SO I NEED ONE FOR A ADULT COSTUME

    Reply
  3. PAMELIA

    September 26, 2014 at 3:15 pm

    I SURE HOPE SOME ONE CAN GET BACK TO ME ON THIS WILLING TO PAY FOR ONE ALREADY MADE IF NOT TO EXPENSIVE WAYNESBADKITTY-KIT

    Reply
    • Heidi

      September 26, 2014 at 3:39 pm

      Hi Pamelia!! I’m so glad you like the collar, but unfortunately I don’t have any for sale. A quick option for you might be to download the template from the post and use it as a stencil to just cut out one layer of felt. No sewing would be required in that case. Best of luck! -Heidi

      Reply
  4. Irene

    October 19, 2014 at 8:49 pm

    Just what I needed to turn my little boy into Kermit for Halloween this year. Thank you so much for sharing this pattern!

    Reply
  5. Rod

    January 22, 2015 at 12:57 am

    Great!

    I am about to make mine; I will add tabs to put the snap onto, so it doesn’t have to overlap. I may have to adjust the patterns to be 90 degrees — I note that it will form more than a full circle; I’m guessing this is to accommodate the snap?

    Reply
    • Heidi

      January 22, 2015 at 8:21 am

      Yep! You’ve got it.

      Reply
  6. Yesenia

    October 27, 2015 at 11:00 am

    Hello!
    I love you idea for Kermit’s collar!!! I can’t download the patter for some reason. Would you please email it to me? I would greatly appreciate it. My BF is going to be Kermit and I will be Miss Piggy for Halloween this coming Saturday. Thank you so much!!!

    Reply

Leave a Reply to PAMELIA Cancel reply

Your email address will not be published. Required fields are marked *

This site uses Akismet to reduce spam. Learn how your comment data is processed.

Primary Sidebar

Heidi Gustad from Hands Occupied / Craft Book Author and Knitting, Crochet, Latch Hook and Macrame Designer

Hi! I’m Heidi, an author, yarn craft designer and content creator specializing in knitting, crochet, latch hook & macrame. My work unapologetically features primary colors and vintage-meets-modern style. My first book, Latch Hook: 12 Projects for the Modern Maker, is now available!

Professionally I’m most known for: advanced intarsia knitting design & modern latch hook design.

work with heidi

UPDATES BY EMAIL

Get a free pattern + biweekly updates sent to your inbox.

Let’s be friends!

  • Facebook
  • Instagram
  • Pinterest
  • Twitter
  • YouTube
Latch Hook by Heidi Gustad

Footer

INSTAGRAM

handsoccupied

Craft book author & content creator in love with primary colors & vintage vibes. / #latchhookbook out now!
.
knitting, crochet, latch hook & macramé

Heidi Gustad 🧶✂️
This dang Yarniversal Championship Belt just makes This dang Yarniversal Championship Belt just makes me so happy! Even more now that it’s helped me connect with fellow crafting & wrestling crossover fans. ❤️ 
.
On the blog today - link is in bio, you can take a look at a bunch more process photos that didn’t make the Design Diary video. For maker-designer types in particular, the post has detail shots & a full supply list. I’m so happy with how the @knit_picks Wool of the Andes colors worked out combined with some neutral handspun! ✂️🧶
.
.
Pictured: A close up of a smiling woman with a punch needle version of a wrestling title belt on her shoulder. 
.
#punchneedle #handsoccupied #kpambassadorsapr21 #sponsored #wooloftheandes #knitpicks #rugmaking #heidigustad #universalchampion #titlebelt #wool
Happy Wrestlemania weekend, folks!!! 🎊 It’s c Happy Wrestlemania weekend, folks!!! 🎊 It’s coincidentally International Punch Needle Rug Hooking Day today, so I’d be remiss not to share a first look at this project finished JUST in time to wear while I watch some rasslin’ on a pirate ship in a football stadium in Tampa! 💪🏻 I’m excited to watch tonight’s women’s matches the most. Eee!
.
.
Pictured: A blond woman in a denim dress and glasses wearing a giant belt made with punch needle. The belt is made with wool in primary colors and was inspired by the WWE Universal Championship title belt. 
.
This is just a preview - after jab 2.0 tomorrow (feeling grateful 🙏🏼), I’ll be editing together a vlog about the design process for this wooly waist cover. Sometimes it’s hard to know how to make some of your wilder craft ideas come to life. Stuff you’ll never find a pattern for, you know? I’ll finish editing that ASAP, but I might take a few days to edit if I feel like trash from 💉 and only want to watch wrestling and wrestling YouTube for a day or two. 😂
.
.
#ipnrhd #punchneedle #wwe #wrestling #championshipbelt #wool #yarn #handmade #universalchampionship #universalchampion #rugmaking #wrestlingfan #wrestlemania37 #wrestlemania
A look at the halo on the back of my wrestling-ins A look at the halo on the back of my wrestling-inspired punch needle project! It’s interesting to see how fuzzy the handspun beige yarn is compared with the primary color sections of @knit_picks Wool of the Andes Bulky. ❤️💛💙🤎 
.
Pictured: The back of an in-progress punch needle project. A wooden punch needle tool sits on the work.
.
#punchneedle #woolrug #rugmaking  #kpambassadorsapr21 #sponsored #griefproject #handsoccupied #wrestlingfan #universalchampion #yarn #yarncraft #wool #needlepunch
Happy Easter / One week til Wrestlemania! Finishin Happy Easter / One week til Wrestlemania! Finishing up the punch needling part of this crazy @wwe inspired project by tonight. 💪🏻🧶 Anybody else have crafty plans for this fine spring day? 
.
Pictured: A blond woman sits, smiling and holding an in-progress punch needle project inspired by the Universal Championship belt. Houseplants are in the background and there’s lots of sun. 
.
#punchneedle #griefproject #handsoccupied #heidigustad #wrestlingcrafts #wwe #universalchampion #universalchampionship #wool #wooloftheandes #primarycolors #oxfordpunchneedle
I'm finally starting to get some of my energy back I'm finally starting to get some of my energy back from the past few weeks, and as I dip my toe back into production mode, the long-promised seamed sweater knitting YouTube series is at the top of my list. I've got FOUR versions of a simple sweater I've been playing with since last JULY to feature as a free pattern for folks who want to knit along during the series. Pictured is the first prototype for the series, knit in 2 colors of @knit_picks Mighty Stitch yarn. I imagine this soon-to-be short sleeved number will come in handy as an emergency Waldo costume or Christmas sweater. 🌲 
.
I've got my own list of topics I think folks would like to see in a series like this: things like tips for construction, working with vintage patterns, how to seam as invisibly as possible, and more, but as always, I'd love to hear from you: What scares you about knitting seamed sweaters? What would be helpful to cover, especially since we'll be doing more long form video content. I get so much positive feedback on my series of 20 minute+ intarsia tutorials, so I'm using those as a starting point as I produce this series. Seamed sweaters using vintage or self-improvised patterns are one of my favorite things on the planet, so I'm eager to share some seamed sweater skills with y'all super sweet folks. 😉 
.
.
Pictured: A red and white striped, short sleeved sweater knit in pieces that have yet to be seamed. They are laid out on a yellow and orange colorblock background and one sleeve is yet to be bound off. 
.
#handsoccupied #seamedsweater #kpambassadorsmar21 #sponsored #knitpicks #waldo #waldosweater #wip #yarncraft #yarn #knitting #knittersofinstagram #heidigustad #vintageknitting #sweaterknitting
Load More... Follow on Instagram

Copyright © 2021 / Foodie Pro Theme On Genesis Framework / Branding by Ink + Mortar
All Site & Shop Policies / Privacy Policy / Cookie Policy