• 0 items$0.00
  • Skip to primary navigation
  • Skip to main content
  • Skip to primary sidebar
  • Skip to footer

Hands Occupied

Contemporary yarn crafts by Heidi Gustad. Knitting, crochet, latch hook and macrame.

  • BLOG
    • Knitting
    • Crochet
    • Latch Hook
    • Macramé
  • ABOUT
  • Shop
  • Studio
  • Nav Social Menu

    • Facebook
    • Instagram
    • Pinterest
    • RSS
    • Twitter
    • YouTube

How-to: Kermit Collar

November 21, 2011 9 Comments

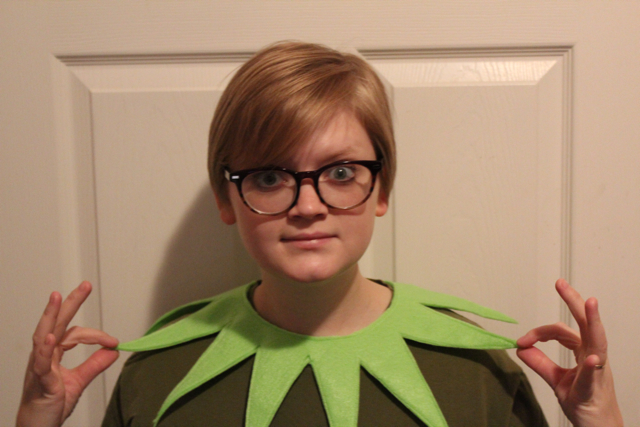
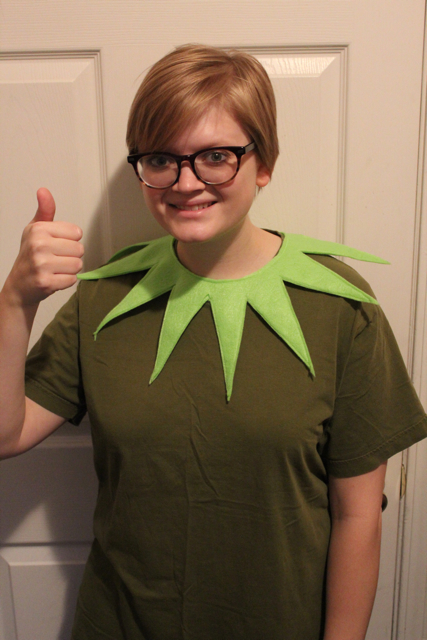
The new Muppet movie comes out Wednesday, and in that spirit, I decided to make a little accessory to wear to the theater. If you haven’t noticed, I really like making media-inspired costumes. This collar can be knocked out in about an hour if you use my pattern.

Supplies

This pattern (it fits a neck up to 18 inches around)
a printer
iron
very sharp fabric scissors
1/2 yd. eco or wool felt in lime green
coordinating thread
freezer paper
needle
sewing machine
snap closure

Directions

Download the pattern, print it and cut it out. Trace the pattern on to a piece of freezer paper. I did half of the collar at a time, but you can do it in quarters, or quadruple the pattern and make one large pattern piece using freezer paper.
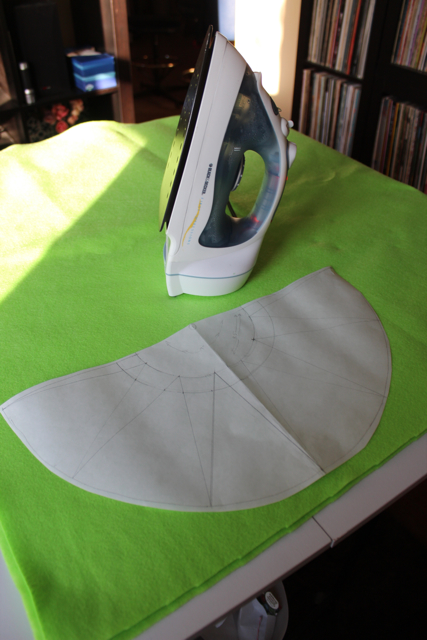
Iron your freezer paper, wax side down, on to your felt.
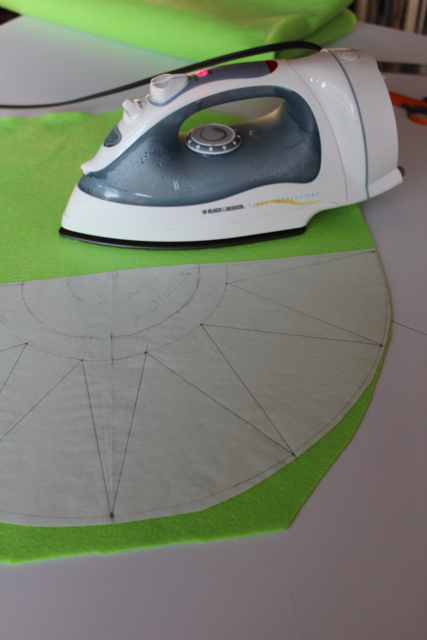
Use your sharp scissors to cut the felt, right through the freezer paper. Cut directly along the pattern lines. There is no seam allowance needed for this project.
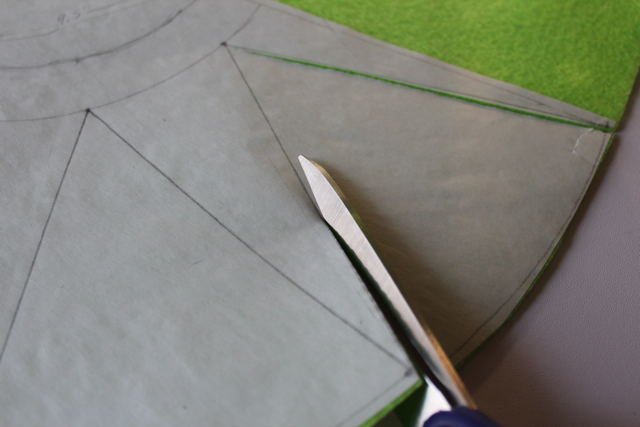
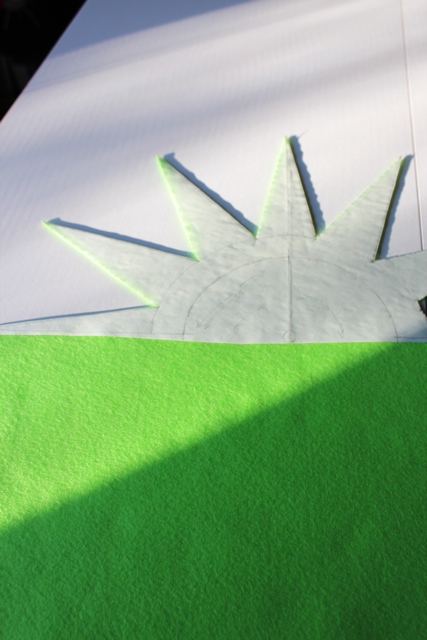
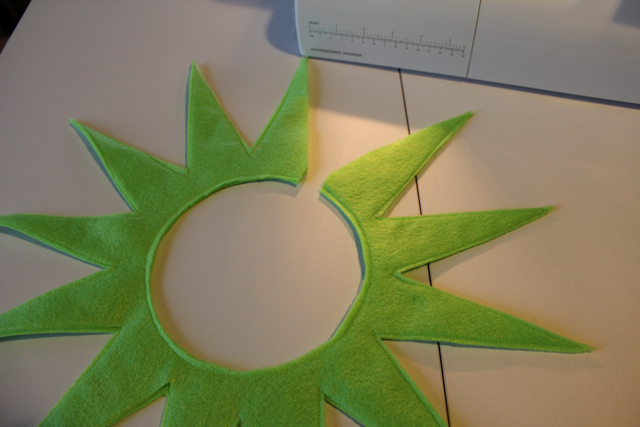
If you’re cutting out the felt in quarters or halves, like I did, you next need to gently remove the freezer paper pattern from your felt. Iron it to your felt, lining it up as carefully as possible. Cut the rest of the felt piece out. I think the finished shape can be best described as a “starburst.”
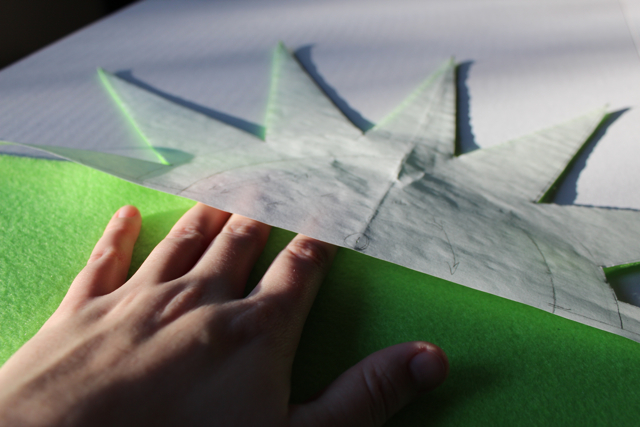
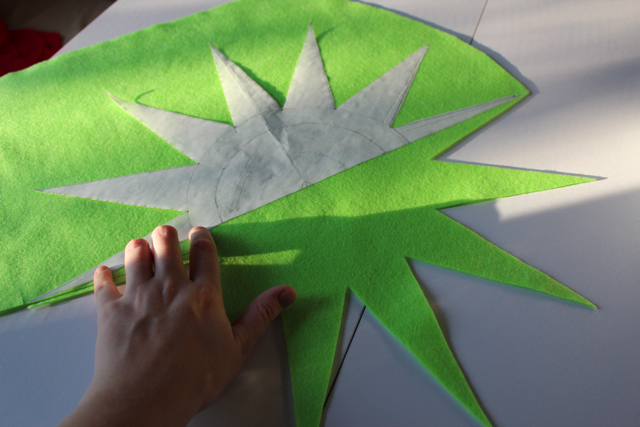
Repeat the whole process to create a second starburst.
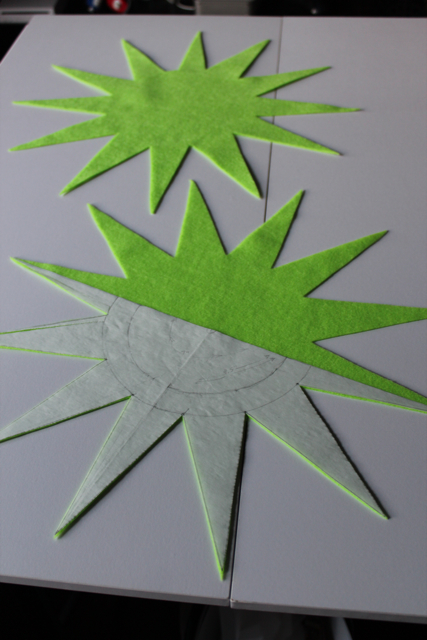
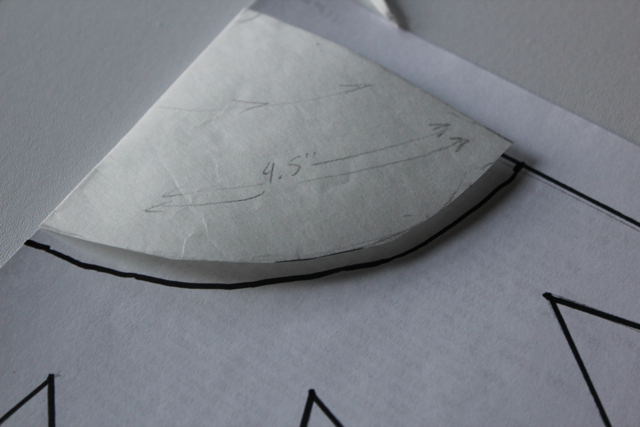
Grab your pattern. Use the quarter of a circle shape in the upper left to create a neck hole. Quadruple the quarter circle on some freezer paper, iron it to the exact center of one of the starbursts. Cut out your head hole. The pattern’s head hole fits a neck up to 18 inches around.
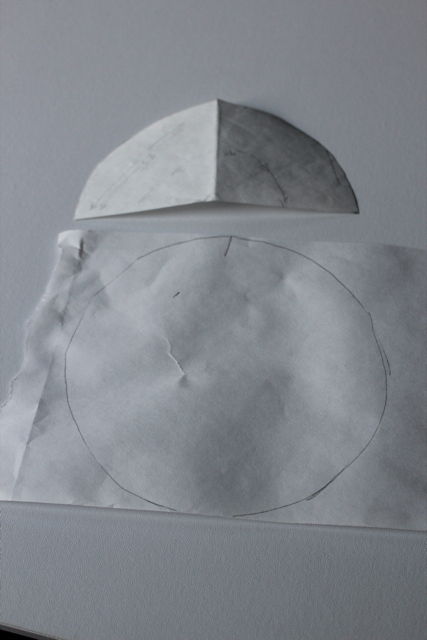
Next, line up your two starbursts. Use a basting stitch to tack the two pieces together. To make sure the pieces stay lined up, baste all the way around the starbursts, all the way to the tip of each point.
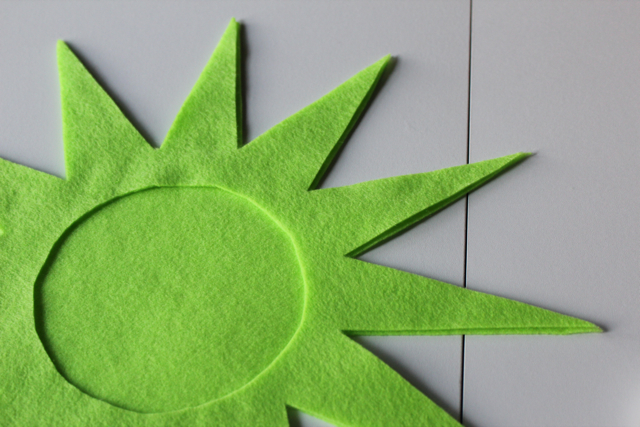
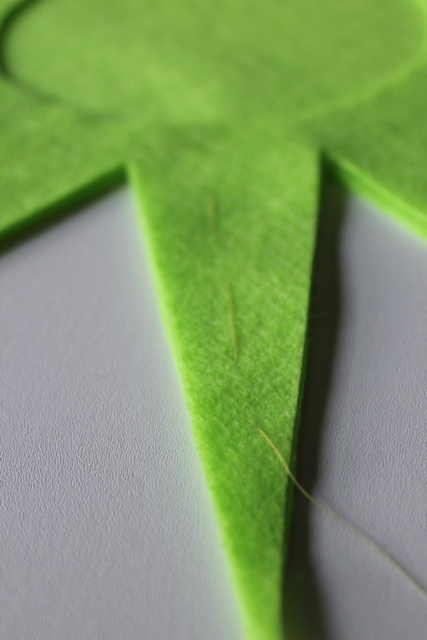
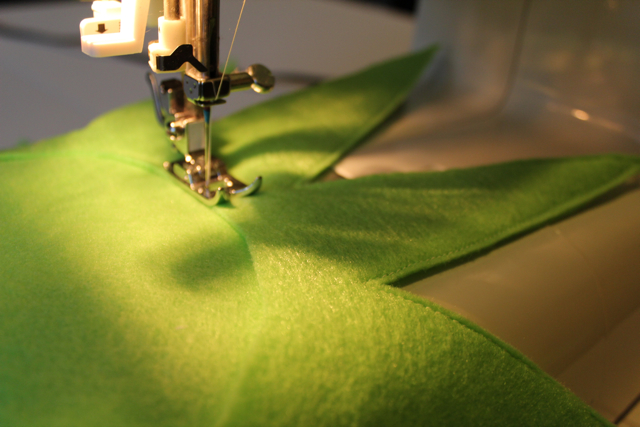
Sew along the edge of the whole garment using a sewing machine.
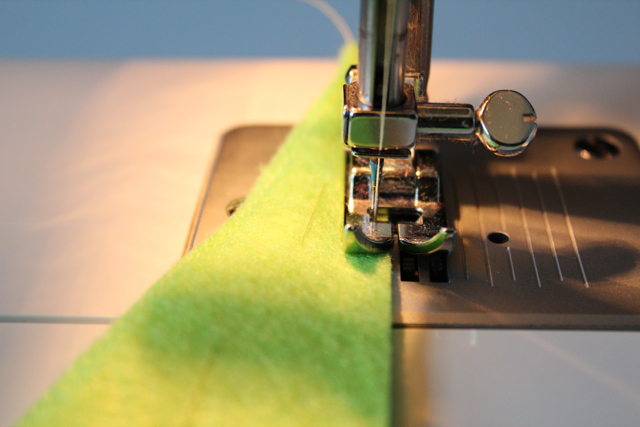
Sew around the neck hole, near the edge as shown.
Pick a point to cut an opening in your collar. Cut the opening as shown, and then cut the head hole out of the second piece of felt.
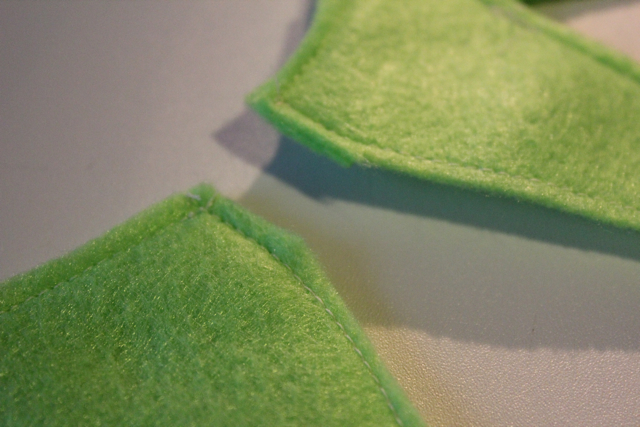
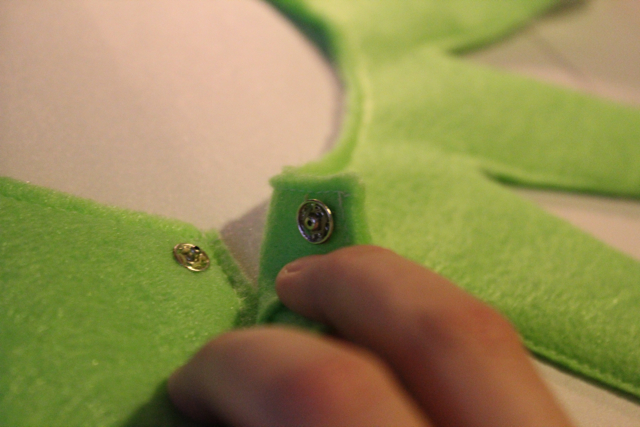
Sew remaining seams. Attach the snap closure with hand stitching.
Finally throw on a green t-shirt and your collar, and you’re set to see the Muppets in style.
Filed Under: How-to, Sewing Tagged With: felt, How-to, kermit the frog, Sewing, the muppets, tutorial

About Heidi

Heidi Gustad is an artist, author and crafts designer specializing in knitting, crochet, latch hook and macrame. In addition to running the Hands Occupied Blog and Pattern Shop, you can find her making videos & co-hosting the Very Serious Crafts podcast.

Previous Post: « Inspiration Thursday
Next Post: How-to: Mod Holiday Decor »

Reader Interactions

DID YOU LIKE THIS POST?
Visit similar articles...

  • How-to: Felt Thanksgiving WreathHow-to: Felt Thanksgiving Wreath
  • How-to: Louise Hat from Bob’s BurgersHow-to: Louise Hat from Bob’s Burgers
  • Quilted Flower Tote & English Paper PiecingQuilted Flower Tote & English Paper Piecing
  • How-to: Punk Rock Valentine’s ClutchHow-to: Punk Rock Valentine’s Clutch

DON’T MISS ANOTHER UPDATE

Comments

  1. amber

    October 20, 2013 at 7:59 pm

    thank you so much! I googled searched this and didn’t really think I would find something. You have saved my Halloween! You are very talented. Thanks again!

    Reply
    • Heidi

      October 20, 2013 at 9:31 pm

      Aww, thanks, Amber! I’m glad to have been your Halloween fairy ;) -Heidi

      Reply
  2. PAMELIA

    September 26, 2014 at 3:13 pm

    LOOKS JUST WHAT I AM LOOKING FOR CAN YOU BUY IT ALREADY MADE SURE HOPE SO I NEED ONE FOR A ADULT COSTUME

    Reply
  3. PAMELIA

    September 26, 2014 at 3:15 pm

    I SURE HOPE SOME ONE CAN GET BACK TO ME ON THIS WILLING TO PAY FOR ONE ALREADY MADE IF NOT TO EXPENSIVE WAYNESBADKITTY-KIT

    Reply
    • Heidi

      September 26, 2014 at 3:39 pm

      Hi Pamelia!! I’m so glad you like the collar, but unfortunately I don’t have any for sale. A quick option for you might be to download the template from the post and use it as a stencil to just cut out one layer of felt. No sewing would be required in that case. Best of luck! -Heidi

      Reply
  4. Irene

    October 19, 2014 at 8:49 pm

    Just what I needed to turn my little boy into Kermit for Halloween this year. Thank you so much for sharing this pattern!

    Reply
  5. Rod

    January 22, 2015 at 12:57 am

    Great!

    I am about to make mine; I will add tabs to put the snap onto, so it doesn’t have to overlap. I may have to adjust the patterns to be 90 degrees — I note that it will form more than a full circle; I’m guessing this is to accommodate the snap?

    Reply
    • Heidi

      January 22, 2015 at 8:21 am

      Yep! You’ve got it.

      Reply
  6. Yesenia

    October 27, 2015 at 11:00 am

    Hello!
    I love you idea for Kermit’s collar!!! I can’t download the patter for some reason. Would you please email it to me? I would greatly appreciate it. My BF is going to be Kermit and I will be Miss Piggy for Halloween this coming Saturday. Thank you so much!!!

    Reply

Leave a Reply to Irene Cancel reply

Your email address will not be published. Required fields are marked *

This site uses Akismet to reduce spam. Learn how your comment data is processed.

Primary Sidebar

Heidi Gustad from Hands Occupied / Craft Book Author and Knitting, Crochet, Latch Hook and Macrame Designer

Hi! I’m Heidi, an author, yarn craft designer and content creator specializing in knitting, crochet, latch hook & macrame. My work unapologetically features primary colors and vintage-meets-modern style. My first book, Latch Hook: 12 Projects for the Modern Maker, is now available!

work with heidi

UPDATES BY EMAIL

Get a free pattern + biweekly updates sent to your inbox.

Let’s be friends!

  • Facebook
  • Instagram
  • Pinterest
  • Twitter
  • YouTube
Latch Hook by Heidi Gustad

Footer

INSTAGRAM

handsoccupied

Craft book author & content creator in love with primary colors & vintage vibes. / #latchhookbook out now!
.
knitting, crochet, latch hook & macramé

Heidi Gustad 🧶✂️
There’s an update on the blog today, & it’s ab There’s an update on the blog today, & it’s about how I’m going to take the next 2 weeks off to rest & recharge. ☺️🧶 No new content for y’all means I can also take a moment to zoom out & plan what’s next. Link is in bio. 
.
.
A note on Very Serious Crafts: In the post I discuss stepping away from the @seriouscrafts podcast to give myself more time to devote to some minor medical issues. Don’t you worry - my health will be fine, & @molliejohanson @redhandledscissors and I are still pals, and after a short break of their own, the podcast will be back! Just sans moi. 💁🏼‍♀️😆 
.
.
See you in a couple weeks! ✌🏻#handsoccupied #knitdesign #craftdesign #sofadedsweater
Been a little quiet this holiday week, as it shoul Been a little quiet this holiday week, as it should be. ☺️🎄The past few days have been filled with a lot of catching up on festive zoom calls & raising toasts to the camera. 🥂 Connecting with people has been a welcome change of pace! Now I’m feeling ready to meet my inevitable end-of-year deadlines. 😆
.
.
Warmest wishes for the season, my friends! ❤️💛💙
Hi, I’m Heidi, the craft book author & maker beh Hi, I’m Heidi, the craft book author & maker behind Hands Occupied! 👋🏻 I’ve been enjoying making Reels a lot lately, but I wanted to bop in to share a regular photo & say hello. 🤓 
.
.
rather than giving you my bio right now, I have a question. I just got this new sweater & I can’t stop imaging how funny it would be to wear this to a knitting class ... is that bad? 🤣🤣🤣
.
.
Pictured: a blond woman with glasses wearing a sweater that reads “all your sweaters are ugly” standing in front of a Christmas tree.
Wet blocking, also called immersive blocking, is o Wet blocking, also called immersive blocking, is one of the most common methods for finishing a knitting project and helping ensure its final size and shape. Learn basic blocking for absolute beginners in an easy-to-follow (non-Reel!) video tutorial! Catch the tutorial on YouTube or the Hands Occupied Blog, link is in bio. 🧶 #handsoccupied #stopswatchandblockit #KPAmbassadorsDec20 #sponsored
Had to share this perfect capture of one of my fav Had to share this perfect capture of one of my favorite weird homemade Christmas ornaments: a simple macramé Santa face with beads for the eyes and nose! My Great-Grandma made it too. 🎄
.
Might have to try making a quickie Reel tutorial for this guy - I think it’s the perfect project for it, don’t you? 🎅🏼 #handsoccupied #macrame
Load More... Follow on Instagram

Copyright © 2021 / Foodie Pro Theme On Genesis Framework / Branding by Ink + Mortar
All Site & Shop Policies / Privacy Policy / Cookie Policy