• 0 items$0.00
  • Skip to primary navigation
  • Skip to main content
  • Skip to primary sidebar
  • Skip to footer

Hands Occupied

Colorful knitting, crochet, latch hook and macrame from craft book author & designer Heidi Gustad.

  • BLOG
    • Knitting
    • Crochet
    • Latch Hook
    • Macramé
    • Punch Needle
  • ABOUT
  • Shop
  • Nav Social Menu

    • Instagram
    • Pinterest
    • RSS
    • YouTube

How to: Make a Coffee Filter Garland Pt. 2

September 29, 2010 3 Comments

See How to: Make a Coffee Filter Garland Pt. 1 for instructions on dyeing & drying coffee filters.

Once your filters are completely dried (assuming you dyed them), it’s pom-pom assembly time. I basically followed these easy instructions from Dandelion and Grey, but here’s my detailed take on the whole process.

Supplies: normal needle, thread, scissors, large-eyed needle (optional), string for stringing your garland

  1. Grab a single coffee filter & crumple it around its center point. Repeat until you have a pile of these.
  2. Sew each filter in groups of four. I tried to have the thread pass through each filter at least twice for safety – my garland is going to be hung high on a ceiling and coffee filters are still tearable.
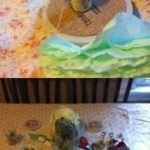
  3. Repeat step 2 until your pom-pom is as dense and spherical as you’d like it to be (see picture at left for my example), and then pass your needle and thread through the center of the pom once or twice before knotting off.
  4. Make as many pom-poms as you require for your garland. I randomly picked eight pom-poms.

Garland assembly

  1. Cut the string you’re hanging the pom-poms on to desired length.
  2. Tie one end of the string to something – I used a doorknob.
  3. Tie a knot in the string where you’d like to place a pom-pom (see picture at right).
  4. Sew a pom to the string as you would a bead – right through the center.
    1. A yarn needle came in handy here. I tried to thread the pom using the raw end of my plastic twine – epic fail. If you don’t have a large-eyed needle hanging around, you could try painting the raw end of your string with nail polish or liquid seam sealant to make the pom-stringing process easier. Just make sure your nail polish is dry before attempting to string a pom with it ;).
  5. Tie a knot near the center of the pom once it’s been strung. Keeping it close to the center will avoid it being visible (see picture at right).
  6. Repeat steps 3-5 until all of your poms are strung. Yay! You have a garland. Super-duper easy. I’m storing my completed garlands in very loosely tied trash bags in a dry place until my March 5 wedding. If these suckers get moldy, I’ll be pissed!

Filed Under: DIY Wedding, How-to Tagged With: coffee filters, garland, Sewing, twine

About Heidi

Heidi Gustad is a craft book author & content creator in love with primary colors & vintage vibes. She specializes in knitting, crochet, latch hook and macramé, and her first book, Latch Hook: 12 Projects for the Modern Maker, is out now!

Previous Post: « How to: Make a Coffee Filter Garland Pt. 1
Next Post: Expanding on the Coffee Filter Concept »

Reader Interactions

DID YOU LIKE THIS POST?
Visit similar articles...

  • Coffee Filter Garland RoundupCoffee Filter Garland Roundup
  • How to: My Wedding Craft Party Pom Pons!How to: My Wedding Craft Party Pom Pons!
  • Picks of the WeekPicks of the Week
  • Mathilde / Handmade WardrobeMathilde / Handmade Wardrobe

DON’T MISS ANOTHER UPDATE

Leave a Reply Cancel reply

Your email address will not be published. Required fields are marked *

This site uses Akismet to reduce spam. Learn how your comment data is processed.

Primary Sidebar

Heidi Gustad from Hands Occupied / Craft Book Author and Knitting, Crochet, Latch Hook and Macrame Designer

Hi! I’m Heidi (she/her/hers), a craft book author & pattern designer specializing in knitting, crochet, latch hook & macrame. Really anything with yarn! ❤️  My work combines vintage and modern design elements, featuring bold colors and graphic motifs.

UPDATES BY EMAIL

Monthly highlights sent to your inbox.

Find Me Elsewhere, If You’re There

  • Instagram
  • Pinterest
  • YouTube
Latch Hook by Heidi GustadDiscover Unique Items

Footer

INSTAGRAM

handsoccupied

Craft book author & pattern designer ❤️💛💙
knitting, crochet, latch hook & macramé
.
Please email for pattern support. 🧶

Heidi Gustad 🧶✂️
Working on a sample for some upcoming videos. It’s an overcast day with intermittent sunshine & I have a scruffy little sidecar. 🐶 Can’t complain! 
.
What’s on your needles this week? 
.
Yarn: @debbieblissknits Cashmerino Aran 
.
#handsoccupied #knitting #knittinglife
Peg boards and craft room organization go together Peg boards and craft room organization go together like peanut butter and jelly. So, as you can see, do latch hook tools and screwdriver organizers! 🪛 
.
I think this trick translates to any tool with a thick handle, so leather working tools, punch needles, print making tools, etc. should work! What other tools am I, a needlecrafter, blanking on right now? 
.
#craftorganization #handsoccupied #latchhook #latchhooking
Pegboard storage is my favorite for craft supplies Pegboard storage is my favorite for craft supplies, so getting a few hung in my new studio has been a priority. Here’s my first attempt. 🔨 
.
Details: This pegboard panel is for organizing my knitting needles, latch hook tools, sewing thread, etc. It doesn’t need to hold much weight, so I didn’t anchor this into a stud - just used basic drywall anchors. I’ve also got a set of two 2’x4’ panels for another spot in my studio, and those will need a stud/more than 3 drywall anchors. Wish me luck! 
.
[description: video features a woman hanging a panel of pegboard using a square dowel and drill]
It’s time for the annual Hands Occupied new year It’s time for the annual Hands Occupied new year update, and for the first time in years, I feel like I have some clarity about what I’m doing next. ❤️ Head to the blog to read all about it, the 1ink is where you’d think. 
.
#handsoccupied #knitting #creativeburnout
June’s face is giving, “What fresh heck is thi June’s face is giving, “What fresh heck is this?” 😆
.
June’s big ears can get cold in winter, so I’m improvising a doggie ear warmer/hood for her. What are the odds she tries to shred it immediately when it’s done? 
.
#knitting #knittingfordogs #handsoccupied #schneagle #wipwednesday #wip
Load More... Follow on Instagram

Copyright © 2023 / Foodie Pro Theme On Genesis Framework / Branding by Ink + Mortar
All Site & Shop Policies / Privacy Policy / Cookie Policy