• 0 items$0.00
  • Skip to primary navigation
  • Skip to main content
  • Skip to primary sidebar
  • Skip to footer

Hands Occupied

Contemporary yarn crafts by Heidi Gustad. Knitting, crochet, latch hook and macrame.

  • BLOG
    • Knitting
    • Crochet
    • Latch Hook
    • Macramé
  • ABOUT
  • Shop
  • Studio
  • Nav Social Menu

    • Facebook
    • Instagram
    • Pinterest
    • RSS
    • Twitter
    • YouTube

How-to: Make a No-Sew Valance

August 2, 2011 1 Comment

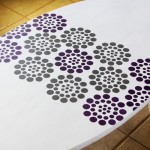
I shared a tutorial for making some really easy living room accessories a couple weeks ago. For round two of my living room decor projects, I wanted to bring some more of the fabric I used for my pillows and bench cushion in to my small space. I’ve always like the look of cornice-style (hard) valances and thought I could easily make one of these myself. Turns out, I was right!

Supplies

I’ll talk about how to buy wood cut to size in a moment. 

1 piece of wood 8″ high by a little wider than your window(s)

2 pieces of wood 4″x8″

6 wood screws

drill

staple gun & staples

fabric of your choice that’s long enough to cover your wood

fabric scissors

two eye screws for mounting your valance

two wood nails

Directions

Visit your local lumber-carrying store with needed wood dimensions in tow. Talk to a salesperson about your needs, including the nature of this project (mention that this will be hanging and you can’t use wood that’s too heavy). Lumber stores don’t generally like to make really small cuts, but the salesperson I worked with said he appreciated the fact that I knew exactly what I needed. He had some scrap wood he didn’t think he’d be able to get rid of, so he offered me an awesome price. It was also a slow time of day when I visited the store, so he even cut it for me using the store’s saw. What a guy!

With your wood all set, you’re ready to make my valance frame. Drill three pilot holes in to your wide piece of wood, making sure to protect the surface below your wood. Assemble your frame, creating the shape shown below. Once that’s done, the hard part’s over!

Now you get to upholster your valance. Cut enough fabric to cover your valance. The only downside, in my mind, to this project is having to cut such a long strip of fabric. Luckily, the strip is narrow and there was enough leftover width after I made my cut that I’ll be able to make some legitimate projects with the leftovers.

Next, lay your valance fabric right side down on the floor and line up your valance frame on the fabric. Be careful not to stretch it in weird ways. My fabric, luckily, includes some straight lines that let me know how straight my fabric was. Once that’s all set, start stapling your fabric to the frame.

Stapling the fabric to the ends of the frame takes a little bit of care. I tried to ensure I folded my fabric over all of the corners in the same way. When each end is stapled, trim excess fabric and secure loose ends.

Screw your eye screws in to each end of the valance, through the fabric and in to the wood. Mount the valance to your window with the wood nails, your eye screws hanging on them.

Don’t you love the finished product? I had a really crappy day at work the other day, and when I came home, I saw my valance and felt a little better. That’s when you know you’re happy with your project.

My dog cuddling up on the cushions I made a couple weeks ago, despite the limited petting opportunities while I work.

Filed Under: Home Decor, How-to Tagged With: cornice, diy, drill, home decor, staple gun, valance, wood

About Heidi

Heidi Gustad is a craft book author & content creator in love with primary colors & vintage vibes. She specializes in knitting, crochet, latch hook and macramé, and her first book, Latch Hook: 12 Projects for the Modern Maker, is out now!

Previous Post: « Vegan Vittles: Smoky Seared Tempeh & Swiss Chard
Next Post: My DIY Wedding: A Crafts & Photo Roundup »

Reader Interactions

DID YOU LIKE THIS POST?
Visit similar articles...

  • Wild about woodWild about wood
  • Stenciled Coffee Table MakeoverStenciled Coffee Table Makeover
  • Giant Valentine’s Day God’s EyeGiant Valentine’s Day God’s Eye
  • Style this DIY: Swiss Army BlanketStyle this DIY: Swiss Army Blanket

DON’T MISS ANOTHER UPDATE

Comments

  1. Sue Rice

    June 18, 2013 at 7:25 am

    Thanks for the info, I am getting ready to make 10 of them and wanted a simple way to do them. I am going to use a thin layer of padding on each.

    Reply

Leave a Reply Cancel reply

Your email address will not be published. Required fields are marked *

This site uses Akismet to reduce spam. Learn how your comment data is processed.

Primary Sidebar

Heidi Gustad from Hands Occupied / Craft Book Author and Knitting, Crochet, Latch Hook and Macrame Designer

Hi! I’m Heidi, an author, yarn craft designer and content creator specializing in knitting, crochet, latch hook & macrame. My work unapologetically features primary colors and vintage-meets-modern style. My first book, Latch Hook: 12 Projects for the Modern Maker, is now available!

Professionally I’m most known for: advanced intarsia knitting design & modern latch hook design.

work with heidi

UPDATES BY EMAIL

Get a free pattern + biweekly updates sent to your inbox.

Let’s be friends!

  • Facebook
  • Instagram
  • Pinterest
  • Twitter
  • YouTube
Latch Hook by Heidi Gustad

Footer

INSTAGRAM

handsoccupied

Craft book author & content creator in love with primary colors & vintage vibes. / #latchhookbook out now!
.
knitting, crochet, latch hook & macramé

Heidi Gustad 🧶✂️
“You’re telling me words can be pronounced in “You’re telling me words can be pronounced in different ways and mean the same things?!” 👀 Posting this here, just to make it clear: when anyone says skayne, skeen, or skyne, it can be safely assumed we’re talking about a bundle o’ yarn,  a SKEIN. It’s not necessary to shame someone for using a word that is known to have MULTIPLE common pronunciations. 🧶
.
.
Can you plz comment sharing how you say SKEIN and where you learned it? The OED happens to say SKAYNE, but it’s not a personal attack if someone says SKEEN and you say SKYNE or even Saskatoon. I’m legitimately curious. We don’t all knit or crochet the same way, and craft evolves a bit like language - it is passed on. There is so much value in having conversations about & embracing these variations! ✌🏻
.
Pictured: A blond woman holds a skein of mustard yellow yarn up to her head like a phone, looking shocked. She’s wearing glasses & a knit sweater. 
.
#handsoccupied #heidigustad #skein #yarn #yarncraft #knit #crochet #yarnaddict #knitincolor #soldotnacrop #language #englishisweird #oed #oxfordenglishdictionary
Sometimes my weekend projects involve hair rather Sometimes my weekend projects involve hair rather than yarn. Here’s the latest mediocre-but-improving result of my slow quest to learn to set vintage inspired curls. 💇🏼‍♀️ I’m hoping to be able to wash my hair less using a regular vintage set, but we’ll see if it ends up being practical. 😆 Hair frustrates me so much more than crafts! 
.
Do you also style your hair using vintage methods? If you have any tips for vintage hair styling or good resources to share, please do!
I suppose this is one way to decide what yarn colo I suppose this is one way to decide what yarn color suits your pooch. 😆 Navy really might be Woodrow‘s color - what do you think? 
.
Pictured: A medium sized, brown, senior dog asleep on a green bed. For some reason a donut ball of navy wool yarn sits on his head.
The first stitch tutorial of the new year is live The first stitch tutorial of the new year is live on YouTube! Diamond Brocade is a great knit+purl only stitch for beginners or anyone wanting a classic look for their knitting project. Find the video with a written stitch pattern on the blog or head directly to the video on YouTube. Both are linked in bio. ✌🏻 
#kpambassadorsfeb21 #sponsored
When your WIP loves ya back! 🥰 This may or may When your WIP loves ya back! 🥰 This may or may not be the third sample I’m making for an upcoming YouTube series on knitting seamed & vintage sweaters. I figure I’ll get to wear them all at the end, so why not? 🧶🤓 
.
Pictured: A few rows of knit ribbing on long circular needles arranged in the shape of a heart on a cream background. The yarn used is @knit_picks Twill worsted weight in Crabapple (wine red). The glasses stitch marker was a diy. 
.
#kpambassadorsfeb21 #sponsored #handsoccupied #vintageknitting #sweaterknitting #redyarn #knitinspiration #knitincolor #wool #redheart #handmadewardrobe #knit #heidigustad #knitpicks #knitpickstwill
Load More... Follow on Instagram

Copyright © 2021 / Foodie Pro Theme On Genesis Framework / Branding by Ink + Mortar
All Site & Shop Policies / Privacy Policy / Cookie Policy