• 0 items$0.00
  • Skip to primary navigation
  • Skip to main content
  • Skip to primary sidebar
  • Skip to footer

Hands Occupied

Colorful knitting, crochet, latch hook and macrame from craft book author & designer Heidi Gustad.

  • BLOG
    • Knitting
    • Crochet
    • Latch Hook
    • Macramé
    • Punch Needle
  • ABOUT
  • Shop
  • Nav Social Menu

    • Instagram
    • Pinterest
    • RSS
    • TikTok
    • YouTube

How to: Ribbon Wands

February 14, 2011 4 Comments

My wedding is now less than three weeks away! I’m so very excited and almost 100% ready to go. The tailoring of my dress and my fiance’s suit will both be done this week, the final floor plan and seating arrangement have been determined, and my crafts are all done. I can’t believe everything has happened so smoothly.

Saturday night, the fiance and I spent a couple hours making 100 ribbon wands for our wedding guests. The venue for my ceremony/reception doesn’t allow rice, bubbles, flower petals, or birdseed, so we decided to give our guests some festive wands to wave around after we say “I do.”

These are pretty easy to make, but this craft could result in hot glue burns or a staple through the finger. We didn’t end up with bad burns or staples in our hands, but we had some time to exchange our respective childhood staple-though-the-finger horror stories. I can only imagine how much it would hurt to get a staple gun staple though your hand.

Supplies

hot glue gun, glue

staple gun, staples

ribbon (I used 7/8″ Offray grosgrain ribbon in Baby Maize, Spring Moss, andWhite.)

1/4″ dowels, cut to 12″ in length (Lowe’s kindly cut my 48″-long dowels in to four equal pieces for free for me!)

spray paint

scissors

liquid stitch

Directions

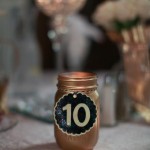
Spray paint your dowels in desired color & let dry. I went with gold and silver to match my ribbon wall dowels and table numbers.

Cut your ribbon in to 18″ pieces. I needed three pieces per wand, so I had 100 each of my three colors, for 300 total pieces. Using liquid stitch, seal one end of each of your pieces of ribbon so it won’t ravel. Let dry.

Cut a 1.5″ piece of your ribbon for each of your wands. Seal one end of each piece. Let dry.

Using one of each color of your ribbon, staple the non-glued end to a dowel using a staple gun. Try to get as close to both the end of the dowel and the ribbons as possible. Try not to staple your hand! As you can see in these pictures, the ends of the staple will stick out a little bit on the far side of the dowel.

Using your hot glue gun, glue one of your 1.5″ ribbon pieces over the staple and around the dowel to hide the raw ends of the ribbon and the staple. Let dry.

Repeat 99 times. My wands look a little like muppets when they’re all bundled together. I really hope my guests have a good time whirling these around at our wedding. The nice thing about these wands is that they can double as a wedding favor, and I don’t have to feel that bad that a lot of these will inevitably wind up in the trash. Between buying wholesale ribbon and the fact that the dowels I got weren’t too expensive, these didn’t cost all that much to make!

Filed Under: DIY Wedding, How-to Tagged With: birdseed, celebration, flower girl, ribbon wands, rice, wedding

About Heidi

Heidi Gustad is a craft book author, designer & creator specializing in yarn crafts like knitting, crochet, latch hook & macramé. Her first book, Latch Hook: 12 Projects for the Modern Maker, is out now.

Previous Post: « How to: Statistics Cross Stitch Inspired by Amy Sedaris
Next Post: No-dairy Thin Mint Cookies »

Reader Interactions

DID YOU LIKE THIS POST?
Visit similar articles...

  • Attention, DIY Brides & Handmade Hostesses!Attention, DIY Brides & Handmade Hostesses!
  • My Life, My KiaMy Life, My Kia
  • How-to: Black & Gold Wedding Table NumbersHow-to: Black & Gold Wedding Table Numbers
  • How-to: Make a Perfect Paper PinwheelHow-to: Make a Perfect Paper Pinwheel

DON’T MISS ANOTHER UPDATE

Leave a Reply Cancel reply

Your email address will not be published. Required fields are marked *

This site uses Akismet to reduce spam. Learn how your comment data is processed.

Primary Sidebar

Heidi Gustad from Hands Occupied / Craft Book Author and Knitting, Crochet, Latch Hook and Macrame Designer

Hi! I’m Heidi (she/her/hers), a craft book author & pattern designer specializing in knitting, crochet, latch hook & macrame. Really anything with yarn! ❤️  My work combines vintage and modern design elements, featuring bold colors and graphic motifs.

EMAIL NEWSLETTER

Never miss a tutorial with these short & sweet monthly updates.

Find Me on Social Media

  • Instagram
  • Pinterest
  • TikTok
  • YouTube
Latch Hook by Heidi GustadDiscover Unique Items

Footer

INSTAGRAM

handsoccupied

Craft book author, designer & creator specializing in yarn crafts like knitting, crochet, latch hook & macramé
❤️ Email preferred

Heidi Gustad 🧶✂️
Nobody panic. This is just the back of an (admitte Nobody panic. This is just the back of an (admittedly insane) intarsia project. One day, this will be a seamed sweater, but today is not that day. 🧶 
.
Have a good weekend, everyone! 
.
Yarn: @universal_yarn’s Fibra Natura Cobblestone in Antarctica & Dragon’s Breath 
.
#handsoccupied #intarsia #intarsiaknitting #wip #knitting
Here’s how to work a Norwegian purl stitch for e Here’s how to work a Norwegian purl stitch for easier continental style knitting. With this purling method, the working yarn says tensioned (held) at the back of your knitting at all times. For many knitters, always holding the yarn at the back helps with tension issues, as well as feeling a little more comfortable. 
.
Have you ever encountered this style of purling before? If you’ve tried it, have you found it helps with your purl tension and knitting speed? I’m curious.
.
For a written tutorial, visit handsoccupied-dot-com. For video, you guessed it, You2be. Both of these platforms allow for longer, more in-depth versions of this tutorial, including full transcripts, alt text & the ability to pause, slow down or speed up at will. (Like if you really want to learn this, I recommend using a platform that doesn’t keep your hands occupied. Thinking of putting this in all my captions these days tbh - shout out to you if you made it this far. 🙌🏻😂)
.
#handsoccupied #learntoknit #continentalknitting #howtoknit #norwegianpurl #norwegianknitting #knit #knitting #knitter #knittersofinstagram #knittinghack  #handknitting #handknit #norwegianpurling
Have you ever tried this style of purl? . All thi Have you ever tried this style of purl? 
.
All this recent talk about throwing vs. continental style knitting made it clear many people struggle with purling in continental knitting. Turns out that Norway may have the answer! In Norwegian purling, the working yarn stays tensioned at the back at all times, helping with speed and tension. 🤯
. 
Head to the bl0g (🔗 in bi0) for a more in-depth look at how to work a Norwegian purl stitch, including a photo tutorial with animated GIF & a video tutorial. Wrapping your mind around how to work a stitch you’re familiar with in a totally new way can be confusing, so I tried to give a few options for clarity. 🤙🏻 Video is also on You2be. 
.
#handsoccupied #norwegianpurl #norwegianknitting #norwegianpurling #continentalknitting #howtoknit #learntoknit #knitterofinstagram #knitters
It’s been a hot second since I showed my face or It’s been a hot second since I showed my face or reintroduced myself, so here goes! I’m Heidi Gustad, a craft book author, pattern designer, and tutorial creator who specializes in yarn crafts. Lately, I’ve been focused on releasing quality knitting videos and related blog posts to help teach things like the difference between provisional cast ons and how to fix common knitting mistakes. Next week I’m shooting requested crochet and latch hook videos, so h👀kers, your time is coming! And if you ever have tutorial requests, please let me know. ☺️
. 
TLDR: I’m Heidi. I design & teach yarn crafts. You can find tutorials on my blog (est. 2010) & You2be. I also have several knitting & crochet patterns + a book about latch hook available. / All of these can be found on my website, the 🔗 is where you’d think. 
.
#handsoccupied #fridayintroduction #heidigustad #knitting #knitter #knittersofinstagram #yarncrafts #latchhookbook
Are you a picker or a thrower? Do you knit Contine Are you a picker or a thrower? Do you knit Continental or English Style? Here’s a quick overview of the differences between the two most common knitting styles, including a side by side comparison. (A good one to save for future reference. 👍🏻) 
.
There’s more on the differences between picking and throwing in my latest blog post & You 2ube video - the l1nk is where you’d think!
.
#handsoccupied #learntoknit #knittingstyles #howtoknit #knittersofinstagram #knitter
Load More... Follow on Instagram

Copyright © 2023 / Foodie Pro Theme On Genesis Framework / Branding by Ink + Mortar
All Site & Shop Policies / Privacy Policy / Cookie Policy