• 0 items$0.00
  • Skip to primary navigation
  • Skip to main content
  • Skip to primary sidebar
  • Skip to footer

Hands Occupied

Colorful knitting, crochet, latch hook and macrame from craft book author & designer Heidi Gustad.

  • BLOG
    • Knitting
    • Crochet
    • Latch Hook
    • Macramé
    • Punch Needle
  • ABOUT
  • Shop
  • Nav Social Menu

    • Instagram
    • Pinterest
    • RSS
    • TikTok
    • YouTube

How-to: Spider Ring Drink Markers

September 30, 2013 Leave a Comment

How-to: Spider Ring Drink Markers - Hands Occupied

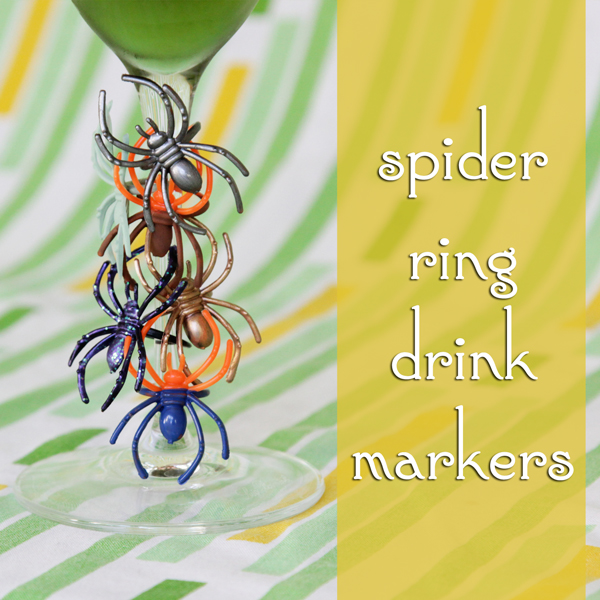
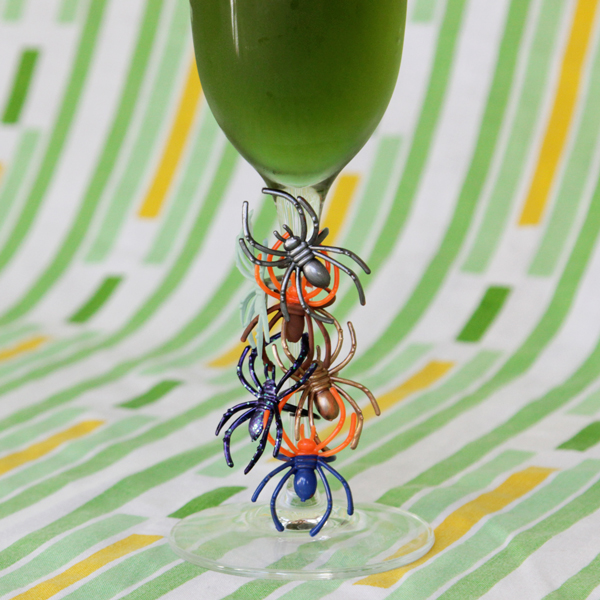
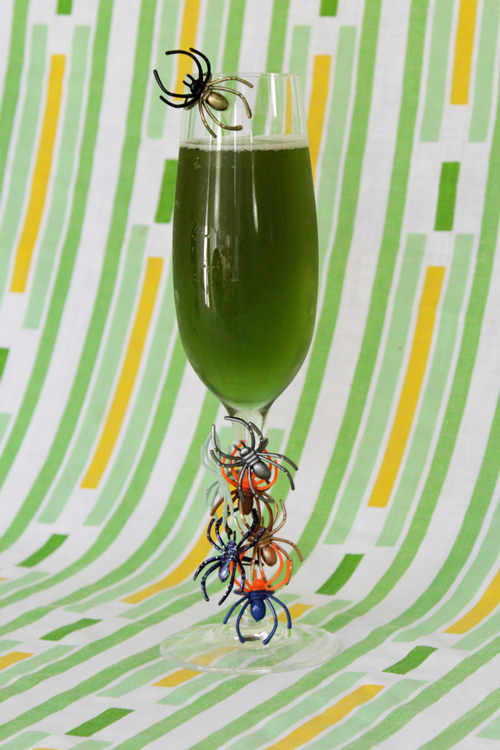
What a difference a little bit of paint makes! Little details like these fun drink markers can really amp up the impact of a party. It’s really hard (for me, at least) to remember to get the little detaily things done among the laundry list of party prep tasks. Some haters might be all “this is just paint on some rings!”, but the ease of this project means, again for me at least, that they’ll actually get done.

PS: My mom likes to call me with ideas for my blog, usually out of the blue. Adorable, I know. Sometimes I use her ideas, sometimes I don’t. However, I have to give her full credit for the idea for today’s spider drink markers. Thanks, Mom! 
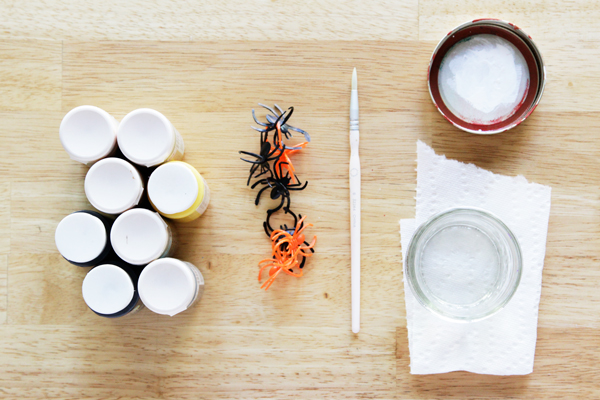
Supplies

plastic spider rings
acrylic craft paint in a variety of colors
paint brush
water cup
paper towels

How-to: Spider Ring Drink Markers - Hands Occupied

Directions

Clean and dry your spider rings before you begin. The paint will stick better to a clean, dry surface.

How-to: Spider Ring Drink Markers - Hands Occupied

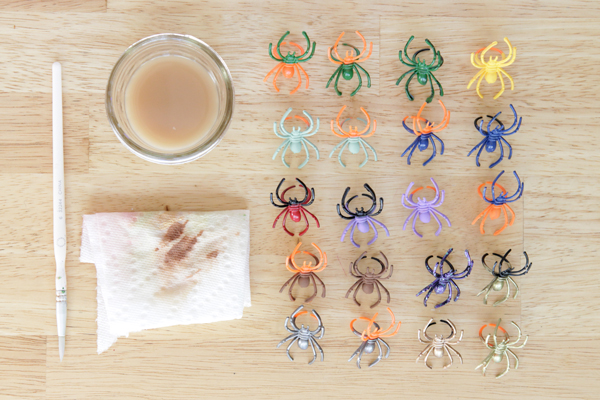
Paint them in a variety of ways, cleaning and drying your paint brush in between.

How-to: Spider Ring Drink Markers - Hands Occupied

Despite this being basically the easiest project in the world, I do have a few tips for success with this one:

  • Paint two to three layers of paint on each ring to get the best coverage.
  • Halloween stores tend to carry spider rings that only come in black and orange. Think about which colors you’re painting on which rings. I found that yellow, for example, looked perfect on an orange ring, but the yellow I painted on the black rings looked awful (patchy, not a vibrant yellow).
  • Notice how some of my rings are just painted from the “waist” down or up? I have a huge stash of craft paint, but not all of the colors worked. When I used too many of my metallic craft paints, the resulting rings all looked the same, which kind of defeats the point of making drink markers at a party. When I found color I really liked, like the glossy blue, I made fully painted, top-only painted, and bottom-only painted markers. That makes 3 obviously different drink markers from just one color of paint.
  • With one color of paint, you can get up to 5 different markers if you also mix and match the red and black rings: full coverage, black with painted top, orange with painted top, black with painted bottom, and orange with painted bottom. This is great if you only want to buy a few colors of paint for these markers, or if your party has a specific color palette and you’re not wild about having a bazillion different colors of drink marker going on.

Yeah, I’m probably way over-thinking a project as simple as just painting some cheap party rings, but that’s me. 

How-to: Spider Ring Drink Markers - Hands Occupied

If you want these to double as take home party favors…

Just seal them with an acrylic craft sealer. I’m a fan of Mod Podge’s Clear Acrylic Sealer. The aerosol can makes it easy to get even coverage and avoid drips of sealant all over your finished projects.

How-to: Spider Ring Drink Markers - Hands Occupied

Filed Under: Halloween, How-to, Parties Tagged With: cheap, crafts, diy, dollar store, drink markers, easy, halloween craft, party craft, party diy, party favors, party store, rings, simple, spiders

About Heidi

Heidi Gustad is a craft book author, designer & creator specializing in yarn crafts like knitting, crochet, latch hook & macramé. Her first book, Latch Hook: 12 Projects for the Modern Maker, is out now.

Previous Post: « Weekly Reader
Next Post: Breathing Easier »

Reader Interactions

DID YOU LIKE THIS POST?
Visit similar articles...

  • How-to: Bat Place CardsHow-to: Bat Place Cards
  • How-to: Balloon Garland | Hands OccupiedHow-to: Balloon Garland
  • Weekly Reader + Pillows to Perk Up Your Place!Weekly Reader + Pillows to Perk Up Your Place!
  • DIY FYI: Finger KnittingDIY FYI: Finger Knitting

DON’T MISS ANOTHER UPDATE

Leave a Reply Cancel reply

Your email address will not be published. Required fields are marked *

This site uses Akismet to reduce spam. Learn how your comment data is processed.

Primary Sidebar

Heidi Gustad from Hands Occupied / Craft Book Author and Knitting, Crochet, Latch Hook and Macrame Designer

Hi! I’m Heidi (she/her/hers), a craft book author & pattern designer specializing in knitting, crochet, latch hook & macrame. Really anything with yarn! ❤️  My work combines vintage and modern design elements, featuring bold colors and graphic motifs.

EMAIL NEWSLETTER

Never miss a tutorial with these short & sweet monthly updates.

Find Me on Social Media

  • Instagram
  • Pinterest
  • TikTok
  • YouTube
Latch Hook by Heidi GustadDiscover Unique Items

Footer

INSTAGRAM

handsoccupied

Helping yarn crafters untangle various techniques on the internet since 2010
🧶 Really into intarsia
Stay up-to-date 💌 & shop the latest patterns ⤵️

Heidi Gustad 🧶 knitting & yarn crafts
It’s time for the monthly review and giveaway! T It’s time for the monthly review and giveaway! This go around, get to know two new sister yarns from @manosyarnsusa, Marla and Sami, and enter to win a skein of each to try for yourself. 
.
What makes these yarns sisters is that, while dyed differently, they’re the same weight and come in intentionally coordinating color palettes. For my review, I opted for a sky-inspired combo of Sami in Natural and Marla in Nube. 🌧️ 
.
Check out the full review & enter the giveaway at the link in my bio. 
.
#handsoccupied #yarnreview #manosdeluruguay #knitting_inspire #crochet #yarngiveaway #knitters #yarn #crochetersofinstagram
If only knitting a whole project took 39 seconds… 😮‍💨 
.
In this video, you can see how the Intarsia Flower Pillow pattern knits up - two flat panels, one with intarsia, both are blocked, and then they’re seamed. Find the pattern on @hi.ravelry & my website, just search Intarsia Flower Pillow. 🌸 
.
P.S. I’m really smiling in this video while seaming the pillow, so I guess I’m proving last week’s claim that I truly enjoy that sometimes-dreaded task. 😆🫣
In knitting, a Left Lifted Increase (LLI) lets you In knitting, a Left Lifted Increase (LLI) lets you add a stitch in between two columns of stitches that leans to the left. Similar to an M1L, LLIs allow you to increase nearly invisibly.
.
To learn more about lifted increases, including when to use them and how they differ from Make 1s, head to the 🔗 in my profle. 
.
Have you ever used lifted increases? I used M1’s almost exclusively for a long time when I needed to inc between stitches, but when I designed the Intarsia Flower Pillow pattern, I needed something that would allow me to increase a lot near my cast on, and M1’s resulted in edge curling. The more you know! 🌈 
.
Yarn: @lionbrandyarn Wool Ease from my Stash / Neddles: @boyeyarncrafts - Just remembered these are the needles I learned to knit on at age 8. 😂
.
#handsoccupied #knitting #learntoknit #howtoknit #sweaterknitting #knitinspiration #knittersofinstagram #liftedincreases
Last week I got to hang out with my family & helpe Last week I got to hang out with my family & helped babysit my red-headed niece and nephew. So here’s some plane knitting, and a couple pictures (shared with permission) of my babysitting adventures.
.
Lessons learned: 1️⃣ Trying to knit around 2 toddlers, 2 cats & 2 large dogs is pretty hard. 2️⃣ I learned during water color time that pink and black make “colorful black.” 🩷🖤 3️⃣ Toddlers do NOT care about your rainbow sorting of their toys. 4️⃣ Toddlers are very good at finding mischief in a very short amount of time, what a surprise. 😂
.
#handsoccupied #knitting #placesyoucanknit #knitters #knitinpublic #handmadelife #knitting_inspiration
Weaving in ends & seaming with mattress stitch are Weaving in ends & seaming with mattress stitch are both so useful for garment knitting! But for me, weaving in ends can feel like a chore while the latter feels like I’ve successfully done magic. 🧙🏻‍♀️ Does anybody else run into this phenomenon? Are you the opposite? Any theories as to why they feel different? 
.
In this video, I’m finishing my brand new Intarsia Flower Pillow. 🌸 I’m working with @universal_yarn Uni Merino & the pattern is available at the 🔗 in my b1o. 
.
#handsoccupied #intarsiaflowerpillow #intarsia #intarsiaknitting #knitting #colorwork #knitpillow #knittinginspiration #knittersofinstagram
Load More... Follow on Instagram

Copyright © 2023 / Foodie Pro Theme On Genesis Framework / Branding by Ink + Mortar
All Site & Shop Policies / Privacy Policy / Cookie Policy