
Note: Consider this post a quick-start guide to latch hook finishing for beginners who aren’t ready to work slowly through a more advanced tutorial. For in-depth latch hook finishing tutorials, check out my tutorials on Square Latch Hook Finishing, Non-Square Latch Hook Finishing (coming July 2020), and How to Finish Hard Nooks & Crannies in Latch Hook (coming July 2020).
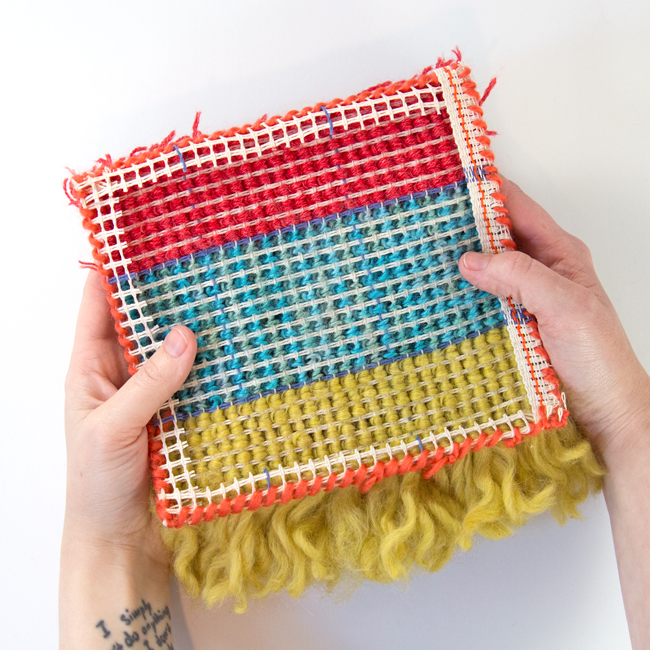
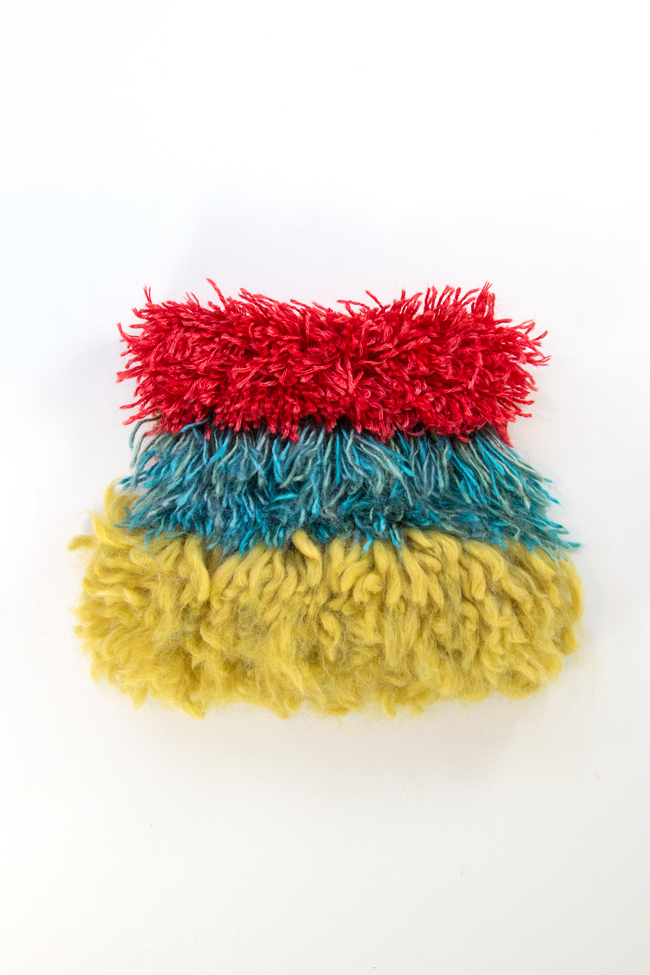
The pattern featured in this tutorial is the beginner-friendly Tiered Colorblock Wall Hanging – get the free pattern here.
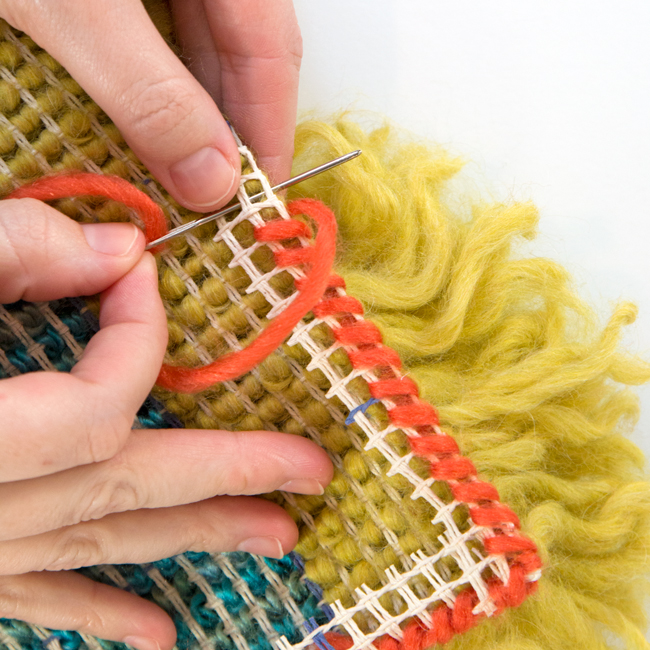
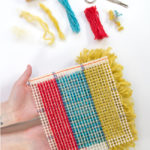
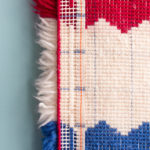
How to: Basic Latch Hook Finishing
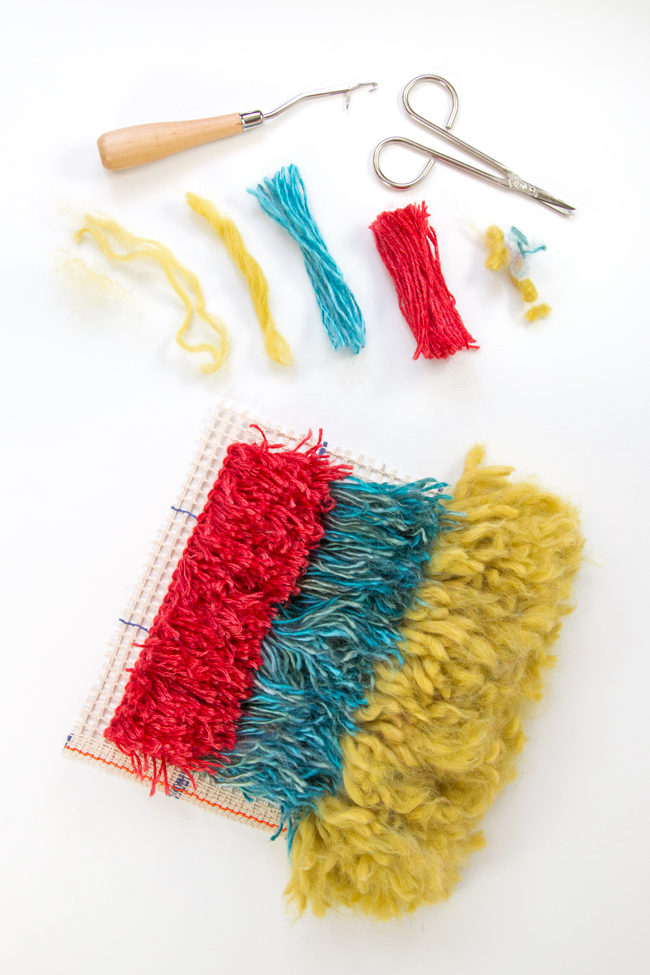
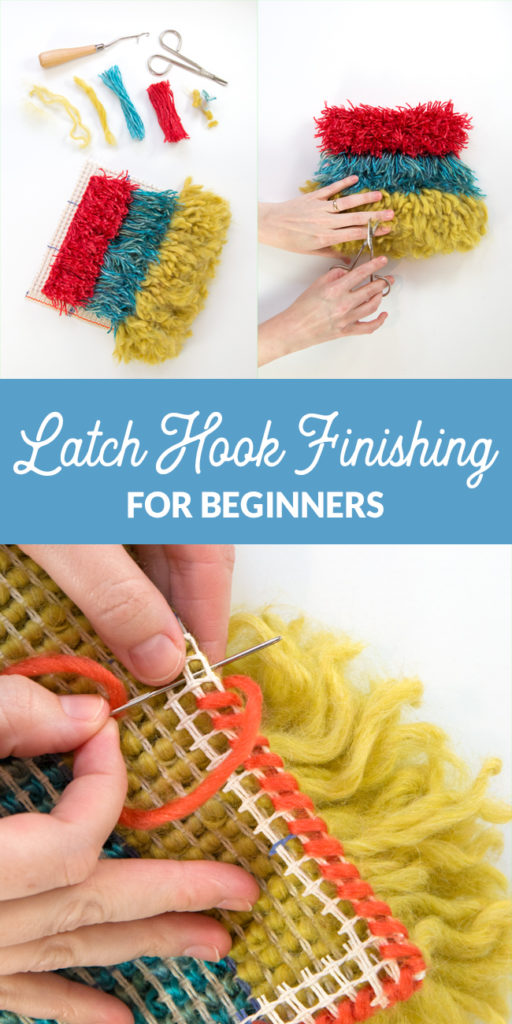
Supplies
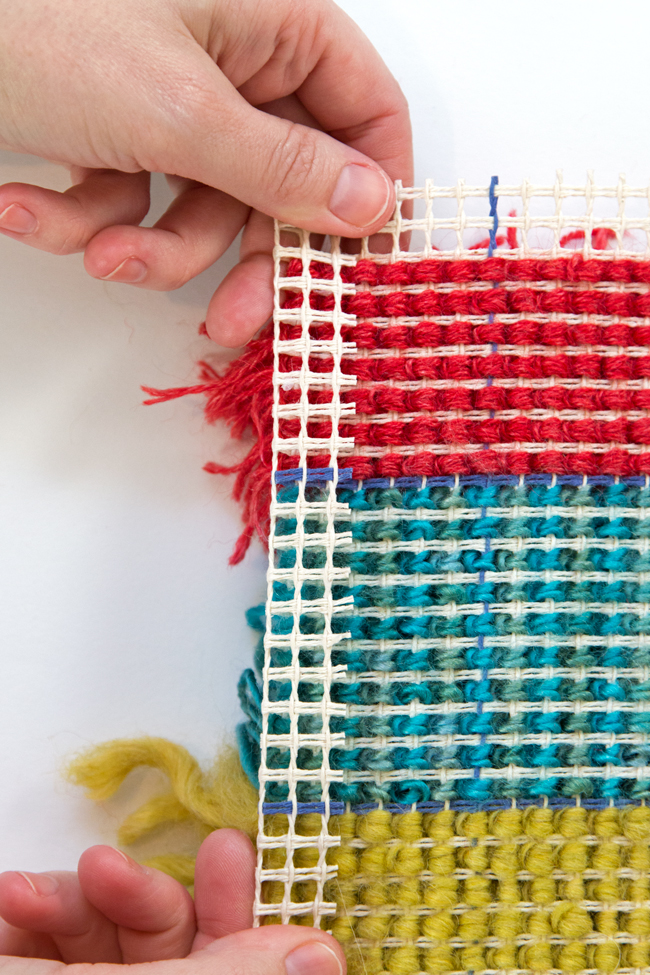
your nearly finished latch hook with ~1″ of empty rug canvas on all sides
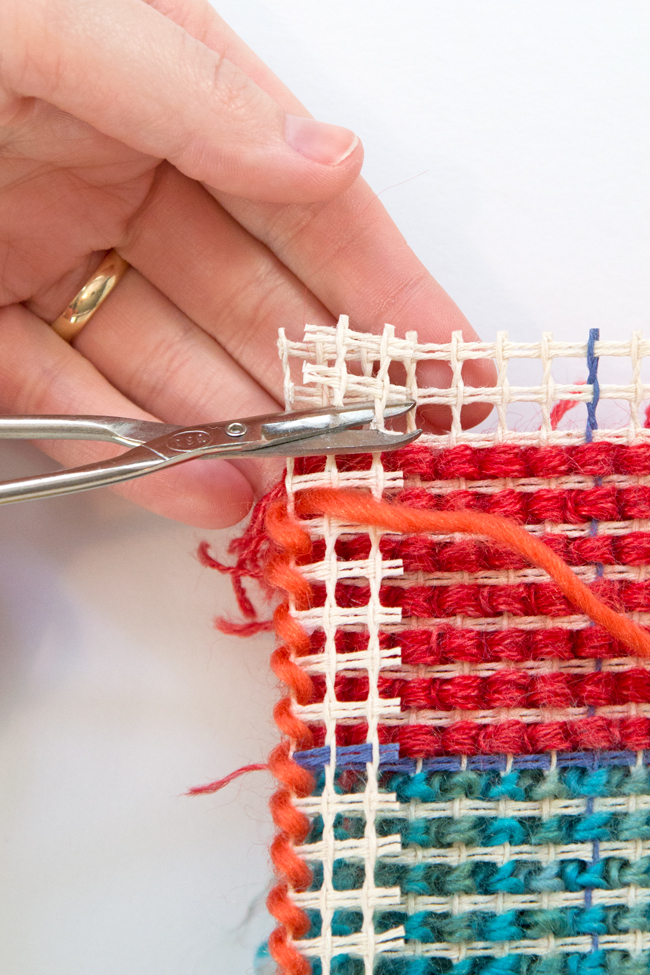
(sturdy) scissors
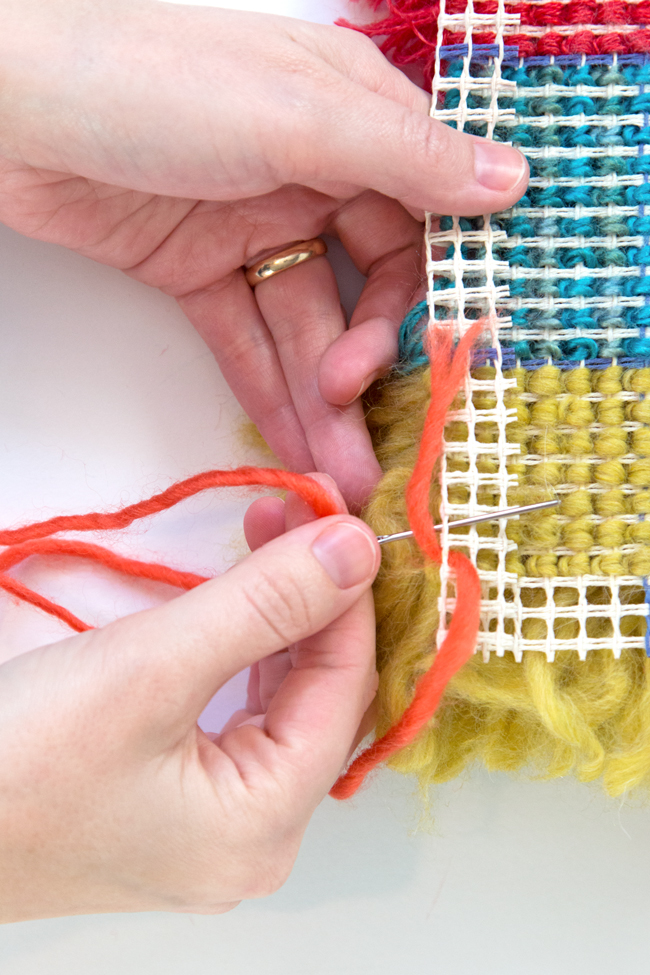
tapestry needle
yarn or strong thread
Directions
If you’re loving the latch hook project pictured in this and last weeks’ basics tutorials, tune in Wednesday for the free pattern to get you latch hooking like a pro!
More great resources for latch hook beginners:
- Latch Hook Basics Tutorial
- Looking for contemporary latch hook inspiration? Here are 9 Things to Latch Hook
- Tiered Colorblock Wall Hanging – free latch hook pattern


Thank you Heidi Brilliant explanation. I bought a hook at a wool fair ages ago and forgot how to use it . Thank you
Thank you for the very clear explanation and pictures of how to finish a rug or hsngibg. It’s very simple, so I understand that’s why it’s glossed over in most articles, but if you’ve never done it, it can still be hard to visualize. Plus you had the tip of trimming the bulk at the corners. That may have occurred to me, but without someone with experience telling me it worked,I would have been afraid it would have encouraged unraveling or something. So excellent post!
Hi! What size tapestry needle and what size thread (if I don’t use yarn) do you recommend for binding a latch hook rug? I have a Christmas tree skirt i finished last summer and would like to finally bind it. Thanks!
It depends on the gauge of your canvas and the finished look you’re going for. I often like to use yarn because it better covers the raw canvas edge than thread. As far as tapestry needle, I just buy whatever says tapestry needle on it. If it’s too big for my yarn or canvas, I look at what needle options in my notions drawer until I find what works. I’d just recommend a blunt tip since you don’t need to sew through fabric, just run yarn around strands of rug canvas.
Best of luck!
Heidi
Hi, I am finishing a 6×9 rug started 35 years ago and have come to a torn thread in the canvas. Can you tell me how to repair it. One of the threads in the hole is ok but worn. I was hoping to run a new thread through the canvas to hook. Please advise. Thanks
If I run into a torn piece of my canvas, I like to patch it like a pair of jeans. You can hand stitch a patch of canvas onto the back of your work (lining up the grids) and hook onto it as normal. I also like to hook through the patch canvas and main canvas surrounding the torn strands to reinforce everything. Hope this helps! -Heidi :)
Hi…do you have any experience using “iron-on” binding? I have a 28” by 36” Santa to finish, then bind but seeing is foreign to me !!! If possible, a brief explanation would help. Thank you.
I haven’t used iron on binding before, but I just did an in-depth tutorial on binding latch hook projects with whip stitch that could help: https://www.handsoccupied.com/whip-stitch-binding/ Cheers! :)
I need your help!!! I didn’t think about leaving a 1 inch trim on my project before I started…as a matter of fact, I lined it up with the blue lines in the pattern and now have only one row if that on the bottom of my beautiful rainbow for my Grandson’s wall. It is actually in danger of fraying along the bottom. I don’t know what to do! It is so gorgeous. Hopefully you can help me.
Thank you,
Kathy Little
Shooting you an email now! -Heidi :)
hola buenas noches soy de mexico donde puedo encontrar la base para la alfombra gracias
mi lona de alfombra favorita se puede encontrar aquí : https://www.colorcrazy.com/collections/supplies-1
Thanks so much for the quick tip on finishing the project. I was interested in the post about not having an inch trim on the bottom as I also started with the first blue grid. I was hoping you posted the answer but you said you would email it to the writer. Any suggestions would be appreciated.
Thank you for referencing the email – here’s what to do:
You’re not the first person to make a project without leaving seam allowance, never fear! Since you’re not the first or last person who will ask this, I’m going to add making a tutorial post and/or YouTube tutorial video to my 2021 to do list, specifically on this topic. Thank you for the inspiration.
On to helping you! :) First thing’s first. I see you commented on this basic latch hook finishing blog post. Many people find tutorials on my site via Google search and don’t realize I have a growing library of latch hook-specific tutorials available, so first, I’ll direct you there as one or a combination of them may help you finish your project: https://www.handsoccupied.com/category/latch-hook/. In particular, the nooks & crannies post should be useful.
Please give those a thorough reading to see if they address your issue, and after that, email me with follow-up questions that I can help answer.
Yours in yarn,
Heidi
Heidi is there anything you can do to stop the fluff coming off the wool, I have done cushion covers but the fluff just keeps coming.
Hi Dorothy,
The level of fluff can depend on the type of fiber used and how the yarn is wound. With single ply, acrylic fibers, I have had more of an issue with having to de-shed the finished project. Sometimes I don’t mind having to maintain a finished project because I like the finished look, but it can be admittedly annoying.
Warmly,
Heidi
P.S. Apologies for the response delay – I’ve been moving this month. 😅
Hello! Thanks for the visual on how to finish the edges – very helpful!
Do you have any words of wisdom re: how to keep the hooked yard from coming loose over time? I thought about spray adhesive for the back, but google doesn’t seem to support that idea.
Thanks!
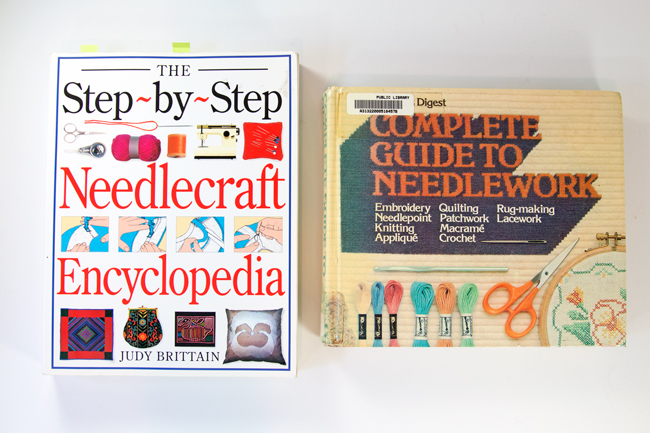
Liquid latex can be used – it will also make your rug skid-proof. Laying your rug face down on a flat surface, you spread a small amount of the liquid latex in a thin layer all over the back, starting in the center of your rug. I learned about this technique from “The Reader’s Digest Complete Guide to Needlework” if you’re ever looking for an older, but really solid reference book that has a killer section on rug making. There’s a bunch of used copies available online – hold out for the cheapest because it was a really popular book, haha! LMK if you have other questions, glad to help. -Heidi
Thanks!