• 0 items$0.00
  • Skip to primary navigation
  • Skip to main content
  • Skip to primary sidebar
  • Skip to footer

Hands Occupied

Colorful knitting, crochet, latch hook and macrame from craft book author & designer Heidi Gustad.

  • BLOG
    • Knitting
    • Crochet
    • Latch Hook
    • Macramé
    • Punch Needle
  • ABOUT
  • Shop
  • Nav Social Menu

    • Instagram
    • Pinterest
    • RSS
    • TikTok
    • YouTube

How-to: Pumpkin Spice Halloween Candles

October 7, 2013 2 Comments

How-to: Pumpkin Spice Halloween Candles at Hands Occupied

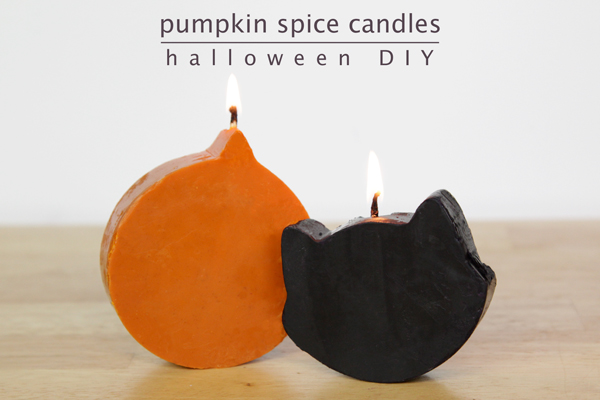
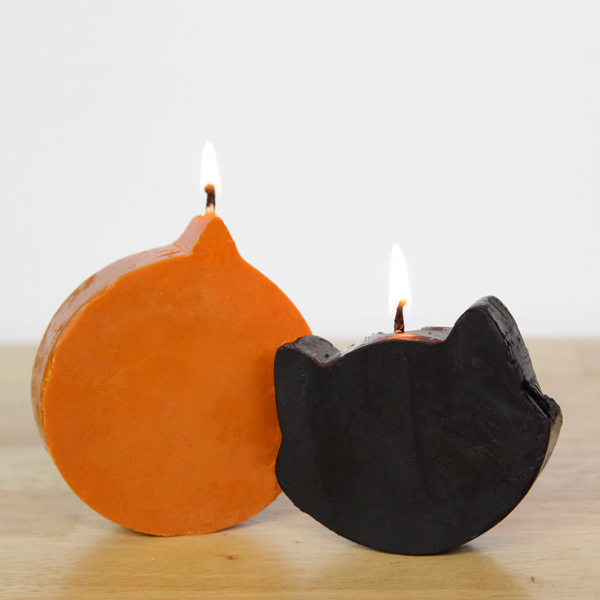
These candles are not only pumpkin spice-scented, but they’re made with Halloween cookie cutters! That’s right, you can make candles with cookie cutters. And you can scent homemade candles with ridiculously popular seasonal spices too. The nice aspect of using food spices for candle making is how subtle its scent is. I tend to prefer to use essential oils to bottled candle scent products for the same reason. Using real spices is a great alternative for DIY candles.
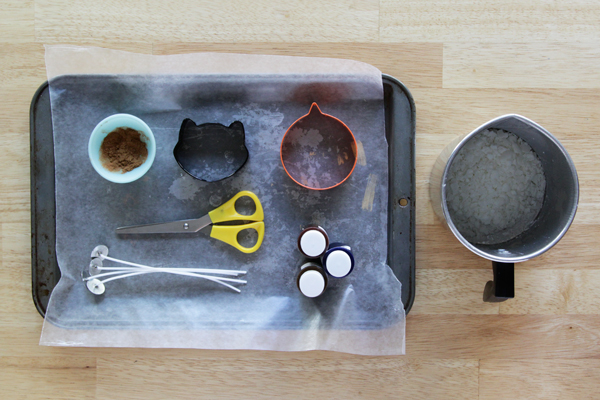
Supplies

double boiler (or a tin can and a cooking pot)
soy wax flakes
candle dyes
pumpkin spice mix
candle wicks
stove
scissors
Halloween cookie cutters
waxed paper
old baking sheet
candle thermometer (optional)

Directions

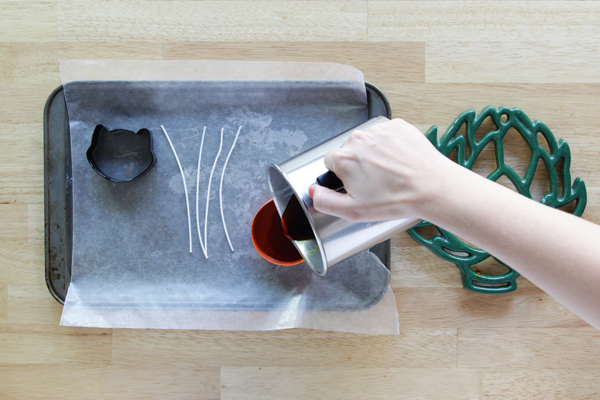
Lay a sheet of waxed paper over the top of your baking sheet. Melt your soy wax flakes using a double boiler (or a clean tin can and a cooking pot). Stir into your wax a basic pumpkin spice flavor mix and your preferred candle dyes. Please note: it’s recommended that you add colors and scents to soy wax at 185 degrees F, and you don’t want your wax to get over 200 degrees F at all. When you’re working with powdered scents, stirring is important to ensure even distribution of the mix throughout your candles. FYI :)

How-to: Pumpkin Spice Halloween Candles at Hands Occupied

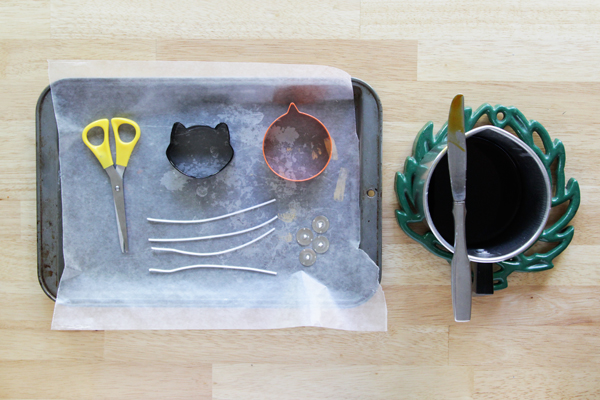
If your candle wicks have metal bases, cut them off. You need to let your wax cool a bit before pouring your candles anyway, so this is a good time to do it.

How-to: Pumpkin Spice Halloween Candles at Hands Occupied

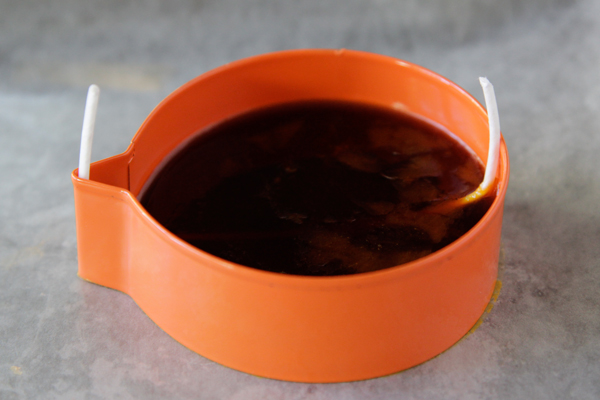
Let your wax cool a bit before pouring, and when you go to pour your wax, make sure to press down on your cookie cutter, forming a seal at the bottom of it. If you don’t create this seal, the situation pictured below will happen. Also, if your wax is too hot, you’ll run into some issues. For one, it’ll be so thin that it pours all over the place, even if you think you’ve got a good seal. If you’ve never made a candle before, you should check out my candle making 101 video tutorial for some beginner tips.

How-to: Pumpkin Spice Halloween Candles at Hands Occupied

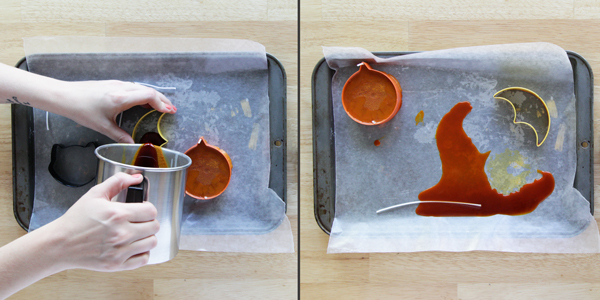
Don’t feel bad if you mess up a candle. Above is literally happened when I poured my second candle, not internet fakery here. You’ll get better at this after you’ve made 1 or 2 of these candles (and maybe a couple of mistakes). That’s what I did! Also, if you mess up, you just fold up the soiled waxed paper and grab a new sheet.

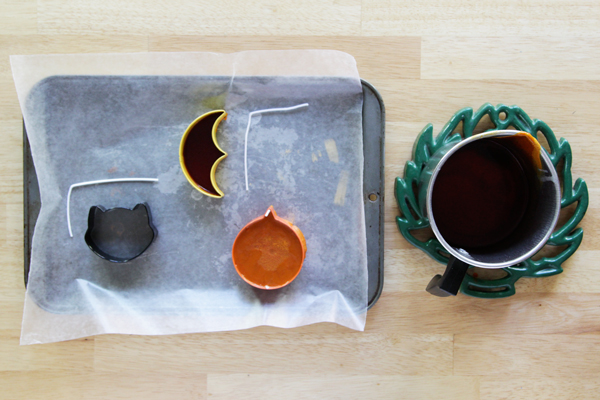
So, you should pour your wax, holding the cookie cutter down firmly. Keep holding it down while you count to 100 so the wax begins to set, forming its own seal over the bottom of the cookie cutter.

How-to: Pumpkin Spice Halloween Candles at Hands Occupied

Let your first layer set for about 10-15 minutes, then put a wick in place wherever you’d like in the cookie cutter, on top of the first layer of wax. I folded my wick into a staple shape as shown, placing it exactly in the middle of my pumpkin candle.

How-to: Pumpkin Spice Halloween Candles at Hands Occupied

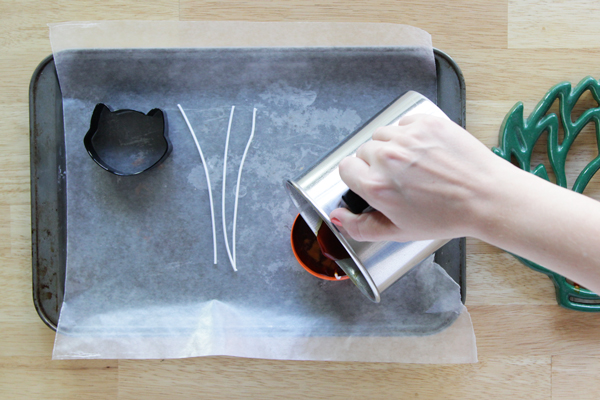
After making my first candle, I switched to simply folding my wicks into a V shape so that there wouldn’t be a weird tail sticking out one side of my candle that would need to be trimmed. The trick is measuring so that one leg of the V is as long as the height of the cookie cutter where you want the wick to run through the candle.

How-to: Halloween Cookie Cutter Candles at Hands Occupied

Next, pour another layer of wax over the wick and the first layer, filling the cookie cutter almost all the way to the top. Let the whole thing harden over night.

How-to: Pumpkin Spice Halloween Candles at Hands Occupied

Peel the waxed paper from the back of your candles. To remove your candles from the cookie cutters, carefully twist the edges of the cutter in opposing directions to loosen the candle. Then, slide the candle out by applying even pressure to the candle.

How-to: Pumpkin Spice Halloween Candles at Hands Occupied

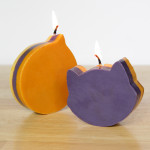
Tune in later this week for how to take cookie cutter candles to the next level by making layered cookie cutter candles in many colors!

Filed Under: Candles, Halloween, How-to Tagged With: candle, candle craft, candle diy, candle making, candles, cat, cookie cutter, cookie cutter candles, diy candles, double boiler, halloween craft, halloween diy, pumpkin, spooky, wicks

About Heidi

Heidi Gustad is a craft book author, designer & creator specializing in yarn crafts like knitting, crochet, latch hook & macramé. Her first book, Latch Hook: 12 Projects for the Modern Maker, is out now.

Previous Post: « Weekly Reader
Next Post: Crane Humidifier Giveaway Winner! »

Reader Interactions

DID YOU LIKE THIS POST?
Visit similar articles...

  • How-to: Layered Cookie Cutter CandlesHow-to: Layered Cookie Cutter Candles
  • Stacked Ombre Heart CandlesStacked Ombre Heart Candles
  • DIY Eggshell Tea LightsDIY Eggshell Tea Lights
  • How-to: Radioactive JarsHow-to: Radioactive Jars

DON’T MISS ANOTHER UPDATE

Comments

  1. marissa | Rae Gun Ramblings

    October 7, 2013 at 10:11 pm

    you make it look so easy! I think I need to give candles a shot

    Reply
  2. carissa

    October 14, 2013 at 2:02 pm

    cute! i love these. i haven’t ever made candles but these definitely make me want to try

    Reply

Leave a Reply Cancel reply

Your email address will not be published. Required fields are marked *

This site uses Akismet to reduce spam. Learn how your comment data is processed.

Primary Sidebar

Heidi Gustad from Hands Occupied / Craft Book Author and Knitting, Crochet, Latch Hook and Macrame Designer

Hi! I’m Heidi (she/her/hers), a craft book author & pattern designer specializing in knitting, crochet, latch hook & macrame. Really anything with yarn! ❤️  My work combines vintage and modern design elements, featuring bold colors and graphic motifs.

EMAIL NEWSLETTER

Never miss a tutorial with these short & sweet monthly updates.

Find Me on Social Media

  • Instagram
  • Pinterest
  • TikTok
  • YouTube
Latch Hook by Heidi GustadDiscover Unique Items

Footer

INSTAGRAM

handsoccupied

Helping yarn crafters untangle various techniques on the internet since 2010
🧶 Really into intarsia
Stay up-to-date 💌 & shop the latest patterns ⤵️

Heidi Gustad 🧶 knitting & yarn crafts
Wow! I am floored by the awesome response to the S Wow! I am floored by the awesome response to the Spiral Hill Sweater Vest. Thank you. 🙏🏻❤️ If you love this pattern & didn’t know already, we are going to be doing a knit along (KAL) from October 1-29 featuring this spooky sweater vest & lots of tutorials, especially for the intarsia part. 
.
Later today my newsletter will be coming out with additional Knit Along details, so if you’re not already signed up, now is a great time - the 🔗 is in my b1o. 
.
Pictured: My Spiral Hill Sweater Vest pattern from the new Nightmare Before Christmas knitting book by @tanisknits. Model is wearing size 1 with 2” of positive ease, knit in @brooklyntweed Imbue Worsted. Vest images via @insighteditions 
.
#spiralhillsweatervest #handsoccupied #nightmarebeforechristmasknittingbook
At long last! I can share the Spiral Hill Sweater At long last! I can share the Spiral Hill Sweater Vest, my contribution to the new book Disney Tim Burton’s Nightmare Before Christmas: The Official Knitting Guide to Halloween Town and Christmas Town, out now! 🎃💀 
.
I’m hosting a knit along (KAL) October 1-29 for anyone who’d like to knit this vest along with a group & learn a little about intarsia while we’re at it. I’ve got weekly tutorials planned to help you knit this worsted weight sweater vest, and there’s a prize package giveaway at the end for KAL participants too. Details are on my site - you know where to find the 🔗 I think. 😉
.
Book by @tanisknits 
Publisher @insighteditions 
Yarn @brooklyntweed Imbue 
Find it wherever fine books are sold. 
.
#handsoccupied #nightmarebeforechristmas #intarsia #sweatervest #knittingpattern #knittingbook #spiralhill #knitting_inspiration #knitting
Since there was some interest in stills of my WIPs Since there was some interest in stills of my WIPs closet after this weekend’s quick tutorial, here are few. ✂️ The tutorial is one post back in my feed as a video.
.
As you can see, I didn’t worry about the wire hangers all being perfectly uniform, but it doesn’t matter to me. Also, this closet holds a lot! Despite that, it is already at capacity. Since the hanging bags don’t appear to be recyclable, I want to reuse them as long as possible. Who knows, maybe this will be a way to limit my WIPs? 😅
.
P.s. In the third photo you can see how I use this system to store the original swatches, scraps, yarn ball bands, & notes from a design project all together. 
.
#handsoccupied #wips #craftstorage #yarnstorage #yarncrafts #knitting_inspiration #craftstudio #craftroom #craftcloset
How to convert a closet into WIPs storage with jus How to convert a closet into WIPs storage with just a few supplies ✂️
.
When I was a librarian, we would use these hanging bags to circulate books with audiobook CDs. They came to mind when I wanted to develop a filing cabinet-like system for my differently-sized WIPs. To fit in my studio closet, a standard bedroom closet, they just needed custom hangers. 🤙🏻 
.
HOW TO MAKE THE HANGERS
1. Carefully cut approx. a 9” (23 cm) length of flexible 3 mm aluminum wire.
2. Near the end of a large knitting needle or dowel, wrap the wire around it as you would a twist tie. 
3. Bend the other end into a hook shape, perpendicular to the circle shape you just created. 
4. Hang like a hanger in a closet, as shown. 
.
#handsoccupied #handmadelife #knitting_inspiration #craftcloset #craftroom #craftroomorganization #craftroomstorage #craftroomdecor #crocheter #latchhook #knittersofinstagram #wip #wips #hangingstorage
It’s time for the monthly review and giveaway! T It’s time for the monthly review and giveaway! This go around, get to know two new sister yarns from @manosyarnsusa, Marla and Sami, and enter to win a skein of each to try for yourself. 
.
What makes these yarns sisters is that, while dyed differently, they’re the same weight and come in intentionally coordinating color palettes. For my review, I opted for a sky-inspired combo of Sami in Natural and Marla in Nube. 🌧️ 
.
Check out the full review & enter the giveaway at the link in my bio. 
.
#handsoccupied #yarnreview #manosdeluruguay #knitting_inspire #crochet #yarngiveaway #knitters #yarn #crochetersofinstagram
Load More... Follow on Instagram

Copyright © 2023 / Foodie Pro Theme On Genesis Framework / Branding by Ink + Mortar
All Site & Shop Policies / Privacy Policy / Cookie Policy