• 0 items$0.00
  • Skip to primary navigation
  • Skip to main content
  • Skip to primary sidebar
  • Skip to footer

Hands Occupied

Colorful knitting, crochet, latch hook and macrame from craft book author & designer Heidi Gustad.

  • BLOG
    • Knitting
    • Crochet
    • Latch Hook
    • Macramé
    • Punch Needle
  • ABOUT
  • Shop
  • Nav Social Menu

    • Instagram
    • Pinterest
    • RSS
    • TikTok
    • YouTube

How-to: Layered Cookie Cutter Candles

October 9, 2013 1 Comment

How-to: Layered Cookie Cutter Candles at Hands Occupied

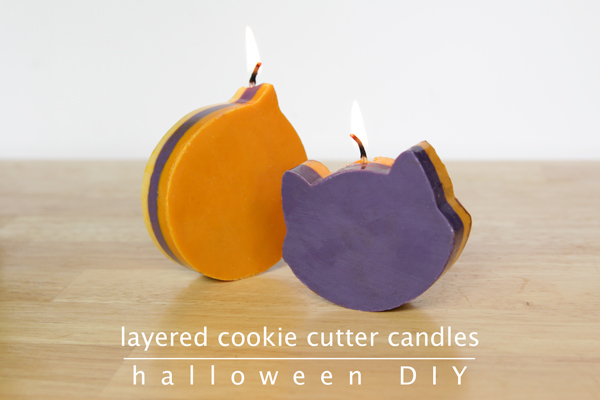
Cookie cutter candles are really fun to make. Plus they’re totally cute. We learned that on Monday, when I went over how to make single-color candles with cookie cutters. Today, I’m sharing how to make them with 2 or more colors in layers. Surprisingly, it’s really not that hard! It’s mostly just a matter of mixing more than one color of wax and letting each layer of poured wax harden enough that the waxes won’t mix, but liquid enough that the layers stick together, forming one layered candle.

Supplies

soy wax flakes
2 double boilers (or 2 tin cans and a cooking pot)
timer
candle dyes
candle scents (essential oils, pumpkin spice mix, whatever you want)
candle wicks
stove
scissors
Halloween cookie cutters
waxed paper
clothespins
old baking sheet
candle thermometer (optional)

Directions

First off, if you haven’t checked out my first tutorial on making candles with cookie cutters, you’ll want to take a look. There are some very useful tips to take into account before trying this more advanced technique. And if you’ve never ever made a candle, I have a candle making 101 video tutorial to help you get started. 

Some reminders from my first cookie cutter candles post to kick off this project… 
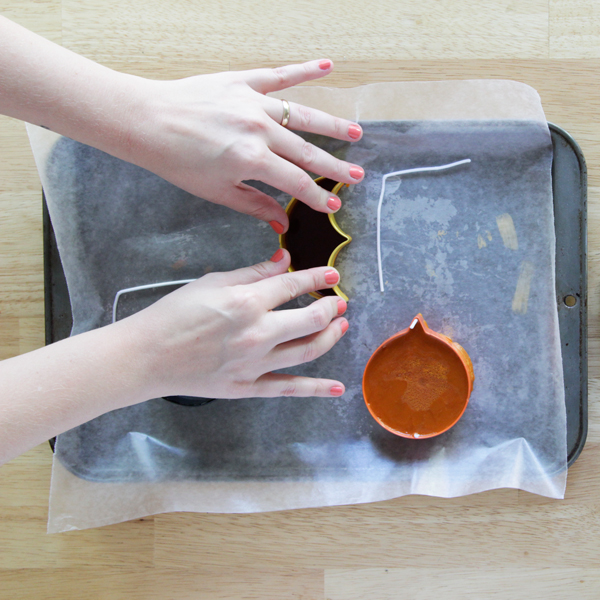
Lay a sheet of waxed paper over a baking sheet, and set washed and dry cookie cutters on top. Melt your soy wax flakes in a double boiler (or tin can) on the stove, mixing in your desired candle dye and scent. Wait to pour the wax into the cookie cutter until the wet wax has cooled a bit – if it’s too hot, the wax can leak under the bottom of the cookie cutter and make a huge mess. Also, don’t pour your wax unless you’re pressing the cutter down into the waxed paper/baking sheet, forming a seal.

Regarding wicks for your candles, I recommend getting them ready before you pour your wax. To prep them, trim the metal bases if they came with them. Then bend them into an L shape with one leg as long as your cookie cutter is tall.

How-to: Layered Cookie Cutter Candles at Hands Occupied

Pour your first layer of wax into one or more of your cookie cutters, following the tips listed above and/or my first cookie cutter candle tutorial. When you pour out your wax, remember to keep your hands pressing down on the cutter and count to 100 before letting go to let the wax cool enough to form a seal over the bottom of the cookie cutter.

How-to: Layered Cookie Cutter Candles at Hands Occupied

Ok, so review part over, for you wonderful, stupendous regular readers out there! 

Moving on. Set a timer for 10 minutes, starting it immediately after your first layer is poured. When it dings, your wax should still be a bit soft. Rather than poking it to see how hard it is (ouch!) literally jump next to your table to see how much jiggle is going on in your wax. Seriously, I jumped around my kitchen like a total weirdo to test all of my candles. Do it! If your wax isn’t cool enough, the heat of the next layer of wax will melt the two layers together, ruining the look. Your candles will be ready for a second layer when there’s almost no jiggle, which should only take 10 or 15 minutes.

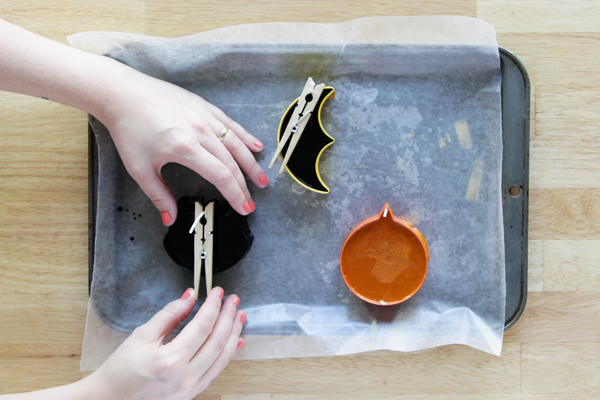
Place your wick in the center of your candle with the tail sticking straight up into the air. To keep it from tipping over, clip the tail into the mouth of a clothespin as shown, resting the butt end of the clothespin on the far edge of the cookie cutter.

How-to: Layered Cookie Cutter Candles at Hands Occupied

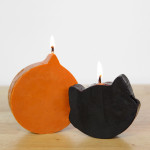
Melt a different color of soy wax in the same scent on the stove like the first layer. Let it cool a bit, just like the first layer, and pour a second layer of wax. Set a timer for 10 minutes to let the second layer of wax harden. Using the crazy jumping-around-the-kitchen test, check to see that your wax has hardened a good amount after your timer dings. Then, melt (or re-melt) a third layer of wax and fill your candle to the brim. Let the whole candle dry overnight, and carefully remove your candles from their cookie cutters. Trim excess length from the candles and light to enjoy!

Note: Your candles don’t have to be 3 layers or 5 or 2 – it’s all up to you! The more layers you do, the more work it is, but they do kinda get cooler the more intricate you make ’em. Just go wild – making candles is totally fun and easy, you’d be surprised!

How-to: Layered Cookie Cutter Candles at Hands Occupied

Filed Under: Candles, Halloween, How-to Tagged With: candle, candle craft, candle diy, candle making, candles, cat, cookie cutter, cookie cutter candles, diy candles, double boiler, halloween craft, halloween diy, layered candles, moon, pumpkin, spooky, wicks

About Heidi

Heidi Gustad is a craft book author, designer & creator specializing in yarn crafts like knitting, crochet, latch hook & macramé. Her first book, Latch Hook: 12 Projects for the Modern Maker, is out now.

Previous Post: « Crane Humidifier Giveaway Winner!
Next Post: Fall Festival Time! »

Reader Interactions

DID YOU LIKE THIS POST?
Visit similar articles...

  • How-to: Pumpkin Spice Halloween CandlesHow-to: Pumpkin Spice Halloween Candles
  • Stacked Ombre Heart CandlesStacked Ombre Heart Candles
  • DIY Eggshell Tea LightsDIY Eggshell Tea Lights
  • How-to: Radioactive JarsHow-to: Radioactive Jars

DON’T MISS ANOTHER UPDATE

Trackbacks

  1. 125 Creative DIY Halloween Ideas says:
    October 15, 2013 at 6:03 am

    […] 19. Layered Cookie Cutter Candles by Hands Occupied […]

    Reply

Leave a Reply Cancel reply

Your email address will not be published. Required fields are marked *

This site uses Akismet to reduce spam. Learn how your comment data is processed.

Primary Sidebar

Heidi Gustad from Hands Occupied / Craft Book Author and Knitting, Crochet, Latch Hook and Macrame Designer

Hi! I’m Heidi (she/her/hers), a craft book author & pattern designer specializing in knitting, crochet, latch hook & macrame. Really anything with yarn! ❤️  My work combines vintage and modern design elements, featuring bold colors and graphic motifs.

EMAIL NEWSLETTER

Never miss a tutorial with these short & sweet monthly updates.

Find Me on Social Media

  • Instagram
  • Pinterest
  • TikTok
  • YouTube
Latch Hook by Heidi GustadDiscover Unique Items

Footer

INSTAGRAM

handsoccupied

Helping yarn crafters untangle various techniques on the internet since 2010
🧶 Really into intarsia
Stay up-to-date 💌 & shop the latest patterns ⤵️

Heidi Gustad 🧶 knitting & yarn crafts
How to convert a closet into WIPs storage with jus How to convert a closet into WIPs storage with just a few supplies ✂️
.
When I was a librarian, we would use these hanging bags to circulate books with audiobook CDs. They came to mind when I wanted to develop a filing cabinet-like system for my differently-sized WIPs. To fit in my studio closet, a standard bedroom closet, they just needed custom hangers. 🤙🏻 
.
HOW TO MAKE THE HANGERS
1. Carefully cut approx. a 9” (23 cm) length of flexible 3 mm aluminum wire.
2. Near the end of a large knitting needle or dowel, wrap the wire around it as you would a twist tie. 
3. Bend the other end into a hook shape, perpendicular to the circle shape you just created. 
4. Hang like a hanger in a closet, as shown. 
.
#handsoccupied #handmadelife #knitting_inspiration #craftcloset #craftroom #craftroomorganization #craftroomstorage #craftroomdecor #crocheter #latchhook #knittersofinstagram #wip #wips #hangingstorage
It’s time for the monthly review and giveaway! T It’s time for the monthly review and giveaway! This go around, get to know two new sister yarns from @manosyarnsusa, Marla and Sami, and enter to win a skein of each to try for yourself. 
.
What makes these yarns sisters is that, while dyed differently, they’re the same weight and come in intentionally coordinating color palettes. For my review, I opted for a sky-inspired combo of Sami in Natural and Marla in Nube. 🌧️ 
.
Check out the full review & enter the giveaway at the link in my bio. 
.
#handsoccupied #yarnreview #manosdeluruguay #knitting_inspire #crochet #yarngiveaway #knitters #yarn #crochetersofinstagram
If only knitting a whole project took 39 seconds… 😮‍💨 
.
In this video, you can see how the Intarsia Flower Pillow pattern knits up - two flat panels, one with intarsia, both are blocked, and then they’re seamed. Find the pattern on @hi.ravelry & my website, just search Intarsia Flower Pillow. 🌸 
.
P.S. I’m really smiling in this video while seaming the pillow, so I guess I’m proving last week’s claim that I truly enjoy that sometimes-dreaded task. 😆🫣
In knitting, a Left Lifted Increase (LLI) lets you In knitting, a Left Lifted Increase (LLI) lets you add a stitch in between two columns of stitches that leans to the left. Similar to an M1L, LLIs allow you to increase nearly invisibly.
.
To learn more about lifted increases, including when to use them and how they differ from Make 1s, head to the 🔗 in my profle. 
.
Have you ever used lifted increases? I used M1’s almost exclusively for a long time when I needed to inc between stitches, but when I designed the Intarsia Flower Pillow pattern, I needed something that would allow me to increase a lot near my cast on, and M1’s resulted in edge curling. The more you know! 🌈 
.
Yarn: @lionbrandyarn Wool Ease from my Stash / Neddles: @boyeyarncrafts - Just remembered these are the needles I learned to knit on at age 8. 😂
.
#handsoccupied #knitting #learntoknit #howtoknit #sweaterknitting #knitinspiration #knittersofinstagram #liftedincreases
Last week I got to hang out with my family & helpe Last week I got to hang out with my family & helped babysit my red-headed niece and nephew. So here’s some plane knitting, and a couple pictures (shared with permission) of my babysitting adventures.
.
Lessons learned: 1️⃣ Trying to knit around 2 toddlers, 2 cats & 2 large dogs is pretty hard. 2️⃣ I learned during water color time that pink and black make “colorful black.” 🩷🖤 3️⃣ Toddlers do NOT care about your rainbow sorting of their toys. 4️⃣ Toddlers are very good at finding mischief in a very short amount of time, what a surprise. 😂
.
#handsoccupied #knitting #placesyoucanknit #knitters #knitinpublic #handmadelife #knitting_inspiration
Load More... Follow on Instagram

Copyright © 2023 / Foodie Pro Theme On Genesis Framework / Branding by Ink + Mortar
All Site & Shop Policies / Privacy Policy / Cookie Policy