• 0 items$0.00
  • Skip to primary navigation
  • Skip to main content
  • Skip to primary sidebar
  • Skip to footer

Hands Occupied

Colorful knitting, crochet, latch hook and macrame from craft book author & designer Heidi Gustad.

  • BLOG
    • Knitting
    • Crochet
    • Latch Hook
    • Macramé
    • Punch Needle
  • ABOUT
  • Shop
  • Nav Social Menu

    • Instagram
    • Pinterest
    • RSS
    • TikTok
    • YouTube

Stacked Ombre Heart Candles

February 12, 2014 8 Comments

Stacked Ombre Heart Candles at Hands Occupied

Valentine’s Day is the perfect holiday to celebrate by making a set of romantic and unique candles like these. I learned how to make candles with cookie cutters for Halloween last year, but these layered ombre candles take cookie cutter candle making to another level. But watch out – this is an addictive project. I ended up getting carried away and made myself 10 total candles. I guess the husband and I will have a Valentine’s dinner table filled with more hearts than food! :)

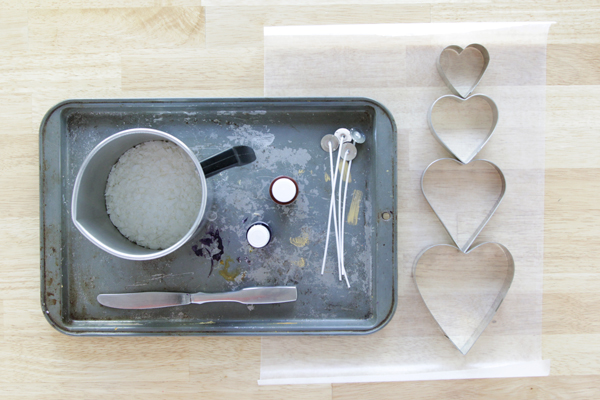
Supplies

soy wax flakes
red candle dye
tabbed candle wicks
double boiler (or a pouring pot plus a regular kitchen pot)
candle fragrance
waxed paper
mess-friendly baking sheet
skewer
heart-shaped cookie cutters
butter knife (optional)
Stacked Ombre Heart Candles

Directions

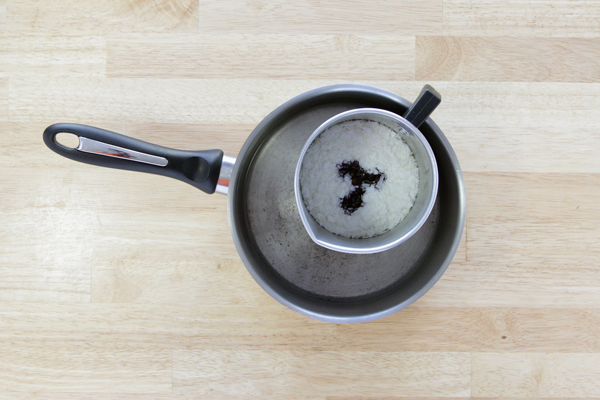
Add several drops of red candle dye to several cups of soy wax candle flakes in a pouring pot. Melt the wax using this technique.
Stacked Ombre Heart Candles

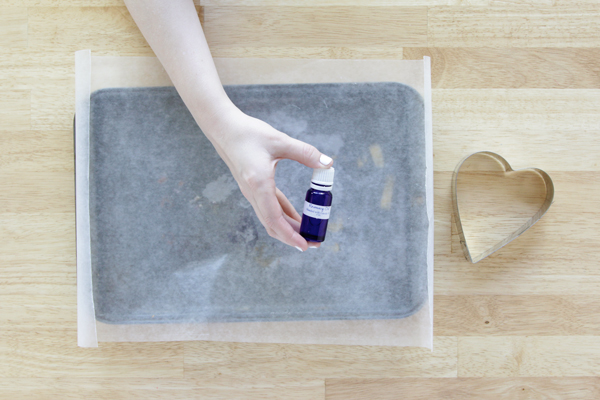
As your wax melts, lay a sheet of waxed paper somewhat larger than your baking sheet on it. When the wax has melted, add a few drops of fragrance.
Stacked Ombre Heart Candles

Take the wax off the stove and let cool for a few minutes, but not long enough that it hardens. Pour your wax onto your baking sheet, as shown. It can be however thick you’d like, but I had the most success when the wax was about 1 cm deep.
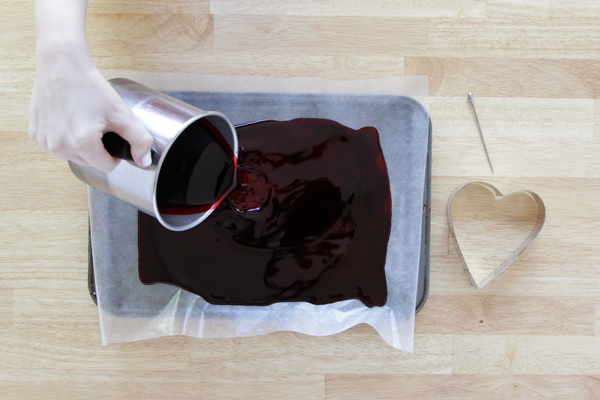
Stacked Ombre Heart Candles

Let your wax cool until it changes color, but is still warm. It shouldn’t jiggle like gelatin, but if it’s too hard, you won’t be able to cleanly cut out your candles.

Stamp hearts through your wax with cookie cutters, leaving them on the sheet. After you’ve stamped your hearts, use a skewer to poke a hole in approximately the middle of each heart. No need to be exact!
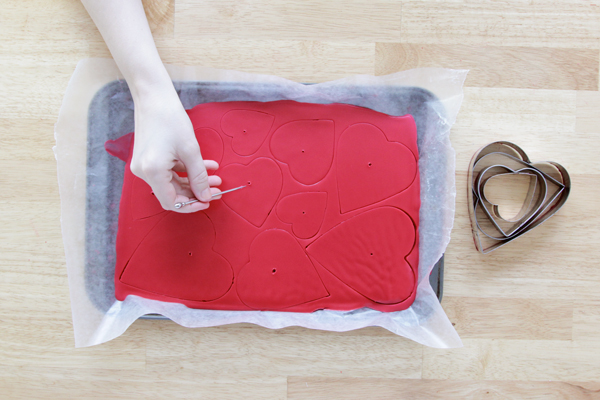
Stacked Ombre Heart Candles

Let your wax cool for several hours until it’s completely hard (if you’re impatient, the fridge is a helpful tool). Carefully break your hearts away from the hardened wax sheet. Put the remnants of the wax back in your melting pot, and add a few scoops of plain soy wax flakes to the pot.
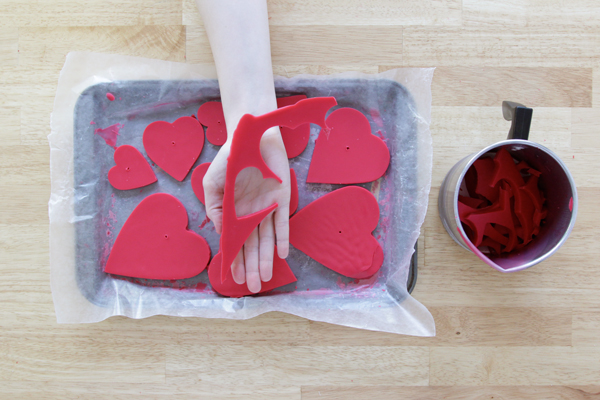
Stacked Ombre Heart Candles

Repeat the wax melting, pouring & stamping process several times. Since you’re adding plain white wax to the remnants of your wax, it gets a shade or two lighter each time you melt it, making an ombre effect! So easy!

String your hearts onto a wick using the holes you poked in each one. Trim your wicks and you’re ready to go. The uneven layers and non-precise centering make each candle unique.
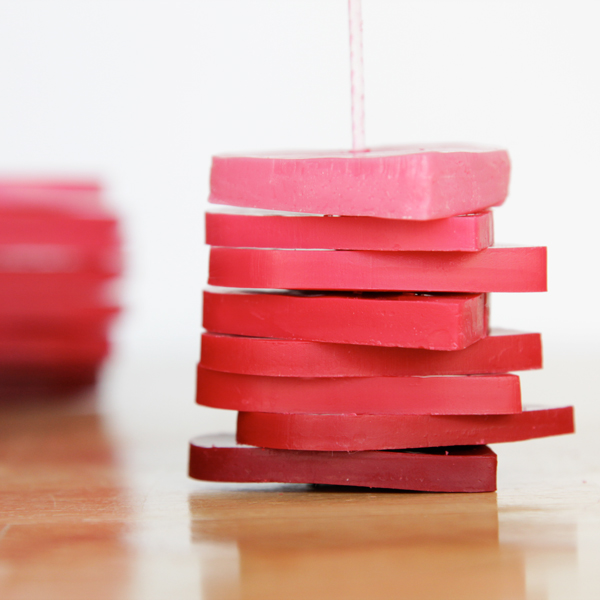
Stacked Ombre Heart Candles

As the candles burn, the wax layers melt together, so it’s okay of they’re not lined up or your layers aren’t perfectly identical. How awesome is that?
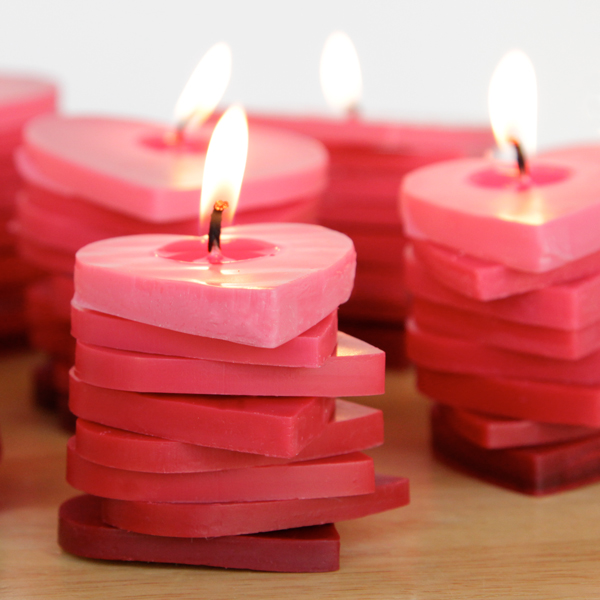
Stacked Ombre Heart Candles at Hands Occupied

This is a great beginner candle project and a great way to use up leftover wax or recycle an old candle. The ombre effect is lovely and a great way to add some Valentines-perfect red on pink to your place!
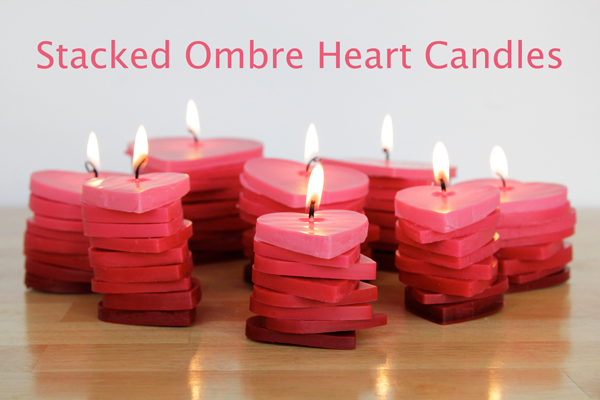
Stacked Ombre Heart Candles at Hands Occupied

Filed Under: Candles, How-to, Valentine's Day Tagged With: candle, candle craft, candle diy, candle making, candles, cookie cutter, cookie cutter candles, diy candles, double boiler, valentine craft, valentine diy, valentines day craft, valentines day diy, wicks

About Heidi

Heidi Gustad is a craft book author, designer & creator specializing in yarn crafts like knitting, crochet, latch hook & macramé. Her first book, Latch Hook: 12 Projects for the Modern Maker, is out now.

Previous Post: « 50 Handmade Valentine Ideas
Next Post: Weekly Reader »

Reader Interactions

DID YOU LIKE THIS POST?
Visit similar articles...

  • How-to: Layered Cookie Cutter CandlesHow-to: Layered Cookie Cutter Candles
  • How-to: Pumpkin Spice Halloween CandlesHow-to: Pumpkin Spice Halloween Candles
  • DIY Eggshell Tea LightsDIY Eggshell Tea Lights
  • How-to: Make a CandleHow-to: Make a Candle

DON’T MISS ANOTHER UPDATE

Comments

  1. Rebecca

    February 12, 2014 at 10:36 pm

    These look so fantastic, especially having so many of them together! I want to make a whole slew of them so I can have stacks of them everywhere around my house!

    Reply
  2. Nadine

    February 14, 2014 at 4:45 pm

    I love this so many ideas in my head different shapes and colors. Flowers for spring, eggs for easter etc. But don’t you need to mix in a hard wax so they don’t melt all over the place? I have looked into making pillar candles with a mold for soy wax, but I was told that straight up soy would make a mess and I had to do at least a 50/50 soy/paraffin mix to prevent a mess.

    Reply
    • Heidi

      February 14, 2014 at 7:53 pm

      I’ve never minded the mess from the softer soy wax, but you’re correct! Mixing a harder wax will result in less runoff as your candle melts. Thanks! :)

      Reply
  3. poonam

    November 5, 2016 at 9:30 am

    Like this idea very much

    Reply

Trackbacks

  1. Valentinstag: DIY Inspirationen - Pixi mit Milch says:
    February 13, 2014 at 4:25 pm

    […] Das Brett in Herzform gefällt mir sehr gut, das DIY findet ihr hier. Die Ombré Herz-Kerzen von handsoccupied.com sind Romantik […]

    Reply
  2. Monday Roundup | The Preoccupied Squirrel Blog says:
    February 24, 2014 at 1:34 pm

    […] Stacked Ombre Heart Candles – Hands Occupied – A great craft for a cookie cutter hoarder like me. I can already tell it’ll be hard to stop myself from covering every surface in the apartment with seasonally-appropriate candle stacks! […]

    Reply
  3. Fun Stuff • 2.22.14 | The Pink Smaurai says:
    May 11, 2014 at 5:13 pm

    […] so gluttonous about all the DIYs around Valentine’s Day because I love hearts!  These heart-shaped candles are super cute, and I’ll absolutely use this technique for different […]

    Reply
  4. 25 Romantic DIY Valentine’s Day Gifts | ABC Creative Learning says:
    January 14, 2015 at 5:01 am

    […] {Kristi Murphy} 11. Rose Almond Body Oil {Hello Natural} 12. DIY Heart Pillow {Whimsy Darling} 13. Stacked Ombre Heart Candles {Hands Occupied} 14. Heart Light {Look What I Made} 15. XO Mugs {The Proper Pinwheel} 16. DIY […]

    Reply

Leave a Reply Cancel reply

Your email address will not be published. Required fields are marked *

This site uses Akismet to reduce spam. Learn how your comment data is processed.

Primary Sidebar

Heidi Gustad from Hands Occupied / Craft Book Author and Knitting, Crochet, Latch Hook and Macrame Designer

Hi! I’m Heidi (she/her/hers), a craft book author & pattern designer specializing in knitting, crochet, latch hook & macrame. Really anything with yarn! ❤️  My work combines vintage and modern design elements, featuring bold colors and graphic motifs.

EMAIL NEWSLETTER

Never miss a tutorial with these short & sweet monthly updates.

Find Me on Social Media

  • Instagram
  • Pinterest
  • TikTok
  • YouTube
Latch Hook by Heidi GustadDiscover Unique Items

Footer

INSTAGRAM

handsoccupied

Helping yarn crafters untangle various techniques on the internet since 2010
🧶 Really into intarsia
Stay up-to-date 💌 & shop the latest patterns ⤵️

Heidi Gustad 🧶 knitting & yarn crafts
How to convert a closet into WIPs storage with jus How to convert a closet into WIPs storage with just a few supplies ✂️
.
When I was a librarian, we would use these hanging bags to circulate books with audiobook CDs. They came to mind when I wanted to develop a filing cabinet-like system for my differently-sized WIPs. To fit in my studio closet, a standard bedroom closet, they just needed custom hangers. 🤙🏻 
.
HOW TO MAKE THE HANGERS
1. Carefully cut approx. a 9” (23 cm) length of flexible 3 mm aluminum wire.
2. Near the end of a large knitting needle or dowel, wrap the wire around it as you would a twist tie. 
3. Bend the other end into a hook shape, perpendicular to the circle shape you just created. 
4. Hang like a hanger in a closet, as shown. 
.
#handsoccupied #handmadelife #knitting_inspiration #craftcloset #craftroom #craftroomorganization #craftroomstorage #craftroomdecor #crocheter #latchhook #knittersofinstagram #wip #wips #hangingstorage
It’s time for the monthly review and giveaway! T It’s time for the monthly review and giveaway! This go around, get to know two new sister yarns from @manosyarnsusa, Marla and Sami, and enter to win a skein of each to try for yourself. 
.
What makes these yarns sisters is that, while dyed differently, they’re the same weight and come in intentionally coordinating color palettes. For my review, I opted for a sky-inspired combo of Sami in Natural and Marla in Nube. 🌧️ 
.
Check out the full review & enter the giveaway at the link in my bio. 
.
#handsoccupied #yarnreview #manosdeluruguay #knitting_inspire #crochet #yarngiveaway #knitters #yarn #crochetersofinstagram
If only knitting a whole project took 39 seconds… 😮‍💨 
.
In this video, you can see how the Intarsia Flower Pillow pattern knits up - two flat panels, one with intarsia, both are blocked, and then they’re seamed. Find the pattern on @hi.ravelry & my website, just search Intarsia Flower Pillow. 🌸 
.
P.S. I’m really smiling in this video while seaming the pillow, so I guess I’m proving last week’s claim that I truly enjoy that sometimes-dreaded task. 😆🫣
In knitting, a Left Lifted Increase (LLI) lets you In knitting, a Left Lifted Increase (LLI) lets you add a stitch in between two columns of stitches that leans to the left. Similar to an M1L, LLIs allow you to increase nearly invisibly.
.
To learn more about lifted increases, including when to use them and how they differ from Make 1s, head to the 🔗 in my profle. 
.
Have you ever used lifted increases? I used M1’s almost exclusively for a long time when I needed to inc between stitches, but when I designed the Intarsia Flower Pillow pattern, I needed something that would allow me to increase a lot near my cast on, and M1’s resulted in edge curling. The more you know! 🌈 
.
Yarn: @lionbrandyarn Wool Ease from my Stash / Neddles: @boyeyarncrafts - Just remembered these are the needles I learned to knit on at age 8. 😂
.
#handsoccupied #knitting #learntoknit #howtoknit #sweaterknitting #knitinspiration #knittersofinstagram #liftedincreases
Last week I got to hang out with my family & helpe Last week I got to hang out with my family & helped babysit my red-headed niece and nephew. So here’s some plane knitting, and a couple pictures (shared with permission) of my babysitting adventures.
.
Lessons learned: 1️⃣ Trying to knit around 2 toddlers, 2 cats & 2 large dogs is pretty hard. 2️⃣ I learned during water color time that pink and black make “colorful black.” 🩷🖤 3️⃣ Toddlers do NOT care about your rainbow sorting of their toys. 4️⃣ Toddlers are very good at finding mischief in a very short amount of time, what a surprise. 😂
.
#handsoccupied #knitting #placesyoucanknit #knitters #knitinpublic #handmadelife #knitting_inspiration
Load More... Follow on Instagram

Copyright © 2023 / Foodie Pro Theme On Genesis Framework / Branding by Ink + Mortar
All Site & Shop Policies / Privacy Policy / Cookie Policy