• 0 items$0.00
  • Skip to primary navigation
  • Skip to main content
  • Skip to primary sidebar
  • Skip to footer

Hands Occupied

Colorful knitting, crochet, latch hook and macrame from craft book author & designer Heidi Gustad.

  • BLOG
    • Knitting
    • Crochet
    • Latch Hook
    • Macramé
    • Punch Needle
  • ABOUT
  • Shop
  • Nav Social Menu

    • Instagram
    • Pinterest
    • RSS
    • TikTok
    • YouTube

How-to: Wedding Fascinator

February 4, 2011 Leave a Comment

How-to: Wedding Fascinator | HandsOccupied.com

On Monday, I wrote about my wedding hair test run, but what I failed to mention was how long it’s taken me to decide what exactly I wanted to do with my hair for the wedding. A couple months ago, I bought this vintage headpiece on Etsy. It really does look cute, but it clashed with the bouquet I’ve spent months making! Taking matters into my own hands, I decided to try making a hairpiece myself.

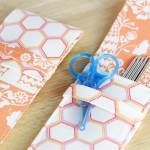
Trying to get inspired for the design of this hairpiece, I started monkeying around with some 1.5 inch wide ribbon I had left over from my ribbon wall (I got it at Walmart, but can’t for the LIFE of me find this same product online). Pleating the ribbon and sewing it into a circle, I decided what to do.

Returning to Lamb’s Gate Antiques, the store where I bought my wedding jewelry, I talked with the shop owner about my hairpiece idea. I just needed to find a brooch for it that complimented my jewelry. Lucky for me, the shop owner is amazing and showed me a few options, two of which I bought to experiment with.

Supplies

a few inches of wide ribbon
1/2 yard tulle
1 brooch
iron
ironing board (or a couple folded towels)
scissors
straight pins
pin cushion
hair comb

Directions

Make a base for your hairpiece. This is what I used my pinwheel for, but I found this list of ribbon how to’s that could work for your hairpiece’s base.

Plug in your iron to warm up, and set it at a medium to low heat level. Cut out a piece of your tulle. Mine was approximately 5 inches by 7 inches. The tulle I had on hand wasn’t particularly stiff, so I had to get creative when I decided I wanted to pleat it.

Using straight pins and a pin cushion, I pinned each pleat to the pin cushion as I made it. This process is more easily described through pictures:

Once your tulle is all pleated, pin it to your ironing board (or towels). Carefully iron one half of your pleated tulle, pin the ironed half to the board, and then iron the other half. When you feel like you’ve solidified your pleats, grab one end of your pleated tulle and fan it out, as shown.

Sew your tulle fan to secure its pleats, and sew the fan to your pinwheel (or whatever you made for a base). I sewed my fan to one side of the pinwheel, drew my thread through the center of the pinwheel, and sewed a little more on the back of the pinwheel before knotting my thread. Don’t cut your thread; you’ll need it for attaching the hair comb. Turn your work over and pin your brooch over the stitches on the front side of your hairpiece.

Grab your hair comb, and sew it to the back of your hairpiece. Be careful of the placement when you attach the comb. The direction the comb lays dictates how the hairpiece will sit on your head.

As far as comb placement goes, I guessed the best I could, but I brought my hairpiece to show my stylist to get her input on how it would work in practice. I got a lot of compliments from other stylists at the salon on Saturday, which I’m thinking means I hit a home run! :)

PS: My wedding is exactly one month from tomorrow. Holy cow!

Filed Under: DIY Wedding, Embroidery, How-to, Sewing Tagged With: antiques, brooch, diy, hairpiece, Sewing, tulle, wedings

About Heidi

Heidi Gustad (she/her) is a craft book author & designer specializing in yarn crafts. Her work combines vintage and modern design elements, prioritizing color and graphic motifs. Her first book, Latch Hook: 12 Projects for the Modern Maker, is out now.

Previous Post: « How to: Ribbon Wall
Next Post: How to: Statistics Cross Stitch Inspired by Amy Sedaris »

Reader Interactions

DID YOU LIKE THIS POST?
Visit similar articles...

  • Knitting Needle Case DIYKnitting Needle Case DIY
  • DIY Light-Up Cuff BraceletDIY Light-Up Cuff Bracelet
  • How-to: Toothpick-Stamped Place MatsHow-to: Toothpick-Stamped Place Mats
  • How-to: Back Seat Pet Protector How-to: Back Seat Pet Protector

Leave a Reply Cancel reply

Your email address will not be published. Required fields are marked *

This site uses Akismet to reduce spam. Learn how your comment data is processed.

Primary Sidebar

Heidi Gustad from Hands Occupied / Craft Book Author and Knitting, Crochet, Latch Hook and Macrame Designer

Hi! I’m Heidi (she/her/hers), and I’ve been helping yarn crafters untangle various techniques on the internet since 2010. I got my start here, as a blogger, and since then I’ve shared more than a few tutorials here and on YouTube as I’ve grown as a pattern designer. 🧶 

learn more / work with me

Find Me on Social Media

  • Instagram
  • Pinterest
  • TikTok
  • YouTube
Latch Hook by Heidi Gustad

Footer

INSTAGRAM

Heidi Gustad 🧶 knitting & yarn crafts

handsoccupied

Knitting & yarn crafts designer 🧶
.
Stay up-to-date 💌 & shop new patterns ⤵️

POV: Showing you how my new Bevelled Tank pattern POV: Showing you how my new Bevelled Tank pattern fits with no ease vs. 4” of positive ease. There’s a bit more length to the cotton (brighter color) sample, but both are cropped and feature shoulder seams designed to sit an inch back onto the shoulder instead of on top, giving it a little swing. Length is easily adjustable for folks looking for less of a crop. 
.
Pattern: Bevelled Tank by @handsoccupied for @pompommag x @hobbii_yarn summer 2024. Available for free from Hobbii at the 🔗 in my profile.
Yarn pictured: @kelbournewoolens Skipper and Camper. 
Dress form is adjusted to a 36” chest and ~5’3”ish in height. 
Human has a 40” chest and is 5’5”.
Both skirts are vintage.
.
#pompomxhobbiisummer2024 #handsoccupied #intarsia #handmade #knitting #colorwork
Let’s talk about fit and ease! . During the Beve Let’s talk about fit and ease!
.
During the Bevelled Tank design process for @pompommag, I knit 2 samples using 2 different @KelbourneWoolens yarns. One was in Skipper (100% cotton, second photo) and the other was in Camper (100% 2 ply wool). The Skipper sample was knit for a 36” bust, which measures in at 40” with 4” of positive ease. And I knit the Camper Sample for my 40” bust with a 44” finished measurement. (BTW, I’m 5’5” for folks that find that measurement helpful in visualizing fit.)
.
Based on the size chart for the Bevelled Tank, that means I knit one size 3 sample and one size 4. As designed, I conveniently fit a size 4 as intended with 4” of positive ease. When I wear the 3, there is no ease at all because the garment and my body are both 40” in size. Comparing the 2 garments, you can see how the fiber content (cotton vs. wool) and fit (no ease vs. 4” of positive ease) makes a difference in the look and feel of the finished garment. 
.
These samples are a great way to compare what ease looks like on different bodies. While I can fit both a size 3 and 4, the garment with no ease feels more like pajamas or a bralette when I wear it. On the other hand, when I wear the one with 4” of positive ease, I feel comfortable enough to wear it to work, even as a crop top. Plus, it leaves me with enough room to layer it with a nice button down if I’m not feeling the cropped look one day. 
.
I’m curious - how would you style this tank? Would you modify it with a few stockinette rows for added length? I’m so curious now that this pattern is finally out in the world. :) 
.
#pompomxhobbiisummer2024 #bevelledtank #handsoccupied #knitting #intarisa #handmade #kelbournewoolens #croppedsweater #summerknits
After a 6 month hiatus, I am happy to say I’m ba After a 6 month hiatus, I am happy to say I’m back with a brand new pattern in 9 sizes, and it’s FREE as part of @pompommag x @hobbii_yarn’s summer design collection! (Link is in my bio.)
.
In my December newsletter, I announced that I was soliciting test knitters for a pattern that had originally been selected for the summer ’24 issue of Pom Pom Quarterly magazine. However, the magazine ceased publication after its spring ’24 issue, leaving in-progress designs unpublished. (It happens.) As a result, I’d begun the long process of editing, testing, and photographing the pattern for independent release through the Hands Occupied pattern shop and Ravelry.
.
Before I was done with that process, Pom Pom Quarterly’s former editors reached out with an exciting proposal for the pattern. Post-magazine, they’ve begun to partner with yarn companies to produce high quality pattern collections. They wanted to include designs from the would-be current issue of Pom Pom Quarterly in a new collection for Hobbii yarn, including my Bevelled Tank. I worked with the same technical editors I would have for the magazine on this one, and as you can see from the photos, Pom Pom’s team did an amazing job of styling the garment to the beautiful standards they’re known for.
.
You can learn more about the pattern on my blog and get the free pattern from Hobbii yarn - links to both in my profile. I’ll post sizing info in the comments for quick reference too. 🧶
.
#pompomxhobbiisummer2024 #knitting #intarsia #sponsored #colorworkknitting 
.
Photos: @dianascarrunz 
Model: @angel.jade_
Here’s a nice throwback for you: my take on a vi Here’s a nice throwback for you: my take on a vintage knitting pattern from 1938 called the Fernlace Pullover. A pattern so nice, I knit it twice.
.
Yellow version 💛: knit with Despondent Dyes’ Vintage Vixen Sport after attending a @squidneyknits vintage knitting retreat in 2019 & learning *so much*. Paired with a self-drafted circle skirt pattern. 
.
Blue version 💙: knit with @eweeweyarns Ewe So Sporty in Sky Blue. Paired with the 1940s Boardwalk Duet sewing pattern from @decades_of_style 
.
Head to my stories for 🔗🔗 to the handmade wardrobe blog posts I wrote about each take on the Fernlace Pullover, working with a vintage pattern, where to find vintage patterns (including the one I used), & some thoughts on sizing. 
.
Image descriptions available in alt text. 
.
#handsoccupied #handmadewardrobe #fernlacepullover #vintageknitting #vintageknittingpatterns #knitting_inspiration
Frogging is a word in the knitting world that mean Frogging is a word in the knitting world that means to rip out your knitting. It’s called frogging because frogs say “ribbit,” and when you’re tearing out your knitting, you will “rip it” out, and that sounds like ribbit. No really. 🐸 Did you know this fun fact? 
.
P.S. I did like this design concept, but to make the pattern more knitter friendly as well as more wearable, I am making some tweaks to the construction. Excited to share when it’s ready! 🥰🧶
.
Yarn: @blueskyfibers Woolstok North in Morning Frost & Highland Fleece 
.
#handsoccupied #knitting #frogging #blueskyfibers #knittersofinstagram #blueskymakers #knittingvocabulary #bsfmakers #knitdesign
Load More... Follow on Instagram

Copyright © 2025 / Foodie Pro Theme On Genesis Framework / Branding by Ink + Mortar
All Site & Shop Policies / Privacy Policy / Cookie Policy