
We’re in the home stretch, knitters!! Today I’m going to show you all how to do a toe decrease, which, surpriii-iiise!, is way easier that the parts of sock knitting you’ve already mastered. Aren’t you excited? :)
The Day 5 Pattern
Reminder: for all of the pattern sections of my Knit Along posts, you’ll find all of the previous days’ sections of the pattern for your reference.
Abbreviations
sl – slip
st – stitch
k – knit
p – purl
CO – cast on
RS – right side
WS – wrong side
k2tog – knit 2 sts together
ssk- sl 1 st as if to k, sl 1 st as if to p, k2tog
p2tog – purl 2 sts together
turn – turn your work over and work on the other side (even if you aren’t at the end of a row/round!)
rnd – round
CO 64 sts, join into a circle with DPNs and begin working a knit 1, purl 1 rib stitch all the way around. Continue working in k1 p1 until your sock is 7 inches from the cast on edge, or as long as you want the ankle to be on your leg.
Heel Flap
Divide half of your stitches* onto 1 needle (or 2 if you like my method of starting on more to avoid stretching). Leave the other stitches on 1-2 needles, untouched.row 1. (WS) {sl 1, p1} across
row 2. {sl 1 as if to p, k1} across*If you’re working with 64 stitches, that means you’ll be working 32 sts.
Turn Heel
row 1. sl 1, k 16**, ssk, k1, turn
row 2. sl 1, p3, p2tog, p1, turn
row 3. sl 1, k4, ssk, k1, turn
row 4. sl 1, p5, p2tog, p1, turn
row 5. sl 1, k6, ssk, k1, turn
row 6. sl 1, p7, p2tog, p1, turn
row 7. sl 1, k8, ssk, k1, turn
row 8. sl 1, p9, p2tog, p1, turn
row 9. sl 1, k 10, ssk, k1, turn
row 10. sl 1, p 11, p2tog, p1, turn
row 11. sl 1, k 12, ssk, k1, turn
row 12. sl 1, p 13, p2tog, p1, turn
row 13. sl 1, k 14, ssk, k1, turn
row 14. sl 1, p15, p2tog, p1, turnFor a heel turn starting with 16 sts, the heel turn is complete. There should be 18 sts on the needle now. If you’re working with more or less sts, your heel needle will have 2 more sts than you began the turn with.
**or whatever number is half of the stitches in your heel flap, a.k.a. 25% of the total number of stitches CO
Beginning the Gusset
Next row: k 9 (half) of the heel sts
k 9 (the other half) of the heel sts with another needle.
Pick up and knit 17 sts*** along the side of the heel with the same needle.
k across the instep sts.
Pick up and knit 17 sts*** along the other side of the heel with a new needle, and use the same needle to k 9 (half) of the heel sts.*** 25% of the number of CO stitches plus 1.
Shaping the Gusset
The beginning of each round is (again) the center of the heel. If you’re working with 64 sts, there will now be 26 sts on the first and third needles, and 32 sts on the second.rnd 1. k around
rnd 2. first needle: k until 3 sts from end of needle, k2tog, k1
second needle: k across
third needle: k 1, ssk, k to end of needleKeep working rnds 1 and 2 until there are 25% of your CO sts on the first and third needle. If you CO 64 sts, there would be 16 sts on needle 1 and 3, and 50% of your CO sts on needle 2.
Knitting the foot
Knit every round until the sock is about 2 inches from end of your toes.
Decreasing for the toe & finishing
rnd 1. first needle: k until 3 sts remain. k2tog, k1.
second needle: k1, ssk, k until 3 sts remain, k2tog, k1.
third needle: k1, ssk, k to end of needle
rnd 2. knit aroundKeep working rnds 1 and 2 until there are 32^ sts left (needle 1: 8 sts, needle 2: 16 sts, needle 3: 8 sts). Now work just rnd 1 until 8 sts remain. Break your yarn and sew it through the last 8 loops using a yarn needle. Weave in ends.
^or 50% of the total number of CO sts.
******CONGRATULATIONS, YOU JUST KNITTED ONE SOCK, OMG!!!!******
Tips & Tricks for the Toe Decrease
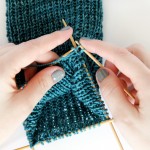
I have bronchitis right now, so I decided to throw my hands up at the universe and demo the toe decrease on a swatch like I tested my gauge on during day 1 of the knit along. So if you’re wondering what happened to the rest of my sock in the photos today, that’s your answer. Next week, I’ll post shots of my finished socks, most likely knit on sick days stuck in bed. Wish me a speedy recovery, please – I’m totally sick of being sick, you guys!
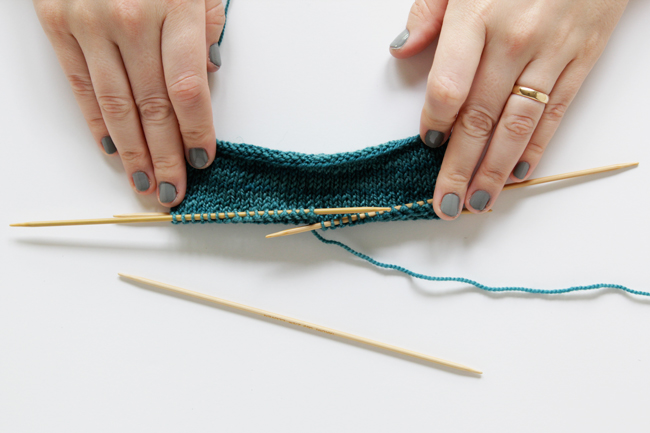
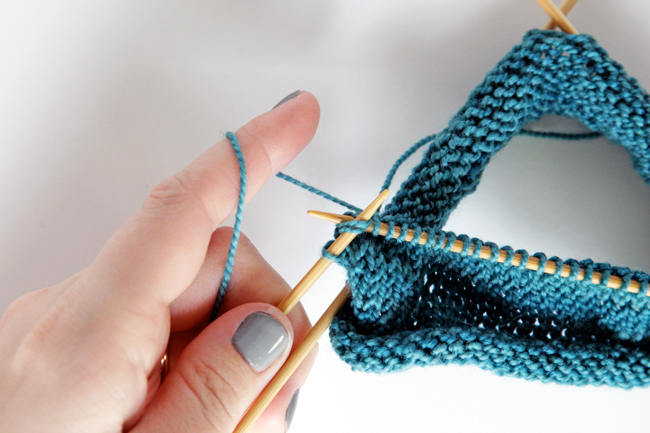
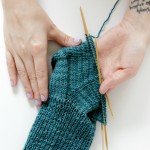
You should by now have knit all the way around each round, stopping about 2 inches before the tip of your toes. Try the in-progress sock on, needles and all, to measure them. When you’re ready for the toe decrease, knit the first needle until there are 3 sts left.
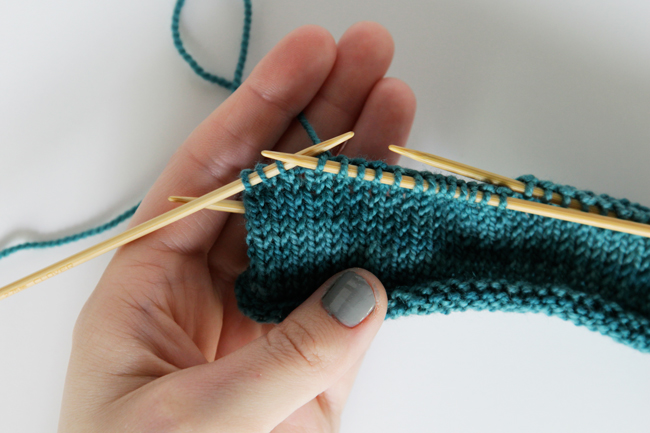
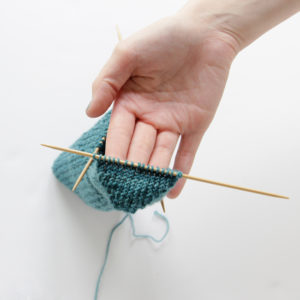
Then knit 2 sts together (k2tog) and knit one. The first needle is knitted.
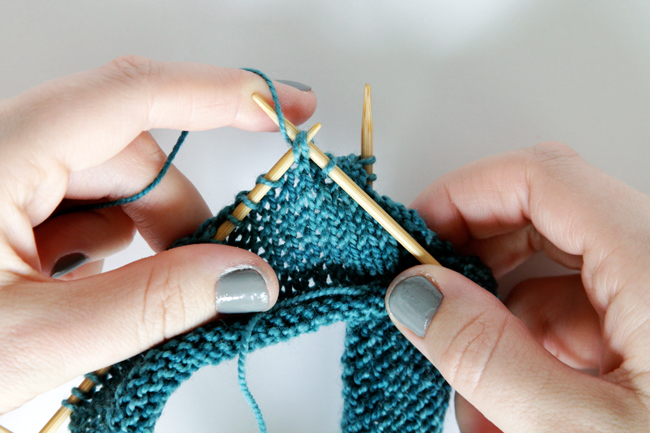
On the second needle, knit 1 stitch, then ssk (check out the heel turn tutorial and gusset tutorial for tips on making ssk’s).
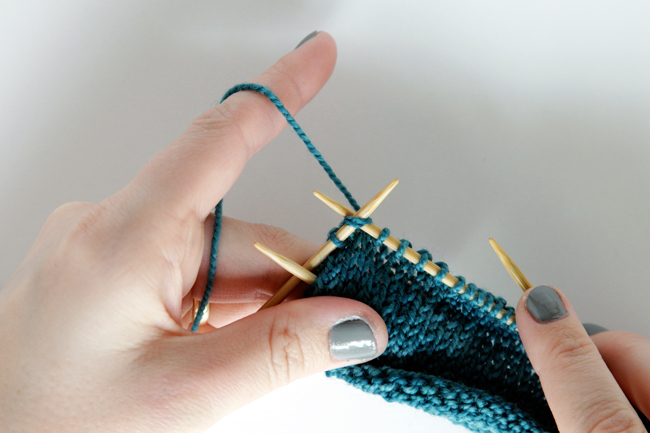
Keep knitting across the second needle until there are again 3 sts left. Knit 2 stitches together (k2tog) and knit 1 stitch. The second needle, the one with the most stitches on it, is now knit.
Knit needle three, starting with knitting 1 stitch and then an ssk like before. Knit the rest of the stitches on needle three.
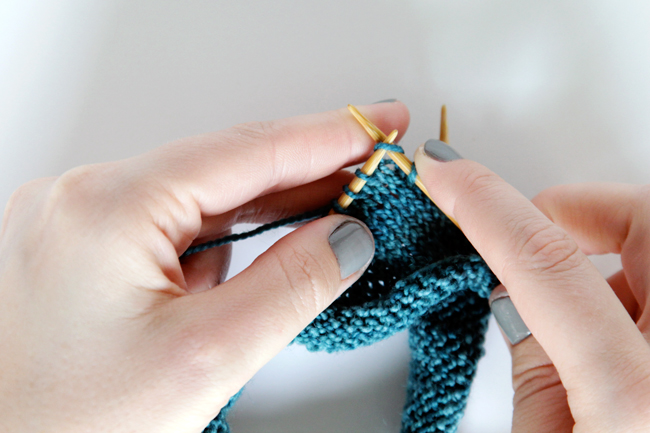
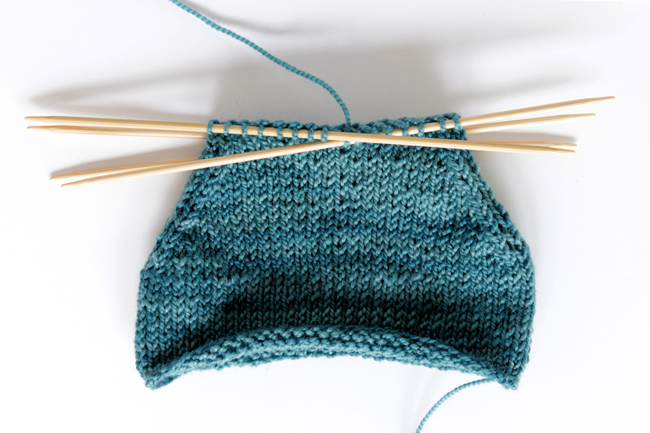
 For the second round of the toe decrease, simply knit around. Then alternate round 1, the round with the decreases (k2tog & ssk), and round 2, the knit round, until there are 32 stitches (or 50% of the number of stitches you cast on) left. At this point, I like to switch to knitting on 4 instead of 3 needles, but you can continue knitting on 3 needles if you find that preferable. :)
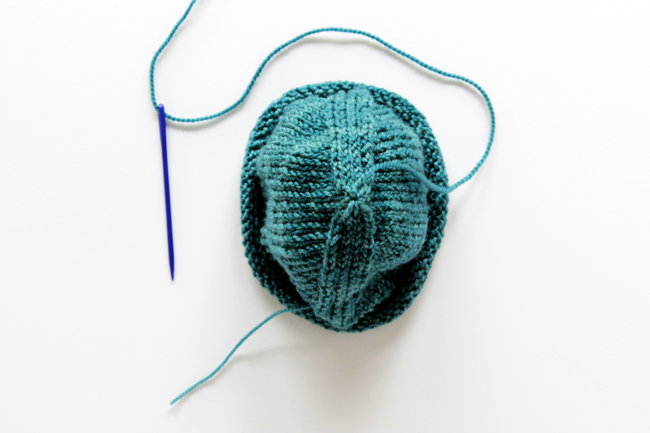
This is what the sock toe should look like when you’ve got just 50% of your initial stitches (or 32 sts) on it.
Now just knit round 1, the round with the decreases (k2tog & ssk), each round until you’ve got 8 stitches left. And this time, no matter how many stitches you cast on, you KEEP DECREASING* until there are 8 stitches left.
*sorry to shout there ;)
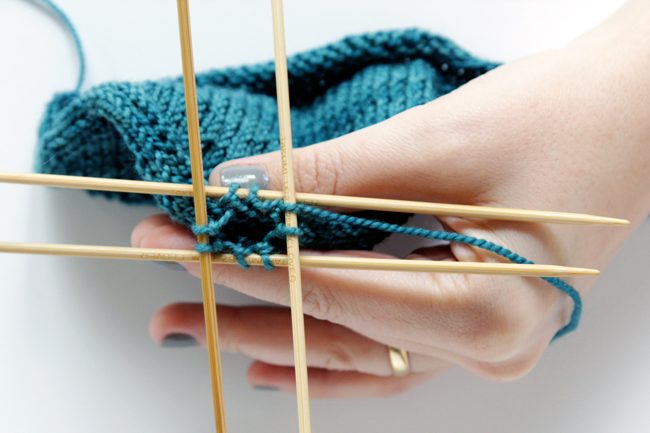
Then, break (cut) your yarn, leaving a few inches of tail to work with. Thread a yarn needle and slip each stitch just like you’re knitting until they’re all on the yarn needle.
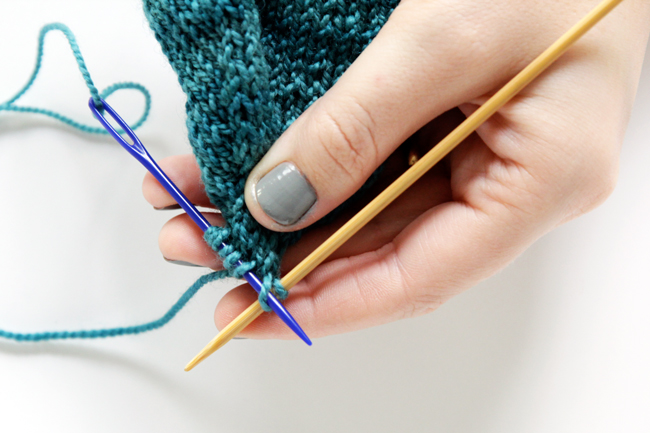
Pull the yarn tail through until the last stitches are touching each other. Weave in the tail, which just means sewing it through the sock for a few inches.
Then… THEN… THEN!!!! Holy crap, you’ve just knit one sock! Now go do it again and you’ll have a PAIR of socks that you made with your own hands!
(I may or may not be on strong cough medicine, which may or may not inhibit my ability to convey words good.)
–
Other posts in this knit along series
KAL announcement / KAL Day 1: Testing Gauge & Casting On / KAL Day 2: Heel Flap / KAL Day 3: The Heel Turn / KAL Day 4: The Gusset / Tune in next week for the full pattern and a look at my finished socks.
If you’re stuck now, or even if you’re stuck a year from now because you finally had time to get around to knitting your socks, don’t hesitate to comment. I’m always checking and happy to help.
When you’ve finished your socks! (Or even just one sock!)
I’d love it if you tag pics or tweets with #handsoccupiedkal so I can see your awesome work! I’d love to also feature every single sock you make in the Hands Occupied Reader Gallery if you’ll let me too. You can mention it online or drop me an email at handsoccupied-at-gmail-dot-com to let me know you’d like to participate.
And if you want to grab a Knit Along badge, here’s the code:
<a href=”https://www.handsoccupied.com/knitalong”><img src=”https://www.handsoccupied.com/wp-content/uploads/2014/04/april2014kal.jpg”></a>


Thank you so much fo this knit-along! I’ve never knit a sock before, or even in the round successfully, but a relative of mine mentined wanting a pair of socks that looked like converse high-tops. I bought the pattern but the part for the actual sock was written so poorly I had no idea what to do. Then I looked for instructions and, after many pages of equally difficult instructions, found your knit-along. Using the measurements from that pattern but the pictures and detailed instructions from this, I’ve successfully made a pair of socks that I’m in the middle of detailing into high-tops as we speak! I’m going to use this to make a pair for myself, after the holidays.
I just thought you might like to know that you saved Christmas this year. I never would have finished them by the holiday if not for this knit-along.
Aww! That’s so nice to hear! You just made MY day right back. :)
I was told as a child that since I was left handed I would never be able to learn how to knit. A neighbor had given me a pair of hand knit socks and I was enthralled. Learning to knit socks went on my bucket list.
I bought books, watched youtube, talked to the ladies in the yarn store and gave it my best shot. All this proved minimally successful. Thanks to you, at 59 years old I just finished my 4th pair.
Your sock class was easy to follow. Your directions and pictures were simple and clear. I am hooked and am starting my 5th pair. Thank you.
Maria, that’s so lovely to hear! My mother and grandmother are lefties, and my mom knit left handed. My grandma knit right handed because that’s who was available to teach her at the time. I’m a righty, so she taught me. In the end, I learned to also knit left handed when I was having some hand issues. While the tutorials are definitely more limited for lefties, they’re out there, and if you want to learn to do something, you can. You should be proud! :D
Dear Heidi,
Your site is so lovely! l found it because l’m knitting my little granddaughter’s Christmas stocking, as my grandmother did for me (l still have mine) and it had been so long since l knitted socks that l couldn’t remember how to turn the heel! Your format is SO clear and accessible. You have done a beautiful job and your love of it shines through! The reason l decided to write to you though is that l noticed your comment that your Grandmother taught you to knit when you were eight years old. l’m 65 and my grandmother taught me to knit when l was eight years old. l adored her so much and l miss her so much and to have this handwork that she loved and passed on to me is just so great, like a link to her even now. lf l’m lucky maybe l will get to teach my granddaughter to knit seven years from now! Thank you for your site. Gail
You’re so welcome, Gail. Thank you for your kind words! <3
Really great guide for beginning sock knitters! Thank you. I use this to help other people learn how to knit their first sock. Don’t ever take it down :-) Megan
oh wow! I’m so glad. This was so much work. LOL! ;) Now that I’m upping my YouTube skills, maybe doing some of these as videos is in the future!