• 0 items$0.00
  • Skip to primary navigation
  • Skip to main content
  • Skip to primary sidebar
  • Skip to footer

Hands Occupied

Colorful knitting, crochet, latch hook and macrame from craft book author & designer Heidi Gustad.

  • BLOG
    • Knitting
    • Crochet
    • Latch Hook
    • Macramé
    • Punch Needle
  • ABOUT
  • Shop
  • Nav Social Menu

    • Instagram
    • Pinterest
    • RSS
    • TikTok
    • YouTube

How-to: Back Seat Pet Protector

November 14, 2013 12 Comments

Kia Logo
How-to: Back Seat Pet Protector | Hands Occupied

Above is a rare glimpse of my handsome bigger dog Woodrow*, a chow mix whose fur sheds everywhere. It’s the kind of fur that seems to weave its way into everything, including car upholstery. The last thing I want to do in the middle of  a long road trip with two pooches is to take a break to vacuum the back seat of my beloved Kia Optima. If you ever travel with pets, or even messy kids, I recommend making your own back seat protector. Even with the most basic of sewing skills, which is totally the camp I fall in, you can sew this back seat protector in an afternoon. With this washable car accessory, you can make your dogs feel at home – even in the car.
How-to: Back Seat Pet Protector | Hands Occupied

*He’s scared of the noises my camera makes! Aww, right?

Supplies

4.25 yds nylon strapping material, 1 inch wide
1 inch wide slide release buckle
3 packages of 3 inch double fold bias tape/quilt binding
2 yds – polar fleece that’s at least 54 inches wide
2 yds – 54 inch upholstery fabric
sewing machine
thread
fabric scissors
tape measure
straight pins
iron

Directions

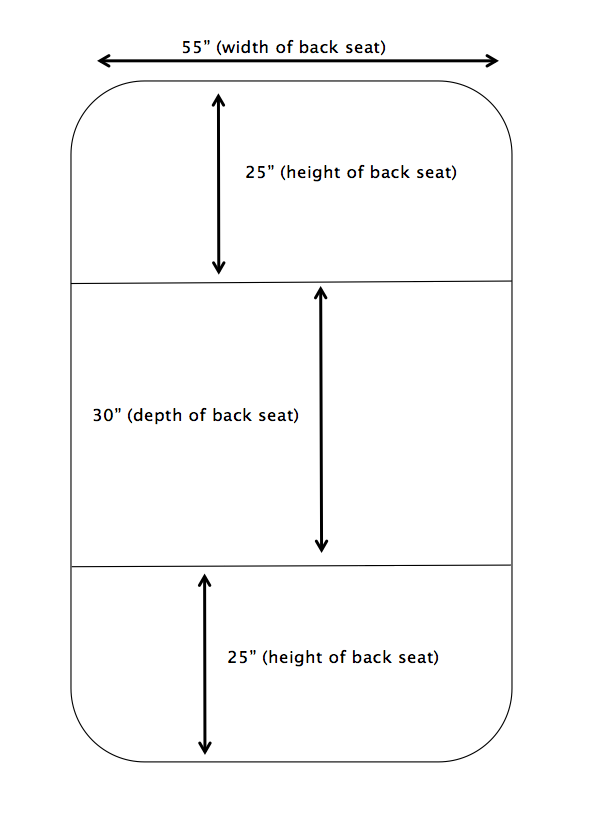
Measure the back seat of your car for dimensions listed below. If you’re driving a 2006 Kia Optima like me, you can use my dimensions.
How-to: Back Seat Pet Protector | Hands Occupied

Iron your upholstery fabric before beginning to remove any wrinkles. Cut your fabric so it meets your back seat’s dimensions. To make purchasing and cutting fabric easier, I stuck to two yards (72 inches) of fabric length. 54 inches is a standard width for fabric, so I decided to make my finished back seat cover 54 by 72 inches for simplicity’s sake. Remember when I said I’m no expert seamstress?

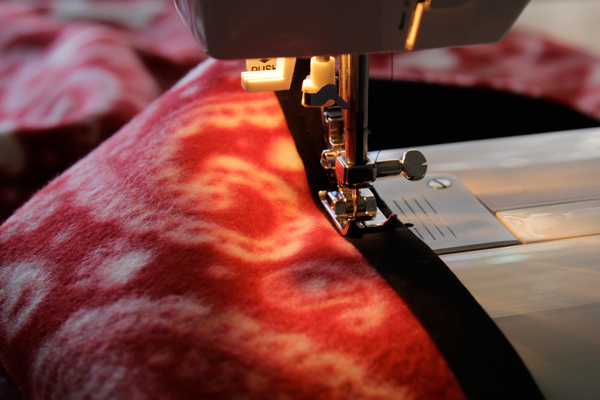
Pin your fabric together, wrong sides facing each other. Sew a basting stitch all the way around to keep the large pieces of fabric in place when you sew. Remove the pins. Pin bias tape all the way around the edges of your fabric and sew it in place with a sewing machine, removing your pins as you go.
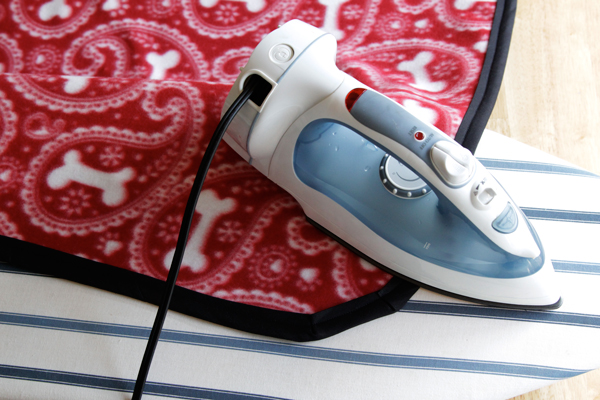
How-to: Back Seat Pet Protector | Hands Occupied Iron all of the bias tape to smooth it out.
How-to: Back Seat Pet Protector | Hands Occupied

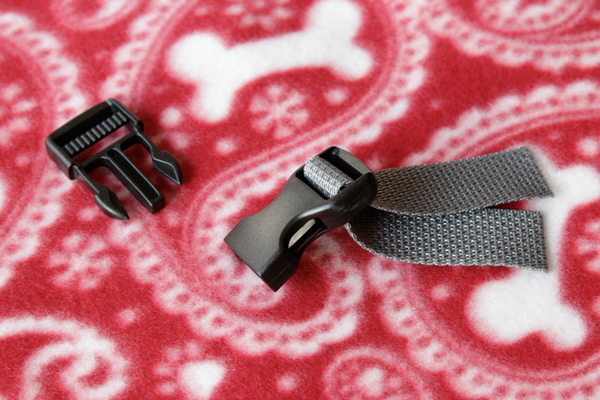
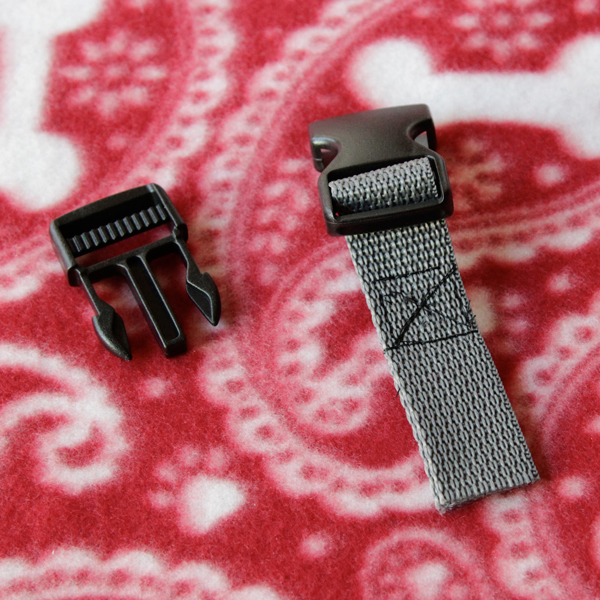
Cut your nylon strapping into the following lengths: 80 inches, 30 inches (2 pieces), 7 inches. Thread the 7 inch piece through the female end of the slide release buckle.
How-to: Back Seat Pet Protector | Hands Occupied

Sew a square with an X through it near the buckle, as shown.
How-to: Back Seat Pet Protector | Hands Occupied

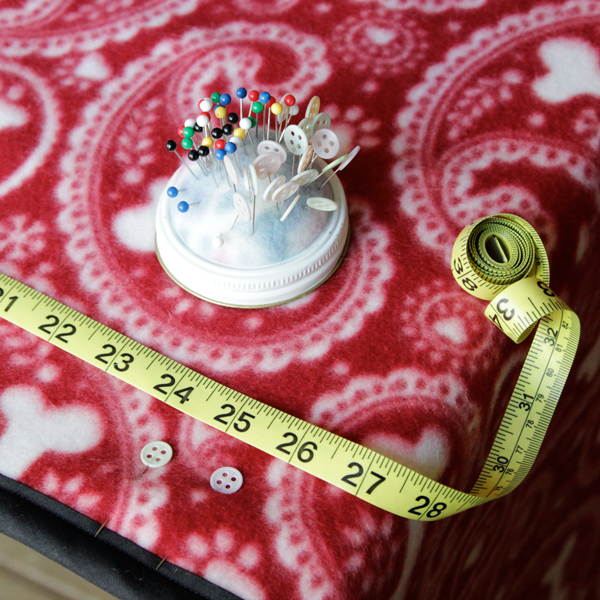
Measure 25 inches (or the height of your back seat) from the shorter end of the rectangle of fabric, and mark it with a pin.
How-to: Back Seat Pet Protector | Hands Occupied

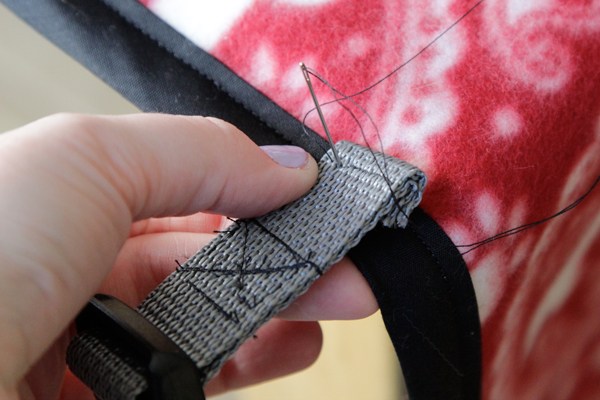
Hand sew the raw end of the nylon strapping to the rectangle where you marked it, folding under the raw edges.
How-to: Back Seat Pet Protector | Hands Occupied

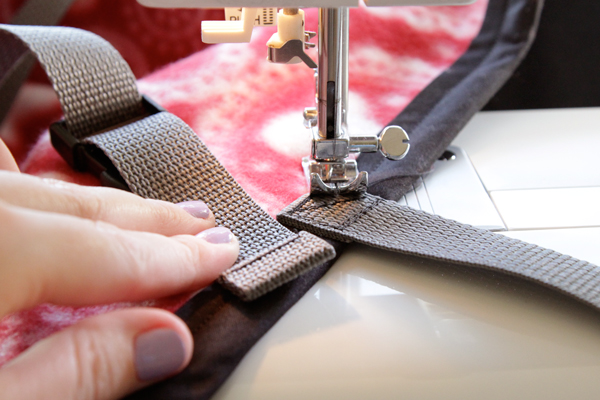
Thread the 80 inch piece of nylon through the other end of the slide release buckle. Fold the end of the nylon nearest the buckle over twice and sew down. Fold over once the other end of the nylon and sew it to the fabric rectangle at the 25 inch mark using a box with an X through it.
How-to: Back Seat Pet Protector | Hands Occupied

Measure the location of your back seat’s head rests. Sew a 30 inch piece of nylon strapping to the rectangle in a horseshoe shape where it will be able to loop over the head rests to keep the back of the seat covered. You should sew each end of the horseshoe shape using the box with an X through it for maximum security.

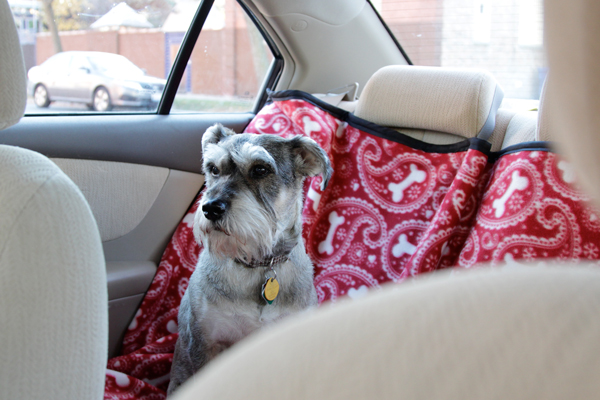
That’s it! A DIY back seat protector to keep your ride clean and your pooches happy. Isn’t the bones and bandana fabric cute, by the way? :)
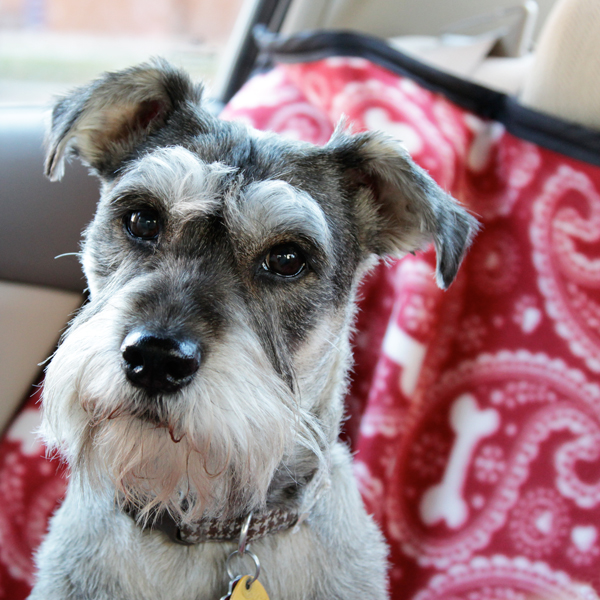
How-to: Back Seat Pet Protector | Hands Occupied

Storm, unlike Woodrow, does not fear the sound of a camera shutter. 
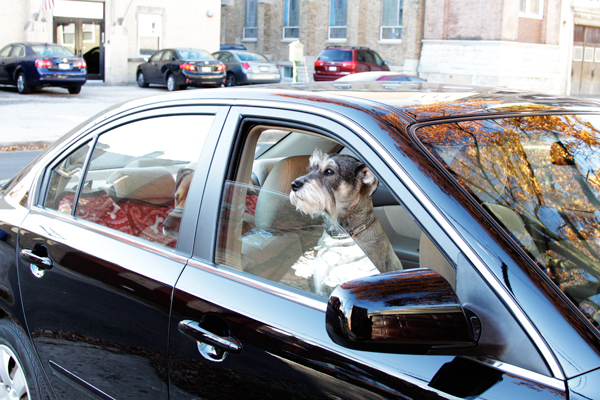
How-to: Back Seat Pet Protector | Hands Occupied

Nor, apparently, does she fear the open road. 

This post is sponsored by Kia.

Filed Under: Giveaways, Reviews & Sponsored, How-to, Pet Projects, Sewing Tagged With: back seat guard, back seat protector, blanket, car guard, craft, crafts, diy, dogs, kia, kia optima, pet diy, pet project, pets, Sewing

About Heidi

Heidi Gustad is a craft book author, designer & creator specializing in yarn crafts like knitting, crochet, latch hook & macramé. Her first book, Latch Hook: 12 Projects for the Modern Maker, is out now.

Previous Post: « DIY FYI: Duct Tape Crafting Tip
Next Post: Weekly Reader »

Reader Interactions

DID YOU LIKE THIS POST?
Visit similar articles...

  • Rope Ball Surprise Dog ToyRope Ball Surprise Dog Toy
  • Dog Costume InspirationDog Costume Inspiration
  • Knitting Needle Case DIYKnitting Needle Case DIY
  • DIY Light-Up Cuff BraceletDIY Light-Up Cuff Bracelet

DON’T MISS ANOTHER UPDATE

Comments

  1. M

    November 16, 2013 at 9:30 am

    So I’m interested in trying to make this, but I can’t figure out what the 80 inch nylon strap at the 25 inch mark is there for. Do you fold down your seat and wrap the strap around the whole seat-back? I also don’t understand why the size of the project is the height of the backseat X 2 + the depth of the backseat. Are you talking about the distance from the floor to the backseat + the depth of the backseat + the height of the back of the backseat?

    Thanks!

    Reply
    • Heidi

      November 17, 2013 at 8:18 am

      Hi M!

      Yes, the strap straps behind the entire backseat if you’ve got one that flips down. I included it since mine does, but also in case I ever need to take my dogs in a friend’a car on a trip and need to step it to a SUV seat or something like that.

      I included the back seat height twice so that the cover would hang down to the floor for extra protection. You can really customize this basic pattern however you like! You can also include a second
      set if nylon “horseshoes” – as I called them – on the other end of the cover to make the cover rotatable. You can also use a second set of “horseshoes” to hook the far end onto the front seats’ headrests, creating a sort of hammock, like this: http://pinterest.com/pin/63472675971529111/

      Thanks for your great questions- let me know if the link doesn’t work for you.

      Heidi :)

      Reply
  2. Anne

    November 17, 2013 at 10:01 am

    Awesome!! I’ve linked to your tutorial over at Craft Gossip: http://sewing.craftgossip.com/tutorial-back-seat-cover-to-protect-your-car-from-pet-hair/2013/11/17/
    –Anne

    Reply
    • Heidi

      November 17, 2013 at 10:08 am

      Thanks, Anne! You’re the best :).

      Reply
  3. Linda G

    November 17, 2013 at 12:53 pm

    On way to car wash to vacuum car, Joanns for fabric and home to make this!!

    Reply
    • Heidi

      November 17, 2013 at 3:43 pm

      Awesome! When you make it, I’d love to see some pics! I’ve got a reader gallery I’m always looking to share people’s projects in :) -Heidi

      Reply
  4. Linda G

    November 17, 2013 at 8:45 pm

    Made it!! Pics later – but wanted to let you know my variation – I put elastic on the top instead of a buckle – slides over the headrests and a bit easier :)

    Reply
  5. Linda L

    June 14, 2014 at 9:05 pm

    This looks great! I will give this a try for our dog (a Dalmatian that really sheds). I think I will make mine with some slits for the seat belts. Our dog wears a harness with a seat belt attachment, so the slit will be necessary to access the receiving side of the buckle. Also, I am thinking of using fleece. Slits will be easy with that since fleece doesn’t ravel. Any thoughts or suggestions for me before I get started? :-)

    Reply
    • Heidi

      June 15, 2014 at 7:45 pm

      That sounds great- just remember to get enough bias tape to cover those openings! I’d love to see it when you’re done :)

      Reply
  6. Teresa

    February 3, 2015 at 1:57 pm

    Hi! I’m just wondering if you know anyone willing to sell these? I would love one and do not have the time to make one.
    Thanks so much,
    Teresa

    Reply
    • Heidi

      February 3, 2015 at 4:58 pm

      I’ve seen similar items on Etsy and Amazon – just search for them and a few options come up. Best of luck!

      Reply

Trackbacks

  1. Tutorial: Back seat cover to protect your car from pet hair | Sewing | CraftGossip.com says:
    November 17, 2013 at 9:58 am

    […] When it gets covered with hair, you can take it out of the car and send through the wash.  Go to Hands Occupied to see how to make […]

    Reply

Leave a Reply to M Cancel reply

Your email address will not be published. Required fields are marked *

This site uses Akismet to reduce spam. Learn how your comment data is processed.

Primary Sidebar

Heidi Gustad from Hands Occupied / Craft Book Author and Knitting, Crochet, Latch Hook and Macrame Designer

Hi! I’m Heidi (she/her/hers), a craft book author & pattern designer specializing in knitting, crochet, latch hook & macrame. Really anything with yarn! ❤️  My work combines vintage and modern design elements, featuring bold colors and graphic motifs.

EMAIL NEWSLETTER

Never miss a tutorial with these short & sweet monthly updates.

Find Me on Social Media

  • Instagram
  • Pinterest
  • TikTok
  • YouTube
Latch Hook by Heidi GustadDiscover Unique Items

Footer

INSTAGRAM

handsoccupied

Craft book author, designer & creator specializing in yarn crafts like knitting, crochet, latch hook & macramé
❤️ Email preferred

Heidi Gustad 🧶✂️
Since it won’t be clean for long, swipe to see w Since it won’t be clean for long, swipe to see what my home studio looks like these days. Nothing will ever quite be like the old Hands Occupied Studio, but I’m pretty pleased with how I shoehorned everything in this space. Function over form + a layer of yarn cuteness-meets-chaos is how I’d describe my creative space needs. 😆 When I was still renting the studio, those needs included “doesn’t rain suspicious brown water from a crack in the ceiling for a year,” so this is an improvement! 😆
.
For a time lapse of the studio organizing and tszuj-ing process, scroll down a couple posts on my feed. (There’s also a video or two featuring the old studio if you’re curious.) Happy June, friends! 
.
#handsoccupied #handsoccupiedstudio #knitdesigner #craftdesign #yarncrafts #latchhook #makerlife #heidigustad #chicagocrafter
Who doesn’t love magic loop knitting? Who doesn’t know what it is? How about when circular needles were invented?
.
In todays new bl0g post + video tutorial, you’ll learn about the magic loop method for knitting in the round, how to do it and why to use it, and when it came to be. The 🔗 is in my b1o. 🧶 
.
#handsoccupied #magicloop #knitting #howtoknit #knittinginspiration #knittingintheround
Finally organizing & putting the finishing touches Finally organizing & putting the finishing touches on my home studio. After losing my studio space last fall, it’s feels really great to *occupy* this new space all the way. 😉
.
I started by removing general clutter & returning straggler supplies from various WIPs, videos & design deadlines to their homes. Next, I hung a third peg board in the space - this one is mostly for display and less for organizing tools or projects. For the first time ever, I’m displaying projects from my book, plus a couple other faves. (The best thing about designing more yarn crafts besides knit & crochet is that I have some really fun -and delightfully pettable 😆- samples around.) I finished by adding a square dowel to my small supply storage tower to keep it from tipping over, plus re-arranging and de-cluttering the closet. 
.
This cleaner space already has me feeling so much more creative and less overwhelmed. Now to find a safe spot in the basement for the tower of project samples in Rubbermaid tubs I liberated from my WIPs closet. Also why are there five?! 
.
Here’s to keeping it clean for a few weeks! 🧶 
.
#handsocupied #handsoccupiedstudio #craftroom #craftroomorganization #craftroomstorage #yarncraft #knitter #crocheter #latchhook #latchhookbook
It’s a disaster in here and my video microphone It’s a disaster in here and my video microphone isn’t cooperating, but it could be worse! How’s your day? 
.
(If we haven’t yet met, I’m Heidi and I’m a pattern designer and tutorial creator specializing in yarn crafts like knitting & latch hook. You can learn more about my work and regularly find new tutorials in my profile. ☺️👋🏻)
.
#handsoccupied #craftstudio #knitter #yarncrafter
How to knit a one-row buttonhole 🧶 . Sweater k How to knit a one-row buttonhole 🧶 
.
Sweater knitters, listen up! Learn how to knit a buttonhole over the course of a single row of knitting, a.k.a. a one-row buttonhole. In this technique, a combination of binding off and casting on stitches on opposite sides of the work creates a symmetrical, stretchy buttonhole. 
.
The time limit on these is 90 seconds, so this quick tutorial is perfect to save for future reference. (Did you know you can make folders of saved items like tutorials? 👩🏼‍🏫) 
.
If you’re brand new to the technique or want to see this demonstration slower and more in-depth, my bl0g and You/2be are the place to be. Thanks for watching & let me know if you have any questions or requests for future tutorials in the comments. ☺️
.
#handsoccupied #knitting #onerowbuttonhole #learntoknit #sweaterknitting #knittutorial #knitting_inspiration
Load More... Follow on Instagram

Copyright © 2023 / Foodie Pro Theme On Genesis Framework / Branding by Ink + Mortar
All Site & Shop Policies / Privacy Policy / Cookie Policy