• 0 items$0.00
  • Skip to primary navigation
  • Skip to main content
  • Skip to primary sidebar
  • Skip to footer

Hands Occupied

Contemporary yarn crafts by Heidi Gustad. Knitting, crochet, latch hook and macrame.

  • BLOG
    • Knitting
    • Crochet
    • Latch Hook
    • Macramé
  • ABOUT
  • Shop
  • Studio
  • Nav Social Menu

    • Facebook
    • Instagram
    • Pinterest
    • RSS
    • Twitter
    • YouTube

How-to: Simple Stamped Pencils

September 9, 2013 13 Comments

How-to: Simple Stamped Pencils | Hands Occupied

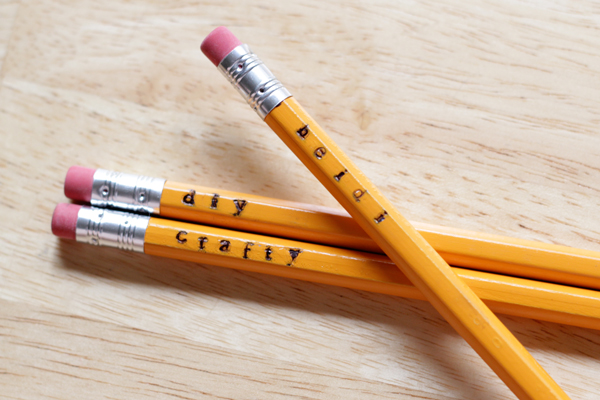
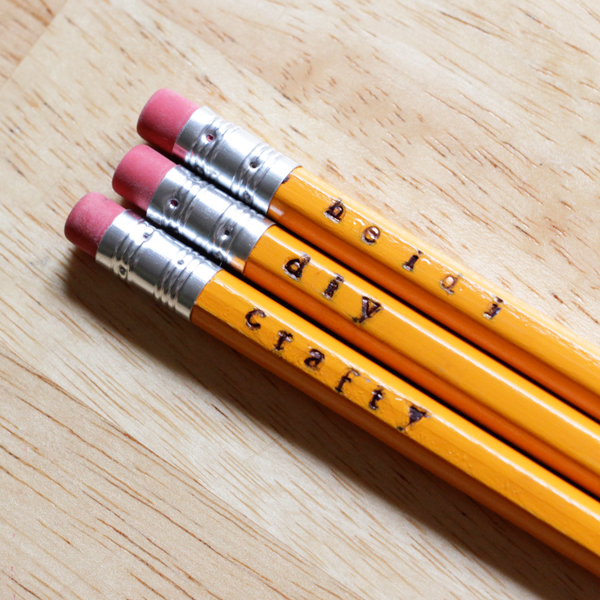
These custom pencils take under 5 minutes to make and offer unlimited ways to make them your own. Back in elementary school, it was super hip to order custom pencils with your name on them, and they pretty much looked just like the DIY version I’m sharing today. I have no idea why I didn’t think of this project until the weekend after I rounded up my back to school series, but since I haven’t moved on to the next theme yet, I figured, what the heck. Plus, they’re just so cute!

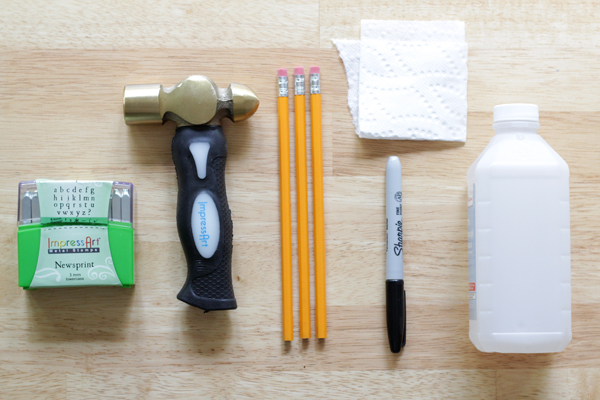
Supplies

plain pencils
hammer
metal stamping letters
permanent marker
rubbing alcohol
tissue
How-to: Simple Stamped Pencils | Hands Occupied

Directions

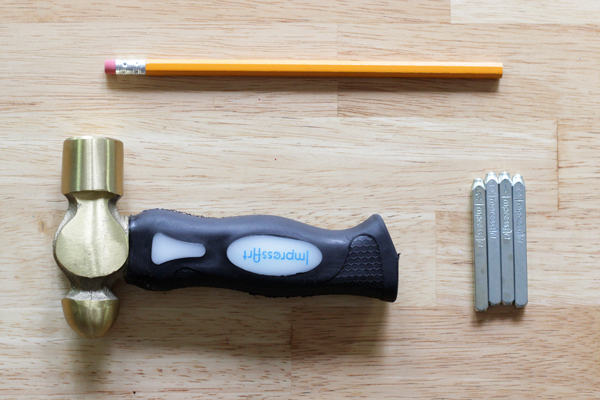
Gather your letters/symbols for the phrase you’d like on your pencil. This is probably the hardest part of this project! The first pencil I made was for my husband and totally says twerk, but since the internet has had quite enough of twerking in the past month, I opted to keep it outta this post ;).
How-to: Simple Stamped Pencils | Hands Occupied

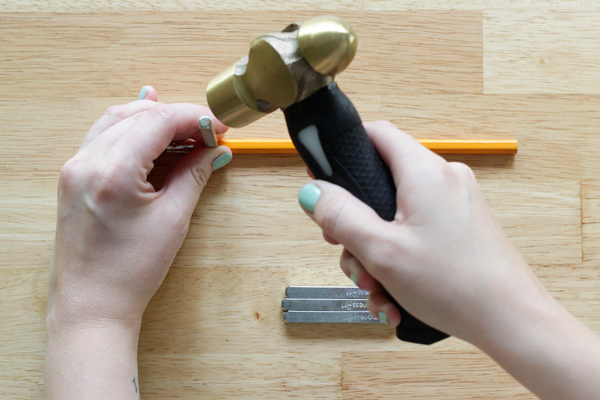
Align your stamp, checking to make sure it’s about centered on one of the pencil’s flat sides, and also that it’s right side up. Give the stamp a tap – hard enough to make an impression in the pencil, but not so hard as to dent the wood in weird ways. You’re using metal stamps on wood, so the force needed is a little different than when you’re working with metal.

[Check out my other metal stamping tutorials here, here and here.]
How-to: Simple Stamped Pencils | Hands Occupied

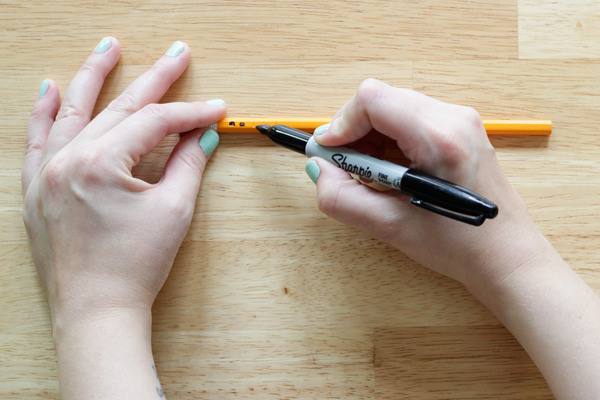
Color in your letters with permanent marker, filling in the stamps all the way so the yellow (or whatever color you’re working with) of the pencil doesn’t show through.
How-to: Simple Stamped Pencils | Hands Occupied

Wipe off excess ink with rubbing alcohol and some tissue, being careful not to use too much alcohol. The pencils are wood, so you don’t want them soaked, and if you use too much, you’ll remove all of the ink, including what you want to show up in the letters. Other than that, you’ll all done! These are super addictive – I grabbed a box of 24 pencils on back-to-school clearance and went nuts. I think my co-workers are going to have to get pencil gifts on a regular basis! Who would you make these for?
How-to: Simple Stamped Pencils | Hands Occupied

The metal stamps and hammer used in this project were provided by Impress Art. 
Filed Under: Back to School, How-to, Metal Stamping Tagged With: custom, easy, impress art, metal stamping, pencil, simple, stamping

About Heidi

Heidi Gustad is an artist, author and crafts designer specializing in knitting, crochet, latch hook and macrame. In addition to running the Hands Occupied Blog and Pattern Shop, you can find her making videos & co-hosting the Very Serious Crafts podcast.

Previous Post: « Weekly Reader
Next Post: How-to: Orange Slice Pumpkins »

Reader Interactions

DID YOU LIKE THIS POST?
Visit similar articles...

  • How-to: Spider Ring Drink Markers How-to: Spider Ring Drink Markers
  • How-to: Bat Place CardsHow-to: Bat Place Cards
  • How-to: Metal Stamping 101How-to: Metal Stamping 101
  • DIY Metal Stamped Stitch MarkersDIY Metal Stamped Stitch Markers

DON’T MISS ANOTHER UPDATE

Comments

  1. Carol

    September 10, 2013 at 8:53 pm

    In days gone by my Grandma gave me pencils with my names on them. I loved them – great stocking stuffer idea.

    Reply
  2. marissa | Rae Gun Ramblings

    September 10, 2013 at 9:48 pm

    another justification for my desire for metal stamping letters!

    Reply
  3. Arie Noel

    September 10, 2013 at 10:44 pm

    I just bought 75 custom pencils last week… spent 40 dollars and won’t have any awesome supplies to show for it. I will save this for future

    Reply
  4. Sharon Harris

    September 13, 2013 at 1:45 am

    What a great idea! I have a niece and nephew that are a challenge to please at Christmas… guess what’s happening this year! Thanks for a great tutorial.

    Reply
  5. Priyanjana

    September 16, 2013 at 8:41 am

    love the idea!
    I wish I had the stamping letters!

    Reply
  6. Ana

    September 25, 2013 at 2:02 pm

    I know what I’ll do with them… Wedding giveaways! This actually came at a really great time because I am racking my brain for economical yet cute wedding giveaways, and this is perfect, especially since my hubby to be is an artist. So tying this with a cute ribbon, and a small bag of meringues (since I love cooking) and we got our custom giveaway!
    Thank you!

    Reply
    • Heidi

      September 25, 2013 at 6:36 pm

      I LOVE that idea! Totally send me pics after you’ve survived the big day :)

      Reply
  7. Deb

    September 26, 2013 at 3:09 pm

    I’d love to make some for my nieces. :) They’ll definitely like these. :)

    Reply
  8. Rebeca

    August 28, 2015 at 3:01 pm

    Such a great and fun idea. Thanks for sharing.

    Reply
  9. Anya

    August 1, 2018 at 2:30 am

    hi!

    I know that this is an old post but may i ask what size of metal stamps you used for this? Im planning to purchase and do the same for my kids’ pencils as they keep on losing it in school.

    Thanks!

    Reply
    • Heidi

      August 2, 2018 at 1:21 pm

      Sure thing! I used the 3mm size. :)

      Reply
  10. Just Someone

    September 4, 2018 at 6:37 pm

    I was just thinking about the kid (now man) who sold a million pixels and made one million dollars. so I read an article about him. He started his venture with “what can I sell one million of” I started thinking. and i thought “PENCILS”. then I started looking at personalized pencils but I had to buy them in bulk so that wouldn’t work. then I thought “hmmm, how can I personalize my own pencils?” That led me to THIS article. then I saw, “Metal stamping letters”. I live in an 80 year old house. My landlord grew up in this house and her father lived here until he was 93 years old. I rented the house (only the third family to live here in it’s 80 year history) in 2016. Well, my basement is like a time machine. Stuff there from the 60’s. I love going down there. So about six months ago I was organizing it (again lol) and I came across about 30 lbs of type. It has to be from the days of old,I guess for a printing press? either way I’m about to make some MULA!!!!

    Reply

Trackbacks

  1. Progetti Back to School | Mamma Felice says:
    September 12, 2013 at 6:42 am

    […] Le matite con le incisioni | 02. Il portapenne da tavolo con le perline | 03. La fascia per capelli con i pompon 04. Il porta […]

    Reply

Leave a Reply Cancel reply

Your email address will not be published. Required fields are marked *

This site uses Akismet to reduce spam. Learn how your comment data is processed.

Primary Sidebar

Heidi Gustad from Hands Occupied / Craft Book Author and Knitting, Crochet, Latch Hook and Macrame Designer

Hi! I’m Heidi, an author, yarn craft designer and content creator specializing in knitting, crochet, latch hook & macrame. My work unapologetically features primary colors and vintage-meets-modern style. My first book, Latch Hook: 12 Projects for the Modern Maker, is now available!

work with heidi

UPDATES BY EMAIL

Get a free pattern + biweekly updates sent to your inbox.

Let’s be friends!

  • Facebook
  • Instagram
  • Pinterest
  • Twitter
  • YouTube
Latch Hook by Heidi Gustad

Footer

INSTAGRAM

handsoccupied

Craft book author & content creator in love with primary colors & vintage vibes. / #latchhookbook out now!
.
knitting, crochet, latch hook & macramé

Heidi Gustad 🧶✂️
There’s an update on the blog today, & it’s ab There’s an update on the blog today, & it’s about how I’m going to take the next 2 weeks off to rest & recharge. ☺️🧶 No new content for y’all means I can also take a moment to zoom out & plan what’s next. Link is in bio. 
.
.
A note on Very Serious Crafts: In the post I discuss stepping away from the @seriouscrafts podcast to give myself more time to devote to some minor medical issues. Don’t you worry - my health will be fine, & @molliejohanson @redhandledscissors and I are still pals, and after a short break of their own, the podcast will be back! Just sans moi. 💁🏼‍♀️😆 
.
.
See you in a couple weeks! ✌🏻#handsoccupied #knitdesign #craftdesign #sofadedsweater
Been a little quiet this holiday week, as it shoul Been a little quiet this holiday week, as it should be. ☺️🎄The past few days have been filled with a lot of catching up on festive zoom calls & raising toasts to the camera. 🥂 Connecting with people has been a welcome change of pace! Now I’m feeling ready to meet my inevitable end-of-year deadlines. 😆
.
.
Warmest wishes for the season, my friends! ❤️💛💙
Hi, I’m Heidi, the craft book author & maker beh Hi, I’m Heidi, the craft book author & maker behind Hands Occupied! 👋🏻 I’ve been enjoying making Reels a lot lately, but I wanted to bop in to share a regular photo & say hello. 🤓 
.
.
rather than giving you my bio right now, I have a question. I just got this new sweater & I can’t stop imaging how funny it would be to wear this to a knitting class ... is that bad? 🤣🤣🤣
.
.
Pictured: a blond woman with glasses wearing a sweater that reads “all your sweaters are ugly” standing in front of a Christmas tree.
Wet blocking, also called immersive blocking, is o Wet blocking, also called immersive blocking, is one of the most common methods for finishing a knitting project and helping ensure its final size and shape. Learn basic blocking for absolute beginners in an easy-to-follow (non-Reel!) video tutorial! Catch the tutorial on YouTube or the Hands Occupied Blog, link is in bio. 🧶 #handsoccupied #stopswatchandblockit #KPAmbassadorsDec20 #sponsored
Had to share this perfect capture of one of my fav Had to share this perfect capture of one of my favorite weird homemade Christmas ornaments: a simple macramé Santa face with beads for the eyes and nose! My Great-Grandma made it too. 🎄
.
Might have to try making a quickie Reel tutorial for this guy - I think it’s the perfect project for it, don’t you? 🎅🏼 #handsoccupied #macrame
Load More... Follow on Instagram

Copyright © 2021 / Foodie Pro Theme On Genesis Framework / Branding by Ink + Mortar
All Site & Shop Policies / Privacy Policy / Cookie Policy