Oh man! The Knit Along is finally here!!! I’m so excited. Today we’re going to test our yarn gauge by knitting a swatch (optional, but I recommend it), cast on, and start knitting our sock ankle. Don’t forget to tag any instagrams, tweets, pins, etc. with #handsoccupiedkal so we can all see what everyone’s up to!
A bit of business
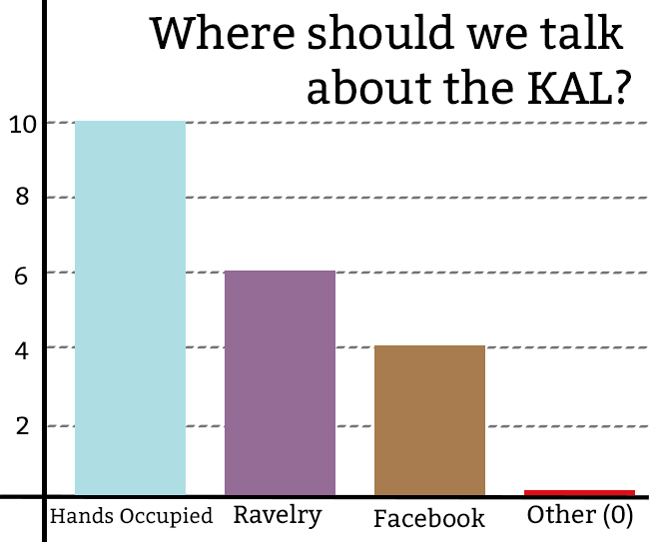
First off, I should share the poll results from the announcement post. A big thanks is in order for the 20 folks who took the time to answer my question – I really appreciate it! It was really reassuring to see this many of you get involved right away. :)
Looks like most of you want to visit this site for all of your Knit Along needs and questions, which is great! Just like any other tutorial on this blog, you can ask your questions in the comments section below the post and I’ll be right there to clear up any questions you might have. I also created a Ravelry Group called Hands Occupied Knit Along (you have to have a Ravelry account to access it, just fyi) at the recommendation of a knitting mentor whose opinion I value. Participation in the Ravelry Group is 100% optional, of course.
Day 1: Testing Gauge & Casting On
Note: If you are a knitting who knows she hates swatching and gauge calculating math, you might want to jump to the day 1/casting on section of this post. I am about to do an almost-embarassingly (for me) thorough run down of how to swatch for socks, test swatches, measure and calculate gauges. Brace yourself, math and tiny stitches follow. ;)
How to make a sock test swatch
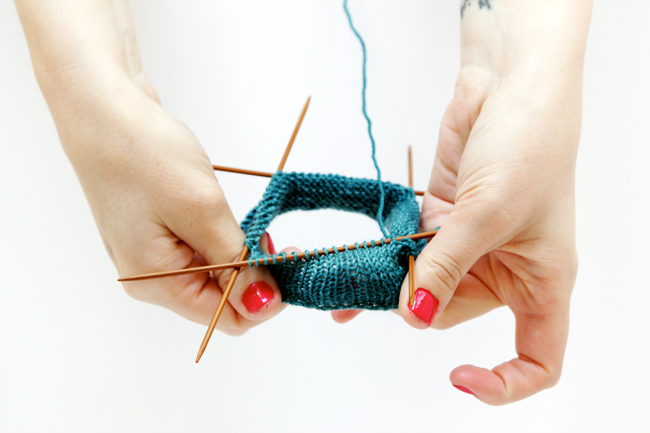
Cast on 40-60 stitches on double pointed needles (DPNs). Make sure to use the cast on method and yarn you’ll be using for your socks. I knitted two swatches with my yarn, one on size 1 DPNs and one on size 2s, just do I could demo the difference between two swatches knit by the same person with the same yarn and what to look for. More on that in a sec!
Here’s a great video tutorial for first-time DPN users.
The first time I ever made socks, I just used the long tail cast on because it was, honestly, the only cast on I ever knew how to use. The problem with using that for socks knitted top down (a.k.a. from the ankle down to the toe, a.k.a. the method we’re using for the Knit Along) is that it’s not very stretchy, which you want your sock ankle to be. A cast on super similar to the long tail cast on that is great for socks is called the Old Norwegian Sock Cast on, also called the German Twisted Cast On.
Here’s another great video tutorial showing how to do the Old Norwegian Cast On.
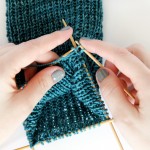
Once you’re all cast on, knit about 2-3 inches in stockinette stitch. Since you’re knitting in the round, that means just knitting around and around and around until you’ve hit your 2-3 inches. Normally with stockinette if you’re knitting flat, you’d knit on the right side of your project and purl on the wrong side, resulting in one side of smooth knit stitches and one of purl. With knitting in the round, the inside of your swatch (which will look like a tube) will be all purl stitches, and the outside will be all knit.
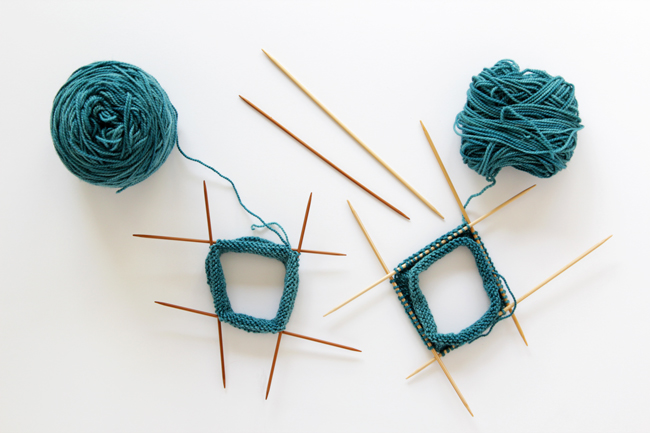
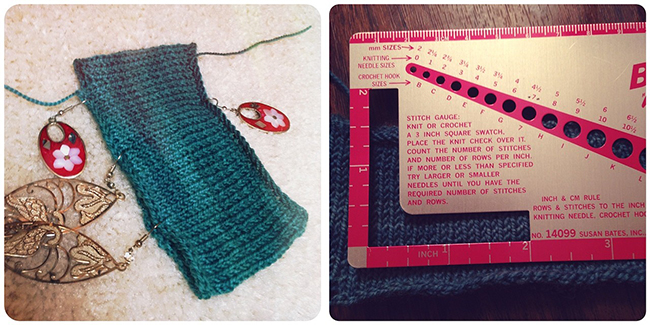
My size 1 swatch is on the left, with the darker needles, and size 2 is on the right.
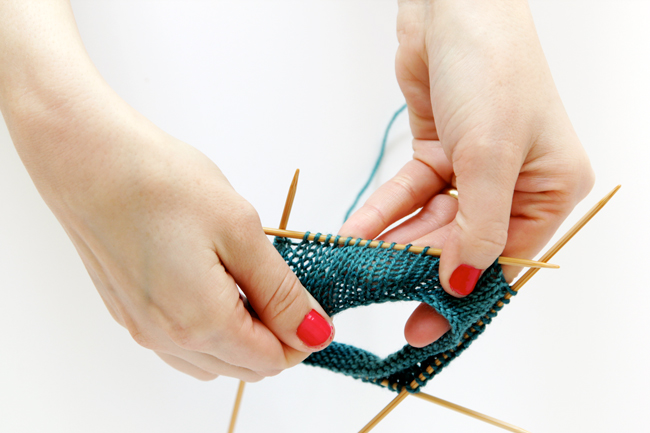
Since you’re working in stockinette, your stitches will curl. That’s just how stockinette works – it’s pretty, but rolls in on itself. Don’t worry when you see the curling. :) When your swatch is done, hold up your work, unrolling the curled edge to examine the stitches.
Above is my size 1 swatch. The stitches are dense, but evenly sized. If your stitches vary wildly in size, you might want to try your swatch again to practice getting those stitches even. Even stitches give you a better idea of what your gauge is. Also, there should be no big gaps between stitches. If there are, you might need a smaller needle.
The Big Toe Test
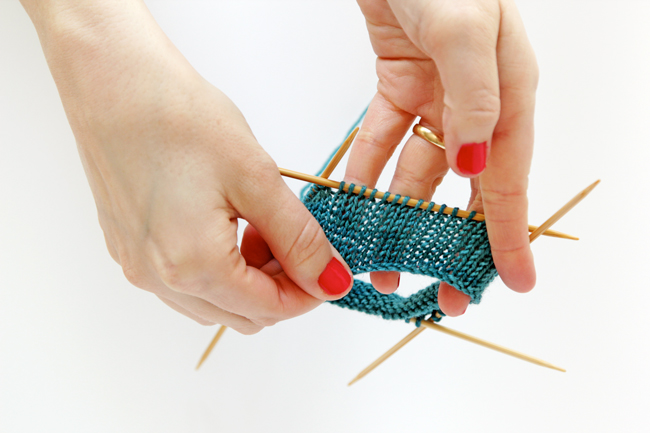
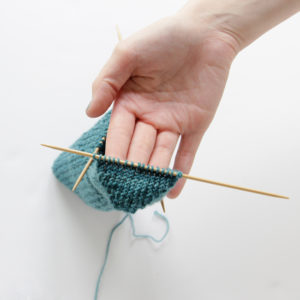
If your stitches are even enough, you should next to the Big Toe Test, which I first read about here. All it is is just pressing your finger hard into the back of your swatch to see how the stitches move. Can you see the flesh of your finger through the knit of your yarn? You want to be able to see a bit of it – but your toe test should separate the stitches no more than the width of one strand of yarn.
Above is a shot of my big toe test on my size 1 swatch. See how you can’t see ANYTHING through the knit when I’m doing the test? That means my swatch is too tight and my finished socks will be too. Time to check out my size 2 swatch!
^My hands are crazy buff looking in this picture. Is that strange to say?^
The stitches are even, which is what we want. Now the toe test…
Lovely! My yarn separates, but not by too much. Huzzah!
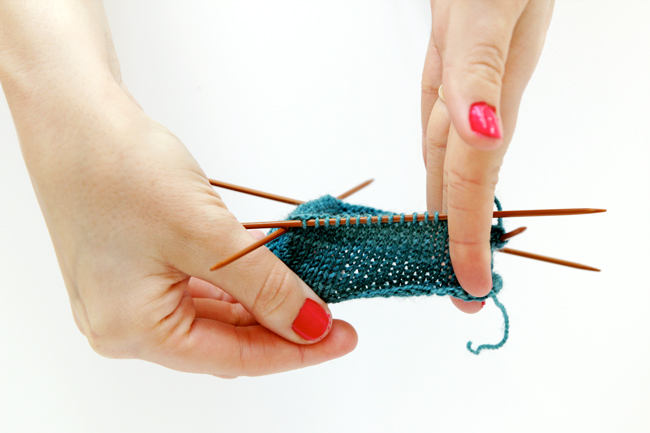
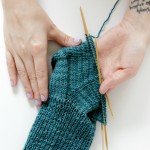
Now I’m ready to measure my size 2 swatch for my gauge. Lay your swatch flat, uncurling the edges without stretching your swatch out or pressing down too hard into it. Streching and squishing will affect your measurements. Use a ruler to measure the number of stitches and rows per inch.
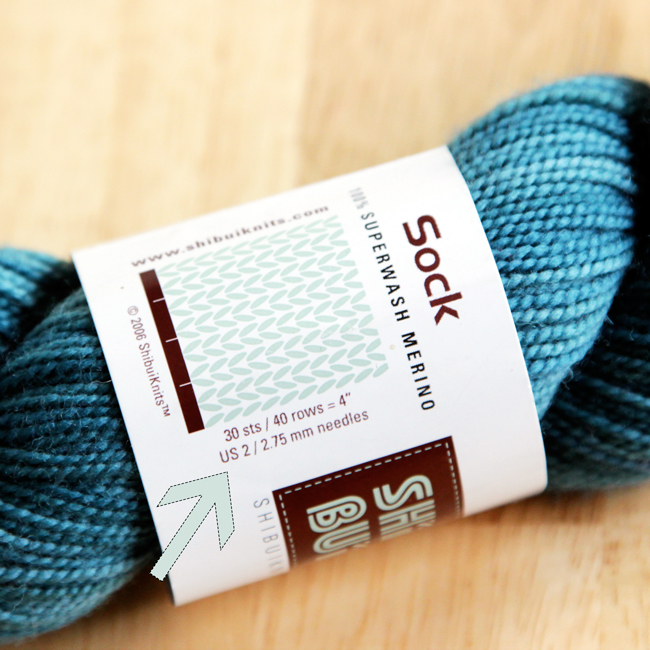
My swatch showed me that with my knitting style, the needles I used and the yarn I used, I was making 6.5 stitches per inch, and 9 rows per inch, which equals 26 stitches per 4 inches and 36 rows per 4 inches. The ShiBui Sock Yarn I’m using came with its gauge on the label, saying the standard gauge with this yarn would be 30 stitches / 40 rows per 4 inches (4 inches is a standard swatching size for knitting, btw). That means this yarn should in theory knit at 7.5 stitches per inch and 10 rows per inch, but my swatch was just 6.5 stitches per inch and 9 rows per inch. SOMEBODY knits kinda tight (that would be me), so it’s a good thing I ditched using the size 1 needles. I would have been knitting forever and had socks that would be highly uncomfortable. And that, friends, is why you should check your gauge. :D
Since I’m knitting at 6.5 stitches per inch, and the part of my calf where I want the top of my sock to reach is 9.8 inches around, I just needed to multiply 6.5 by 9.8 to get 63.7. Now I know to cast on 64 stitches. Note: Whatever your gauge, you are going to want to cast on the closest number of stitches to your gauge that’s divisible by 4 since later on that will be necessary. 64/4 = 16, so I’m good to go!
And if you’re interested in reading more on swatching and gauge measurement, try this article.
For good measure, you might want to also block (see my tutorial on how to block a knitting project) your project and measure the gauge one more time to be safe. When I blocked and measured my gauge one more time with my swatch, I got very similar numbers. My yarn is what’s called superwash, so blocking is recommended. After blocking, I was measuring 9.25 rows and 6.67 stitches per inch, so super close. Since my blocked swatch is still pretty elastic, imma go with the 64 stitches for casting on.
Casting On Your First Sock
Full disclosure, and after that super long tutorial on swatching and toe testing and measuring, I am not a fan of swatching before a project, but that can get dangerous and result in socks, sweaters, hats, etc. that don’t fit right. Ironically enough, the pattern first pair of socks I ever knitted called for arbitrarily casting on 64 stitches. And that first pair of socks I knitted totally fit, so I figured this disclaimer was worth mentioning if all that math above was a little terrifying.
If you swatched, make sure to use the same cast on method you used for the swatch so the gauge you calculated applies.
FINALLY! The Day 1 pattern:
Cast on 64 sts, join into a circle with DPNs and begin working a knit 1, purl 1 rib stitch all the way around. Continue working in k1 p1 until your sock is 7 inches from the cast on edge, or as long as you want the ankle to be on your leg.
If you want to mark the beginning of the round with a stitch marker and move it up your work as you go, feel free. That’s what I like to do, but it’s optional.
—
Other posts in this knit along series
KAL announcement / more to come soon!
Tune in next week Thursday, April 24 for the next installment of the Knit Along. (I was going to do Tuesday but since next weekend is Easter, I know a lot of folks might have more family time and less knitting time on their hands. Just thought I’d give a couple extra days of wiggle room this first week.) Don’t forget to ask questions in the comments if you get stuck! You can also tag social media updates with #handsoccupiedkal and join the Hands Occupied Knit Along Ravelry Group if you’re interested. Happy Knitting!
PS: If you want to grab the Knit Along badge for your site too, here’s the embed code.
<a href=”https://www.handsoccupied.com/knitalong”><img src=”https://www.handsoccupied.com/wp-content/uploads/2014/04/april2014kal.jpg”></a>


Can I use 3 dpns instead of 4? I find 4 very cumbersome.
Totally! The technique is all up to you, lady!
If I use 3 DPN instead of 4, how will that effect the heel turning?
Just be really careful about marking the beginning of your round and counting stitches. If this is your first sock and you’re nervous, my tip (that I use myself all the time!) is to take copious notes on paper of where you’re at stitch count-wise and row-wise as you go.
So cool! I LOVE knitting – especially socks!
Can you offer any advice ? I bought a ball of Kreativ Regia 4-ply Coloe sock wool which came with a free pattern. This is only my second pair of socks and the first pair were not wholly successful so I really want to get these right. Anyway the problem is that the pattern says to use five US 1-3 (2-3mm) dpn “or size to gauge”. But I cannot find the correct gauge anywhere in the pattern so have no idea which size needles to try or how many stitches I should have to the inch. Is there a standard gauge for this type of wool?
They’re likely referring to the gauge listed on the yarn’s label, either listed in words or on a square icon. If you send me a link to the yarn or a picture of the label & I’m happy to take a look and see if I can find the gauge listed.
I’d recommend doing a test swatch and wet blocking it before measuring the gauge you get using the yarn. That’s the best way to ensure a good fit!
Hello,
Do you know the name of the article you linked to about the toe test? The link is not working for me.
Cheers
Cheryl
I tried the link as well, and it looks like the website where I first learned the “big toe test” trick is no longer active. Not to toot my own horn, but I looked for a bit and haven’t found an online source with a more thorough description of the big toe test than what I’ve covered here. If you find one, please let me know. Happy sock knitting!